HP 150 Software Installation

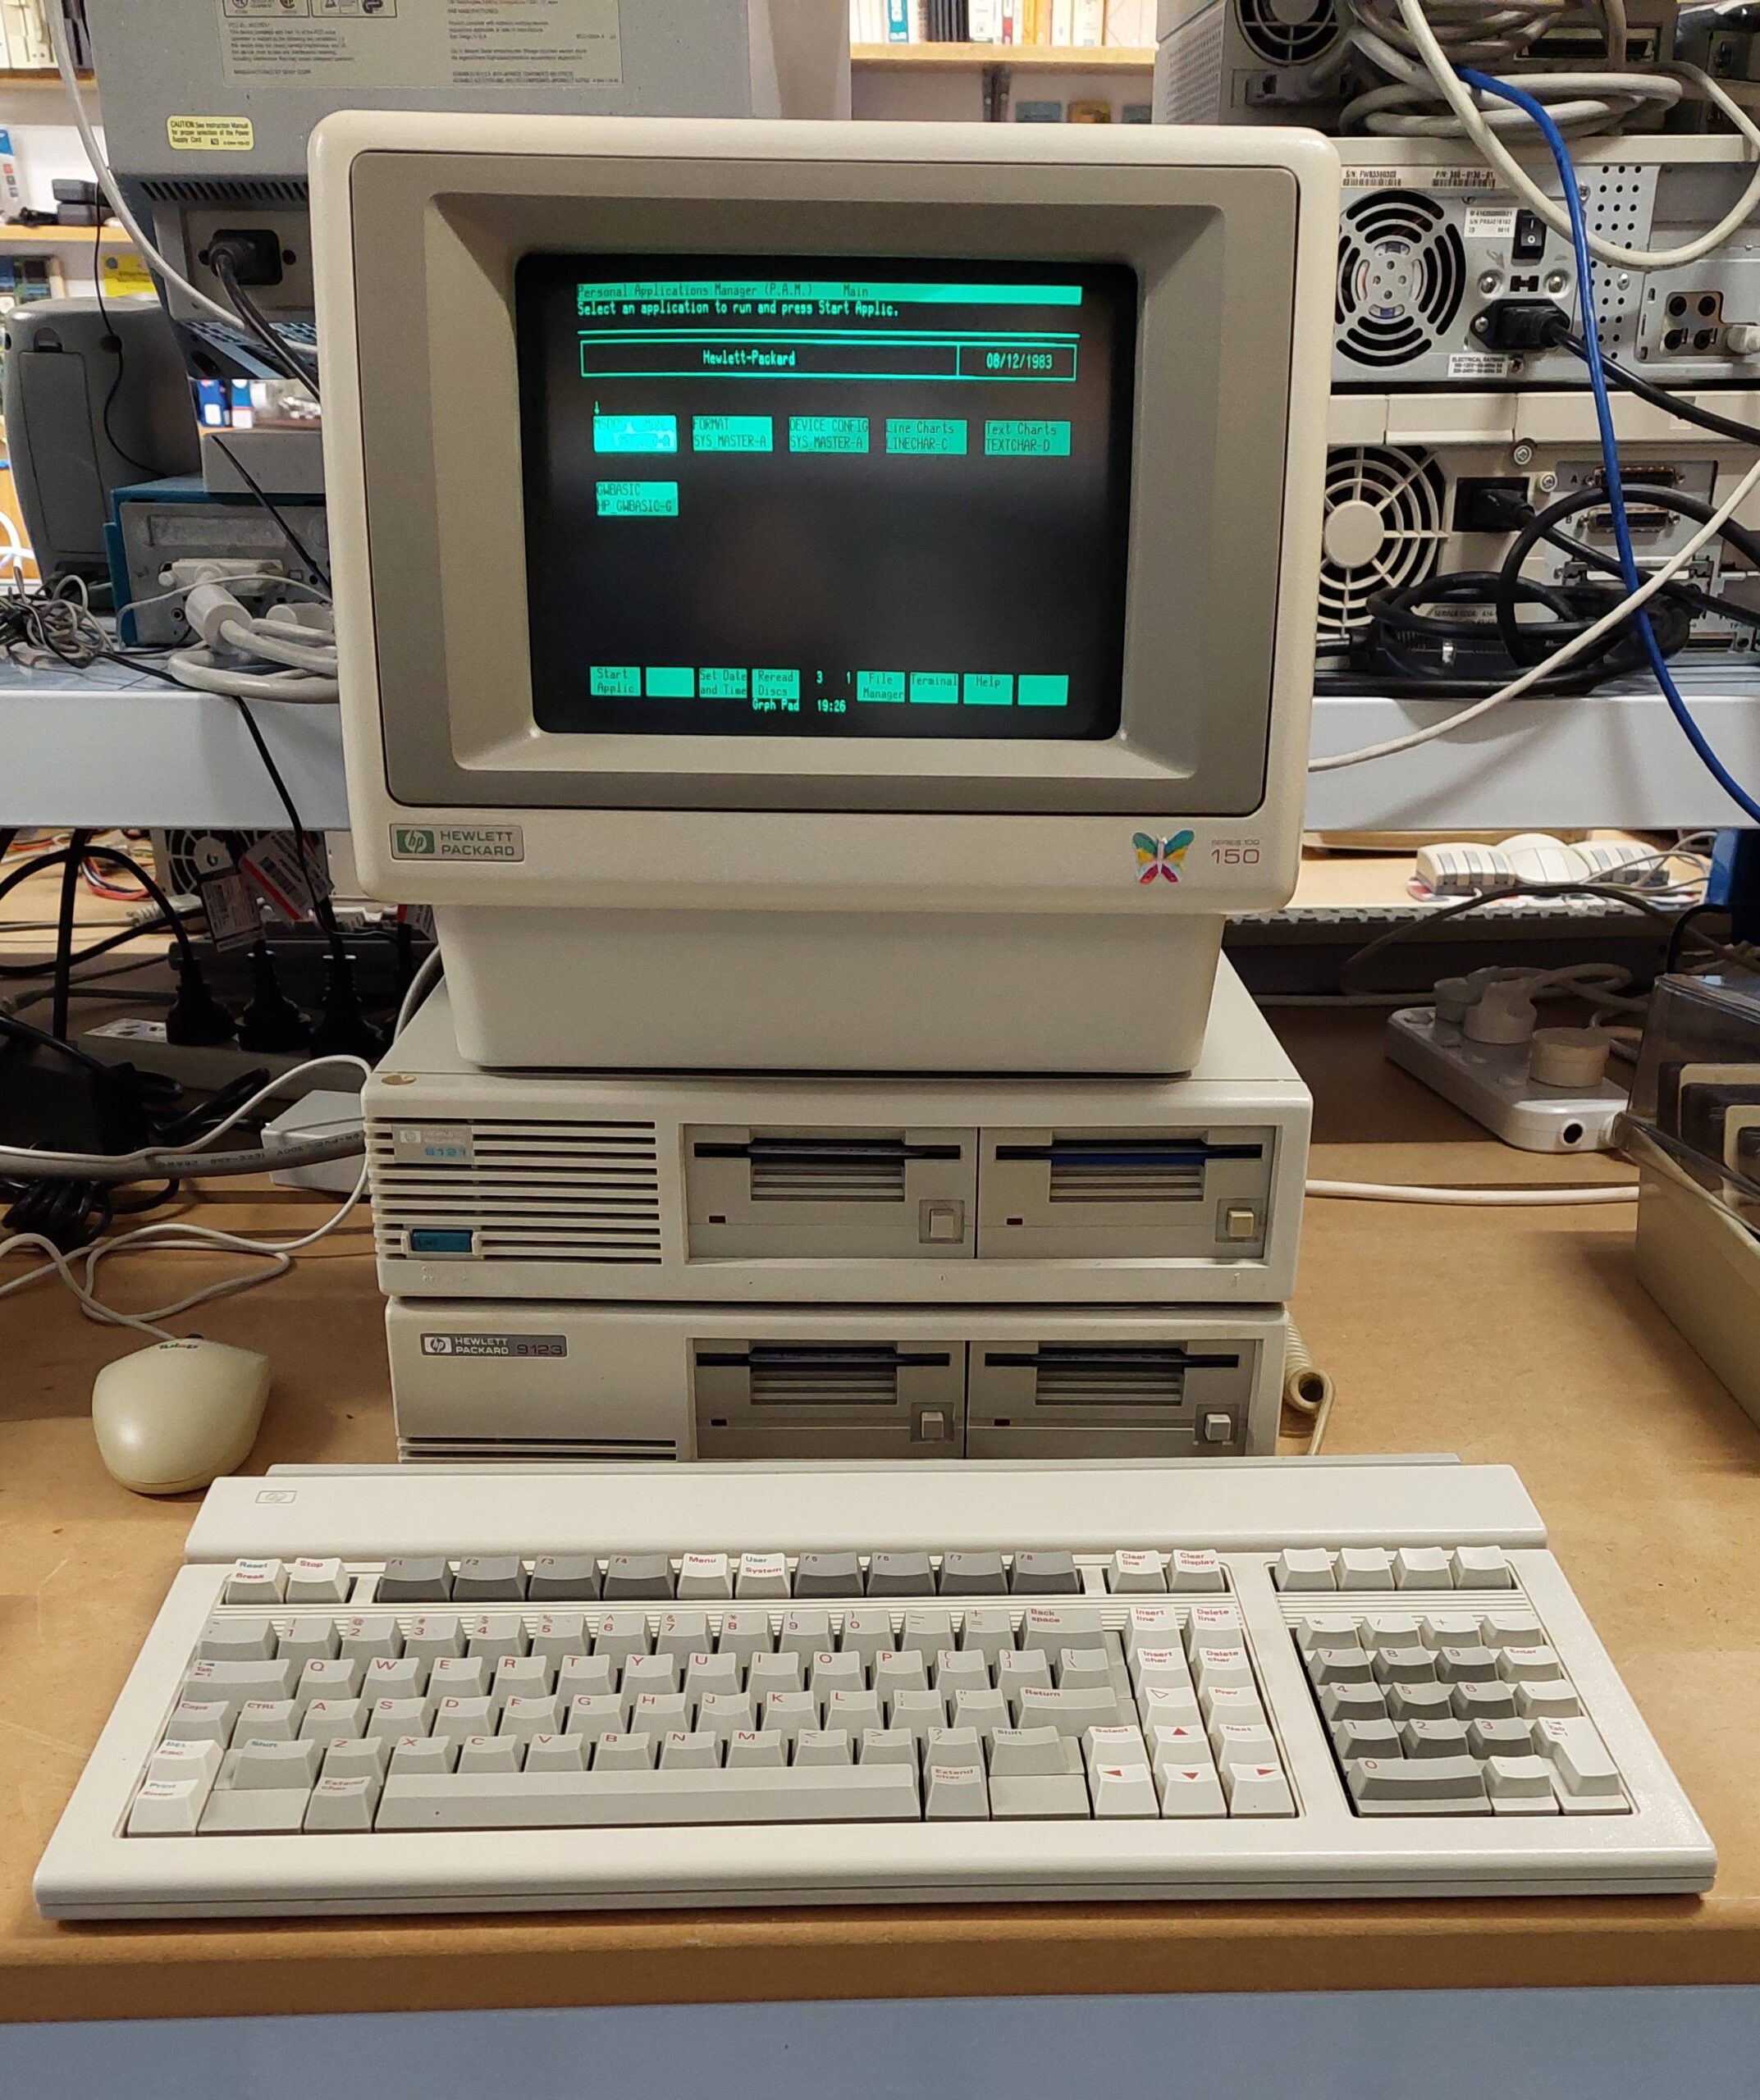
Software setup is somewhat complicated by HP’s Personal Application Manager (PAM). This is a shell which provides touch buttons for applications. You can just exit the shell (or circumvent it at startup) but then the charm of the machine is somewhat lost.

Programs with command line parameters are best run from the normal command.com shell.

Application software is distributed with installation files (<app>.IN$) that provide some basic info on the application, including required files etc. Details of how to create these files are in section 20 of the HP 150 MS-DOS User’s Guide.

Installation is done using the Personal Application Manager disk (which itself should be installed on another disk). It will ask for the source and destination drives, and then the required applications are selected.

During this process, the required files are copied and a new hidden file, PAM.VOL, is created. <app>.RM$ files are created for each app. These provide info for PAM installation program to uninstall apps if required.

The HP Computer Museum archive images (usually Teledisk format) are often images of installed disks. They often don’t have the IN$ files or even the PAM.VOL file.

If they have the PAM.VOL file, it’s probably hidden. This means that simply copying a disk image using the emulator is fraught with peril even though they run ok from the emulator. It is better to write the image with Teledisk or to use the HxC software to convert to HFE and then write with greaseweazle.

In a couple of cases the PAM.VOL file had been renamed PAM2.VOL and this stops them from working. Renaming resolved the problem.

If the IN$ files don’t exist and the PAM.VOL file does not exist, then the IN$ files can be recreated with an editor following the instructions in section 20 of the HP 150 MS-DOS User’s Guide. Wordstar in non-document mode works well for this task. I did this for the 150GAMES and Microsoft Word disk images.

The HP 150 disk format is awkward. There are no HP Community tools for accessing files as there is for the HP 85, and Greaseweazle does not have a predefined format (as far as i know).

On the plus side, there is an HP 150 disk driver (HP150.SYS) for the IBM PC so at least files can be shuffled using, say a 5170 with a 3.5″ disk drive. I have used this method to smuggle some utilities on to the system eg a program to change file attributes.

Note that some of the images on the HP Computer Museum site are corrupt and some are double-sided (they can be accessed with MS-DOS 3.2). Everyone thinks that the HP Computer Museum has a complete archive so there are not a lot of alternatives (hmm – noted).

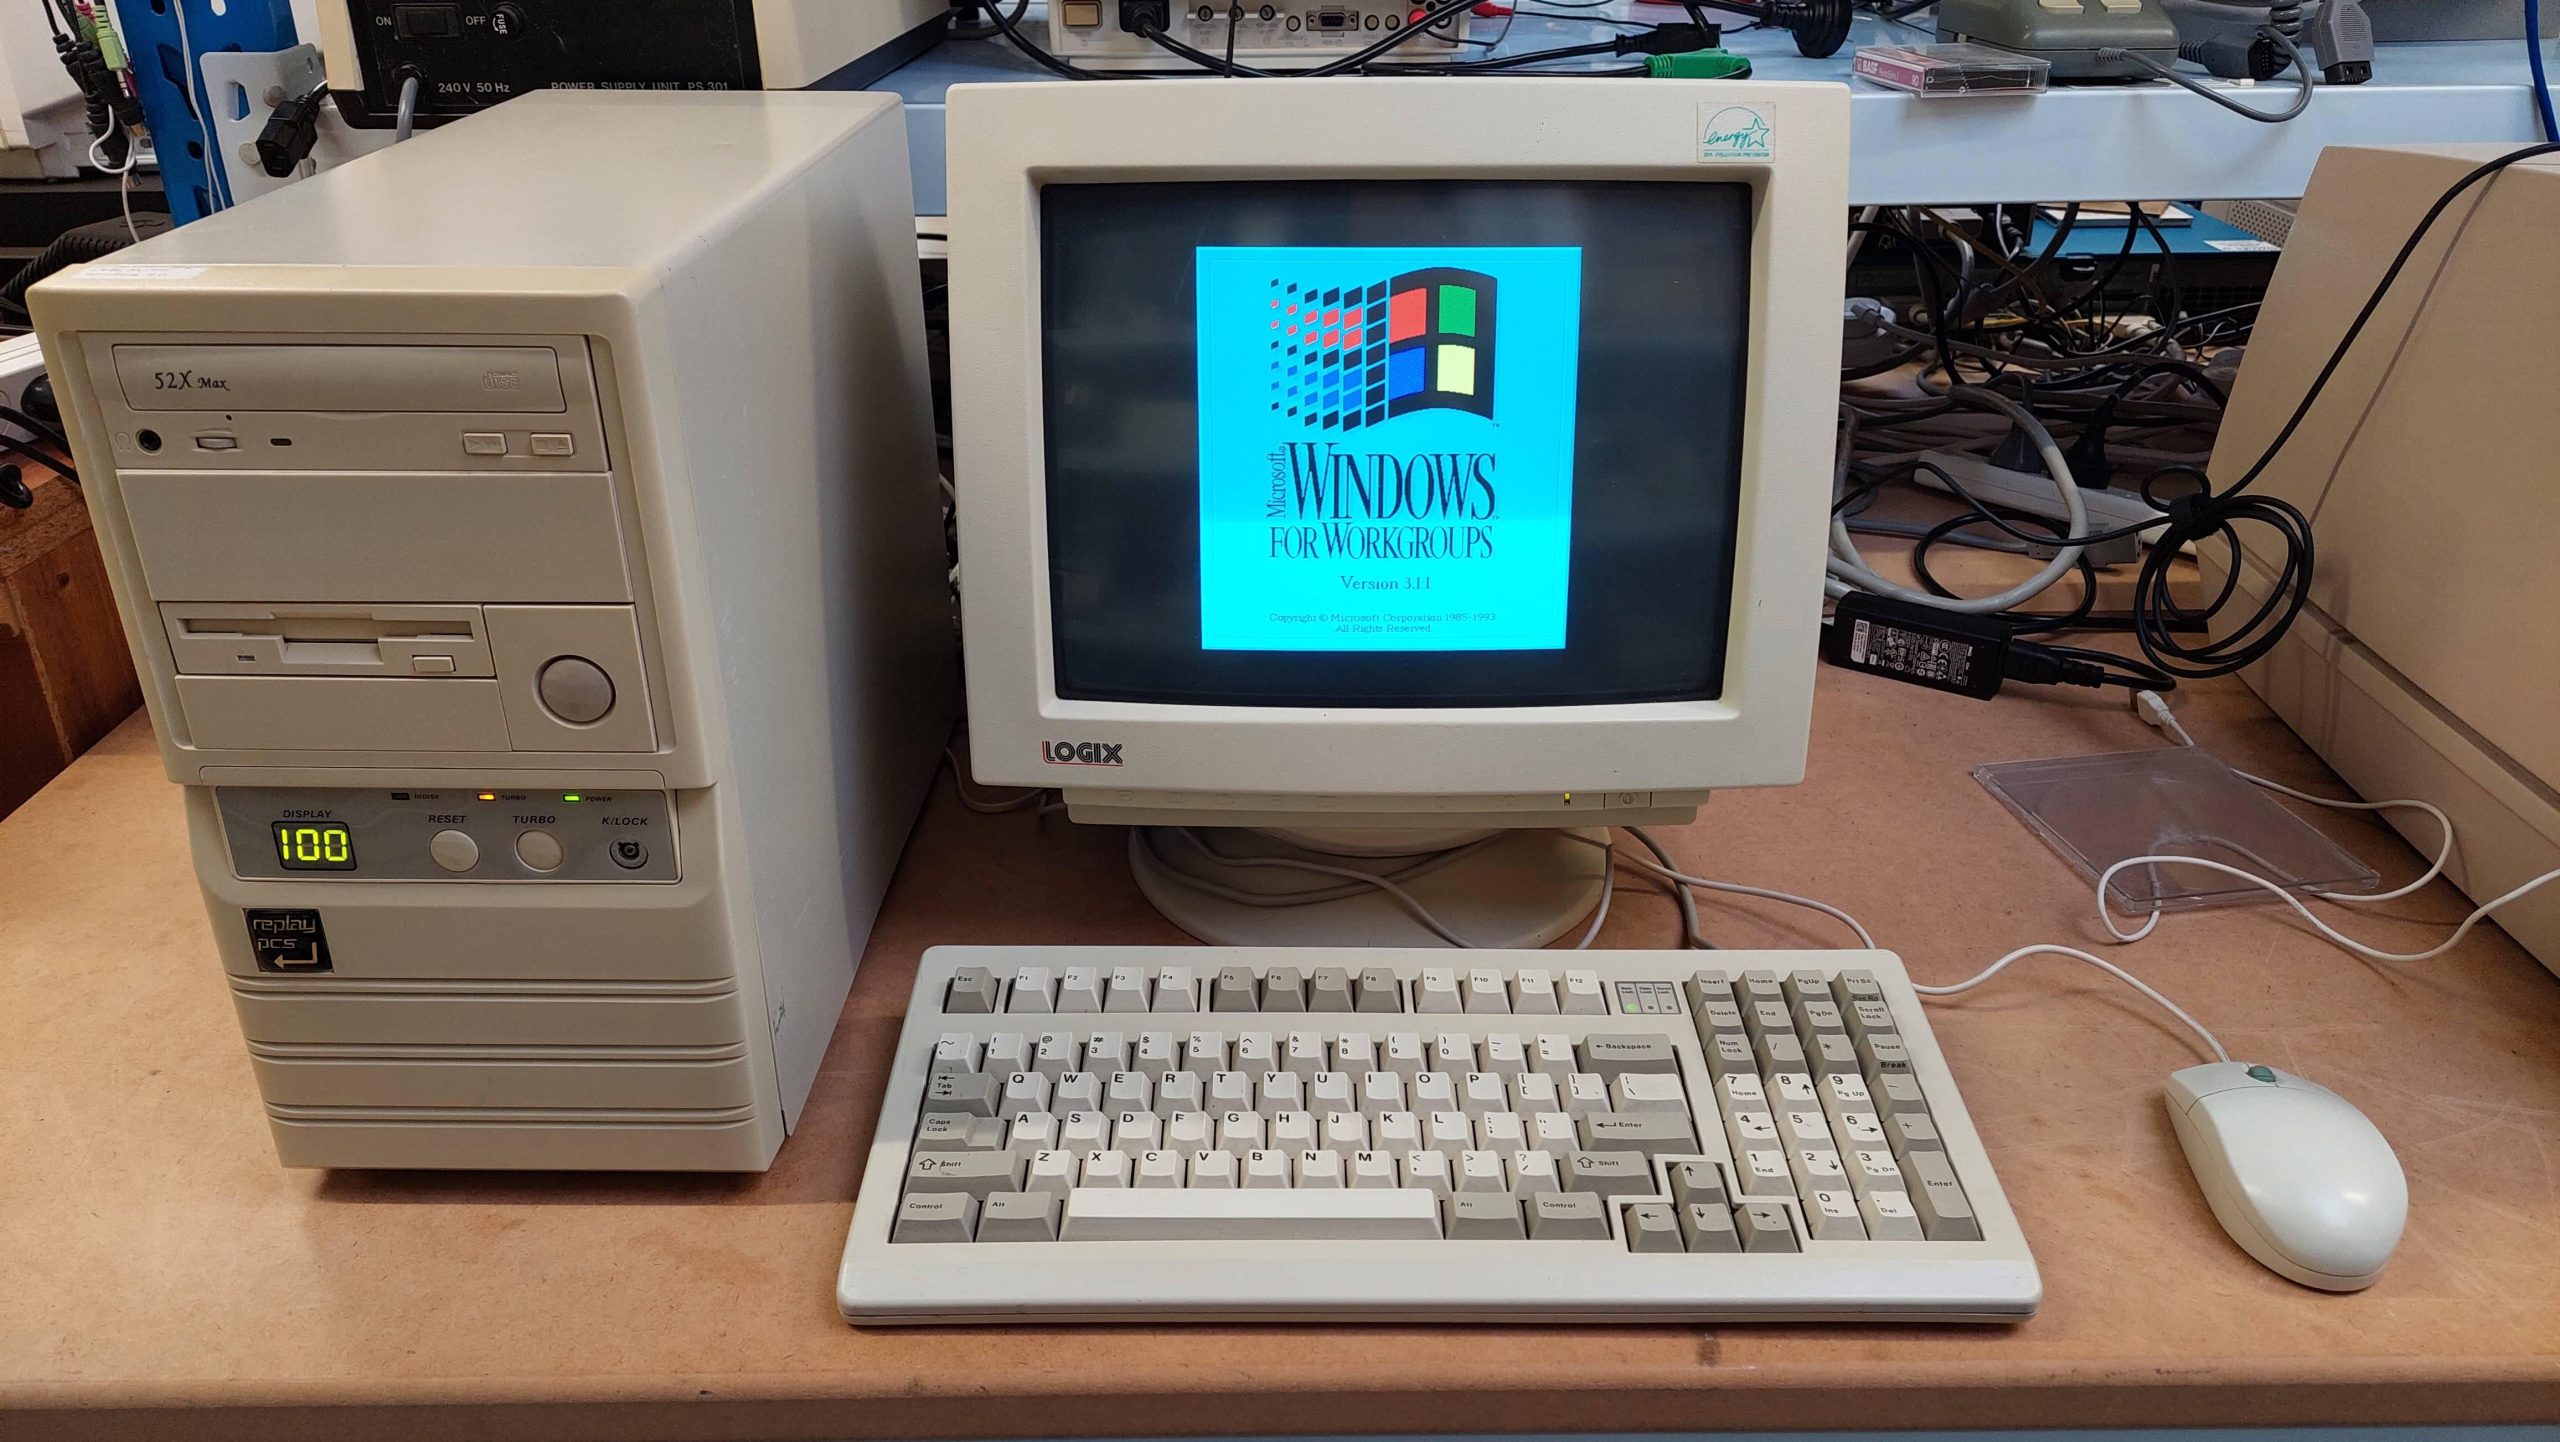
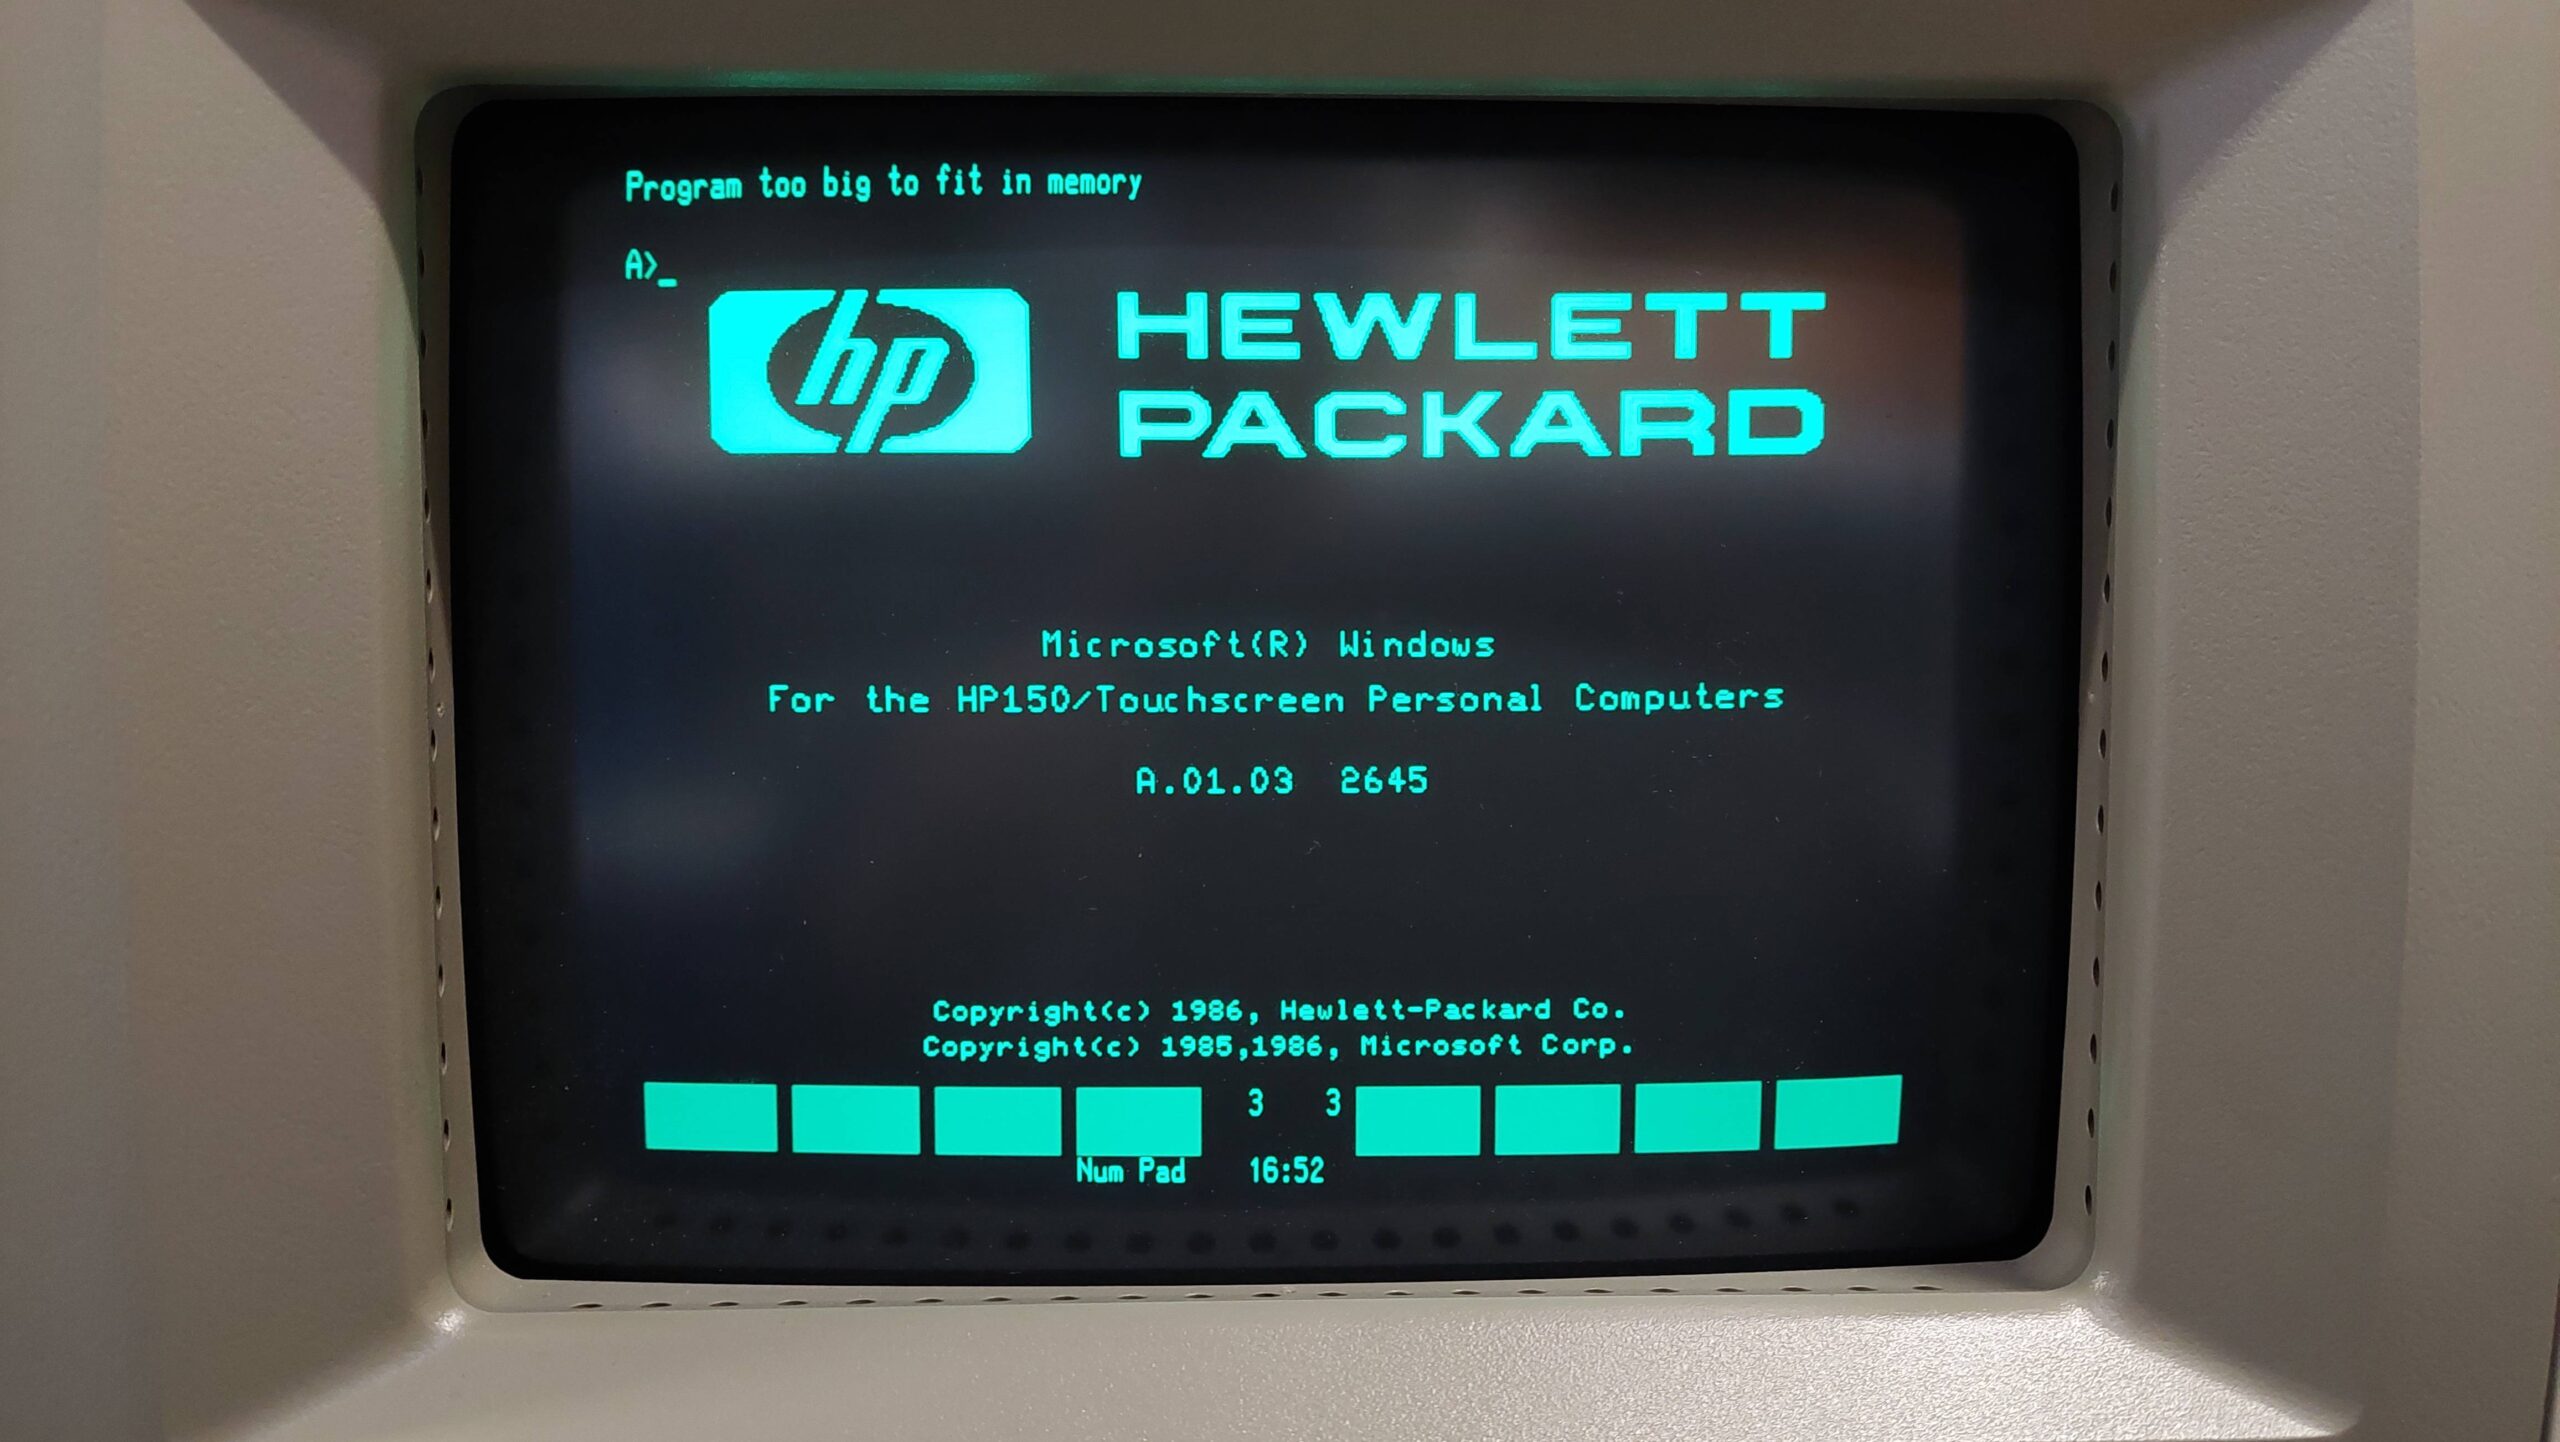
Also note that some disks require Windows, which does run on the HP 150, but not on my HP 150 because of insufficient memory.
Also note (there are lots of notes) that some software is dongle protected eg Diagraph and Picture Perfect. It is possible to make the dongles – there is information on the HP Computer Museum website to assist.
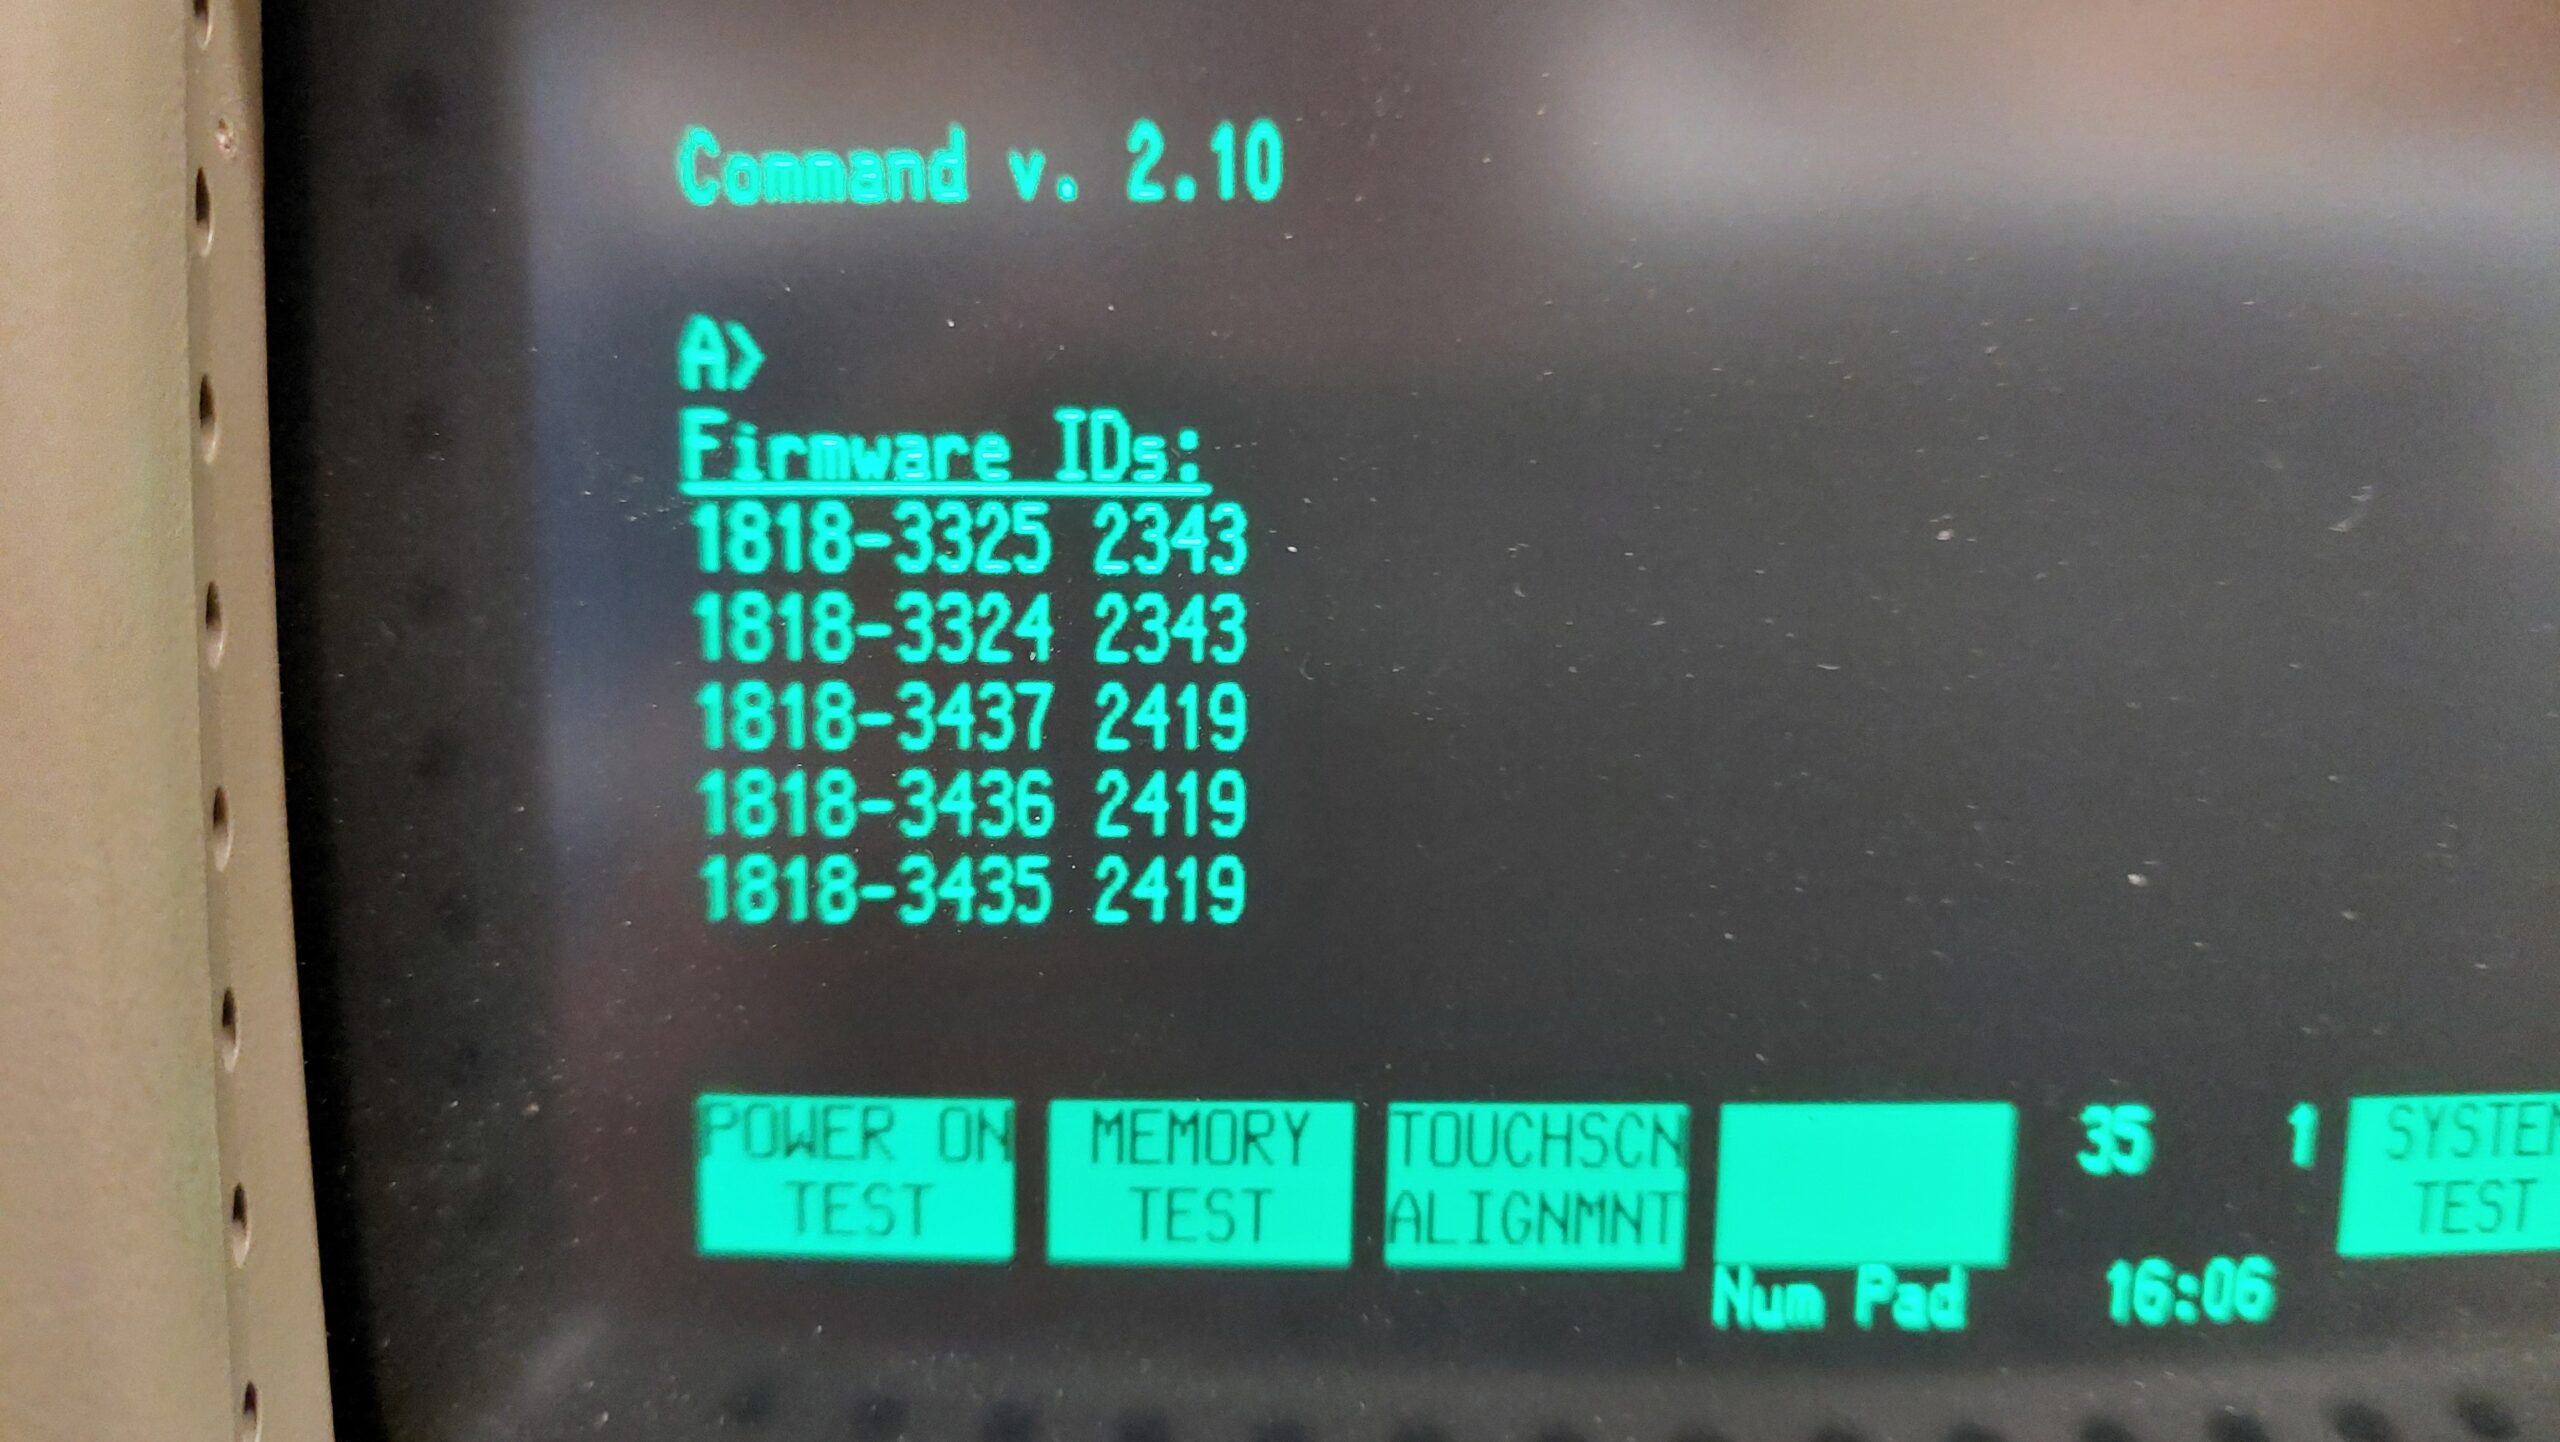
HP 150 ROM Version & Compatibility

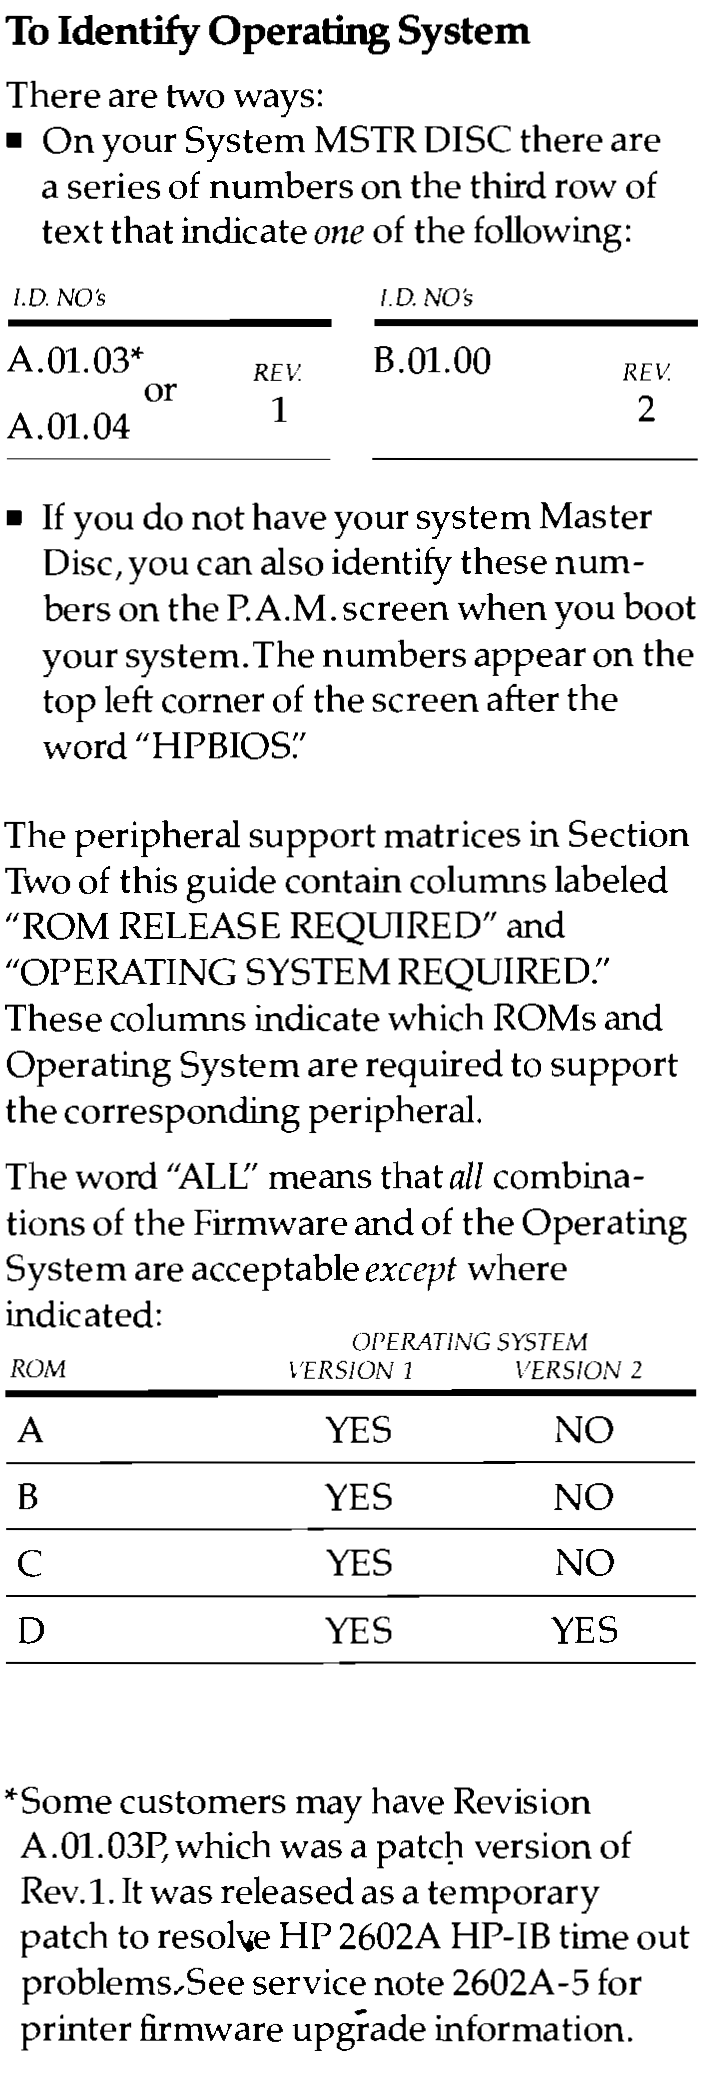
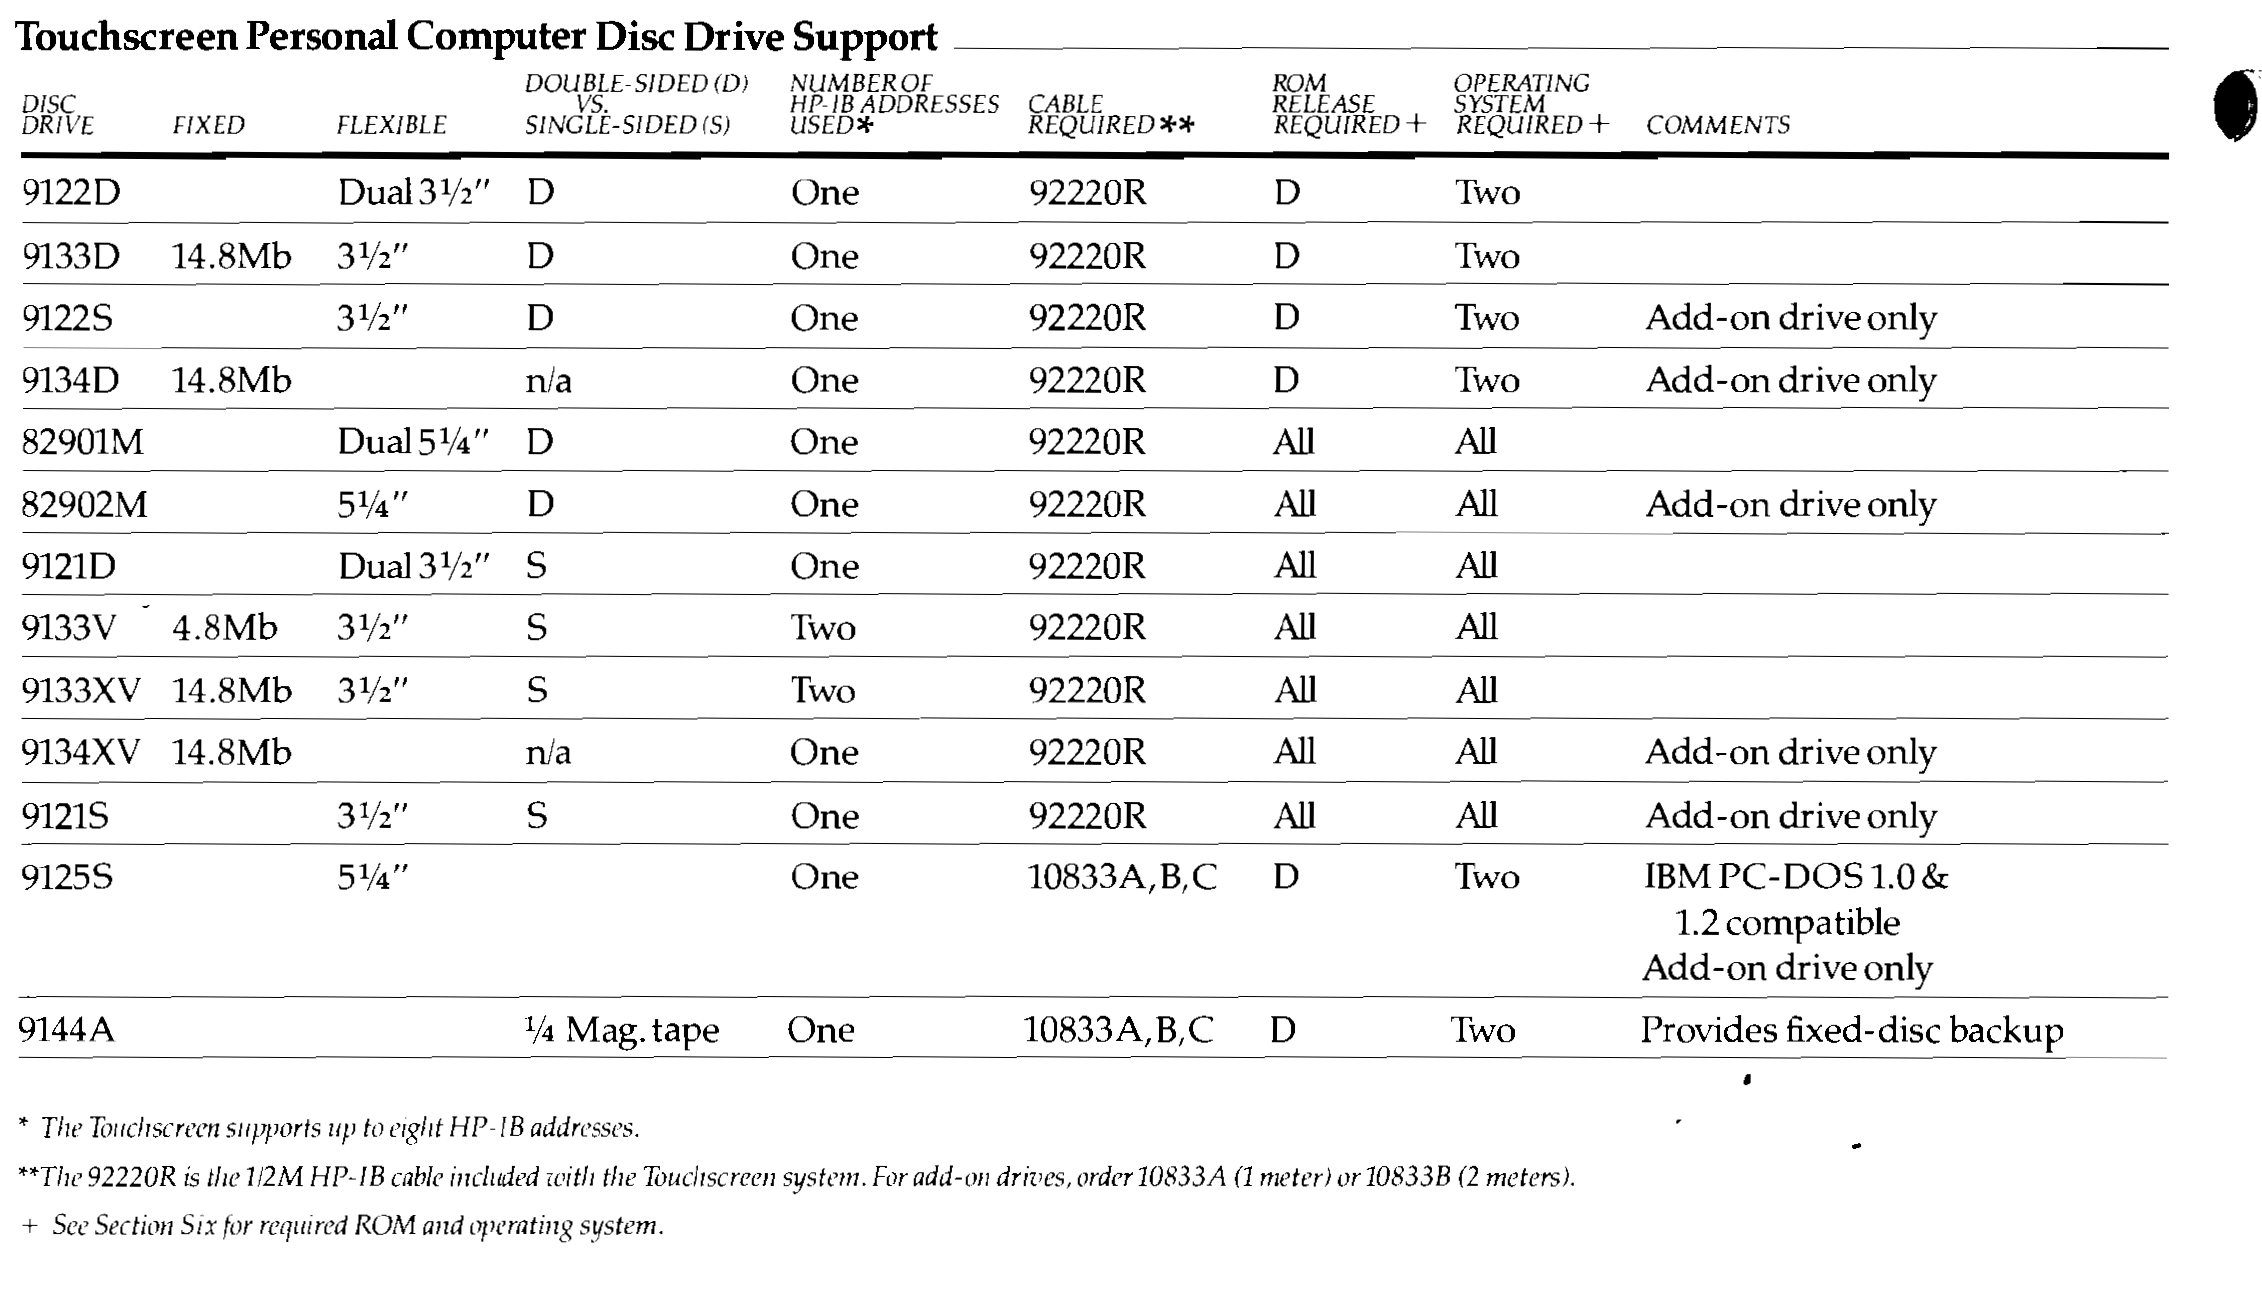
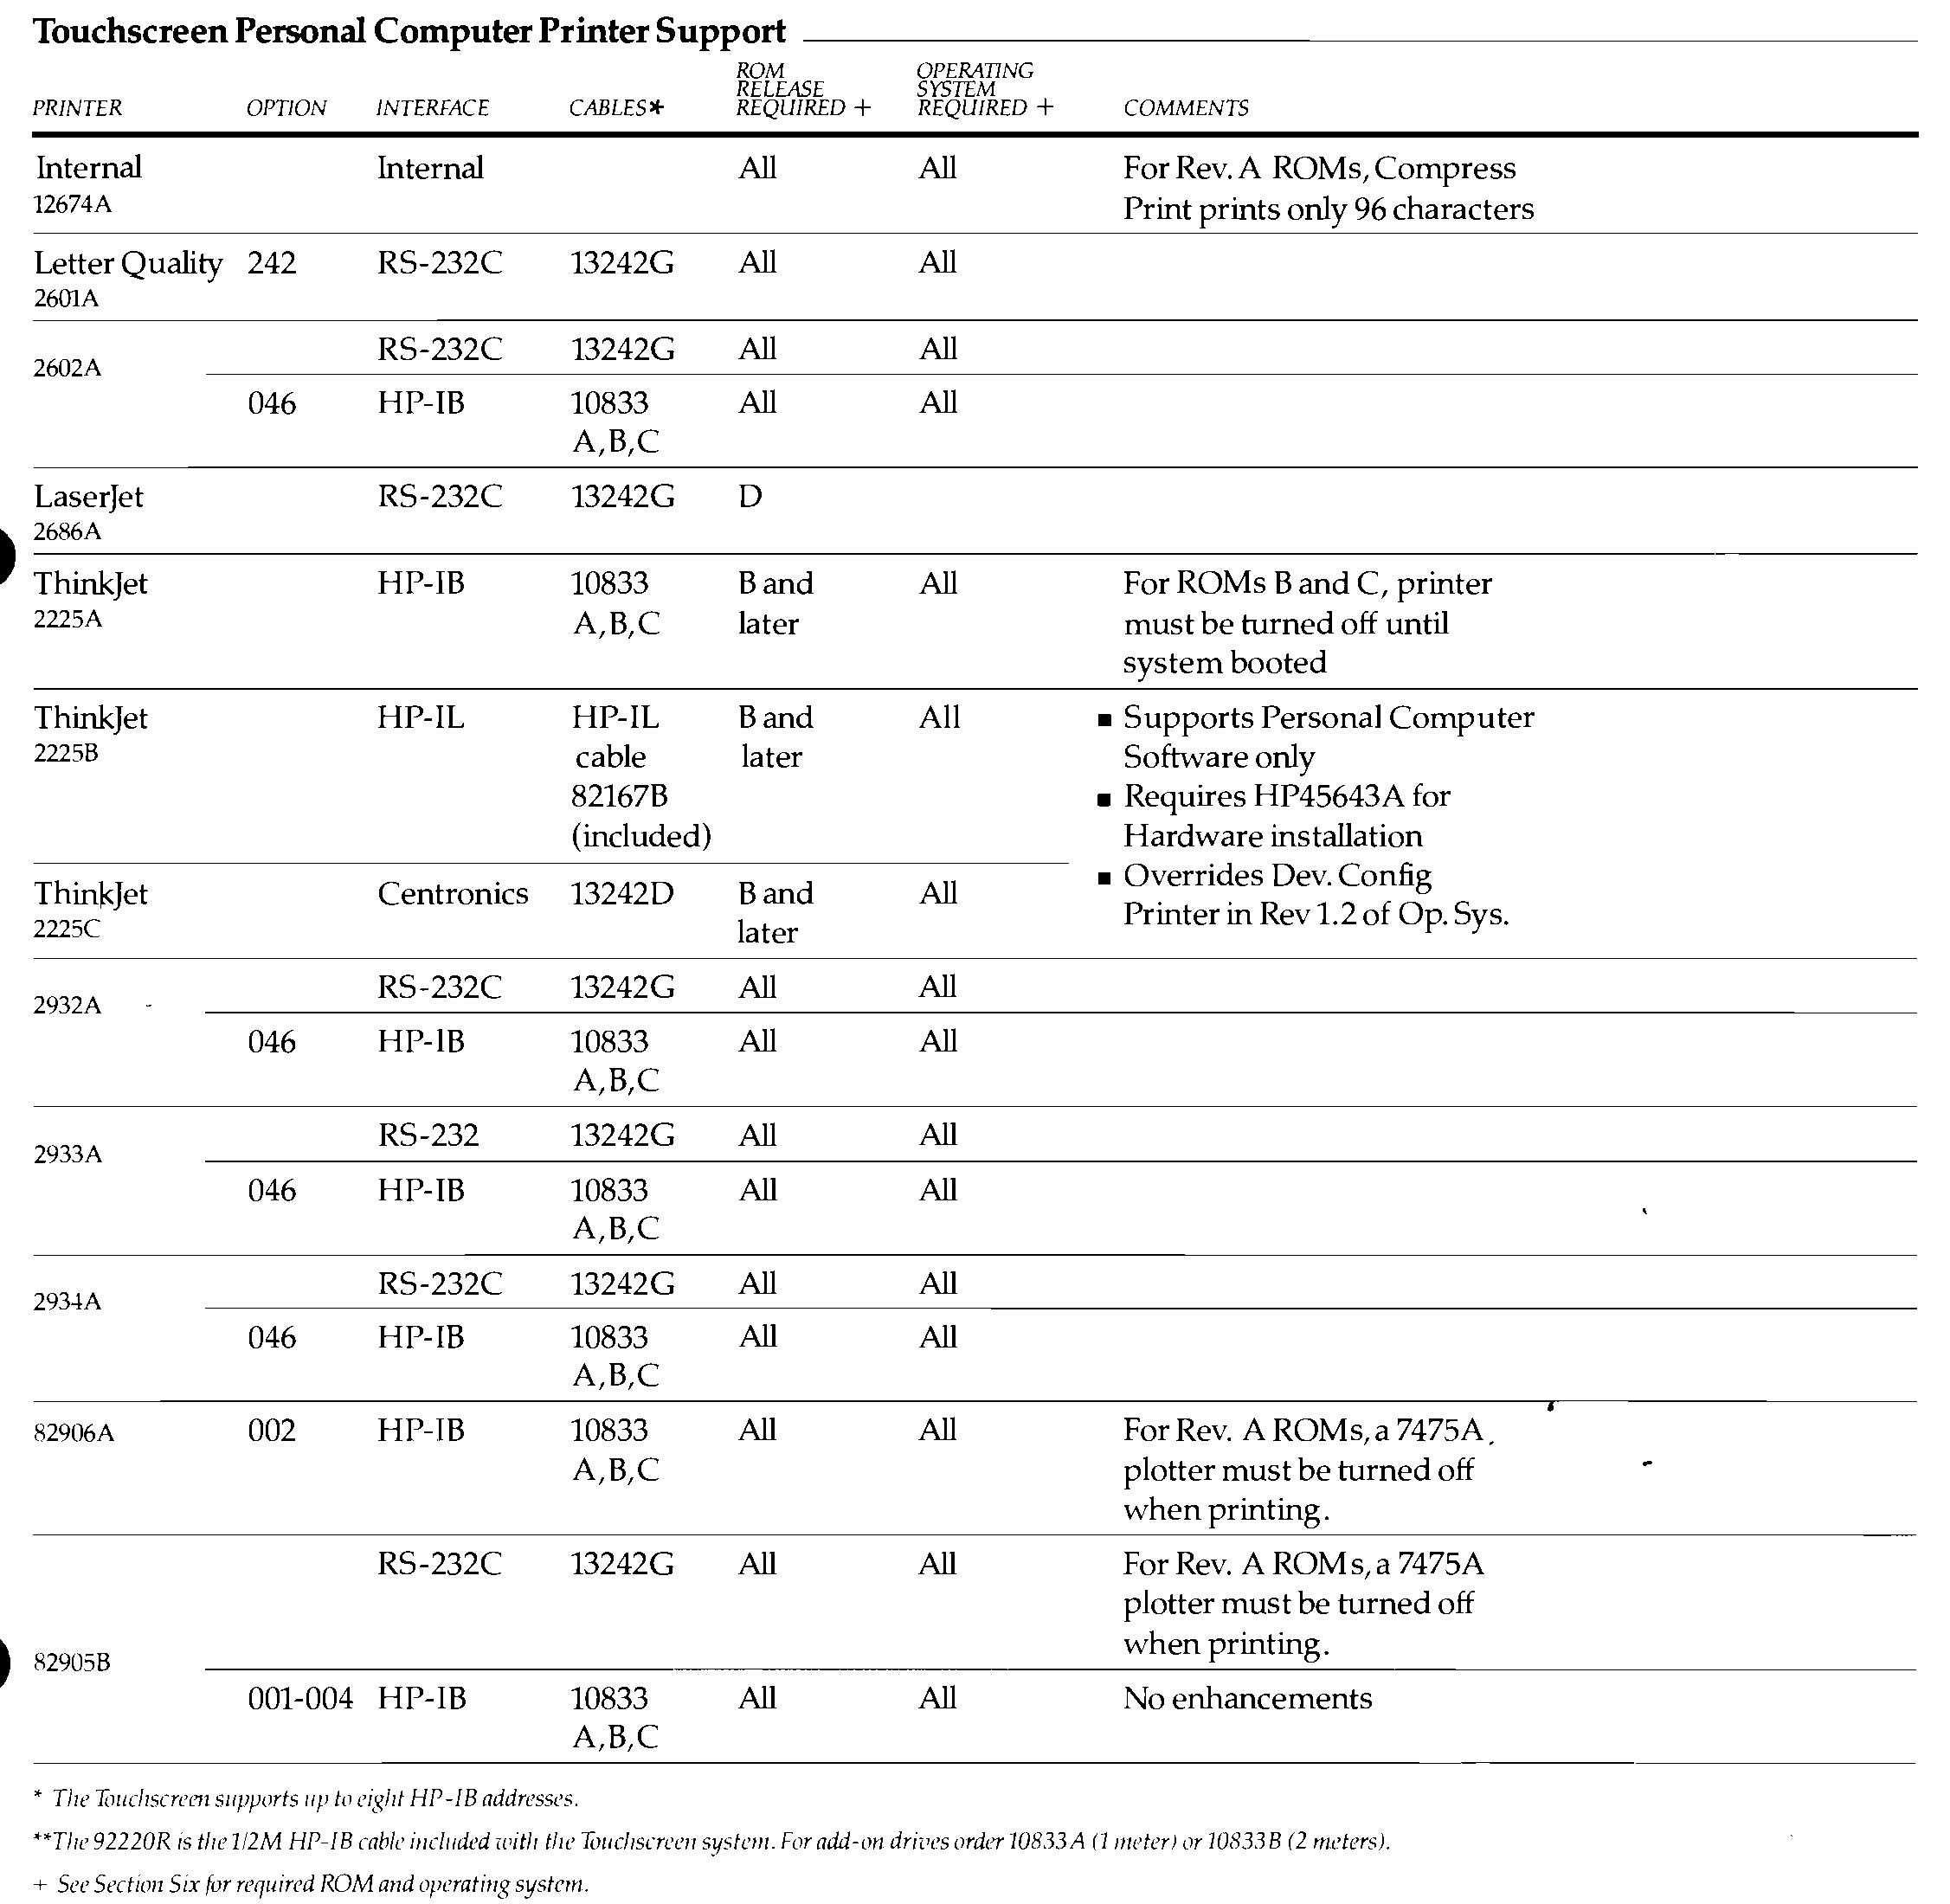
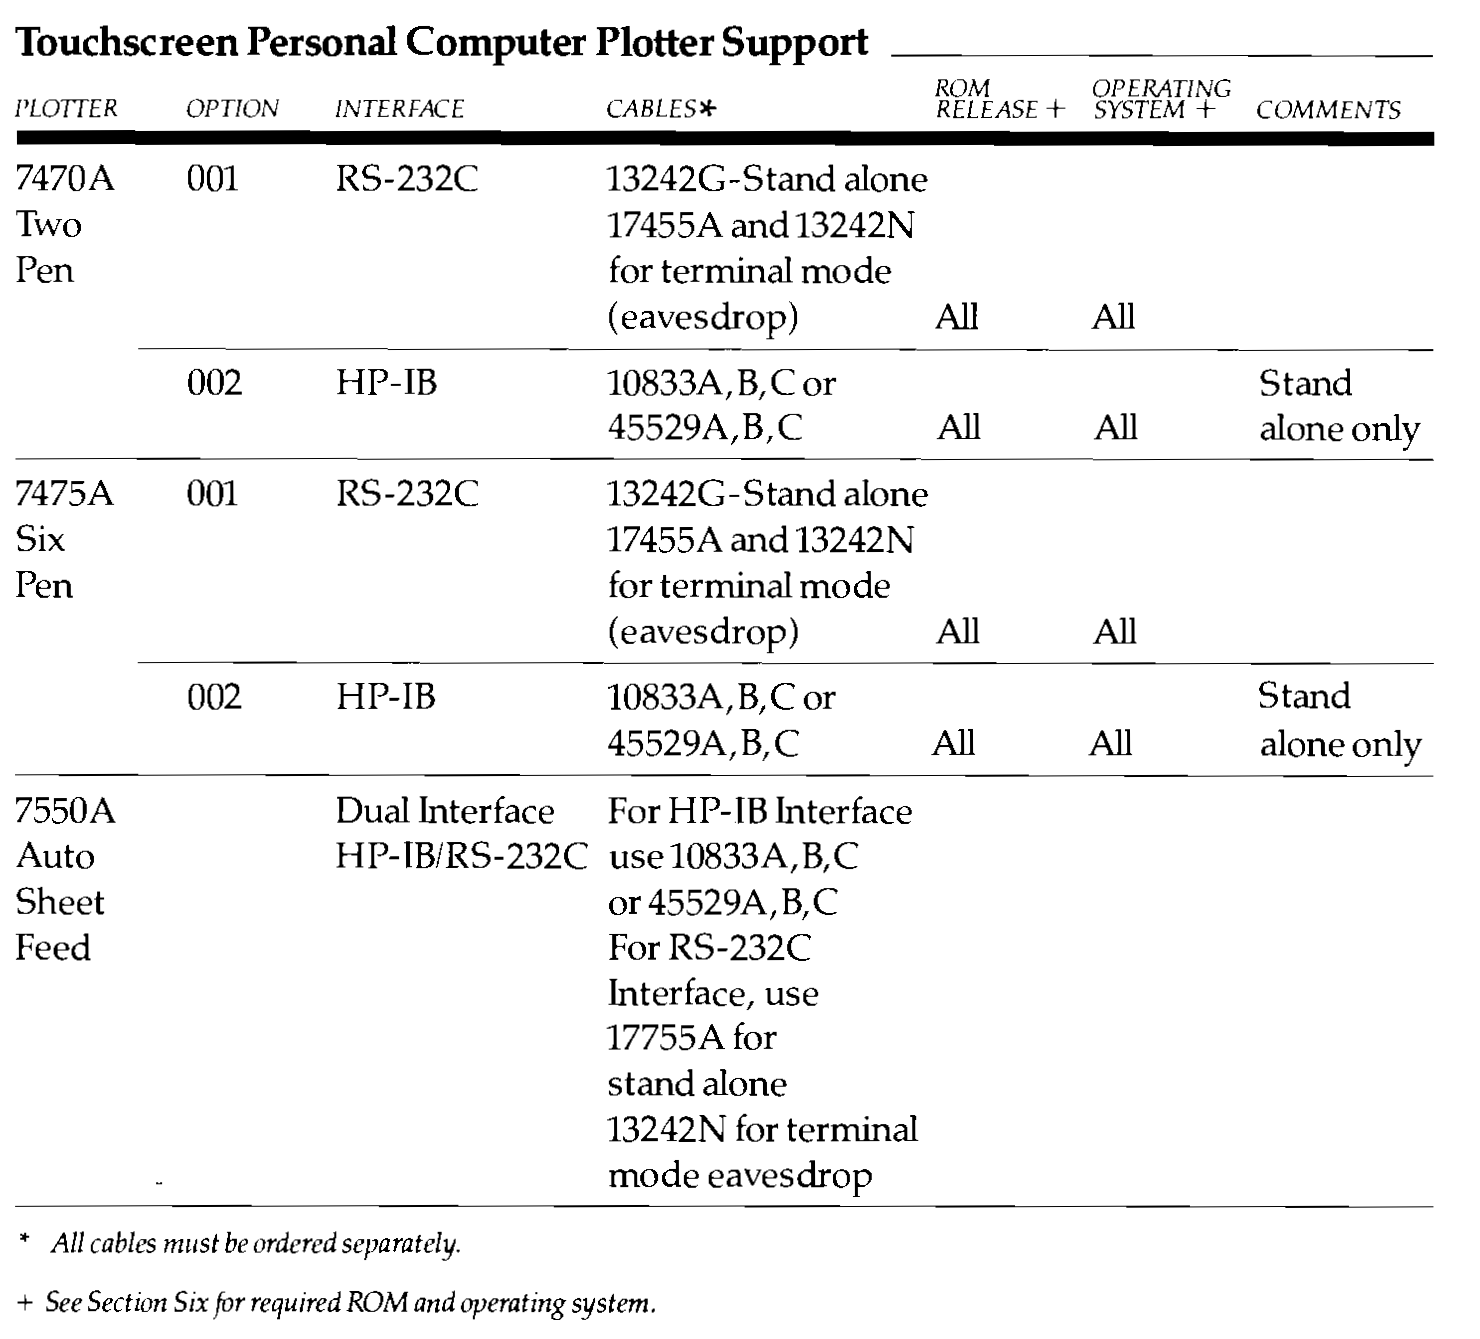
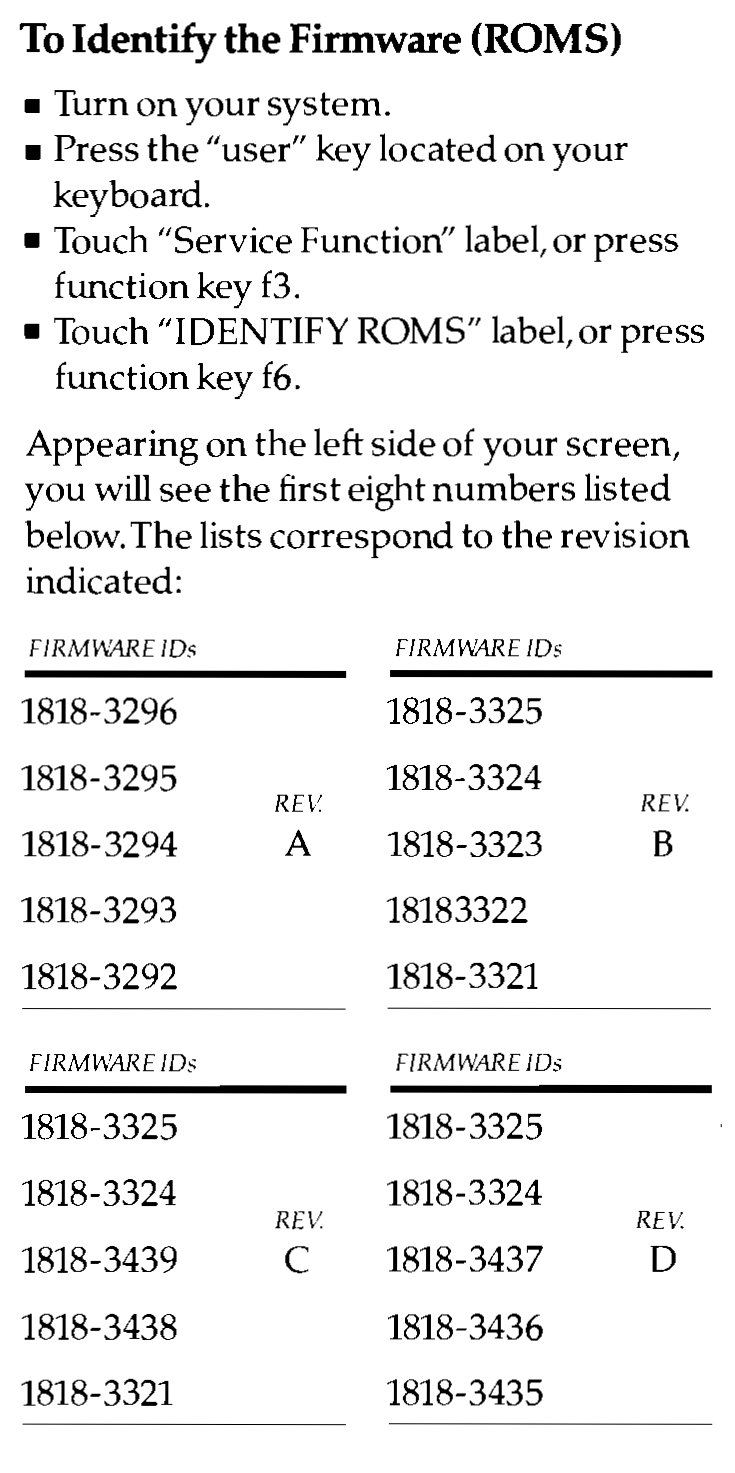
I was thumbing through a document called the HP Touchscreen Personal Computer Systems Configuration Guide and noticed that it had some handy information.

This sets the ROM version as D.

This means that it should cope with the later operating system. It shipped with 45621-13001 A.01.03, but it seems to run with E.01.01 ie MS-DOS 3.2.

It also supports the 9122 disk drive unit, which i’ve used on the HPDrive emulator. It’s also much the same as the 9123 unit that i’ve added. Although it claims compatibility, i’ve had no success accessing double-sided disk images. Under MS-DOS 2.1 i can’t format single sided disks in the 9123, but i can under MS-DOS 3.2.

HP 150 and HP 9123

I’ve had an HP 9123 Dual DS DD 3.5″ Drive Unit sitting on a shelf for a couple of years. This drive unit was intended to operate with the HP 150 II rather than the HP 150, but i thought it might work ok with my older machine anyway.

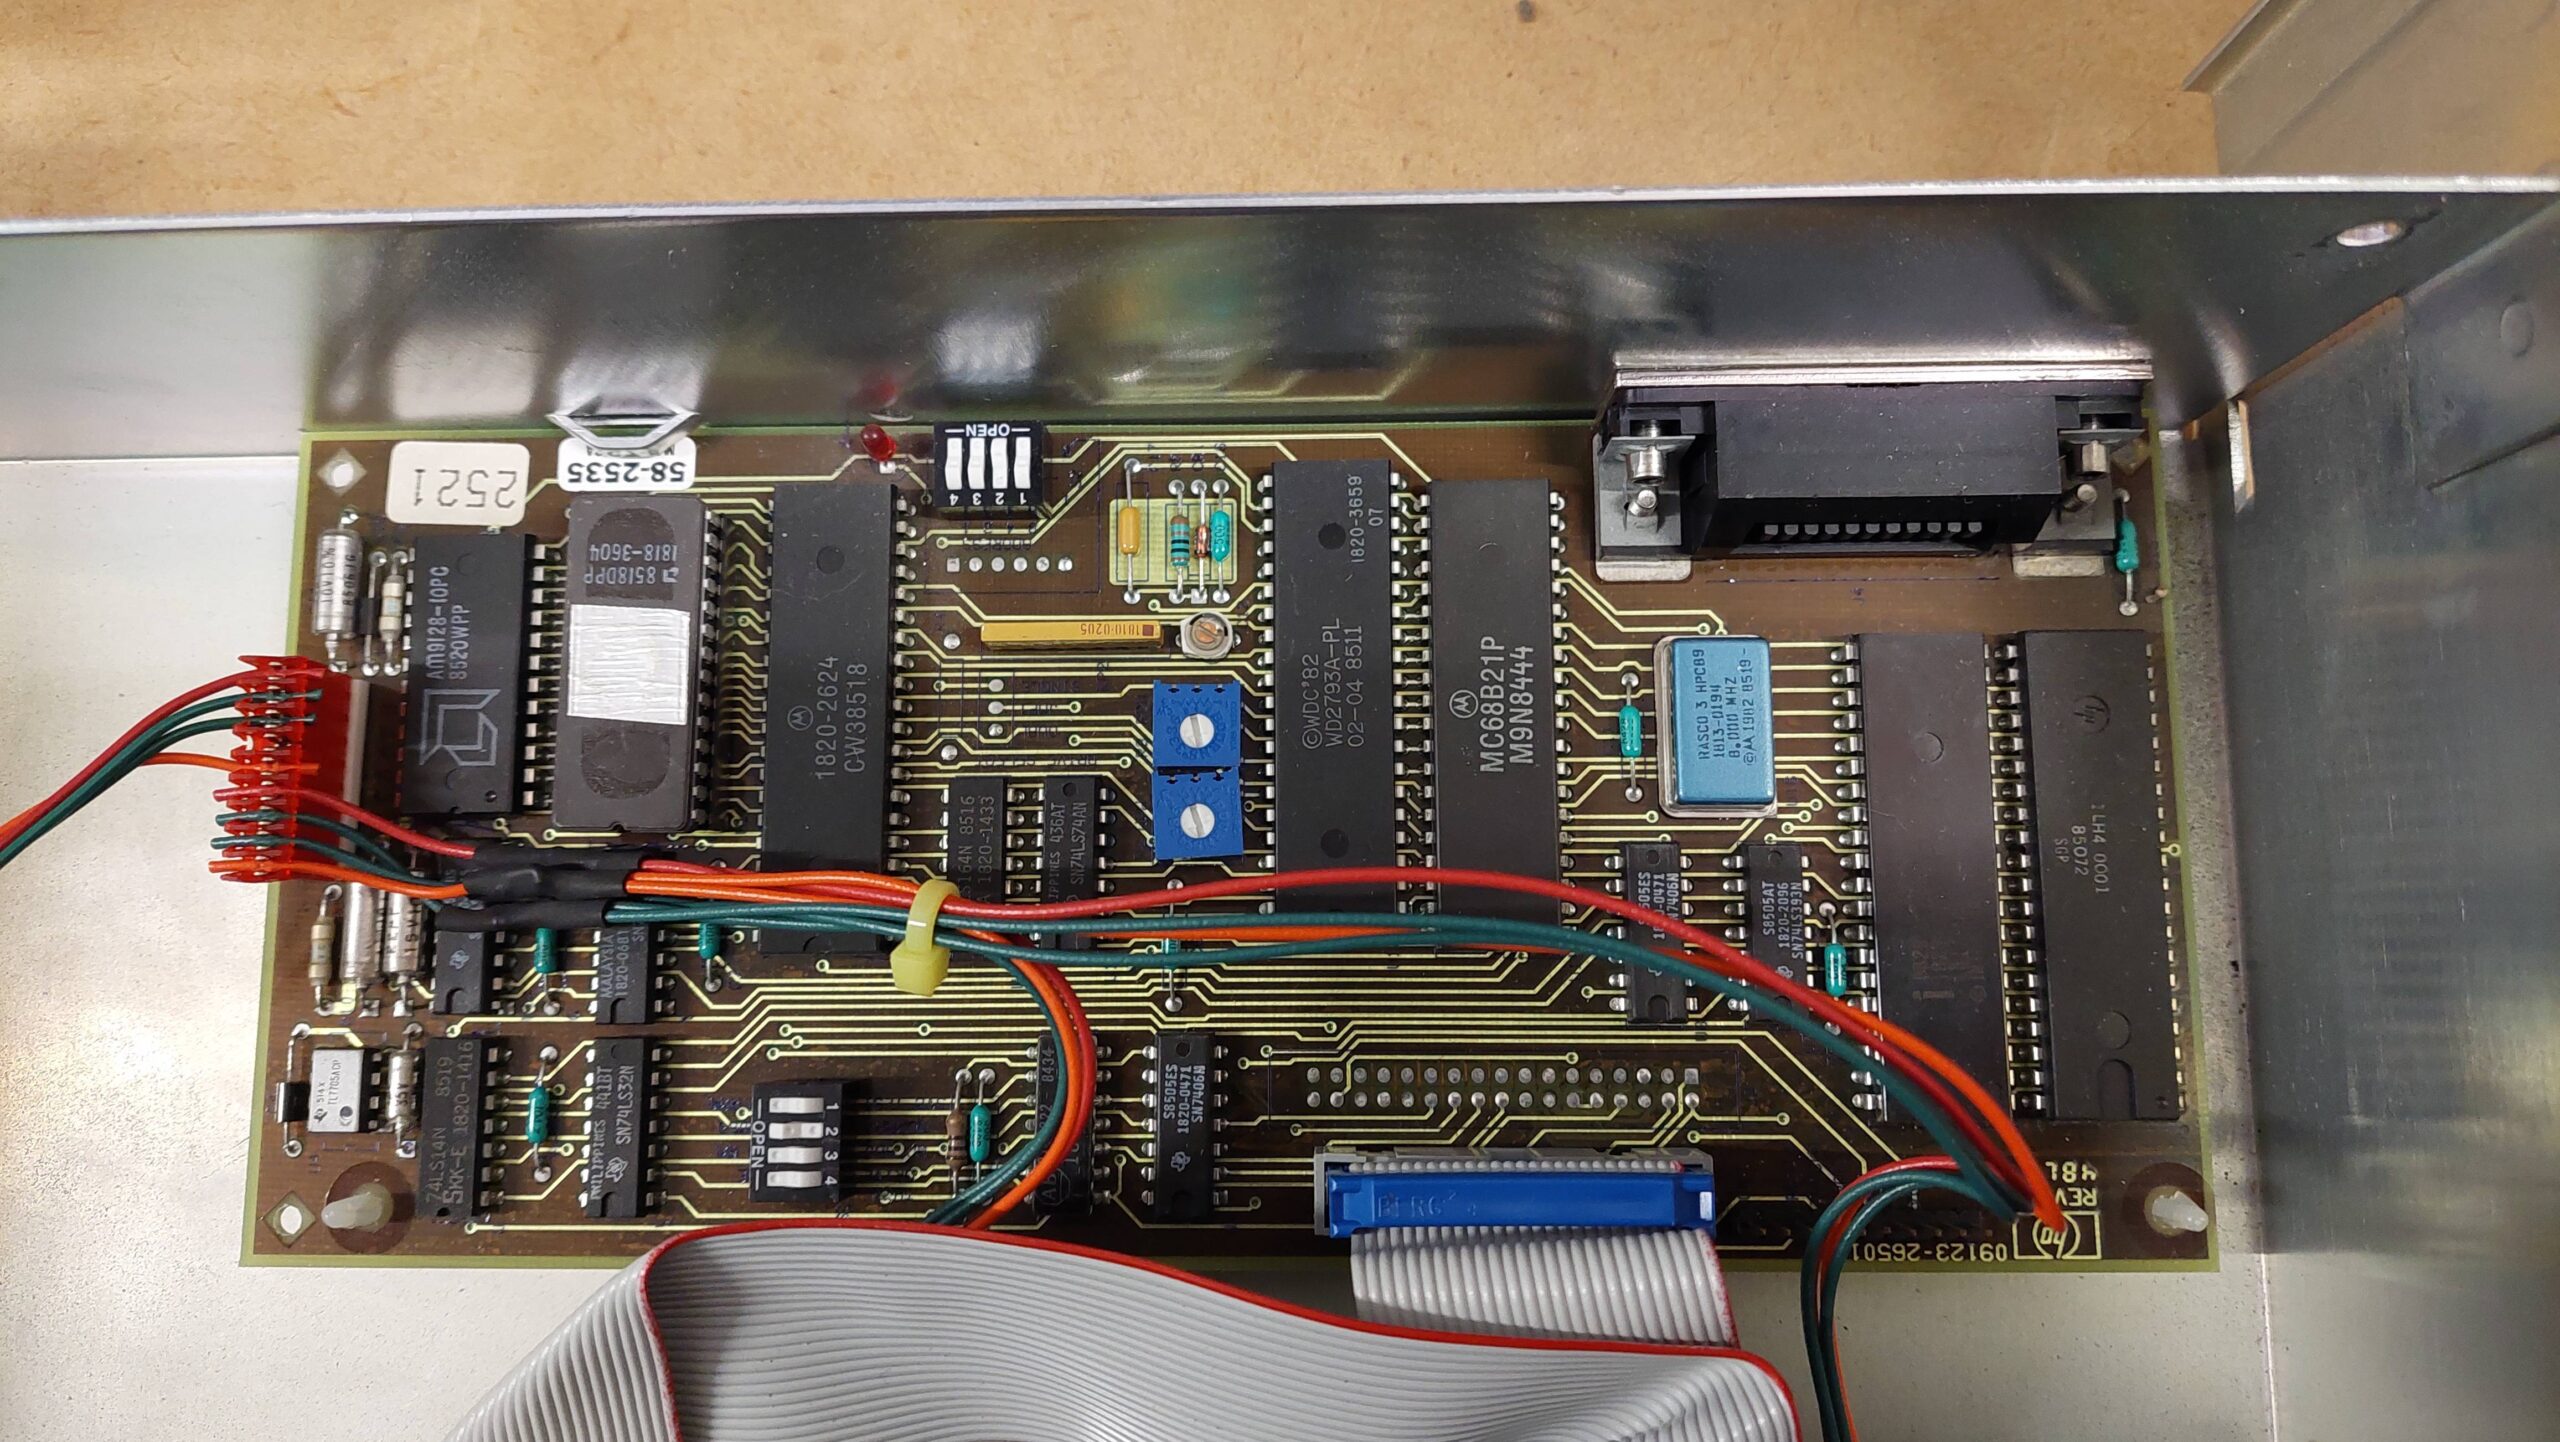
Unlike the 9121 it does not include a power supply; it was intended to draw power from the host computer. Although it uses HP-IB to communicate with the computer, it uses a different protocol: SS80 instead of amigo. I was pretty sure that i had used SS80 on an emulated drive, so i figured that would not be a problem. I wasn’t sure what the computer would make of the double-sided disk drives.

In these situations, there is only one thing to do: suck it and see.

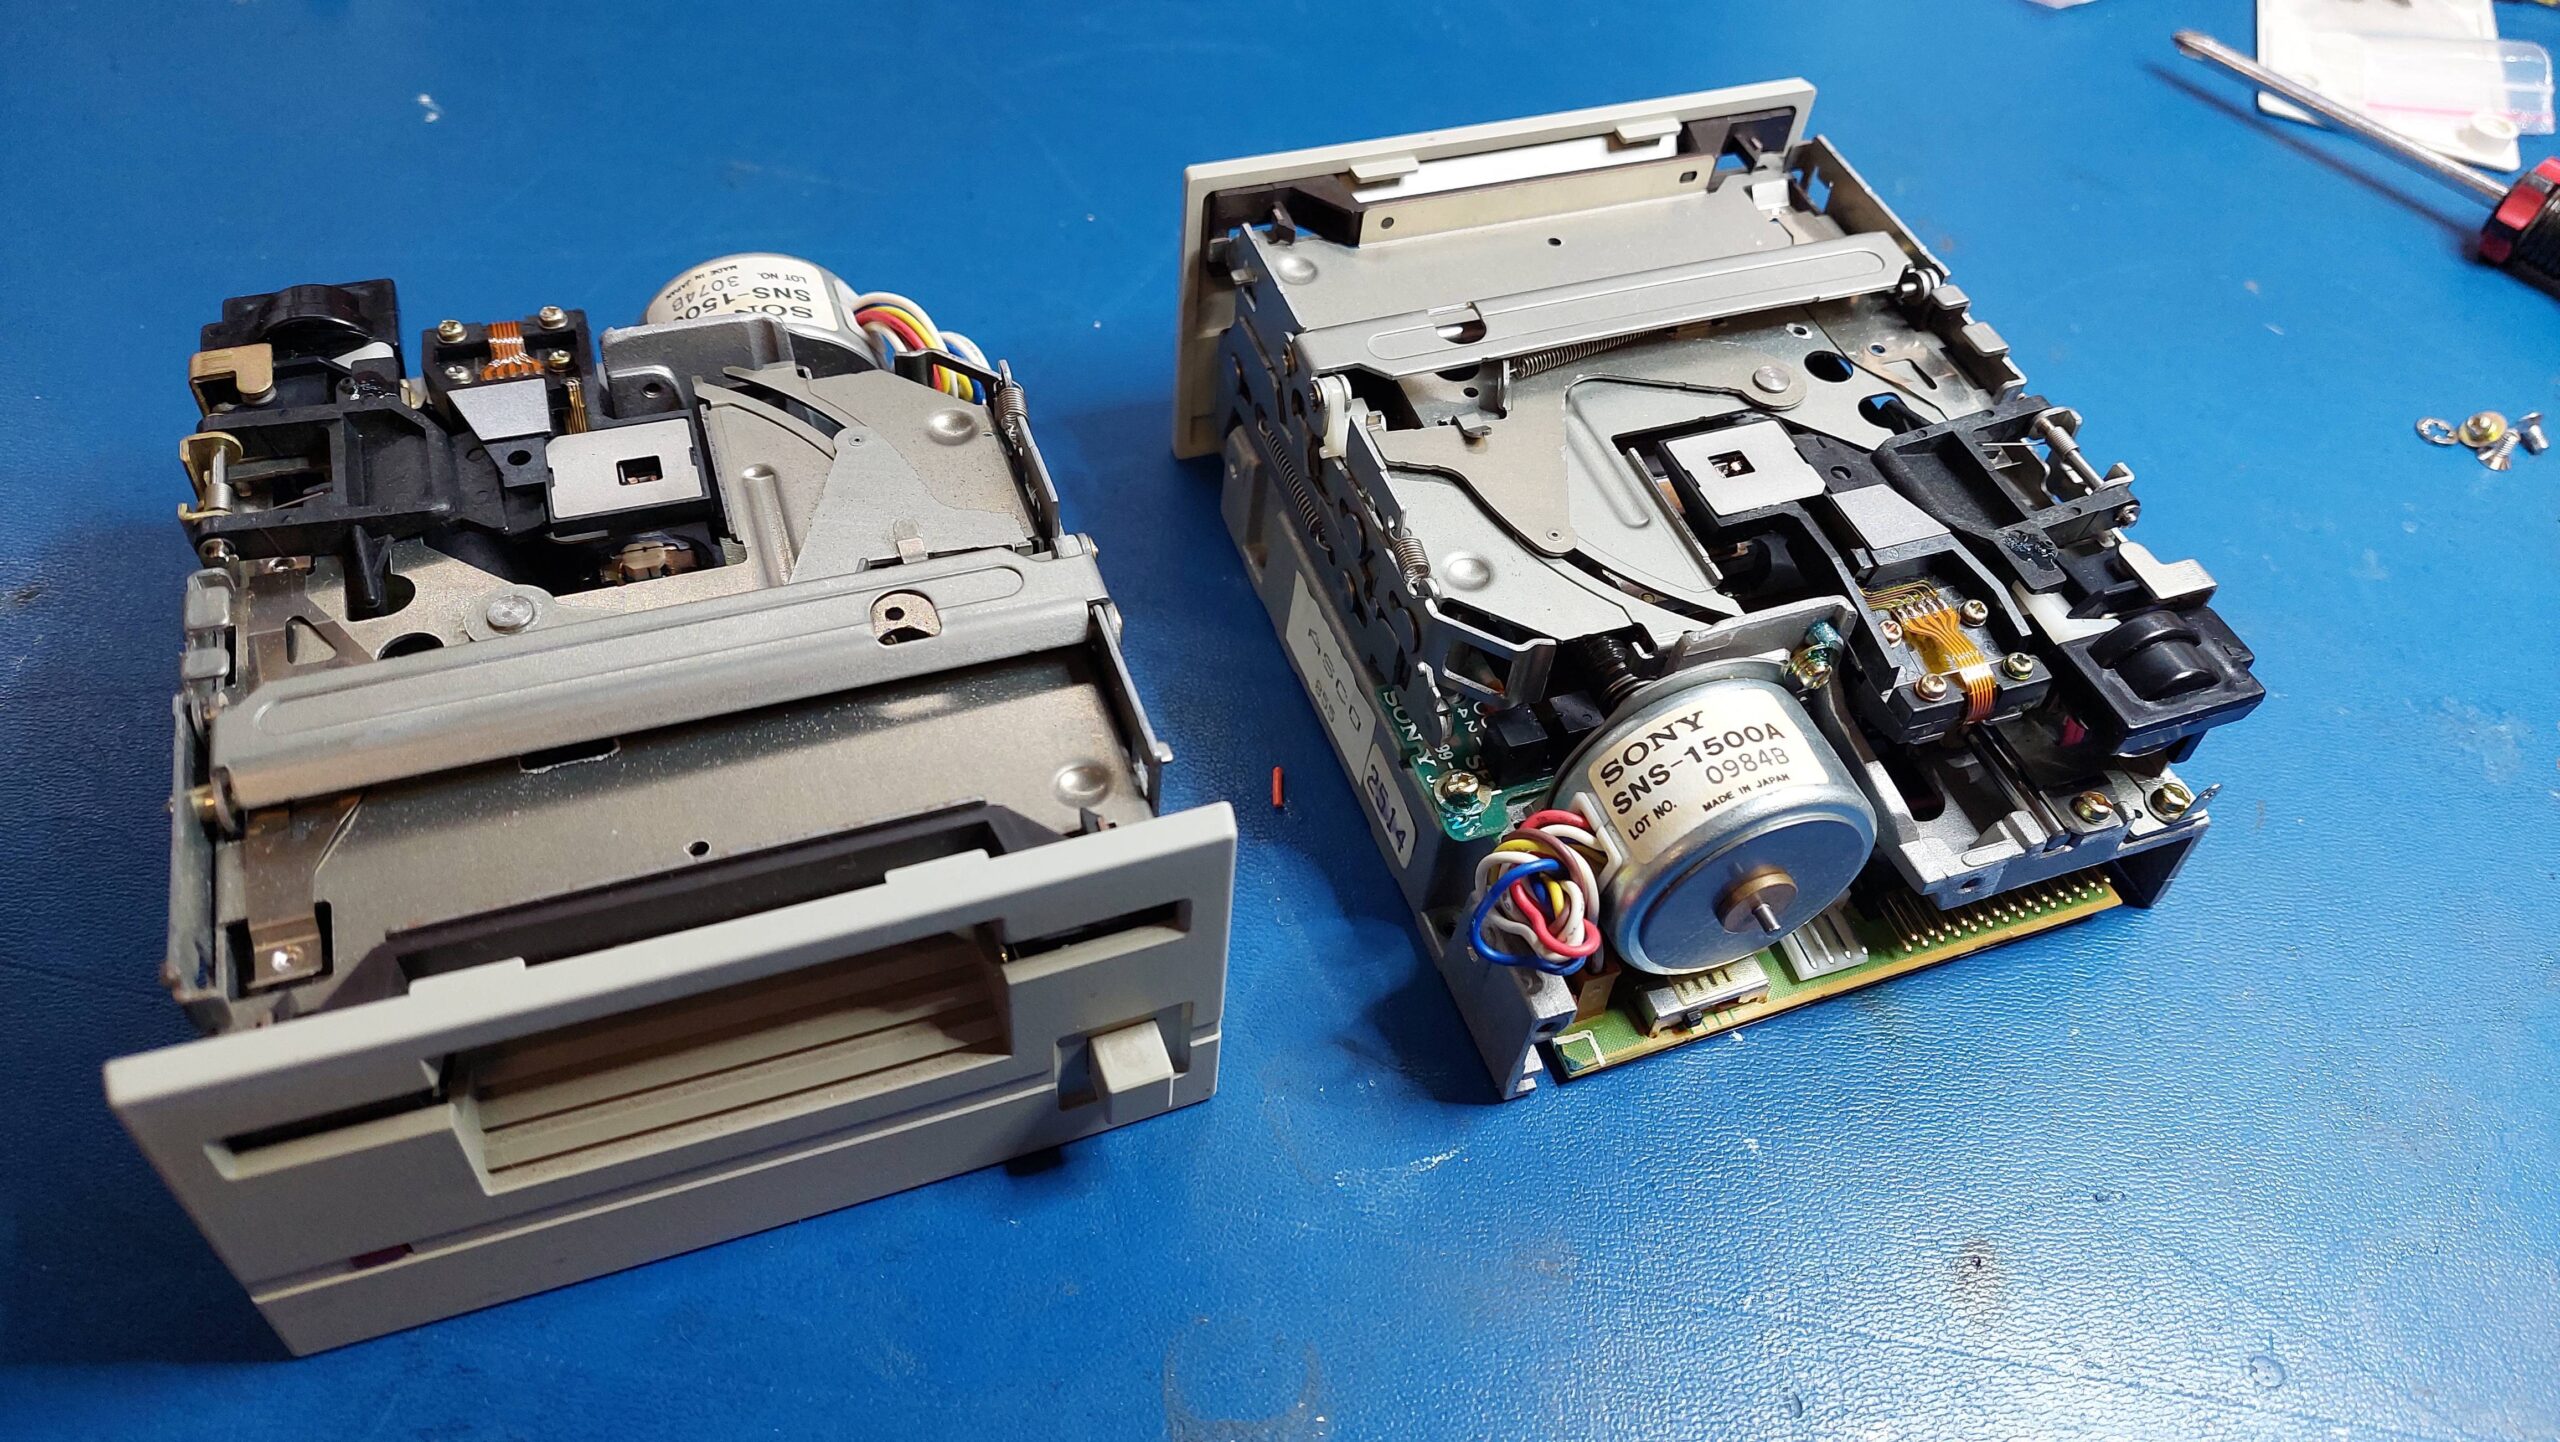
I started by ungumming the drives. The lubricant used on these old Sony drives seems to set like glue with enough time. IPA cleans it out pretty well. I re-lubed with some light oil.

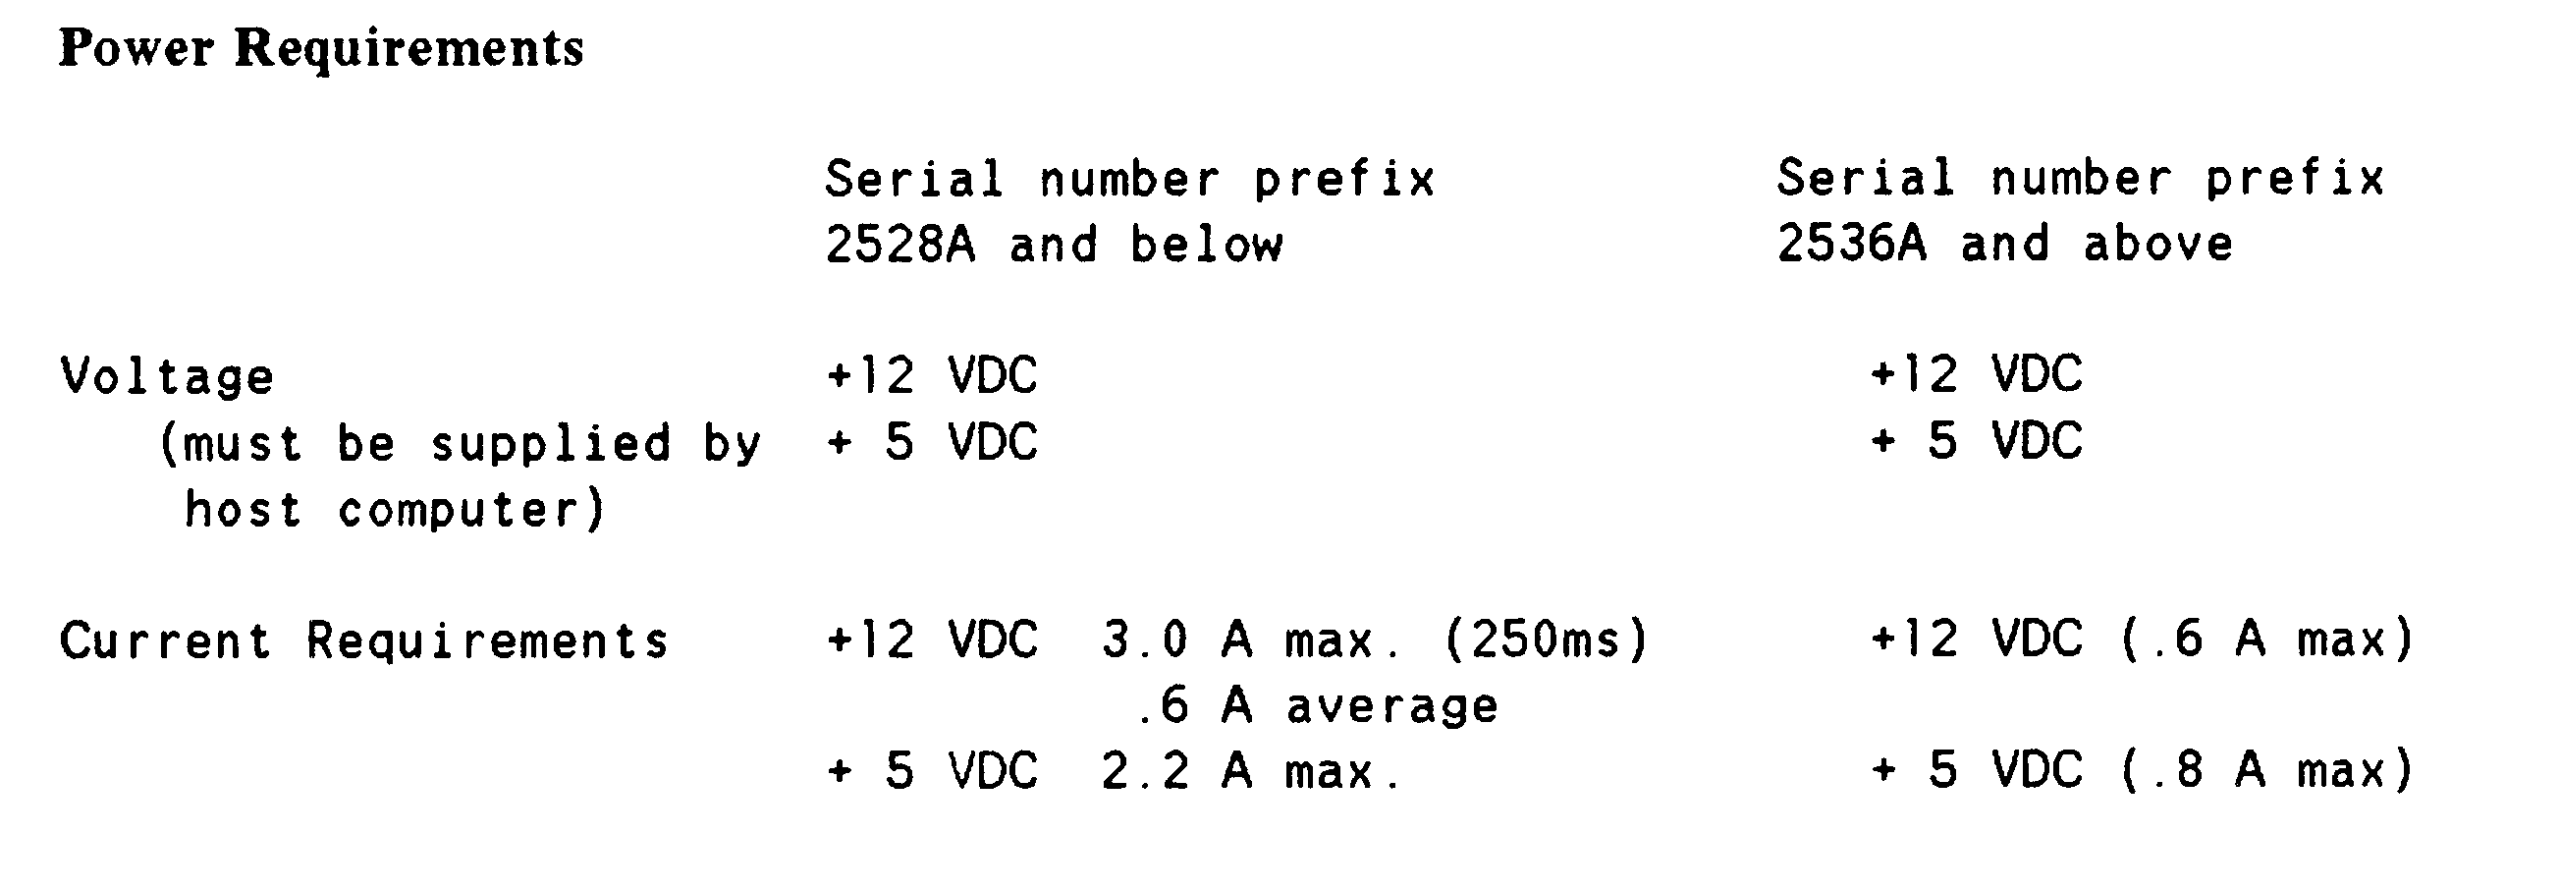
The service manual indicated that the power requirements. This unit was the thirstier option.

I had a 5A 12V power brick, so i figured i could use a buck converter to make the required 5V. I found a suitably low cost converter, which turned out to be tiny. After buzzing out the supply lines, i made up a little adapter box, checked the voltages, and plugged it all in.

The unit fired up, spun the drives, exercised the head carriage and extinguished the self-test light as it should.

I set up the address to 04 and configured the HP 150 to use drives at that address. Initial accesses did not go well – lots of errors and a disturbing amount of noise.

I thought that i had cleaned the heads, but closer inspection with a dental mirror and bright light showed a couple of stubborn spots on the top heads. These were dragging on the disk surface, generating noise, and gouging the disks. IPA is the usual goto for head cleaning, but i find that sometimes some water/detergent on a cotton bud is more effective. Once the heads were spotless, things went a lot better.

I found that i could read and write disks that had been formatted as single-sided in the 9121 drive unit. I could not format disks on the 9133 – the HP 150 format program failed. I tried with MS-DOS 2.1 and MS-DOS 3.2.

HP 150 7470A Plotter (Serial)

I have an HP 7470A plotter that i originally bought to go with my HP-85 computer. It worked ok with the HP 85, but wasn’t fully supported by all the software because it was a serial model rather than the HP-IB version. 

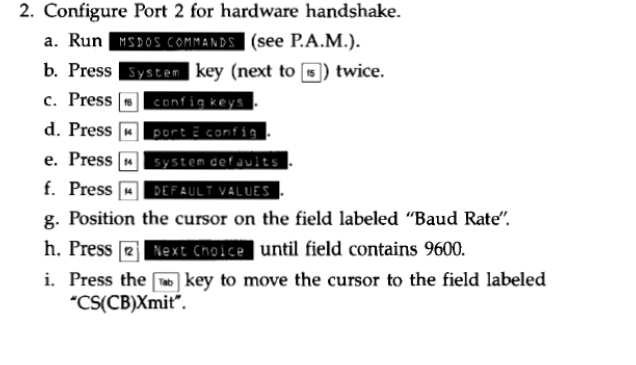
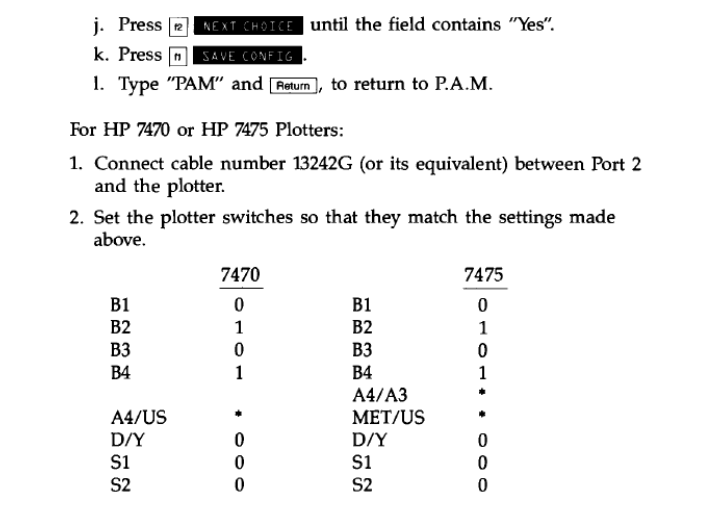
The HP 150 seemed happy to allocate the plotter to the second serial port and the manual for the HP 150 Graphics package had instructions for the HP 7470A on a serial port.  It uses hardware handshaking – I tried without and it gave errors.

The instructions said to use an HP 13242G cable.  The cable I had didn’t have enough conductors, so I made a cut-down version with just the signals supported by the plotter (see technical manual) and to give symmetry. 

The formatting of the manual is a little messed up, but the HP 150 has to be set up just right.  Go to MS-DOS command prompt.  Once there, the machine can be put into the built-in configuration. 

I stuck with 2400 baud for compatibility with my notes on the HP 85.

It worked really well!

HP 150 7470A Plotter (HP-IB)

Warning: Sad ending

After a five-year wait, an HP-IB plotter finally came within reach. Mike at the ARC Group had got it as part of a job lot, and he generously gave it to me.

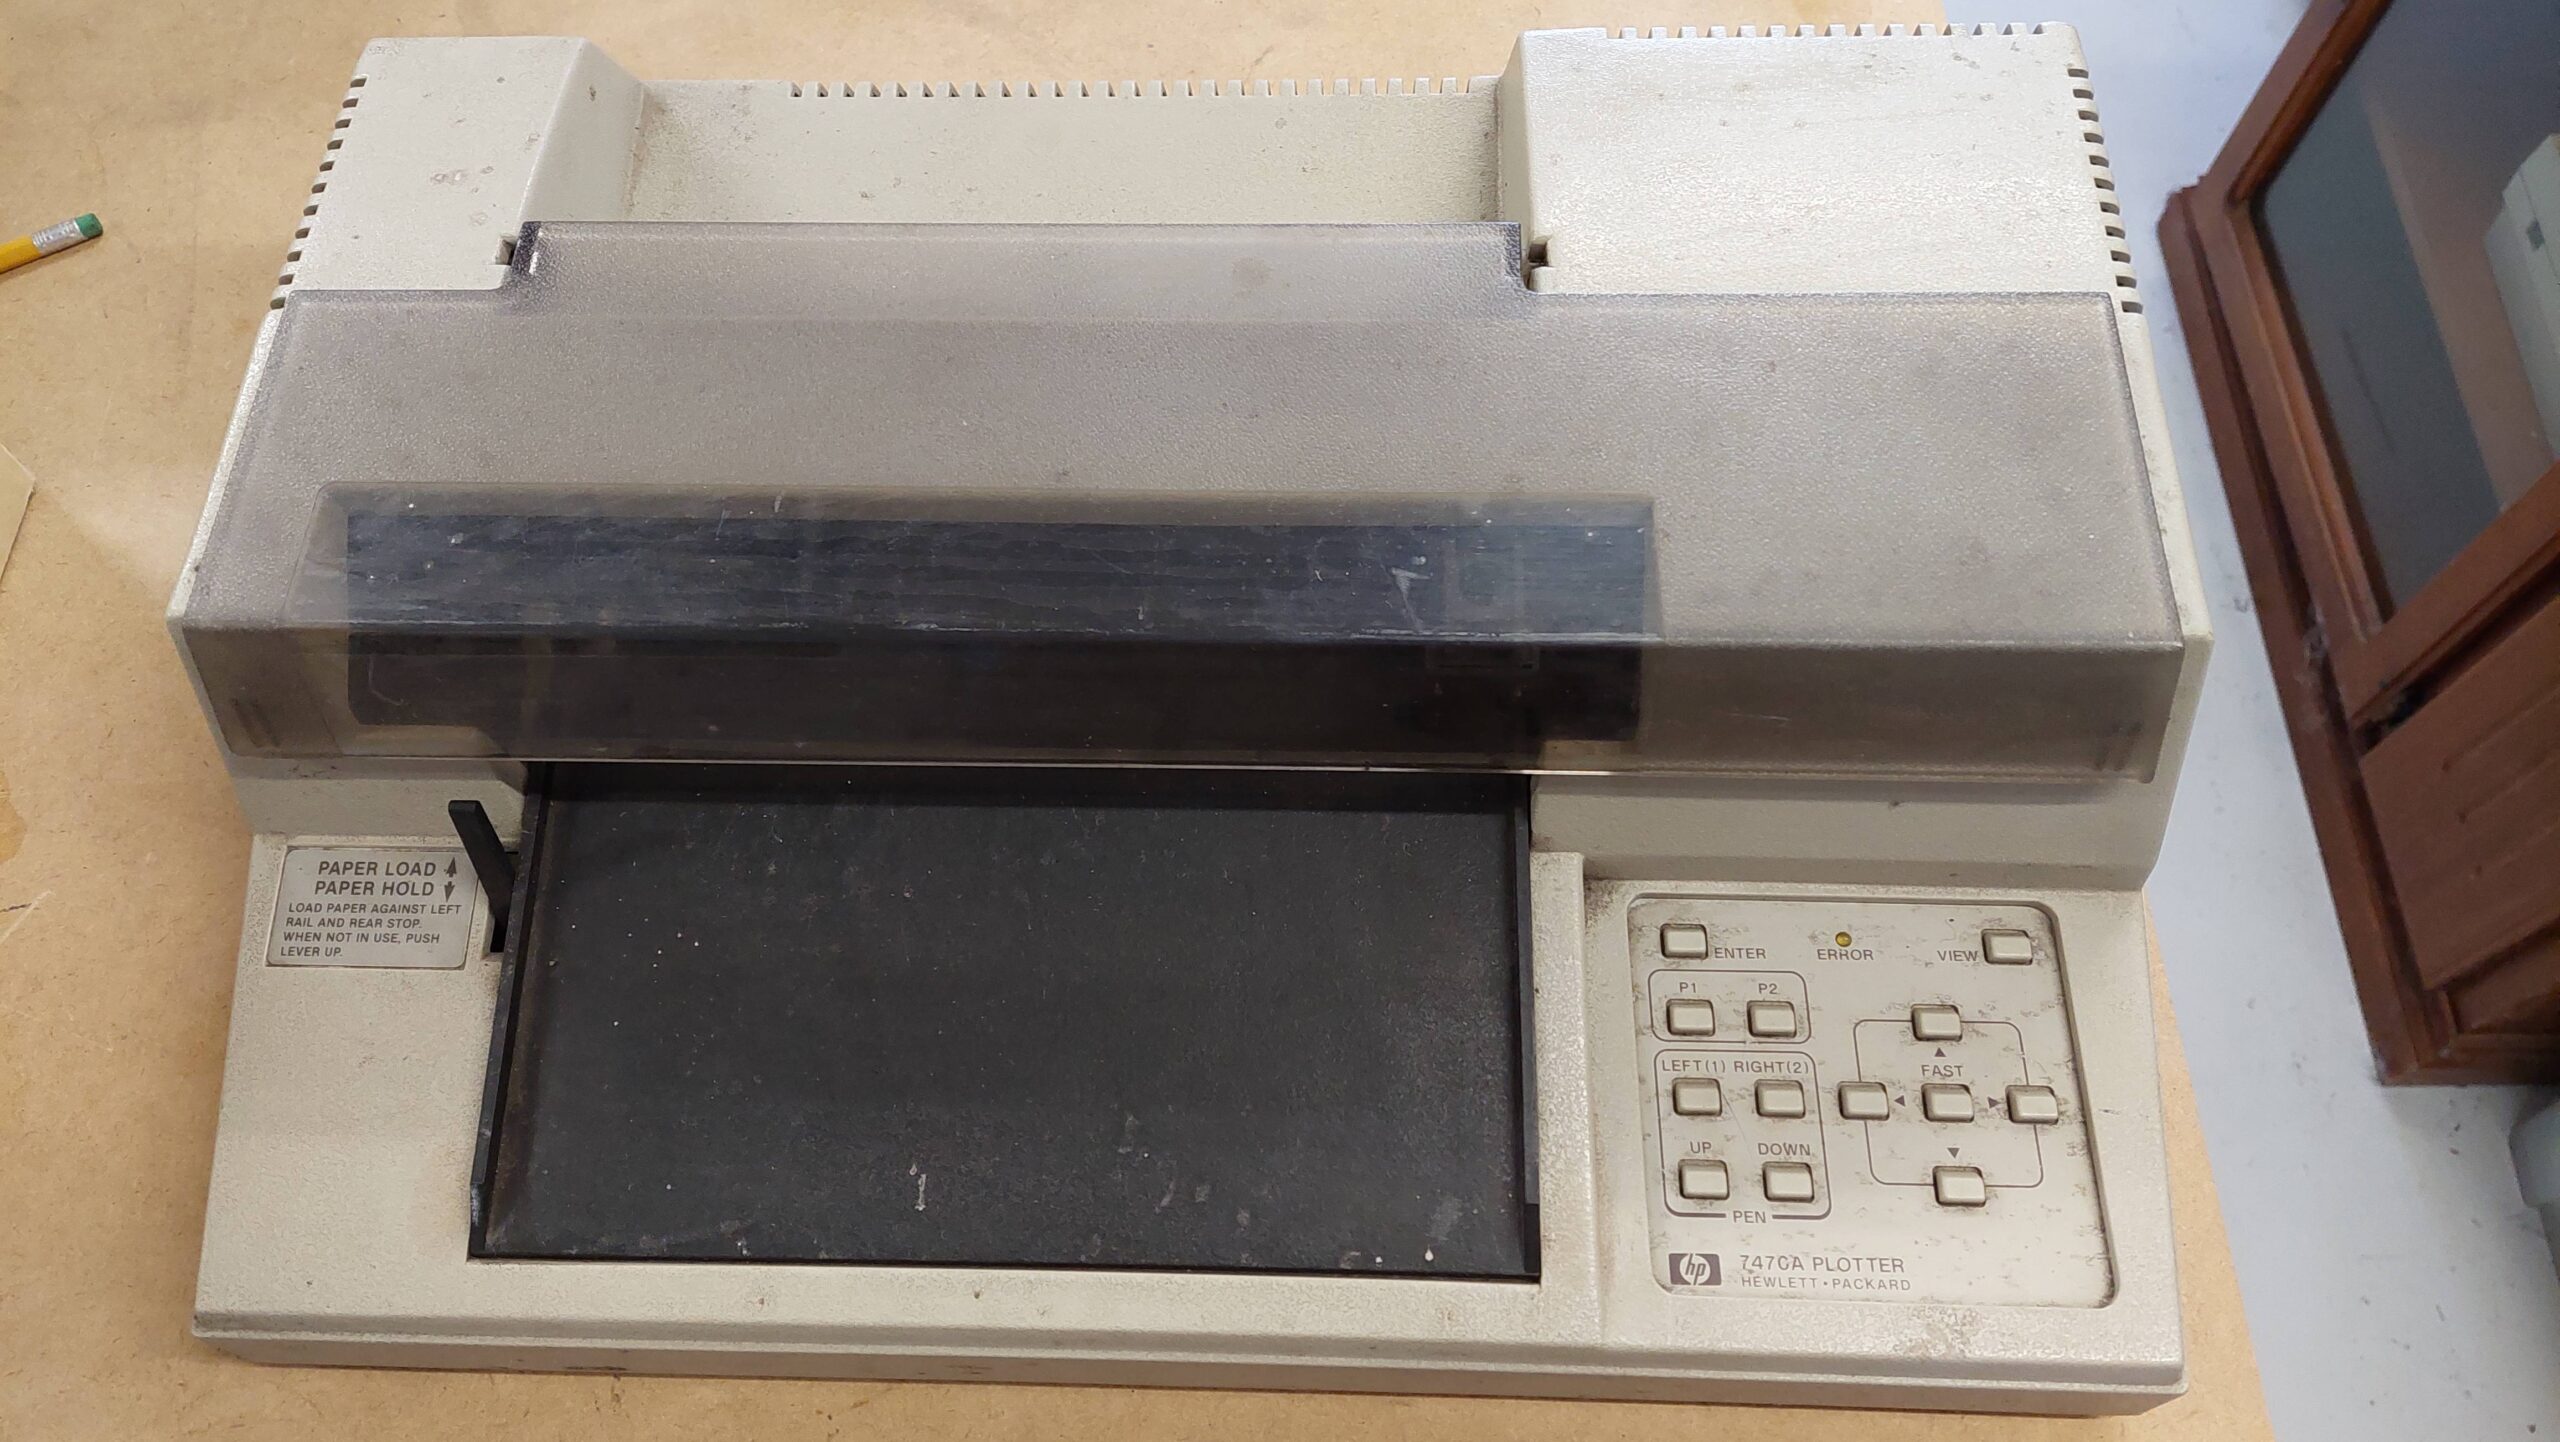
This is my second HP 7470A plotter – the other is the serial version. These plotters are very simple, two pen, paper-moving plotters. The serial interface supports operation with computers from many different manufacturers, whereas HP-IB is the native interface for the HP computers of the era.

There was just one problem with the new arrival: it had seen some weather.

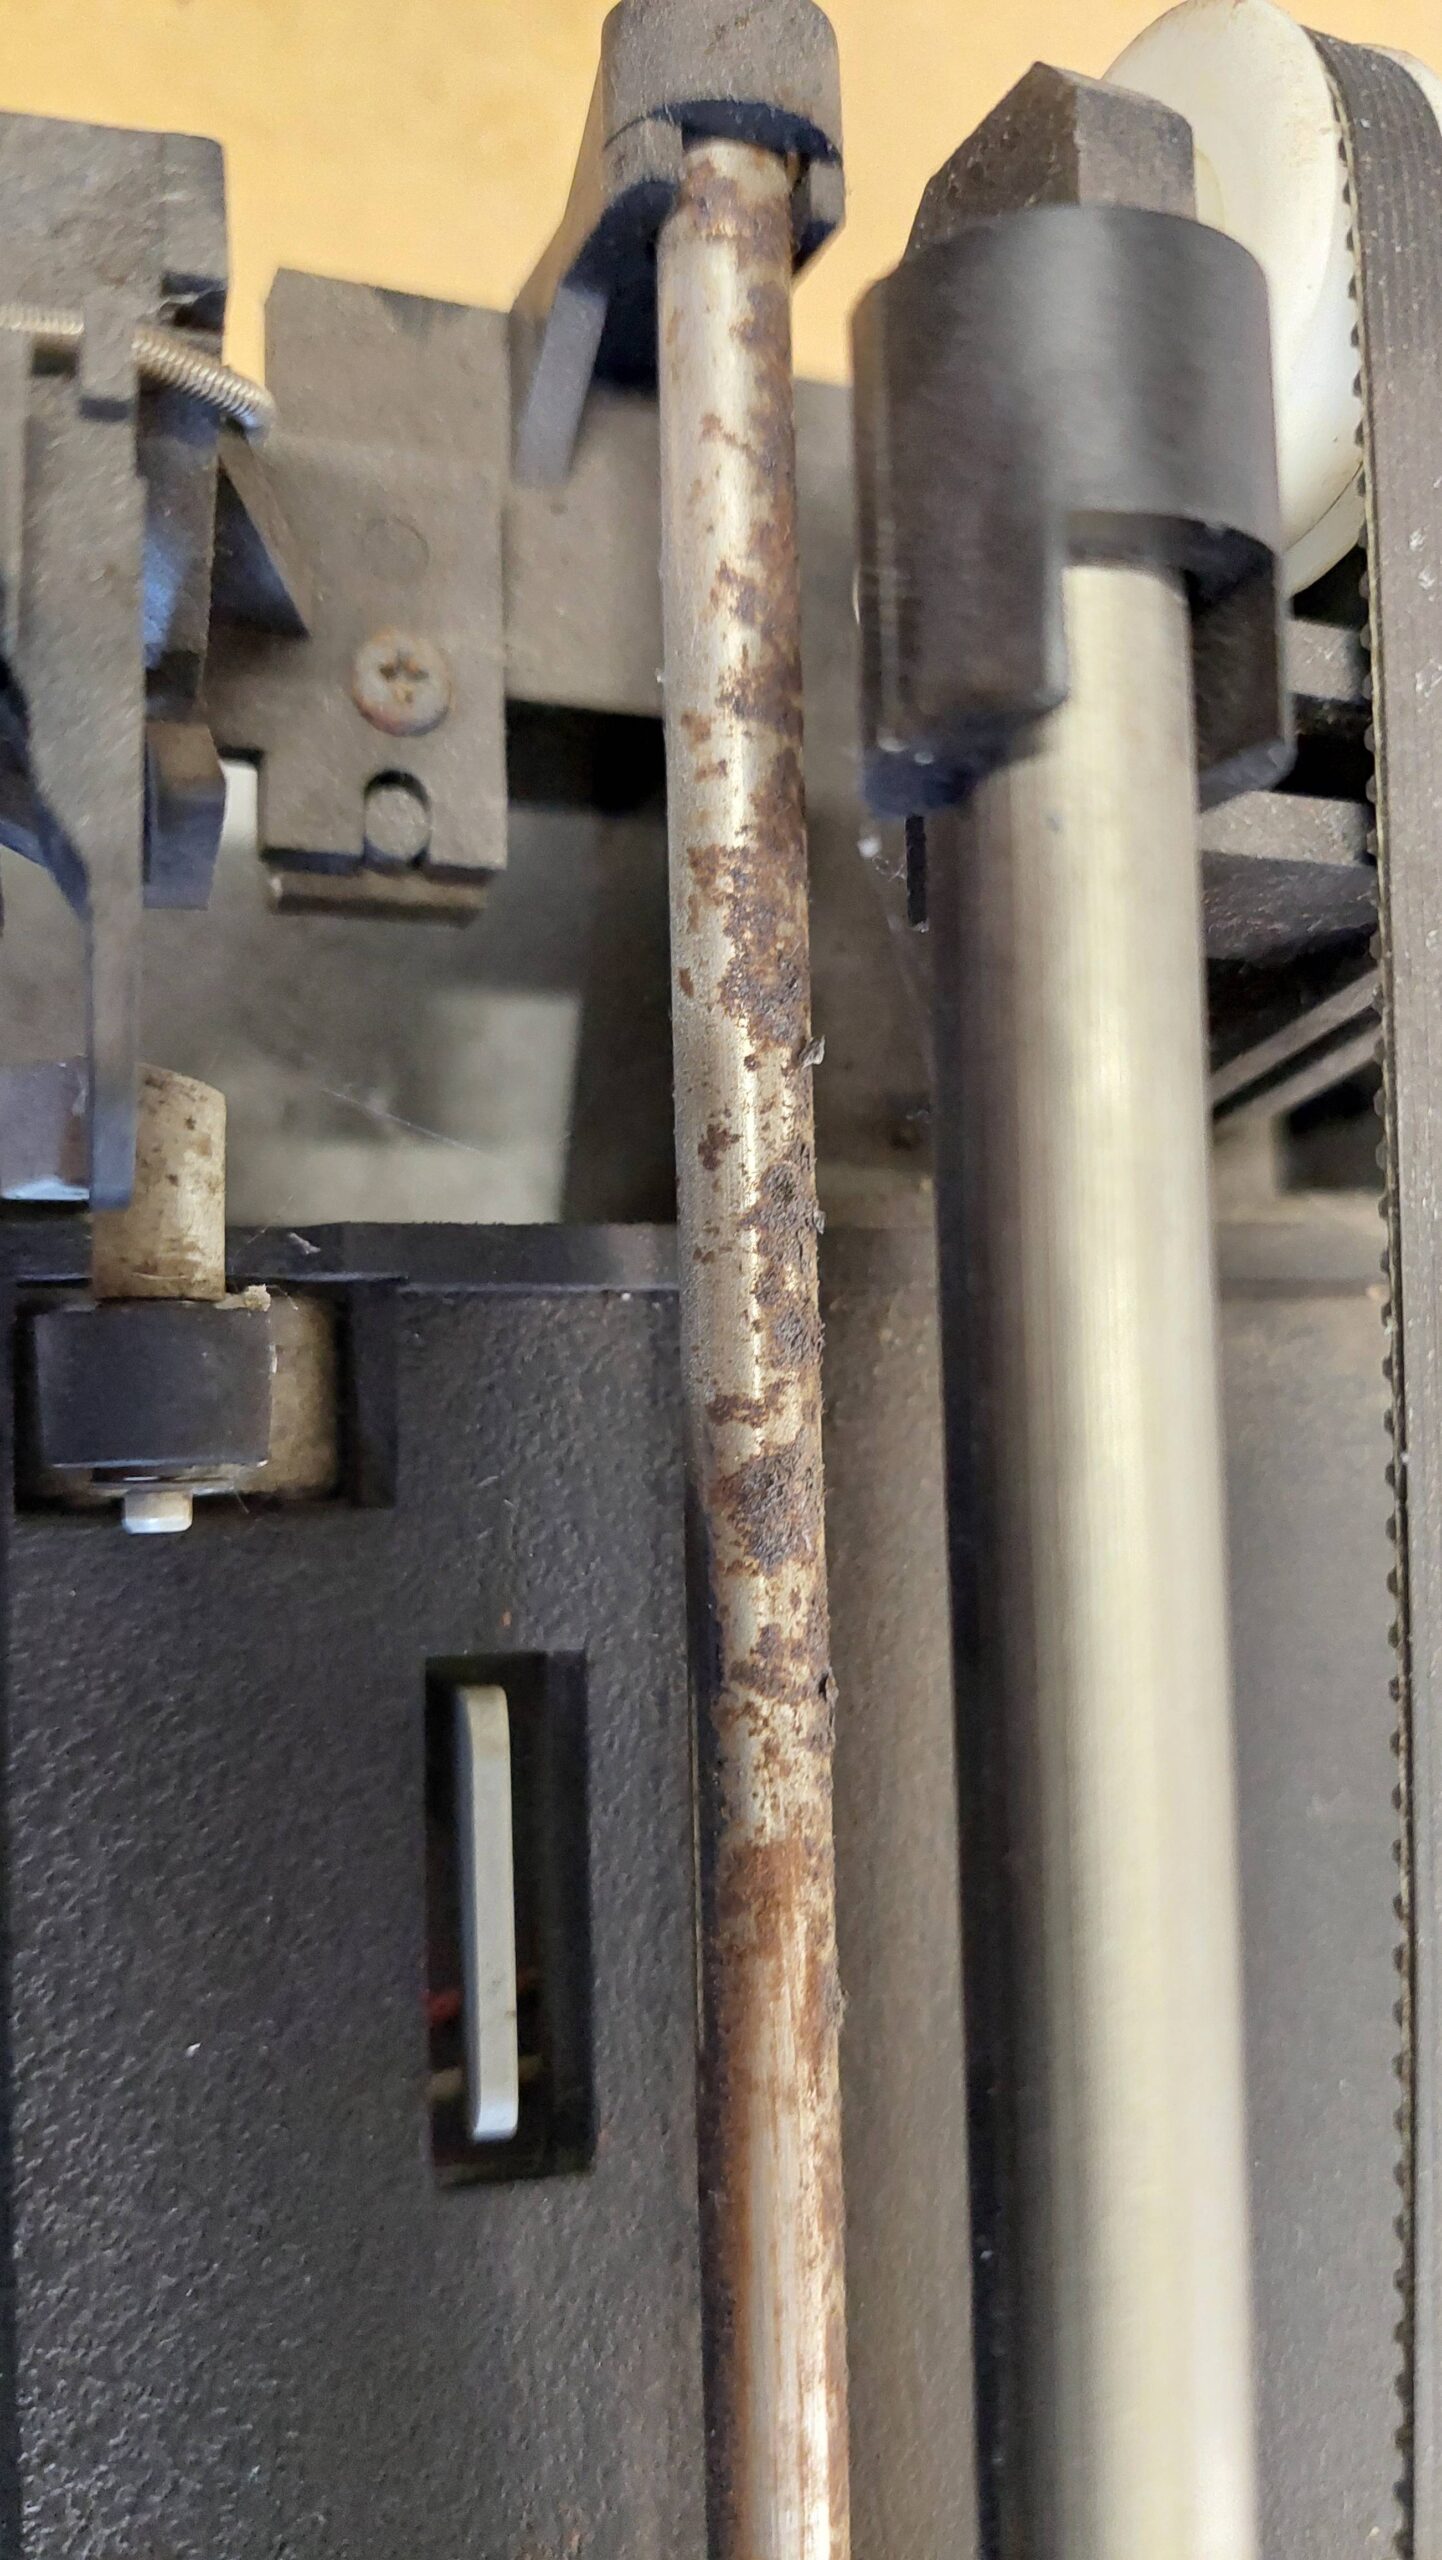
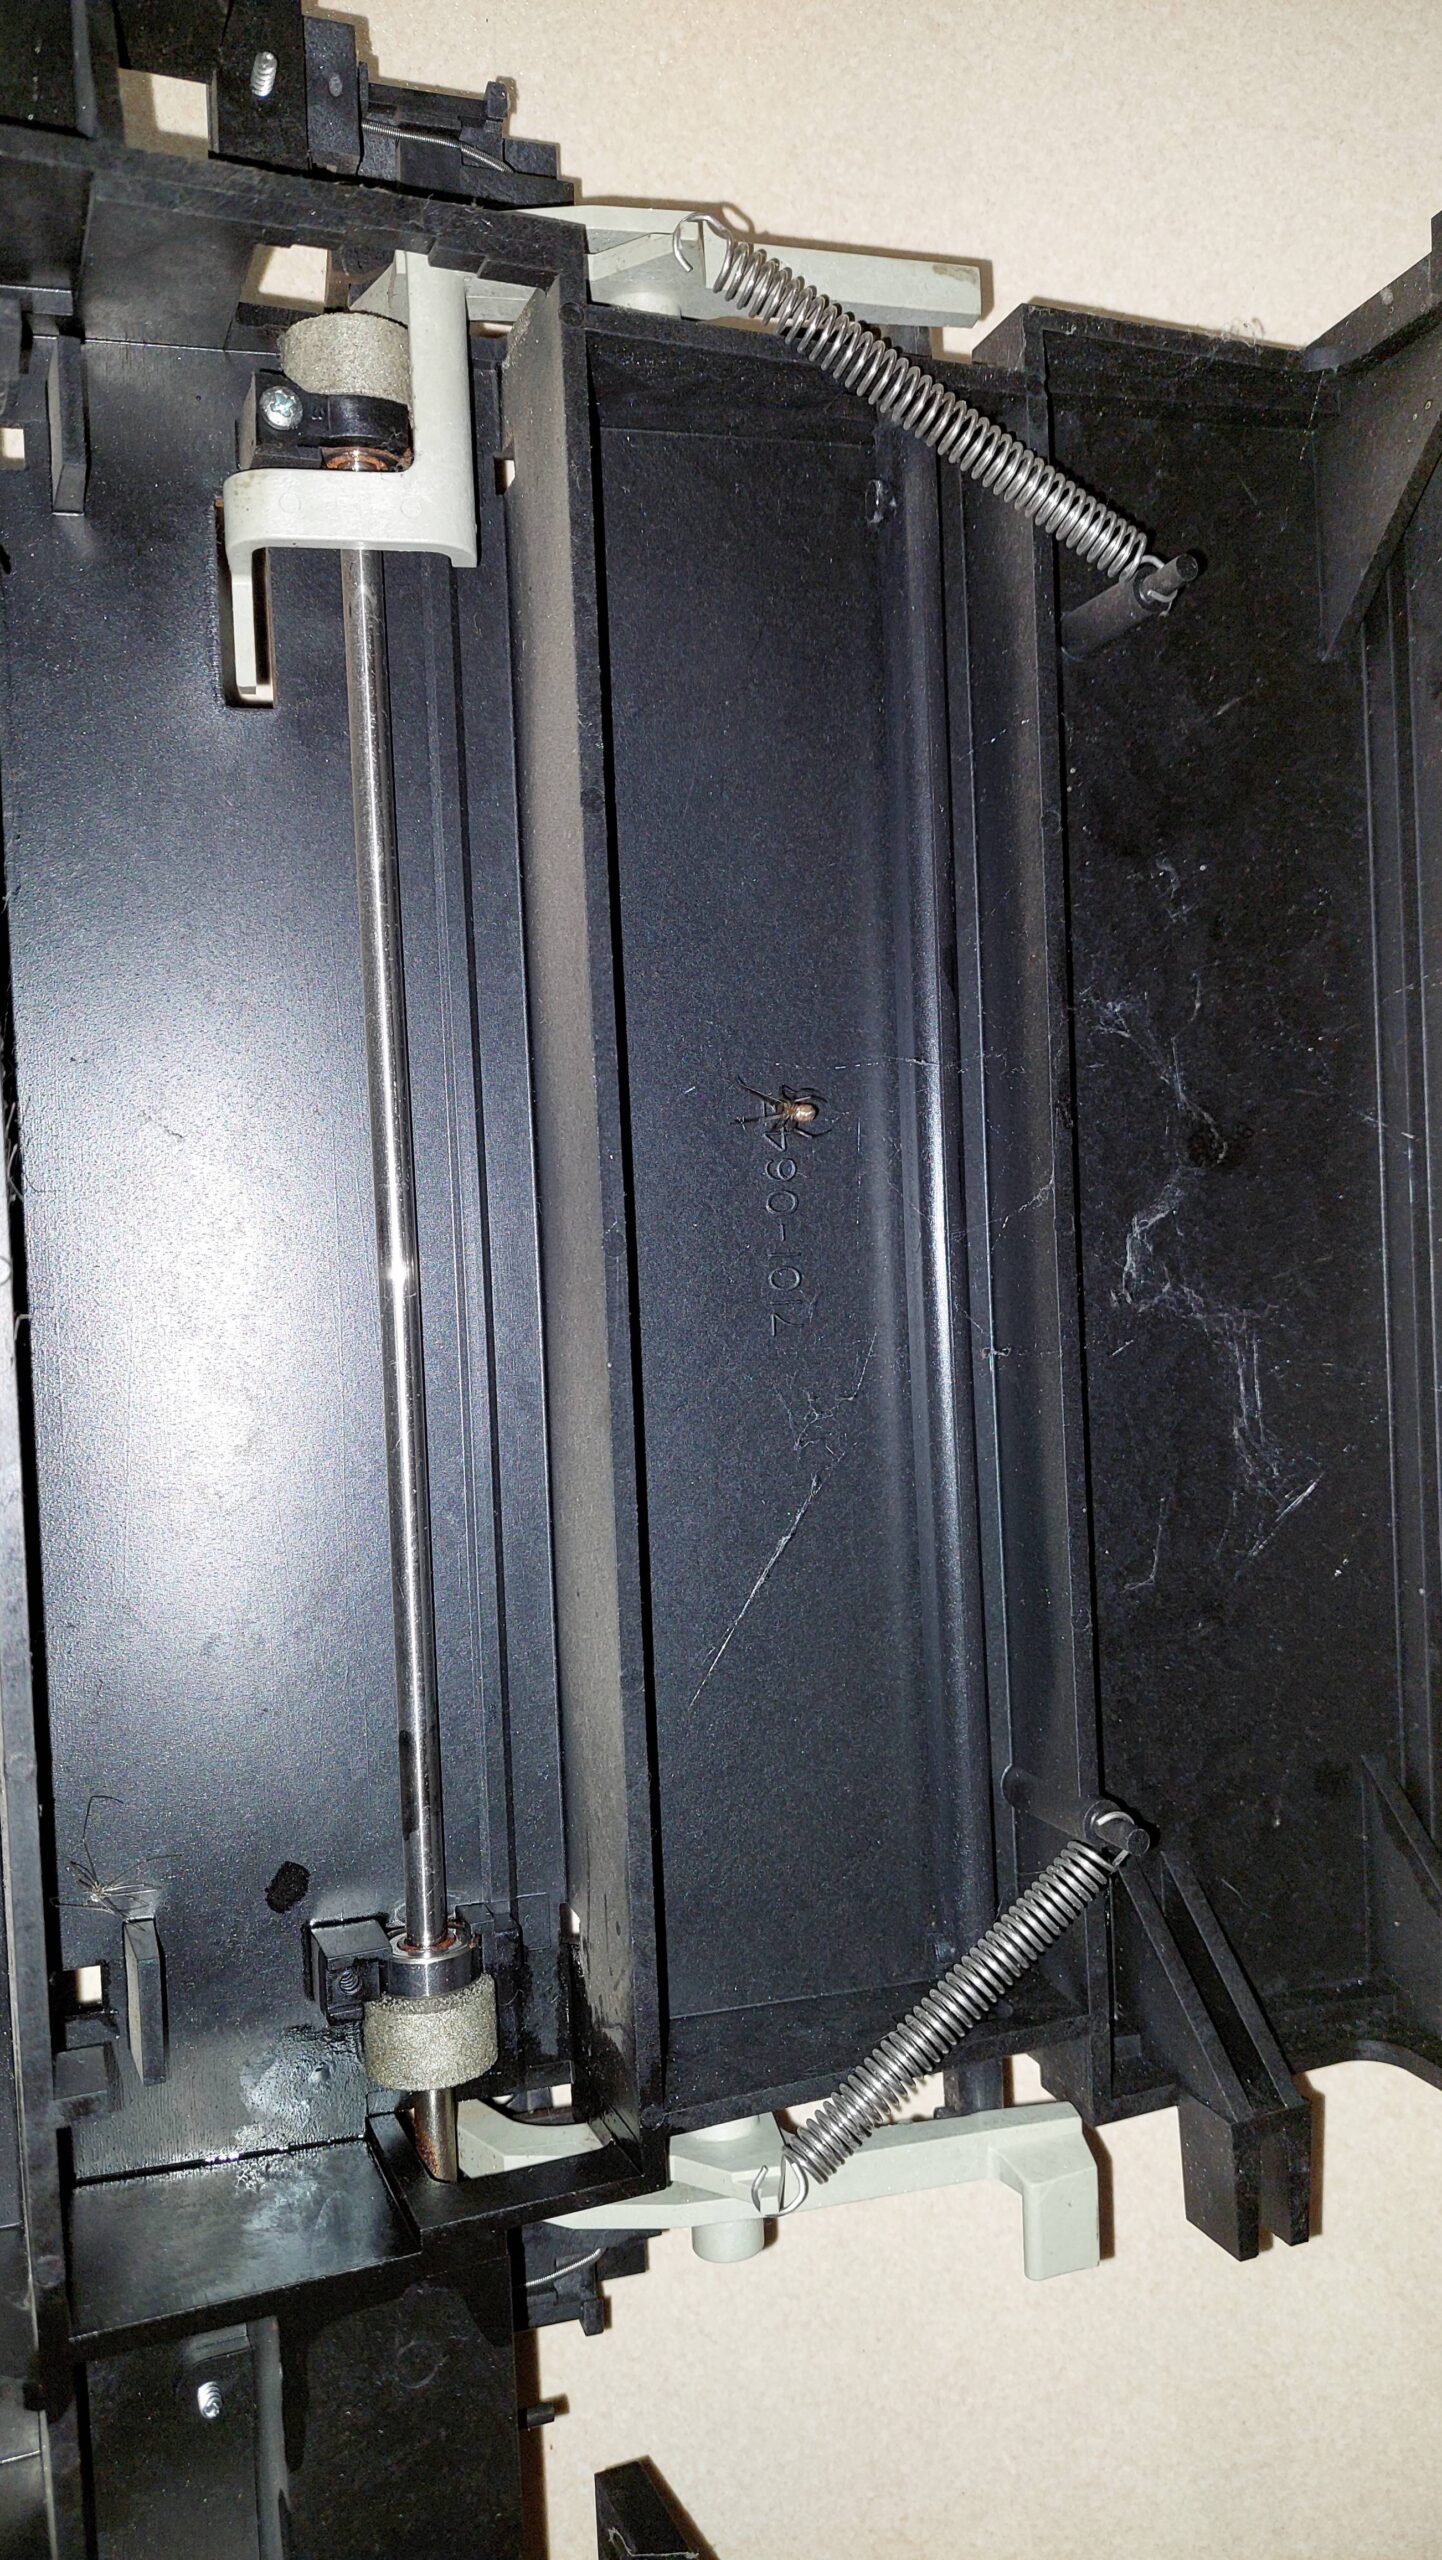
With power off, the carriage would not budge and the papers wheels were similarly stuck fast. The carriage guide bar was quite corroded.

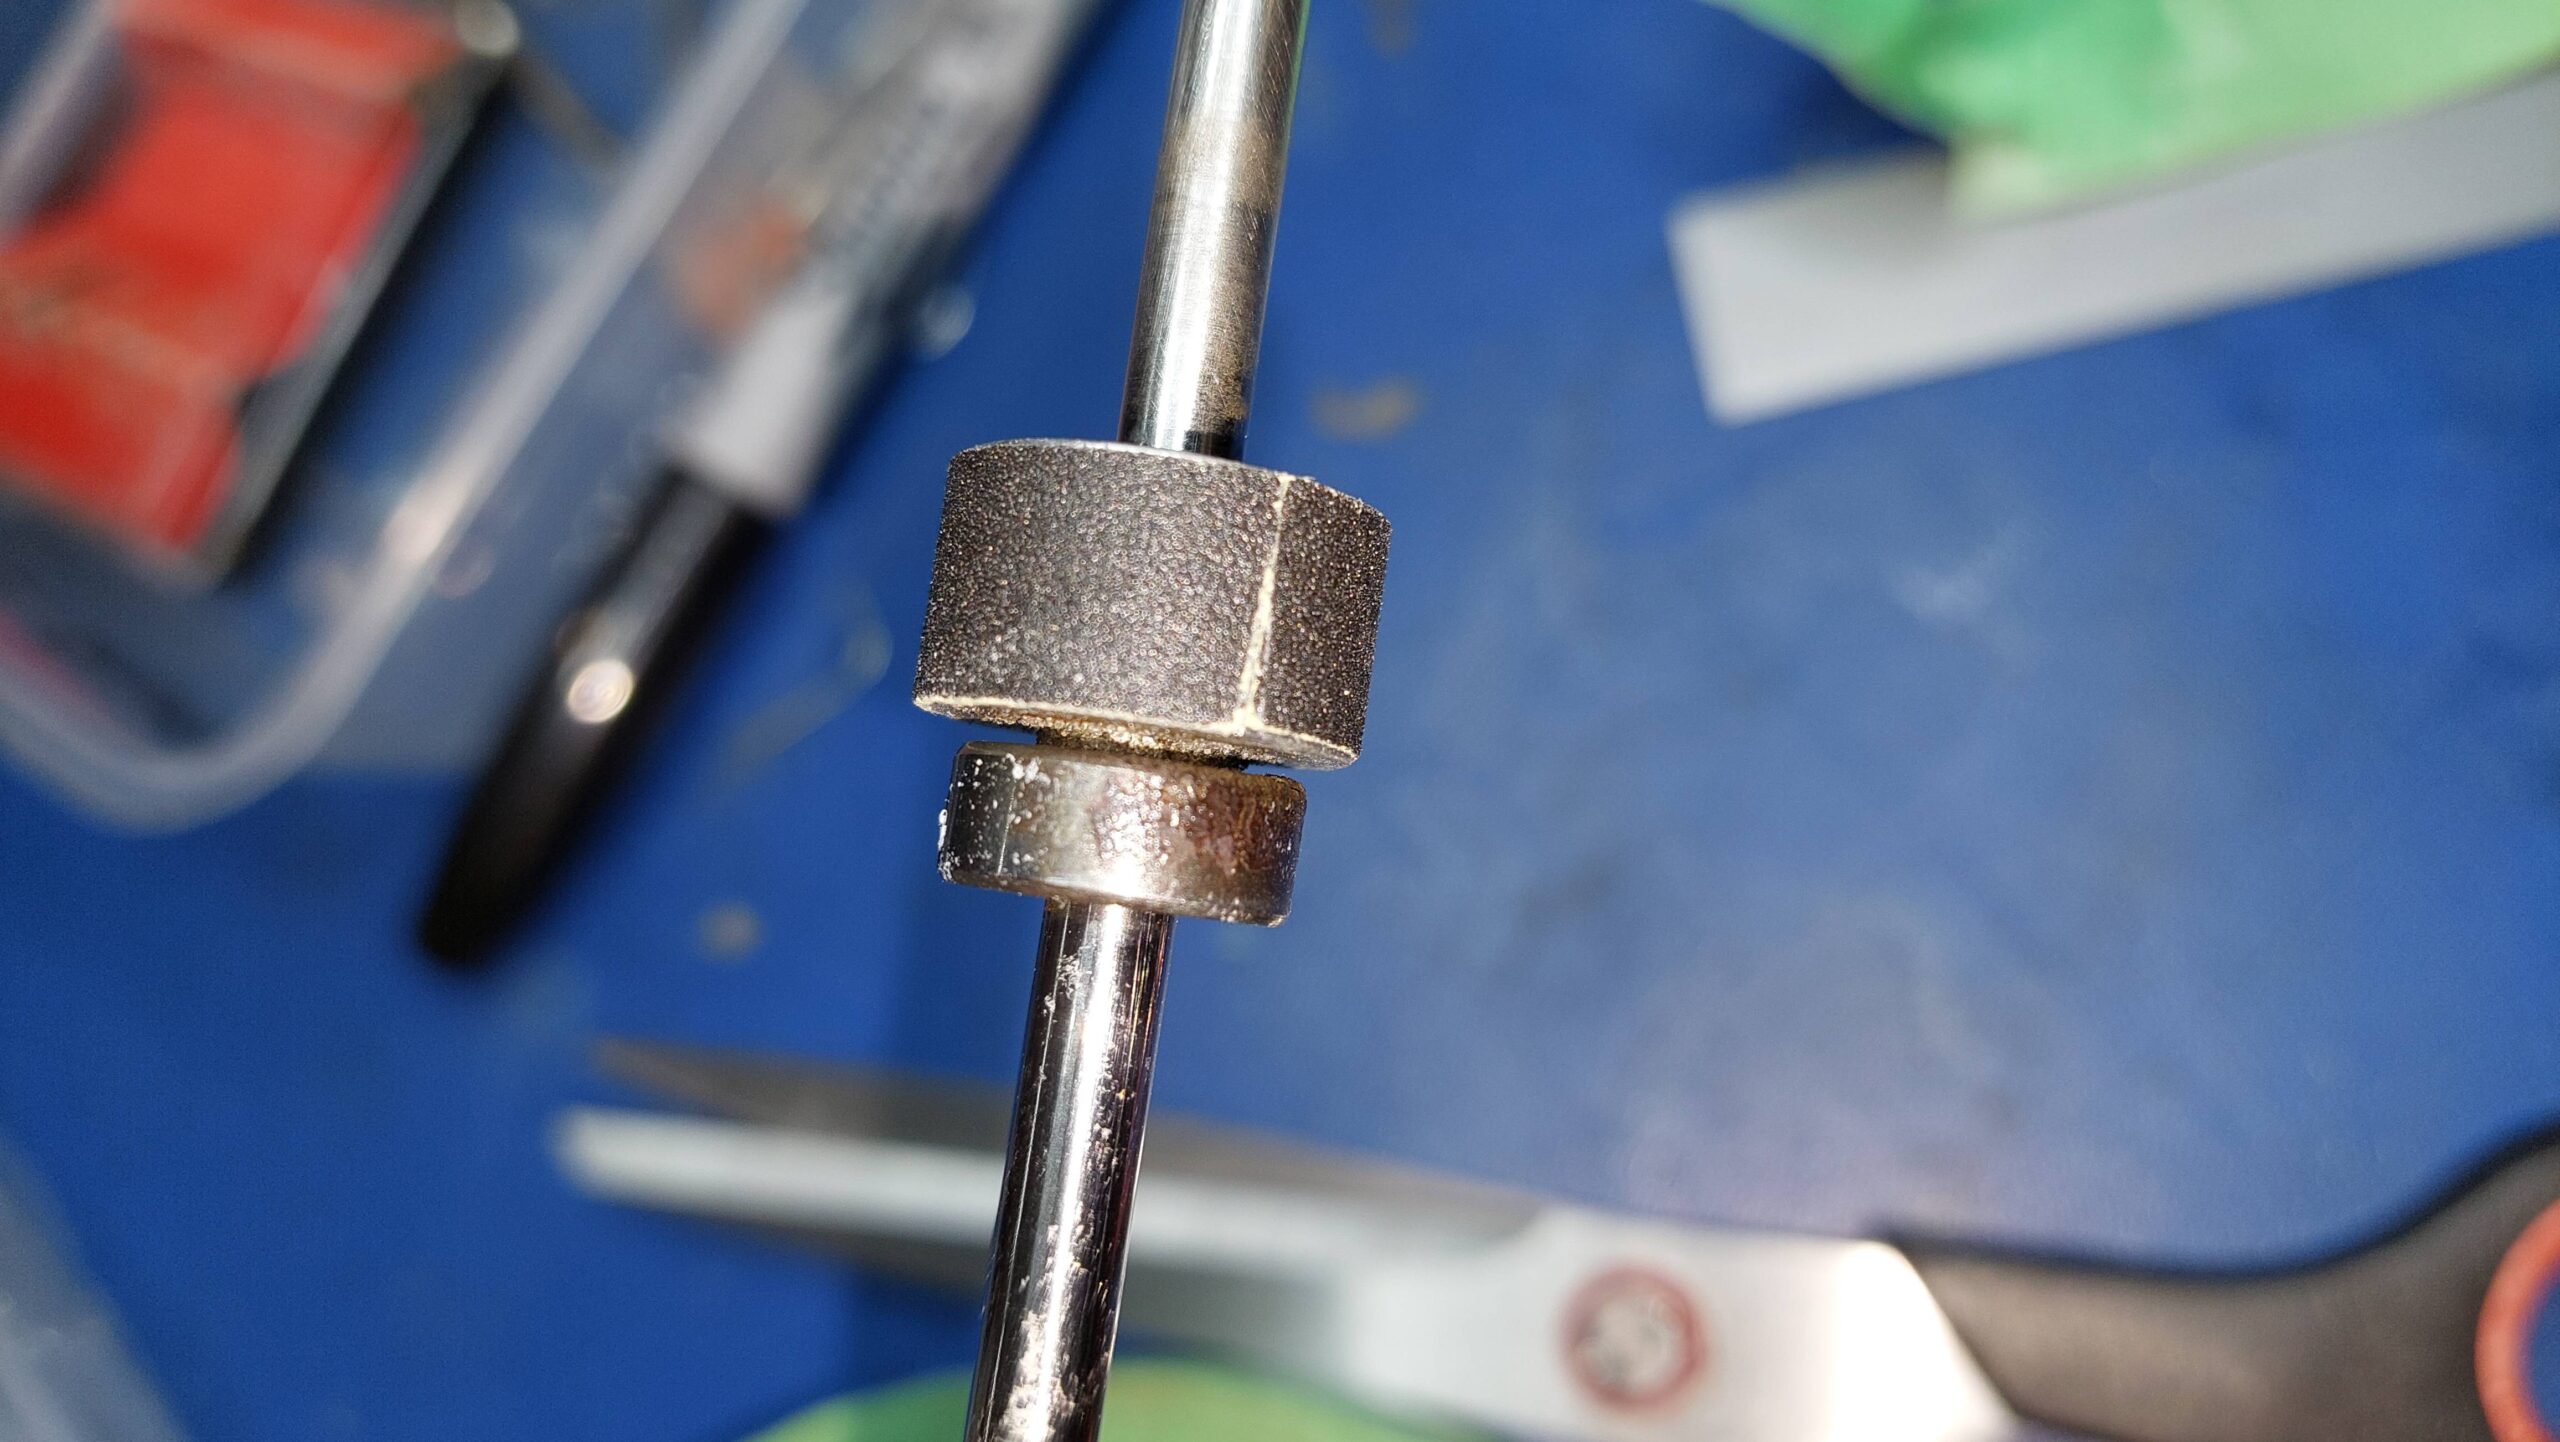
I could also see that some of the grip had come off the paper wheels and that the opposing rubber wheels had flat spots.

The machine was pretty filthy, so a full tear down seemed appropriate. I couldn’t find a service manual, so i used the force. I took a lot of photos as i pulled it apart.

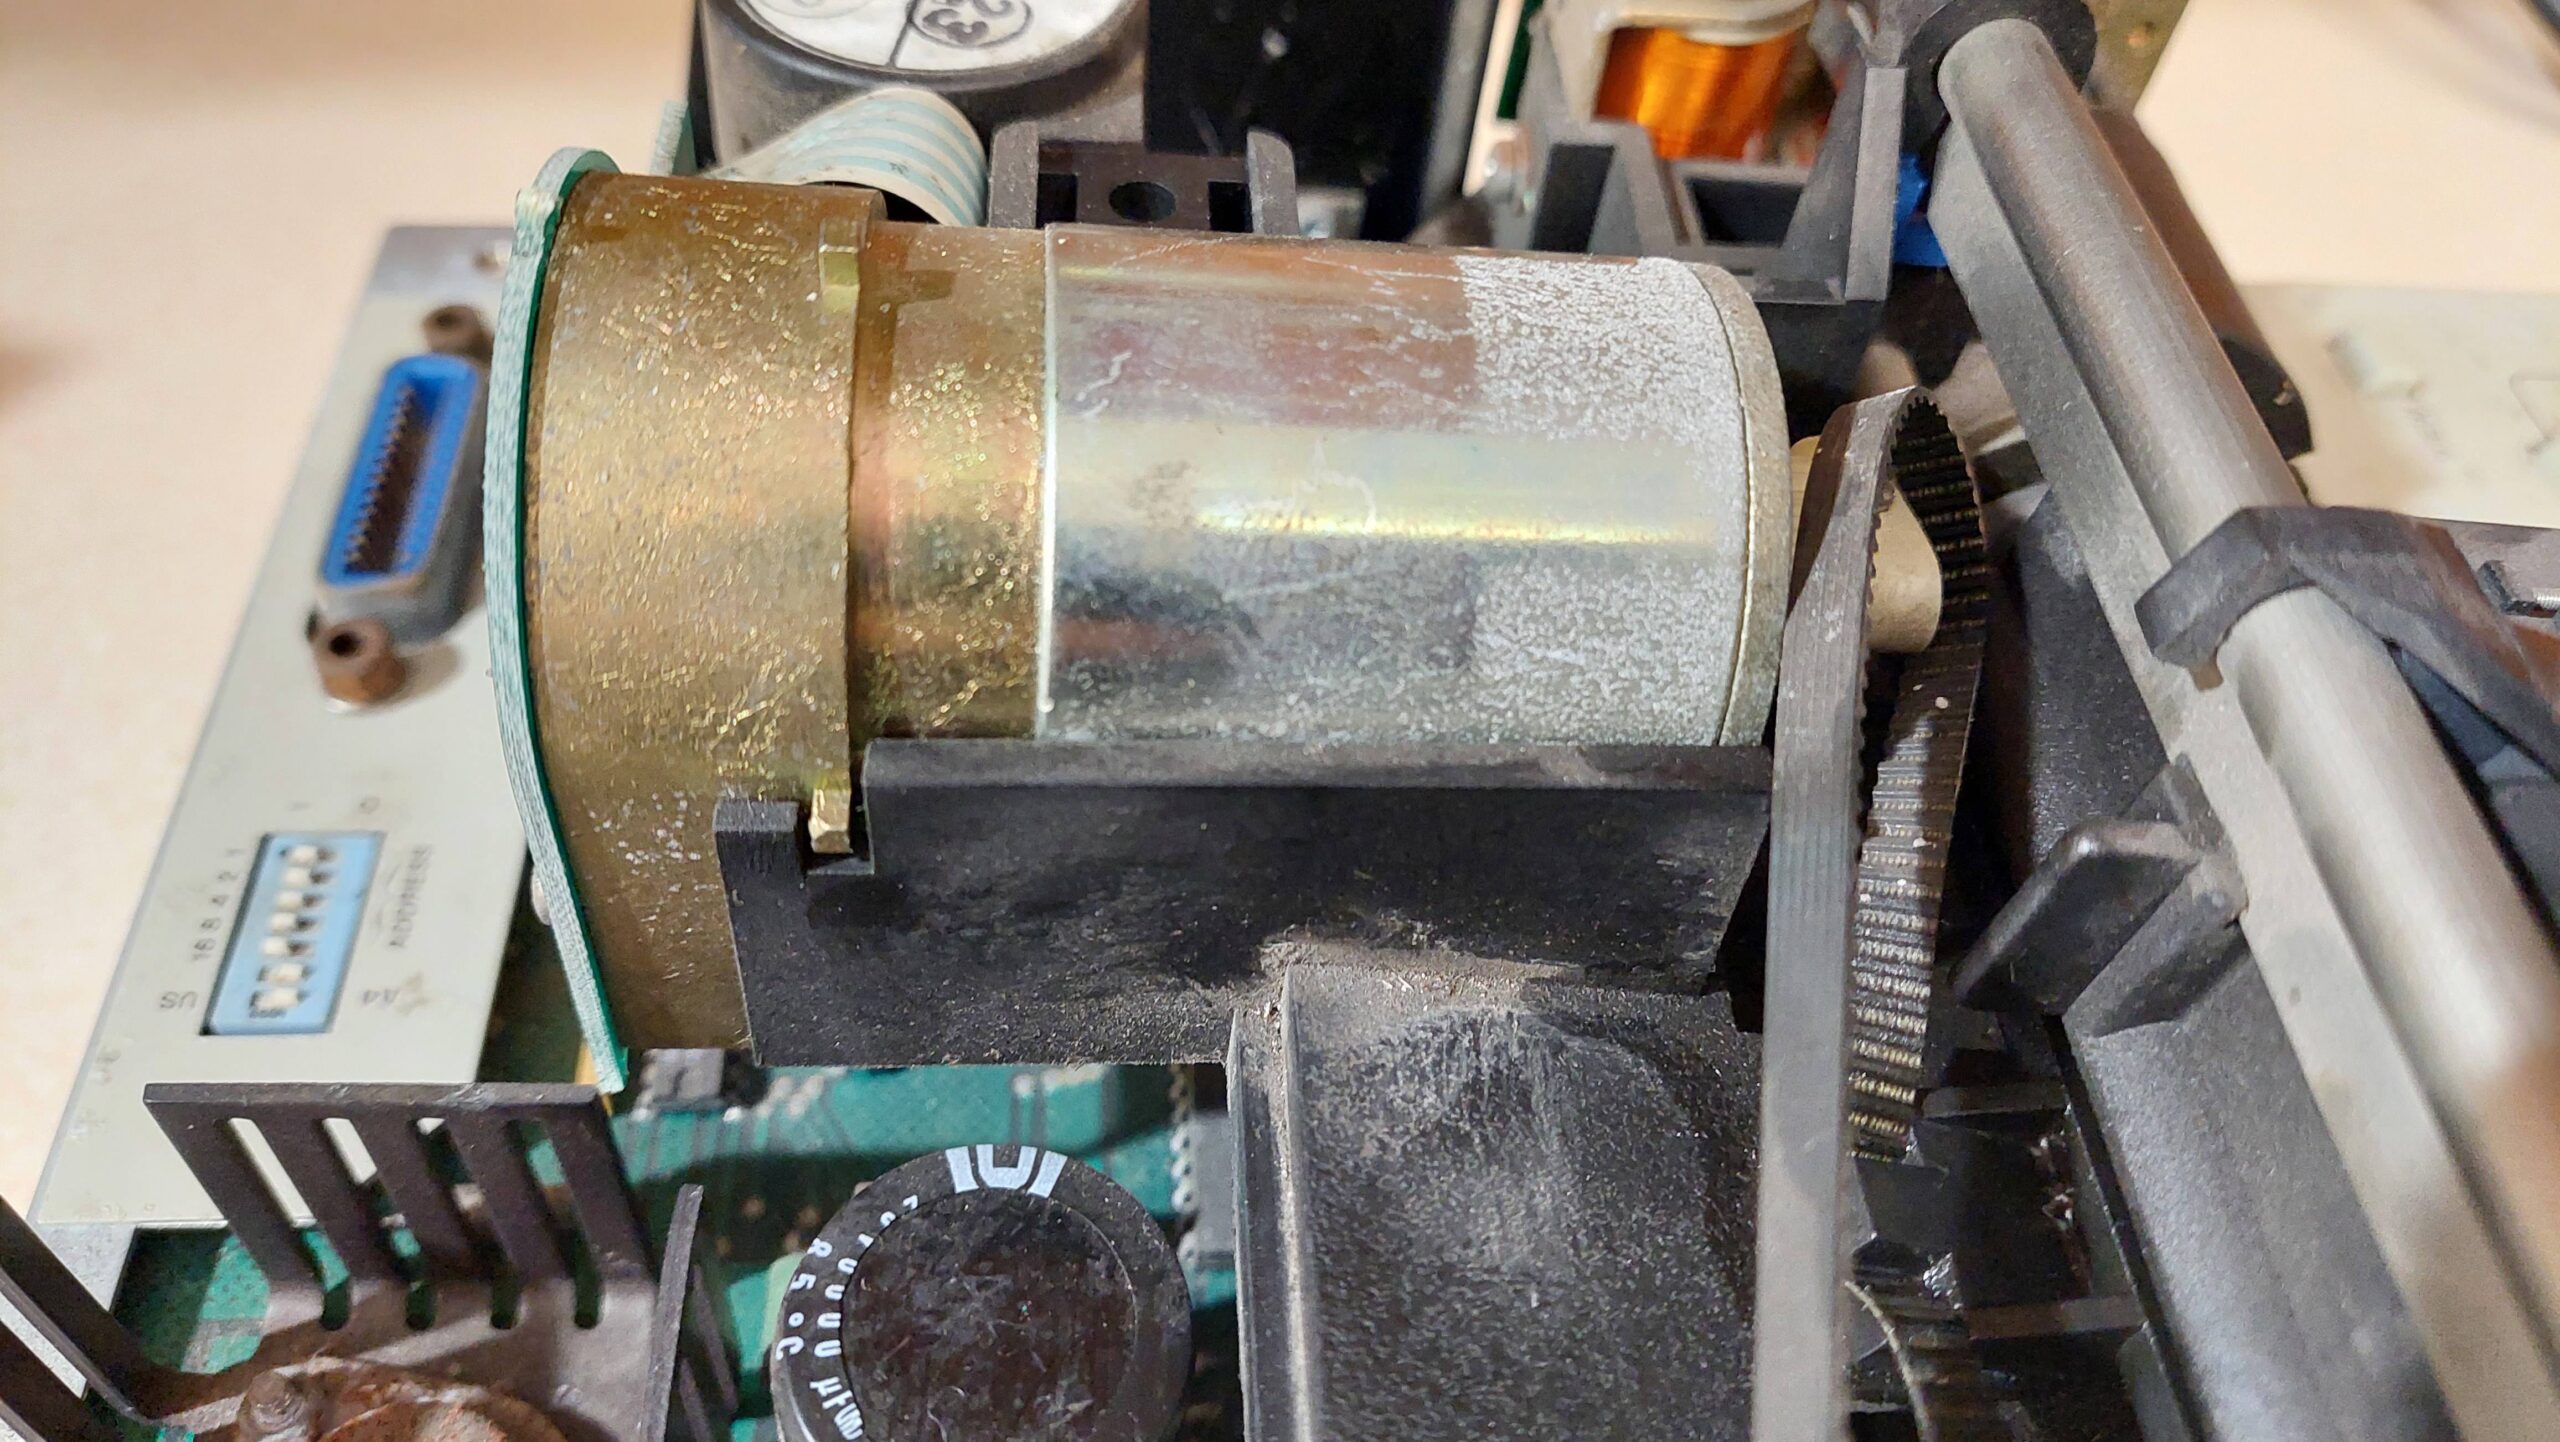
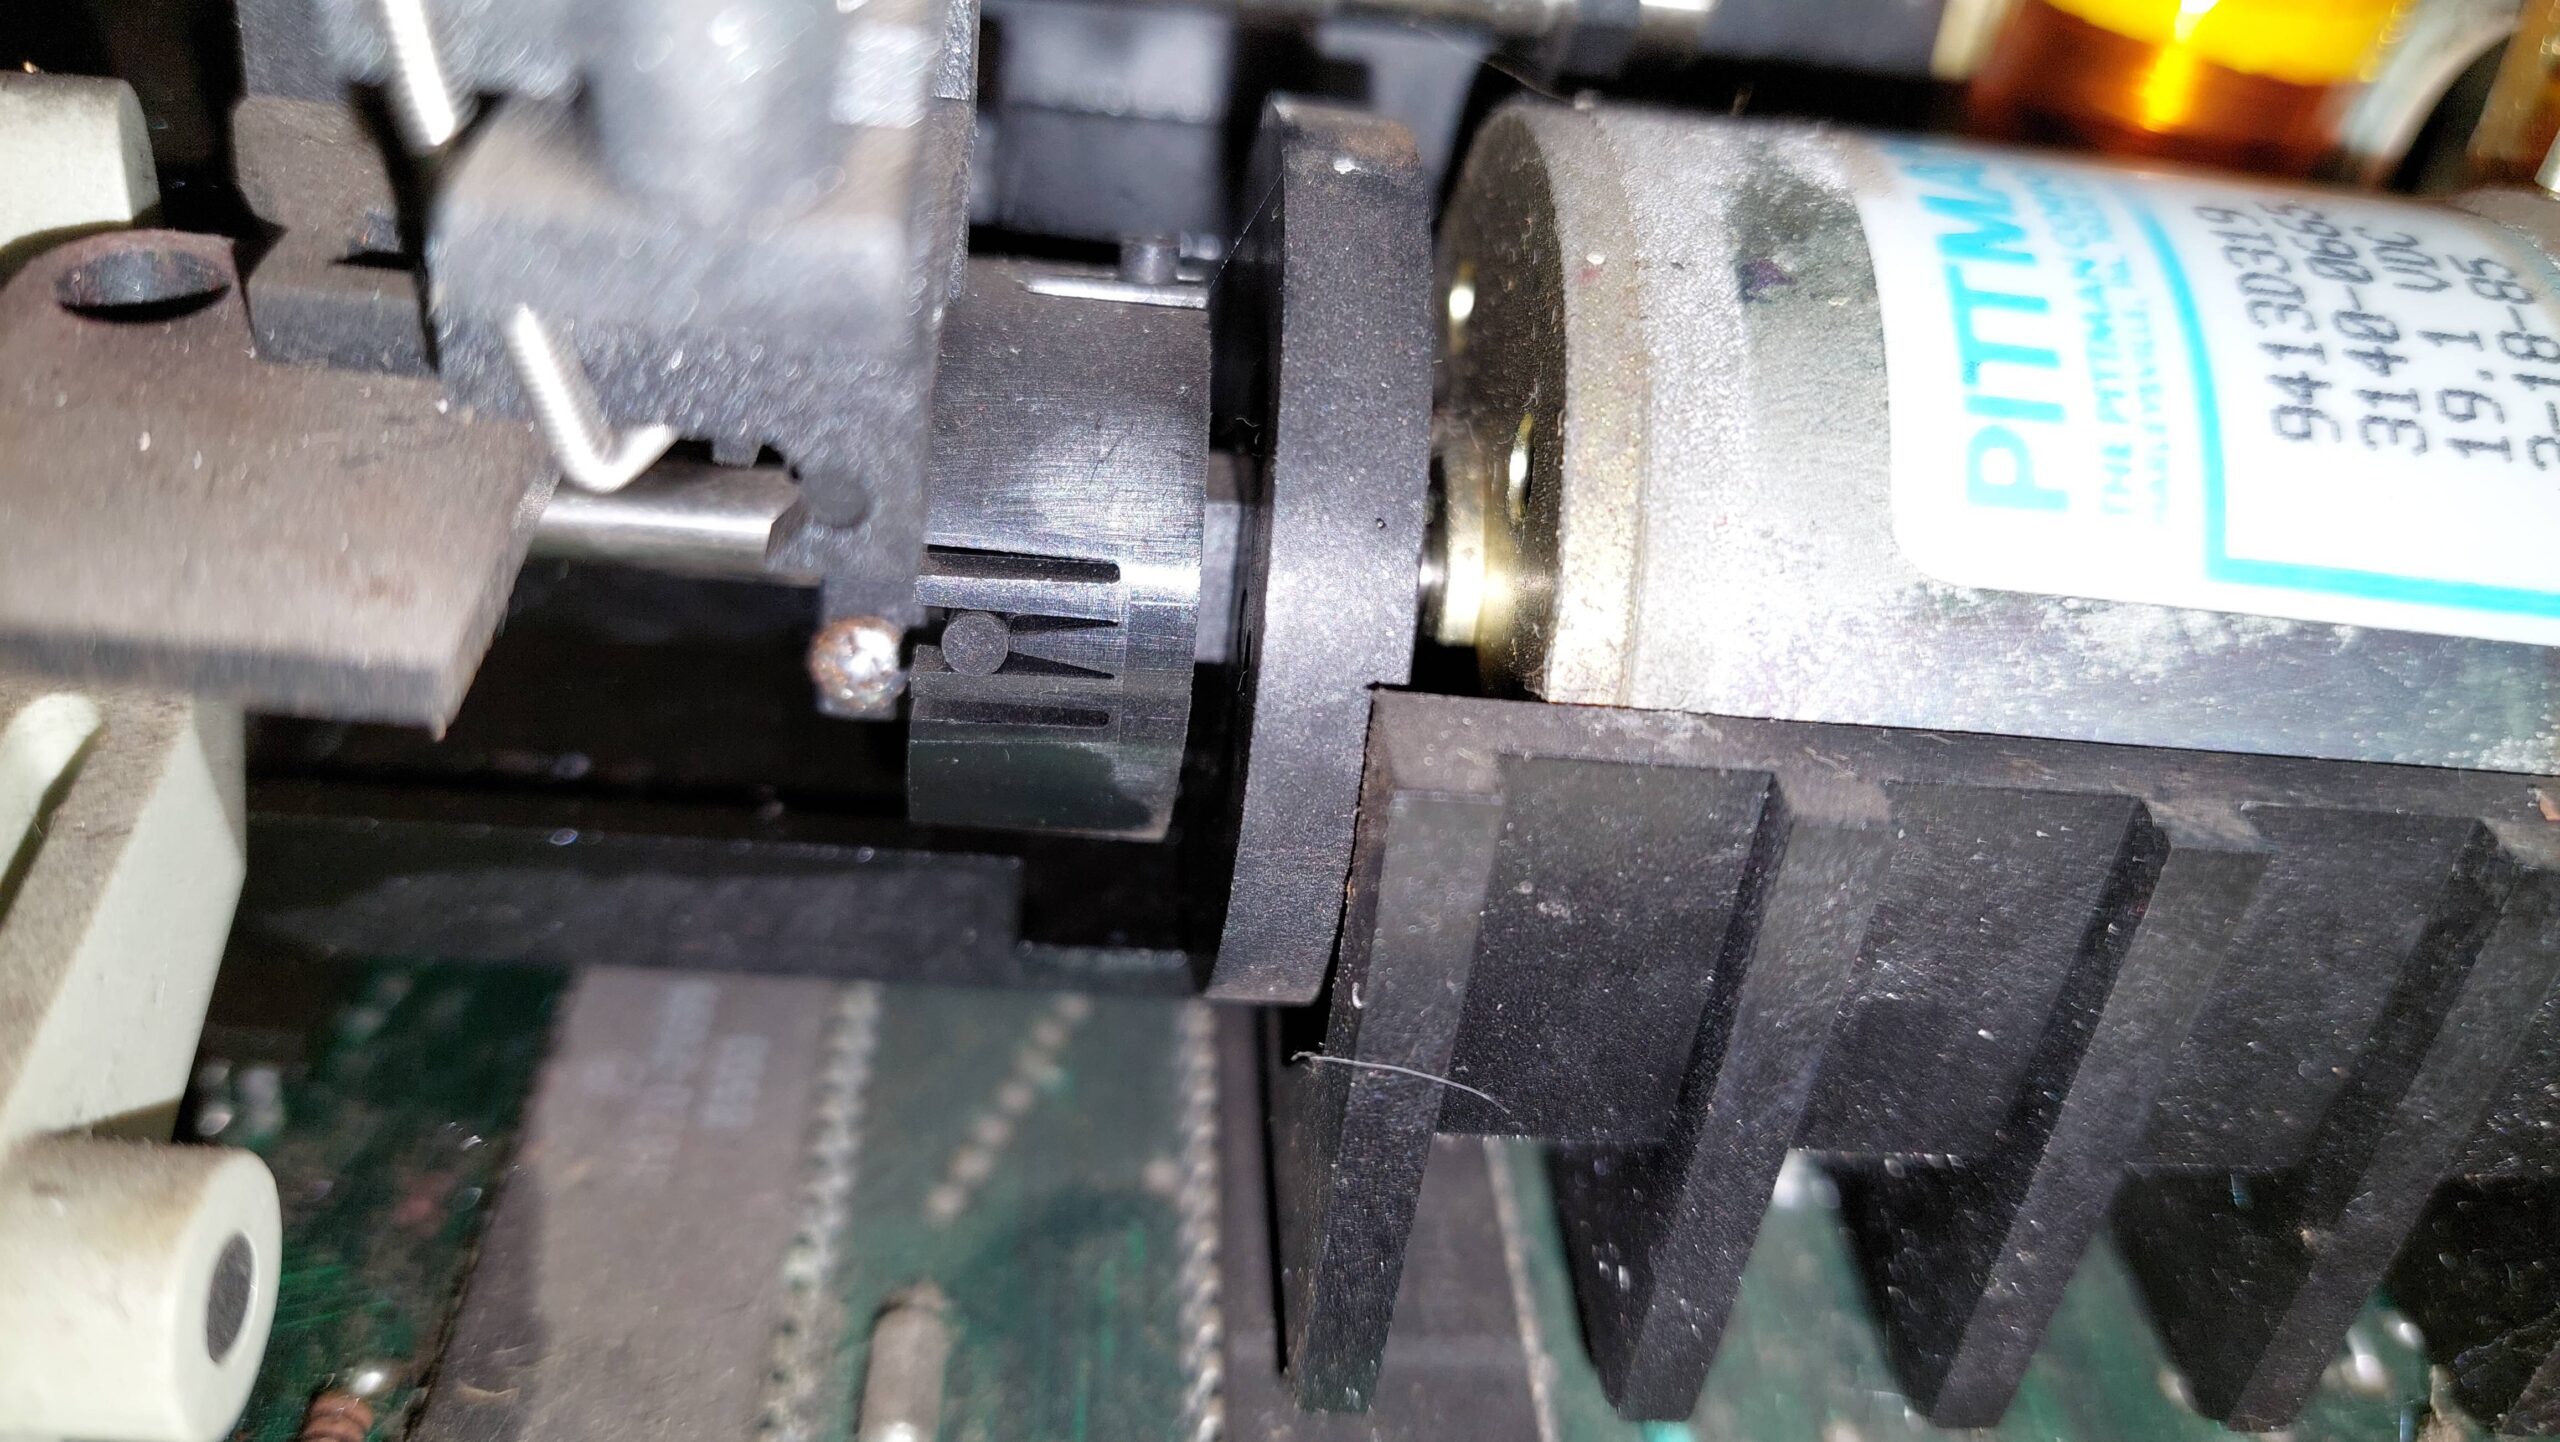
One screw to release the carriage motor. It was still spinning freely, which was a good sign. The belt tensioner and wheel came loose at this point. They were put safely in a container with the spring.

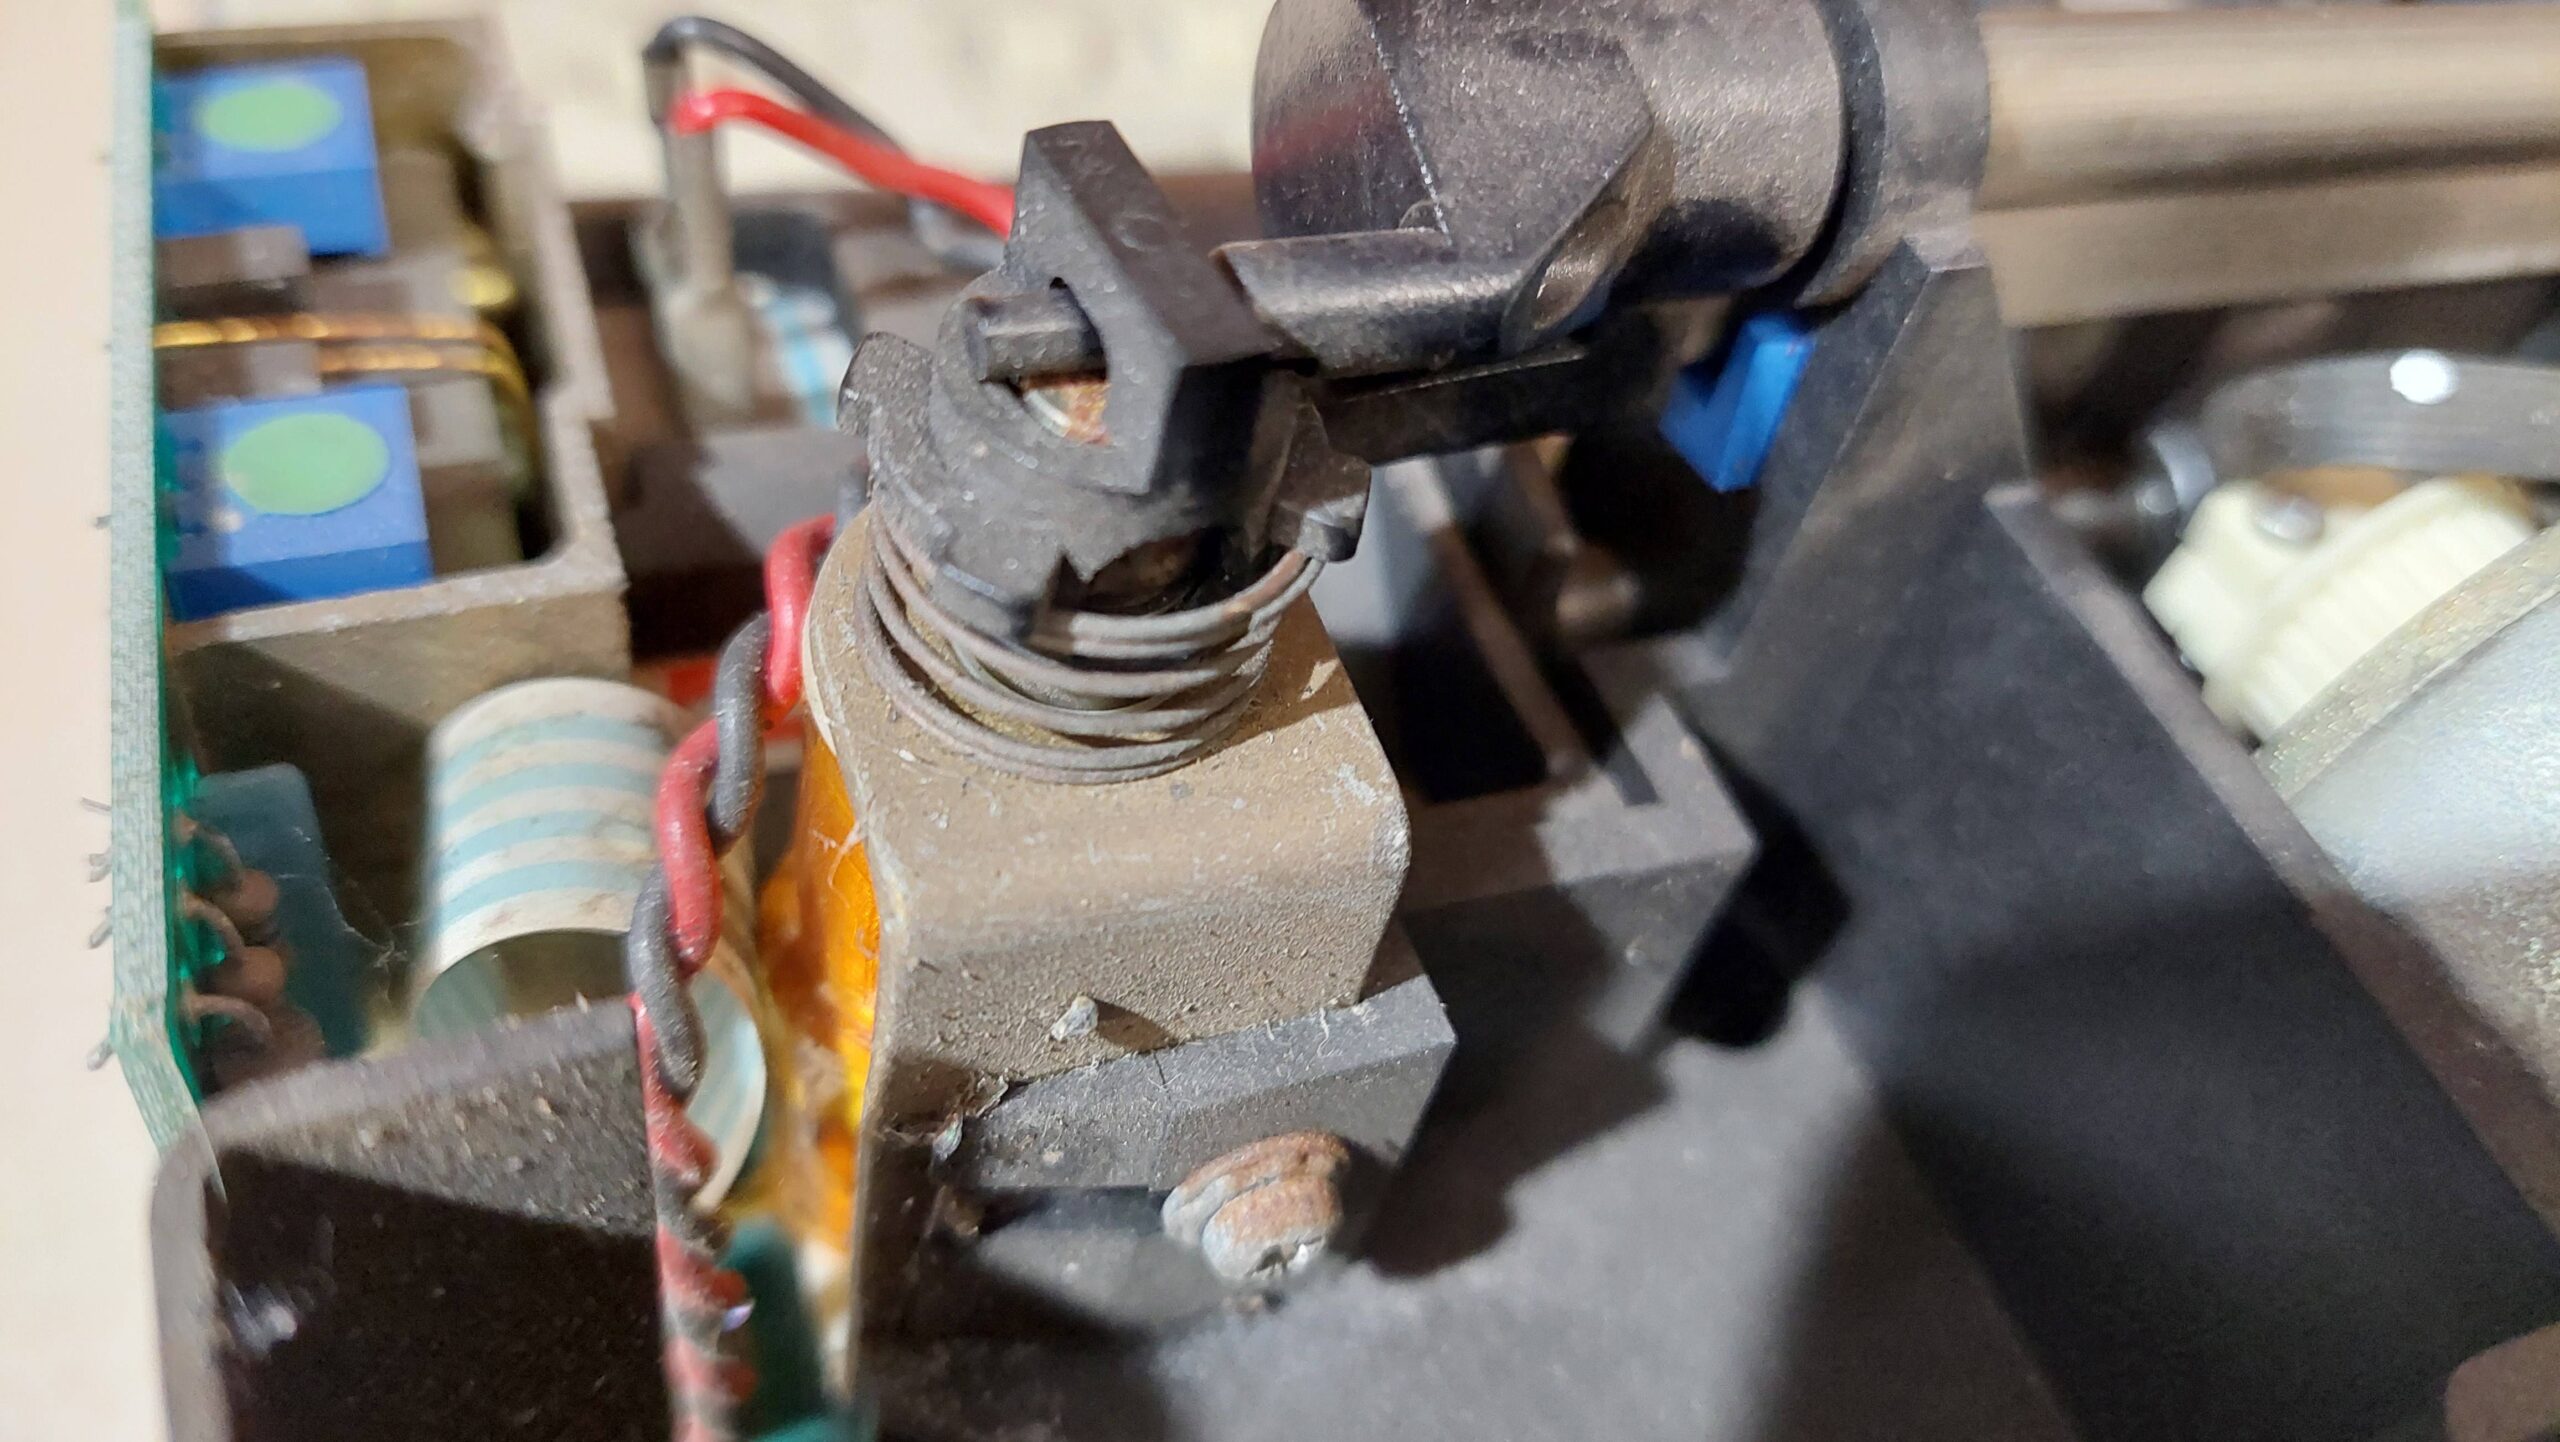
With the carriage motor out of the way, the up/down solenoid mounting screw can be backed off and the pen up/down bar can be removed. The rubber belt can then be removed.

The paper motor has a flexible coupling like a universal joint. Once the axle clamp is backed-off the motor can be removed. Then the solenoid can be disconnected and removed. The core just falls out.

The carriage guide can then be removed and then the carriage from the guide. The guide cleaned up very easily with some emery paper. Often rust looks much worse than it is, and it was certainly the case this time.

I didn’t fully disassemble the carriage. There are a couple of springs in there, so i just put the carriage in a takeaway container and sealed it down.

The main plastic chassis could then be unscrewed and removed.

After the springs were removed, the paper release mechanism came away fairly easily. Then the bearings could be released.

The bearings seemed to have seized but they turned out to be ok. They had just got a little glued with rust from the shaft. They are probably stainless steel.

I removed the rest of the “grip” from the wheels and wrapped them in some emery paper. We’ll see how that lasts. I could have cut it a little straighter, but i thought it was good enough against a rubber wheel.

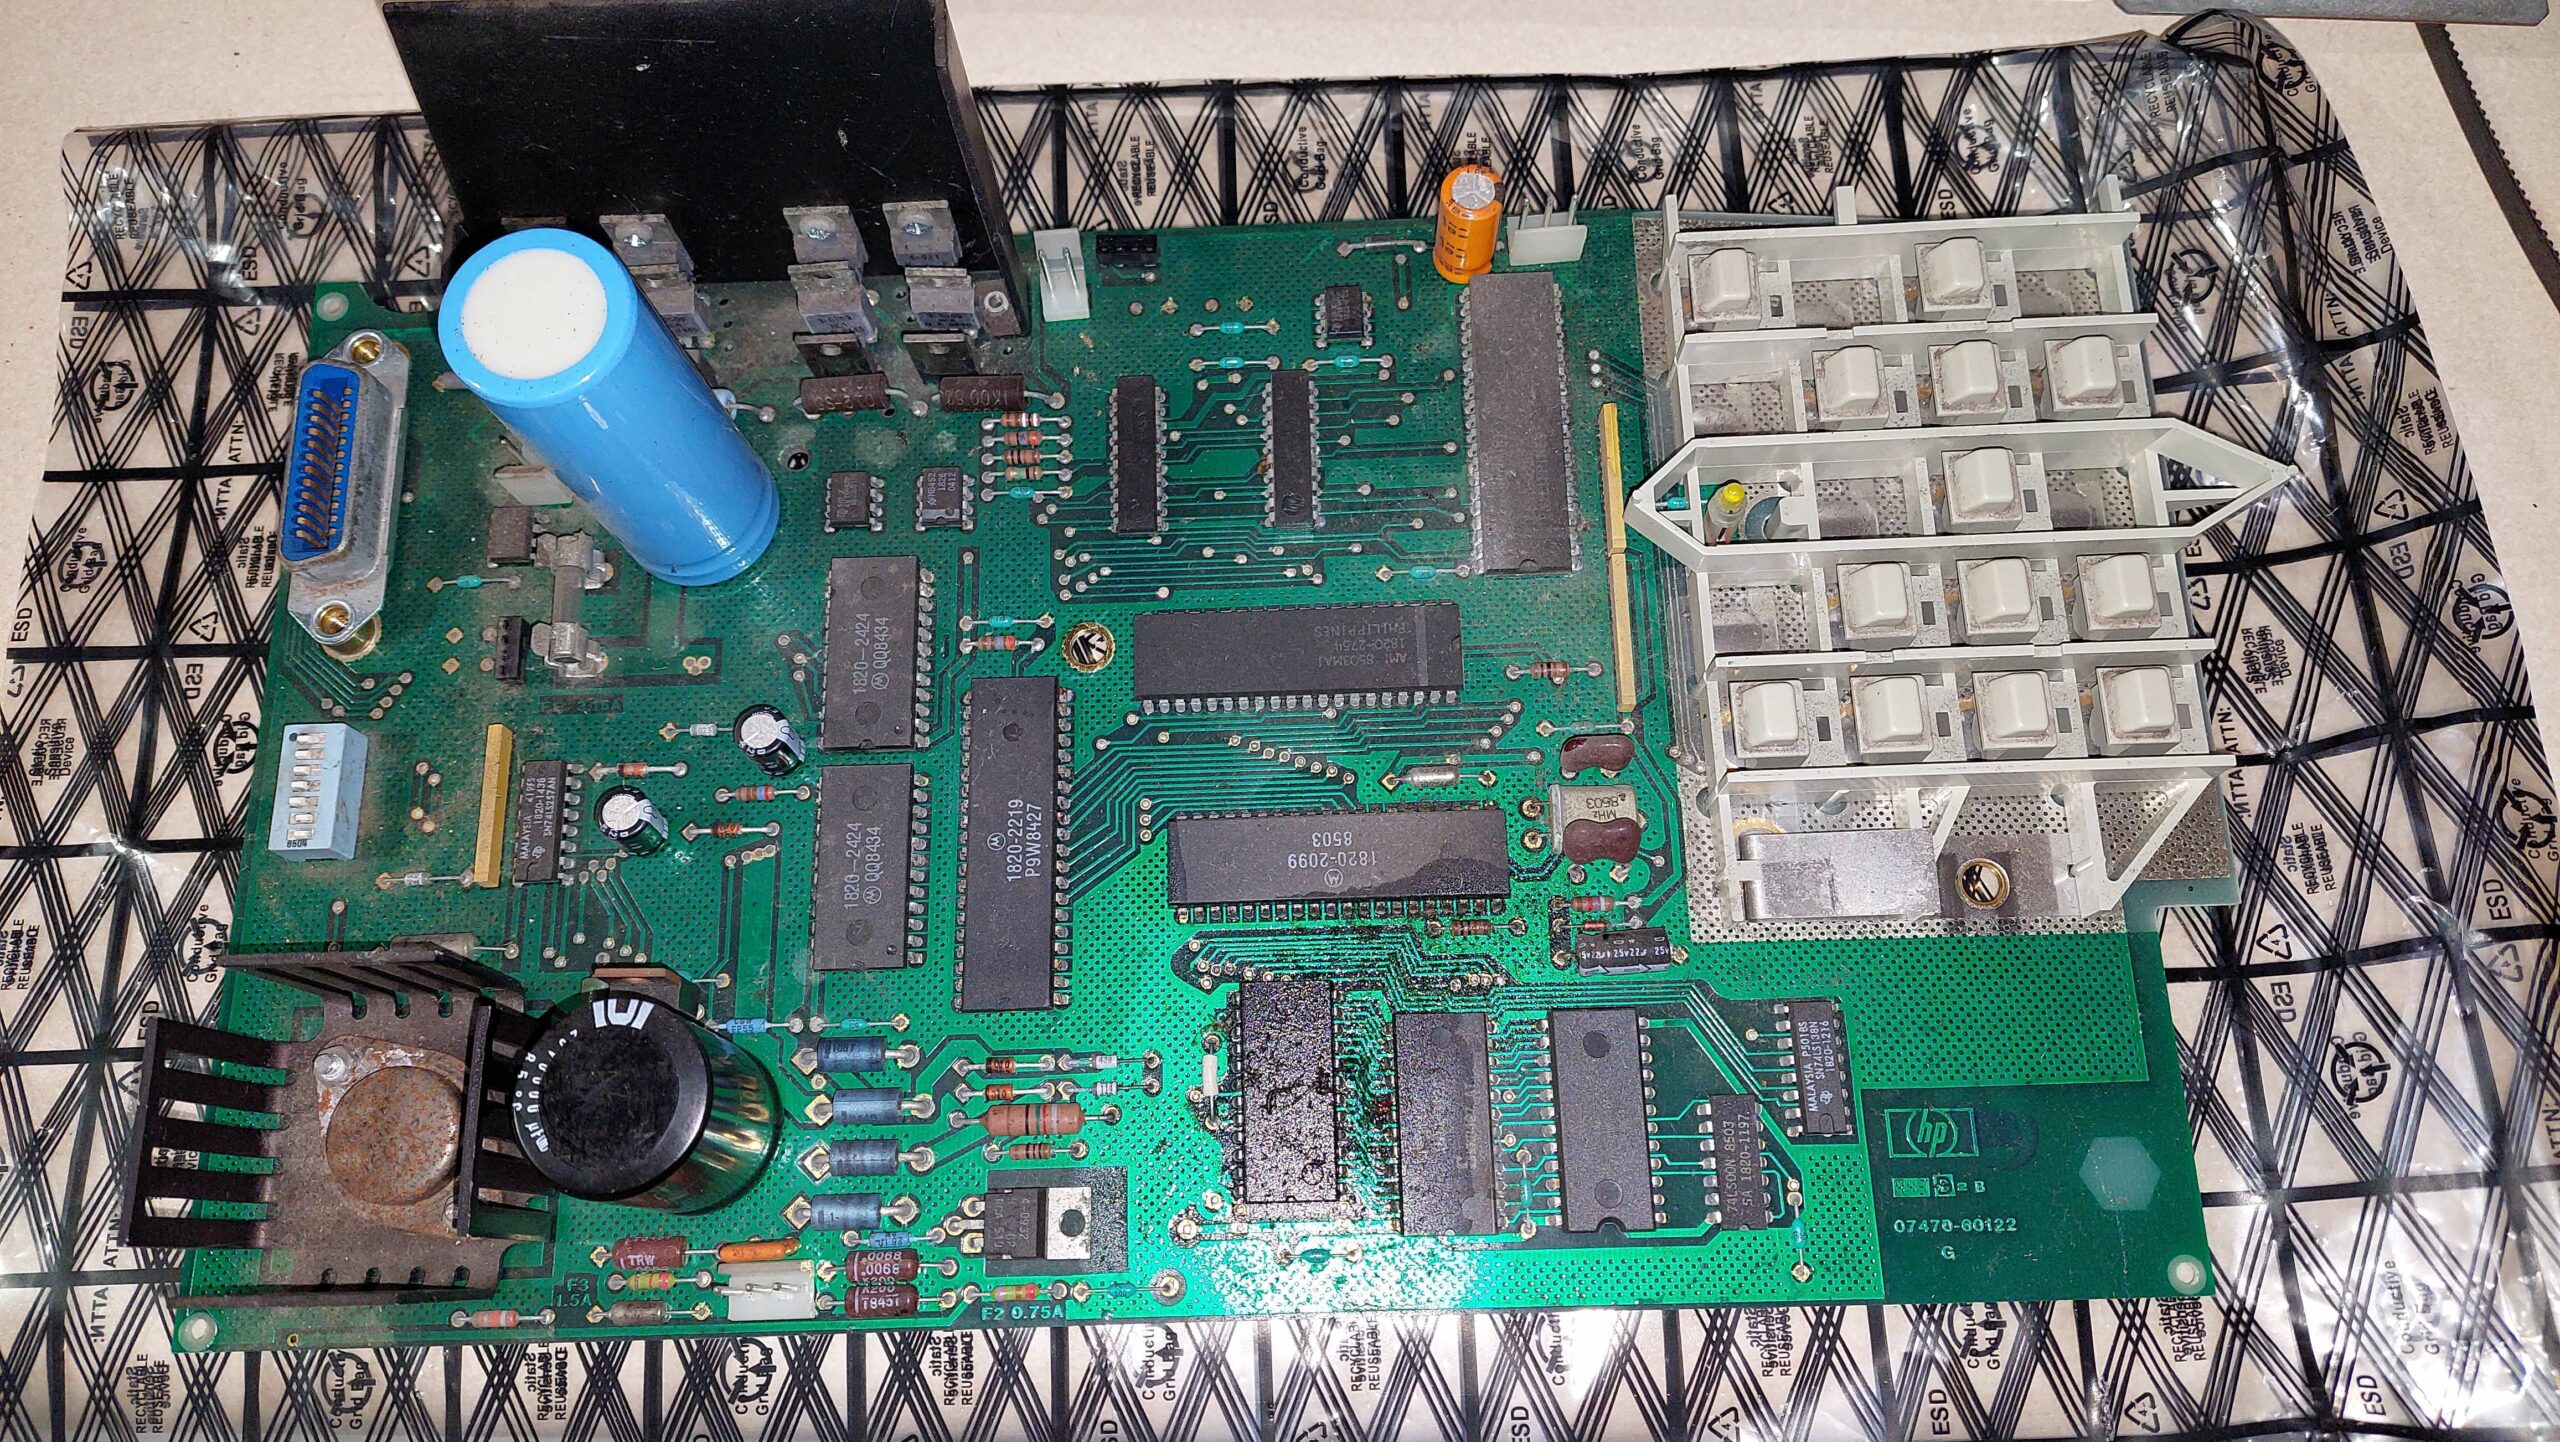
I didn’t touch the mains wiring. It looked well protected. I did give the board a clean in spots, but i didn’t want to get any moisture into the buttons.

The button panel is aluminium and it had some oxidation. I just gave it a light rub with some scotchbrite.

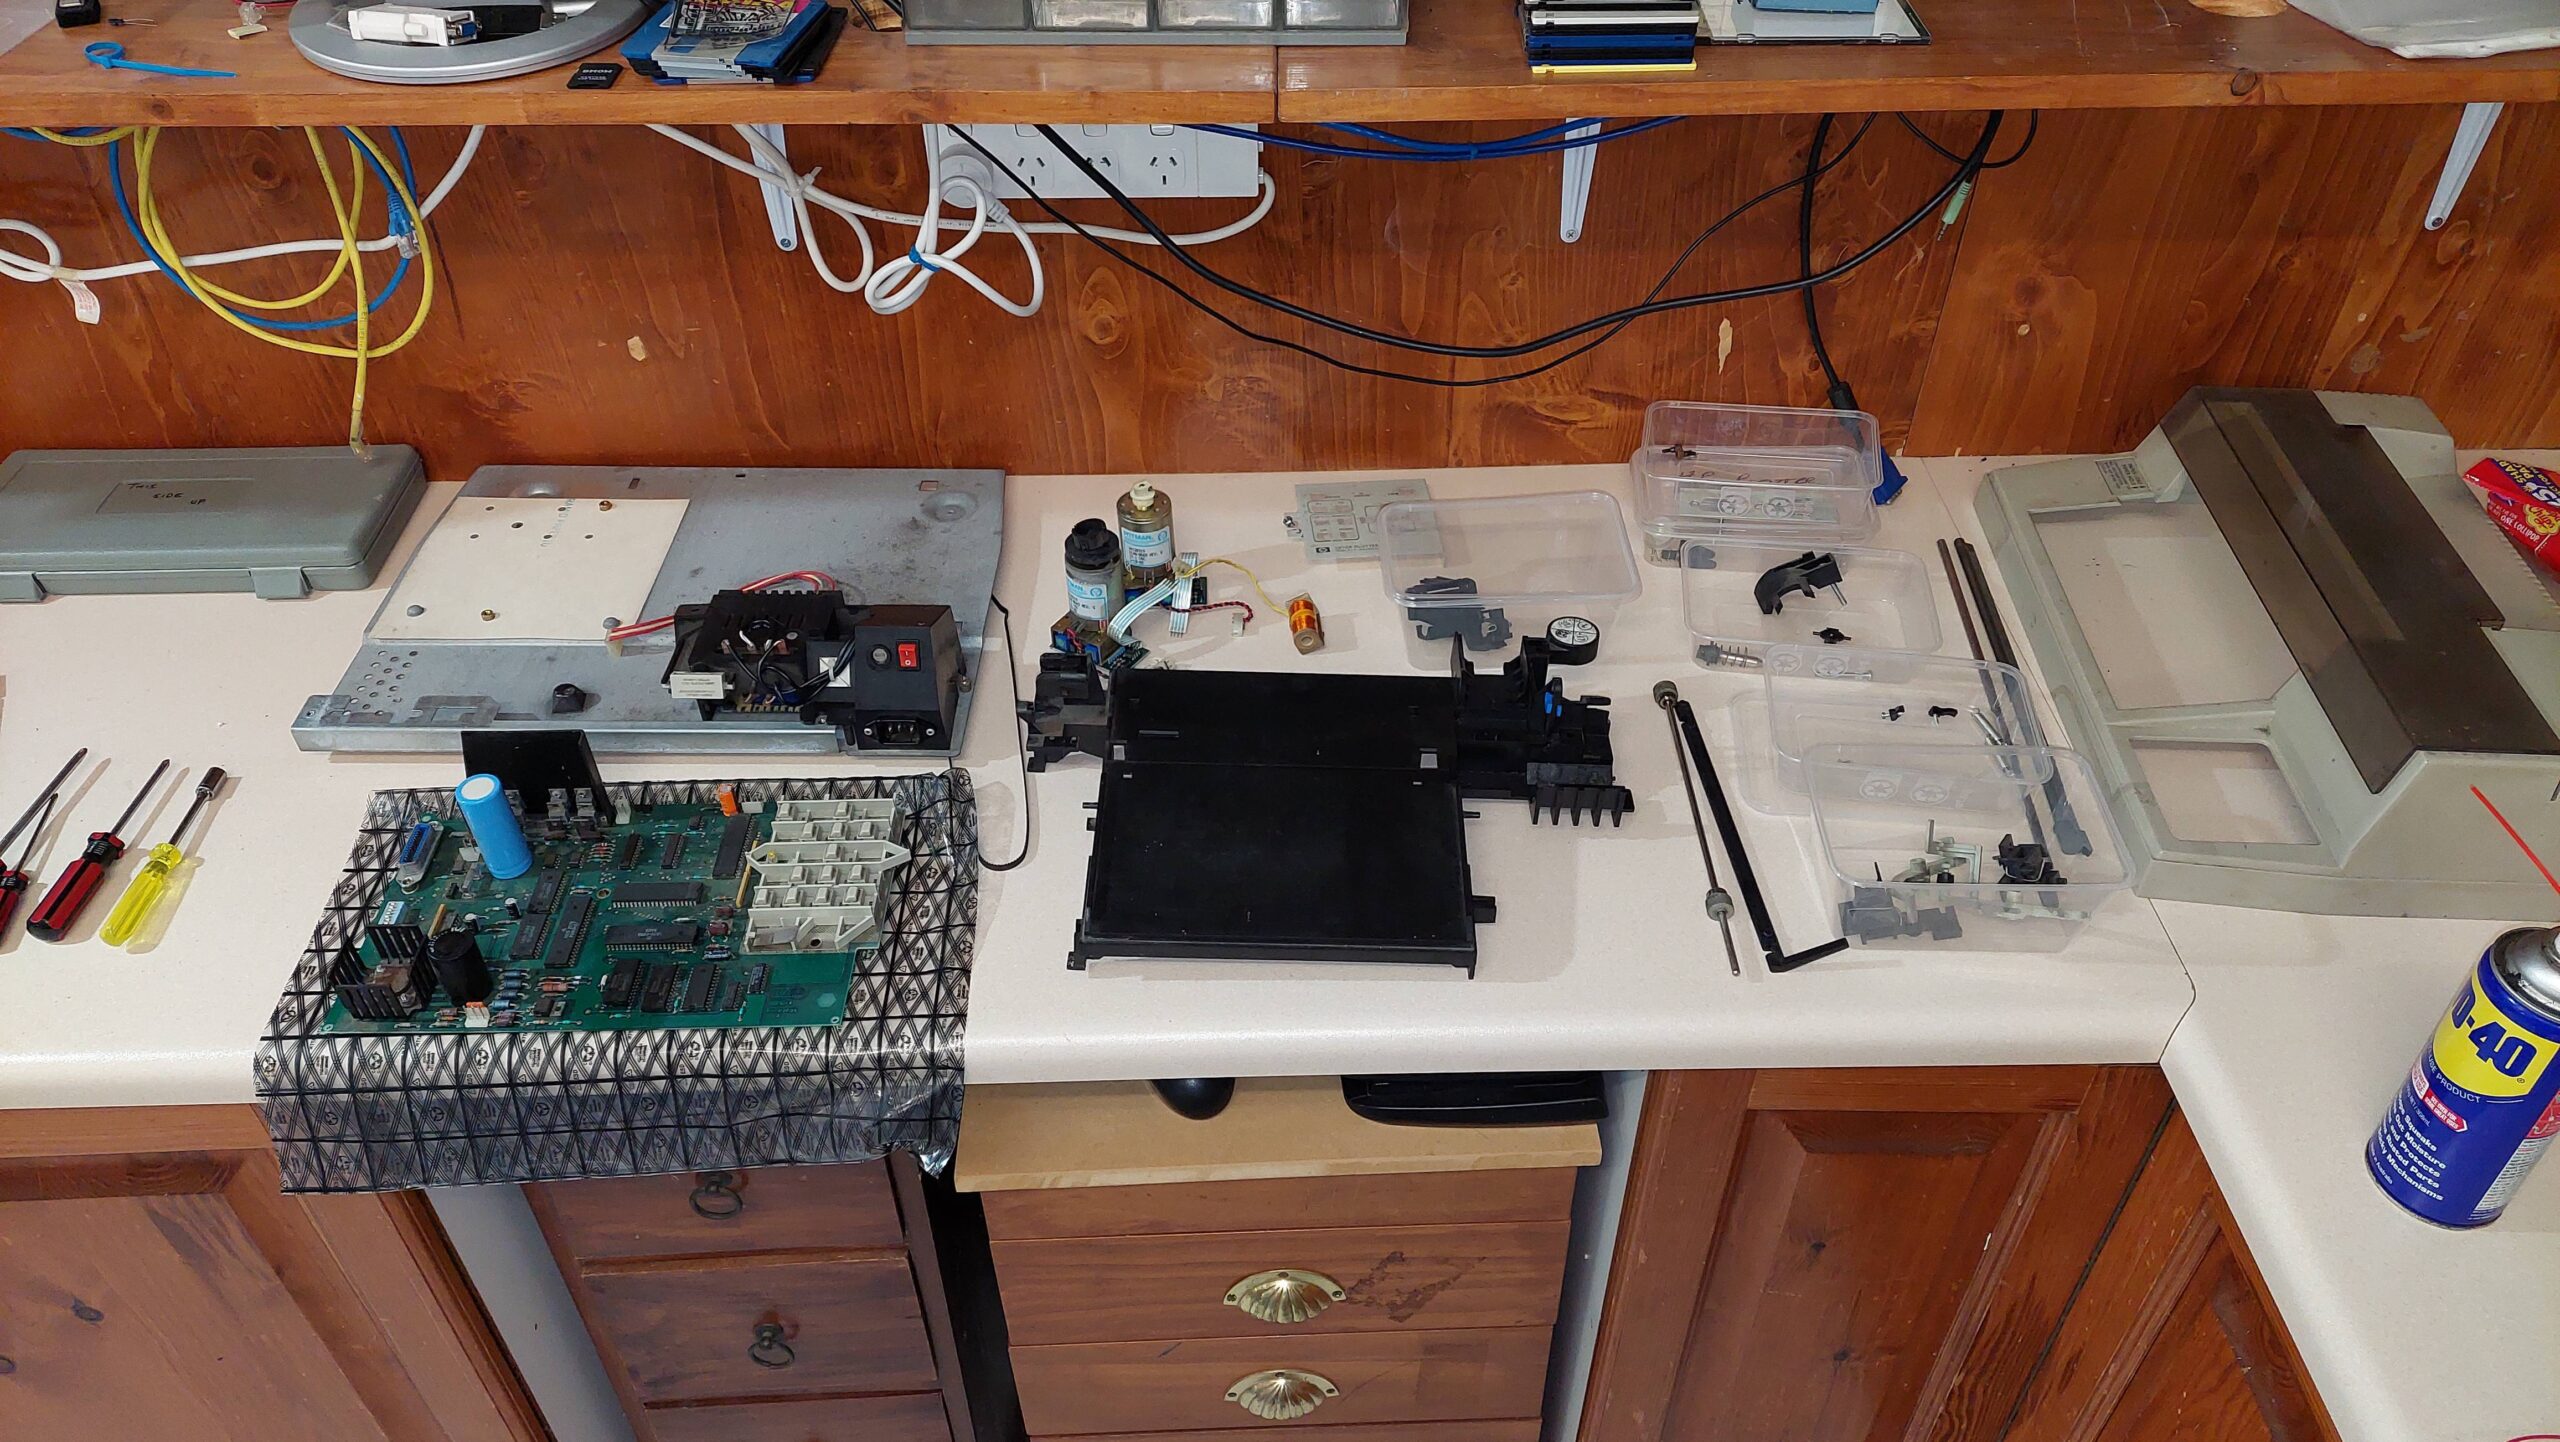
Unassembled, the plotter took up a lot of space:

The case was filthy. I used jif and elbow grease to clean it up.

Having cleaned everything, and made sure that everything was moving ok, i put it all back together. I put a drop of oil on the carriage guide.

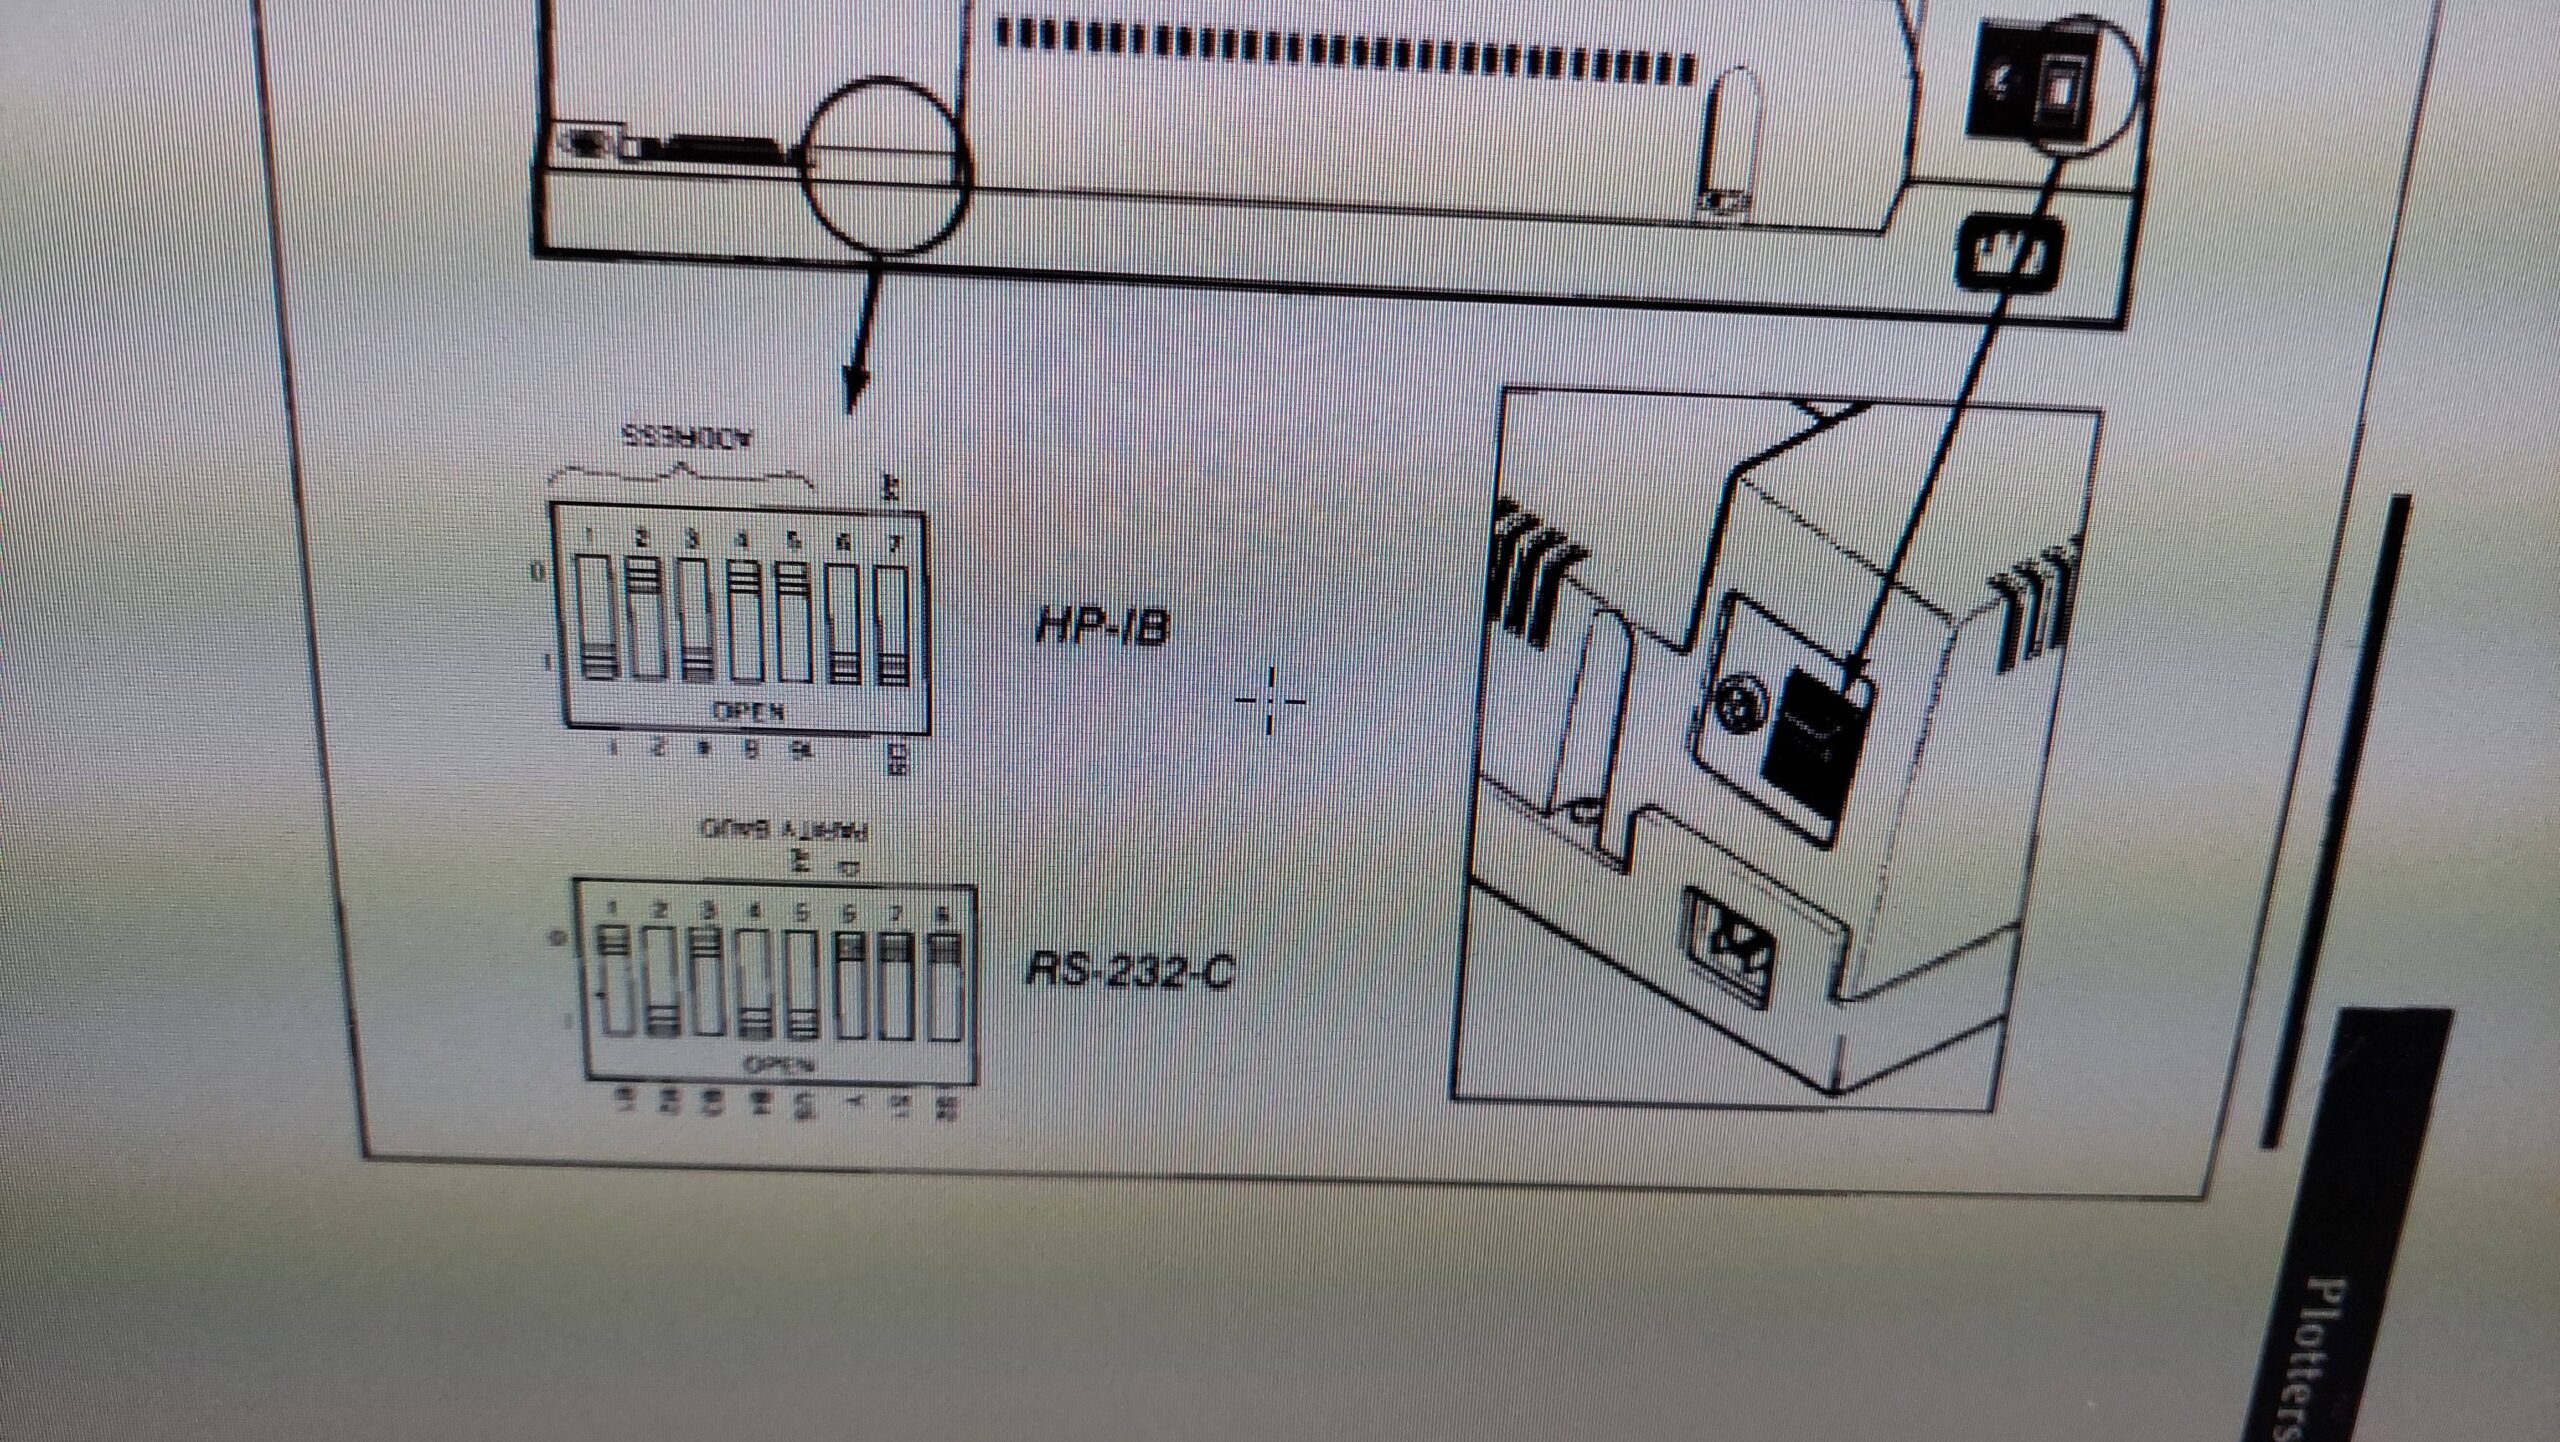
I set the DIP switches as per the manual, except i used A4.

The HP 150 had been set up to use the serial plotter. I changed this with the configuration program on the setup disk to HP-IB address=05.

Initially, the grip on the paper failed at the flat spots on the rubber wheels. I rounded them off with a file and then added some surgical tubing over them. They worked much better then.

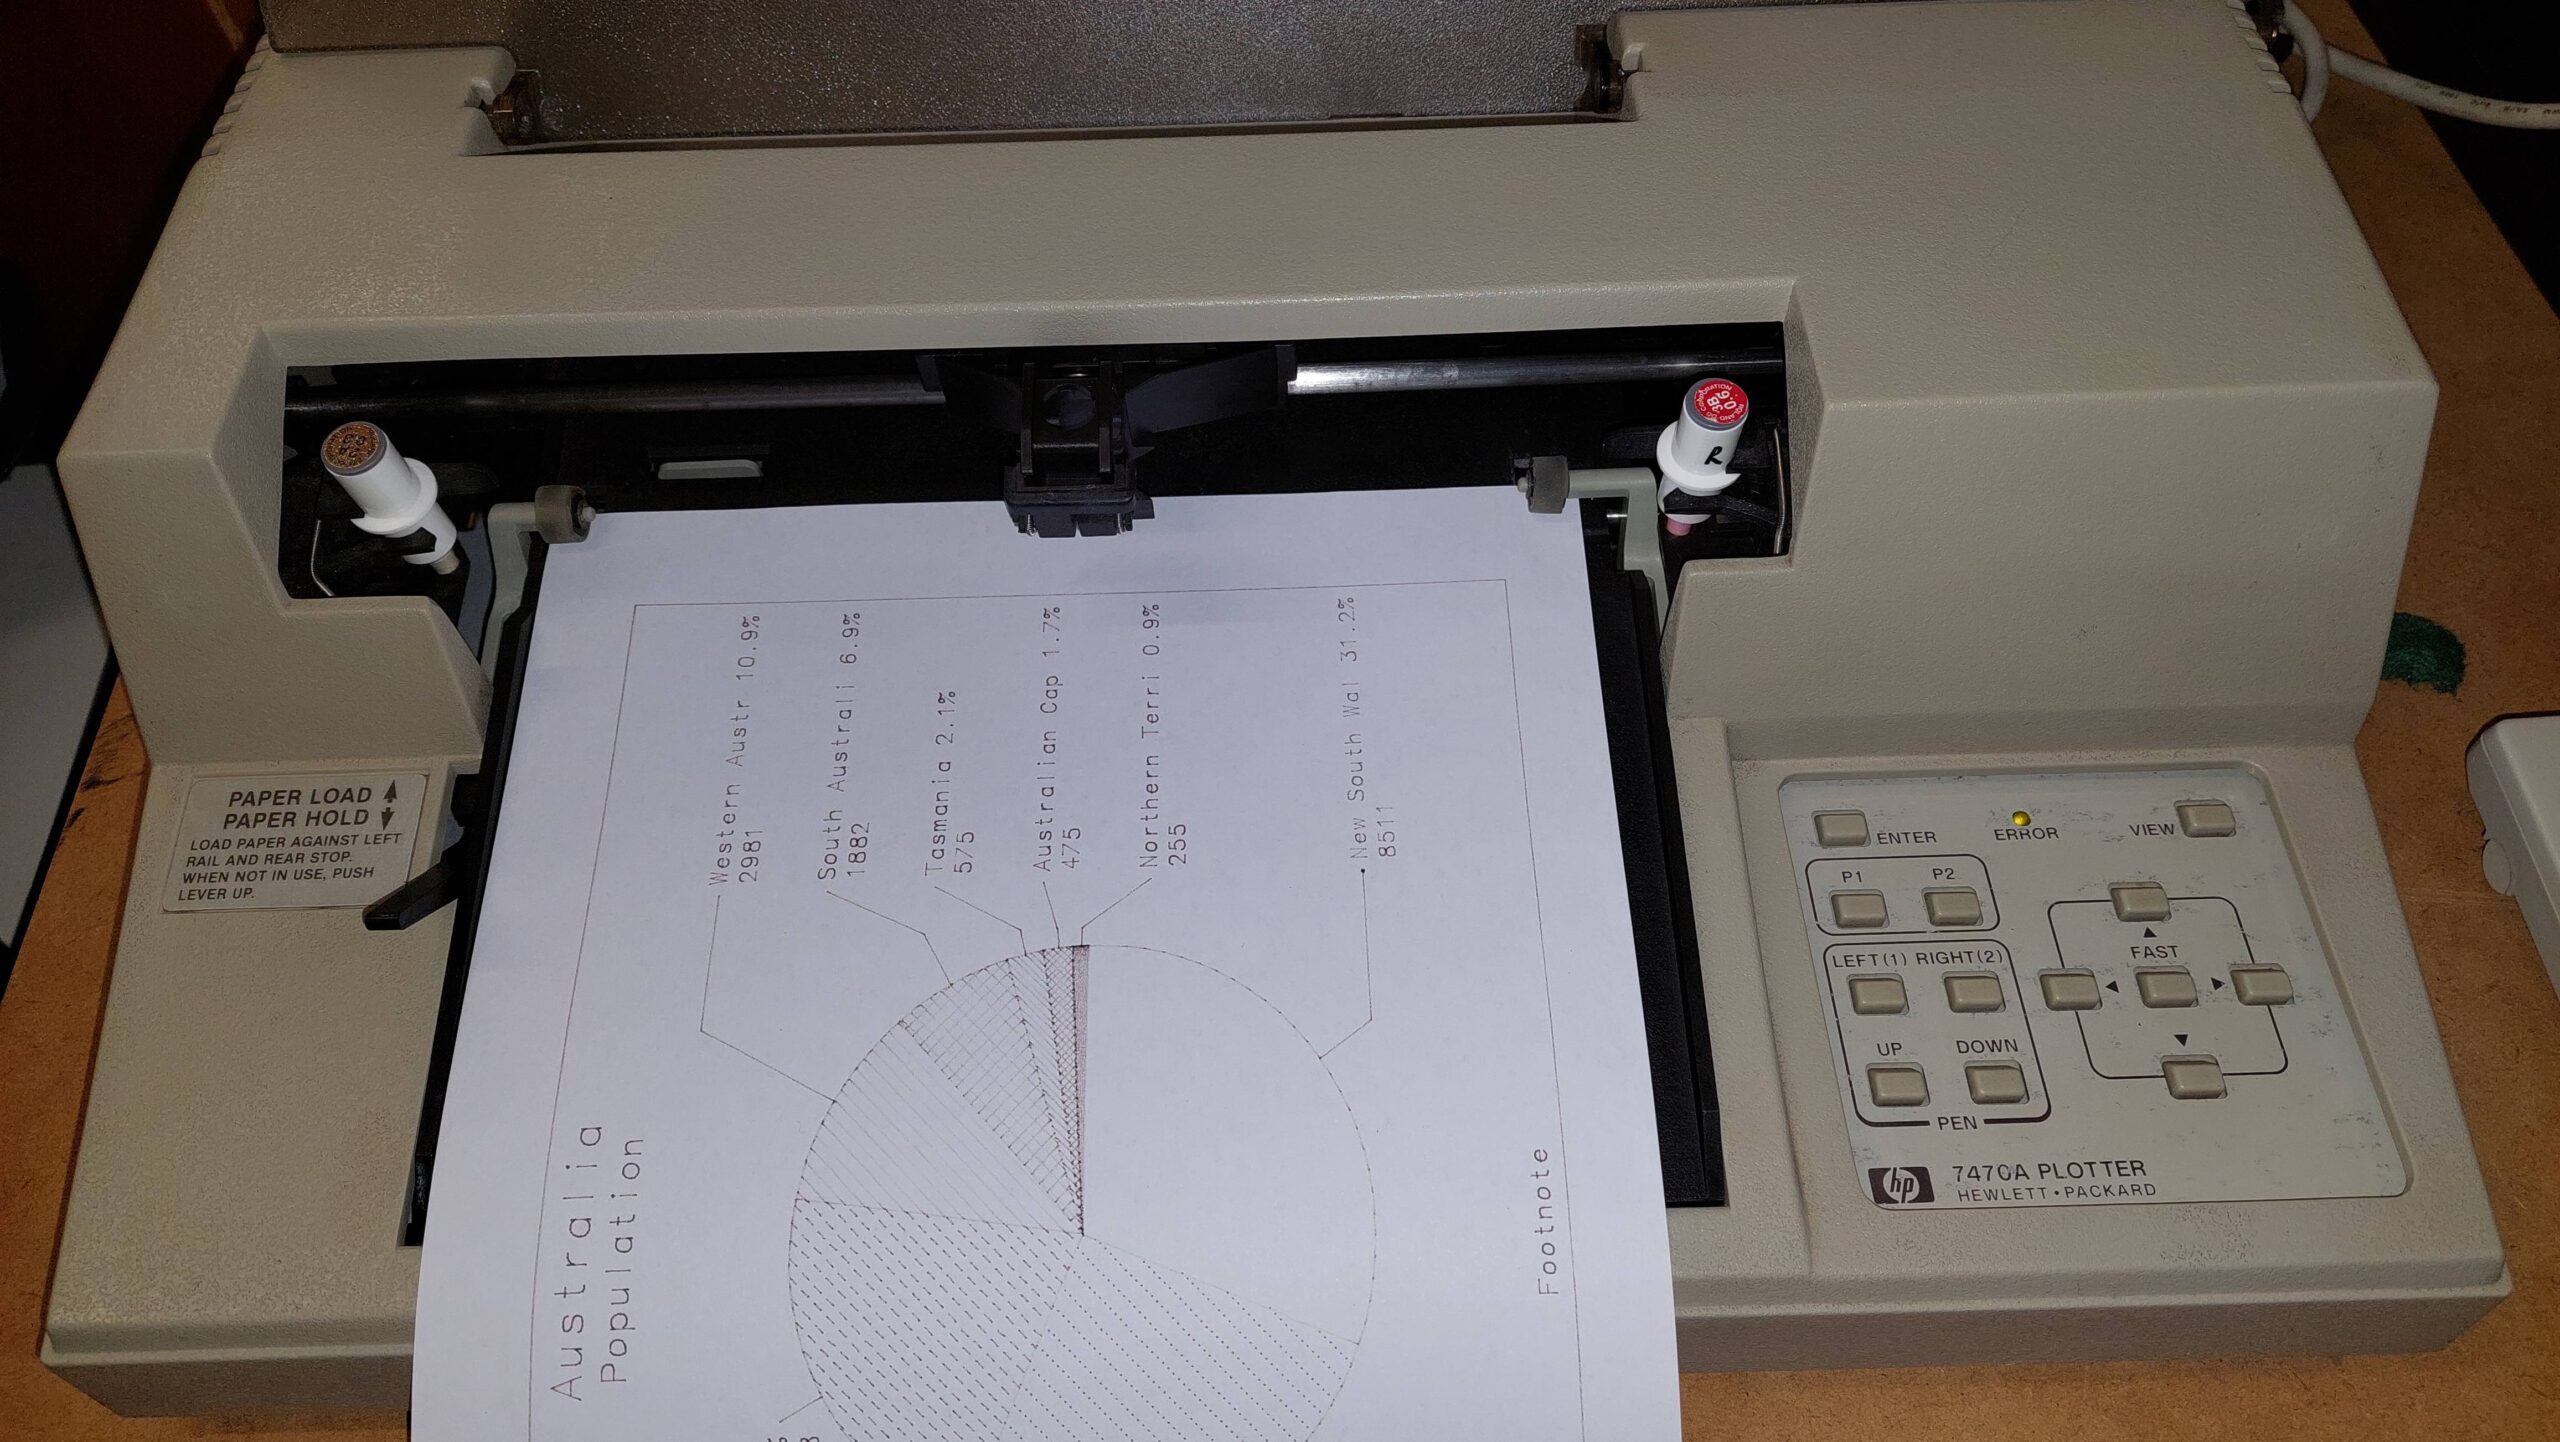
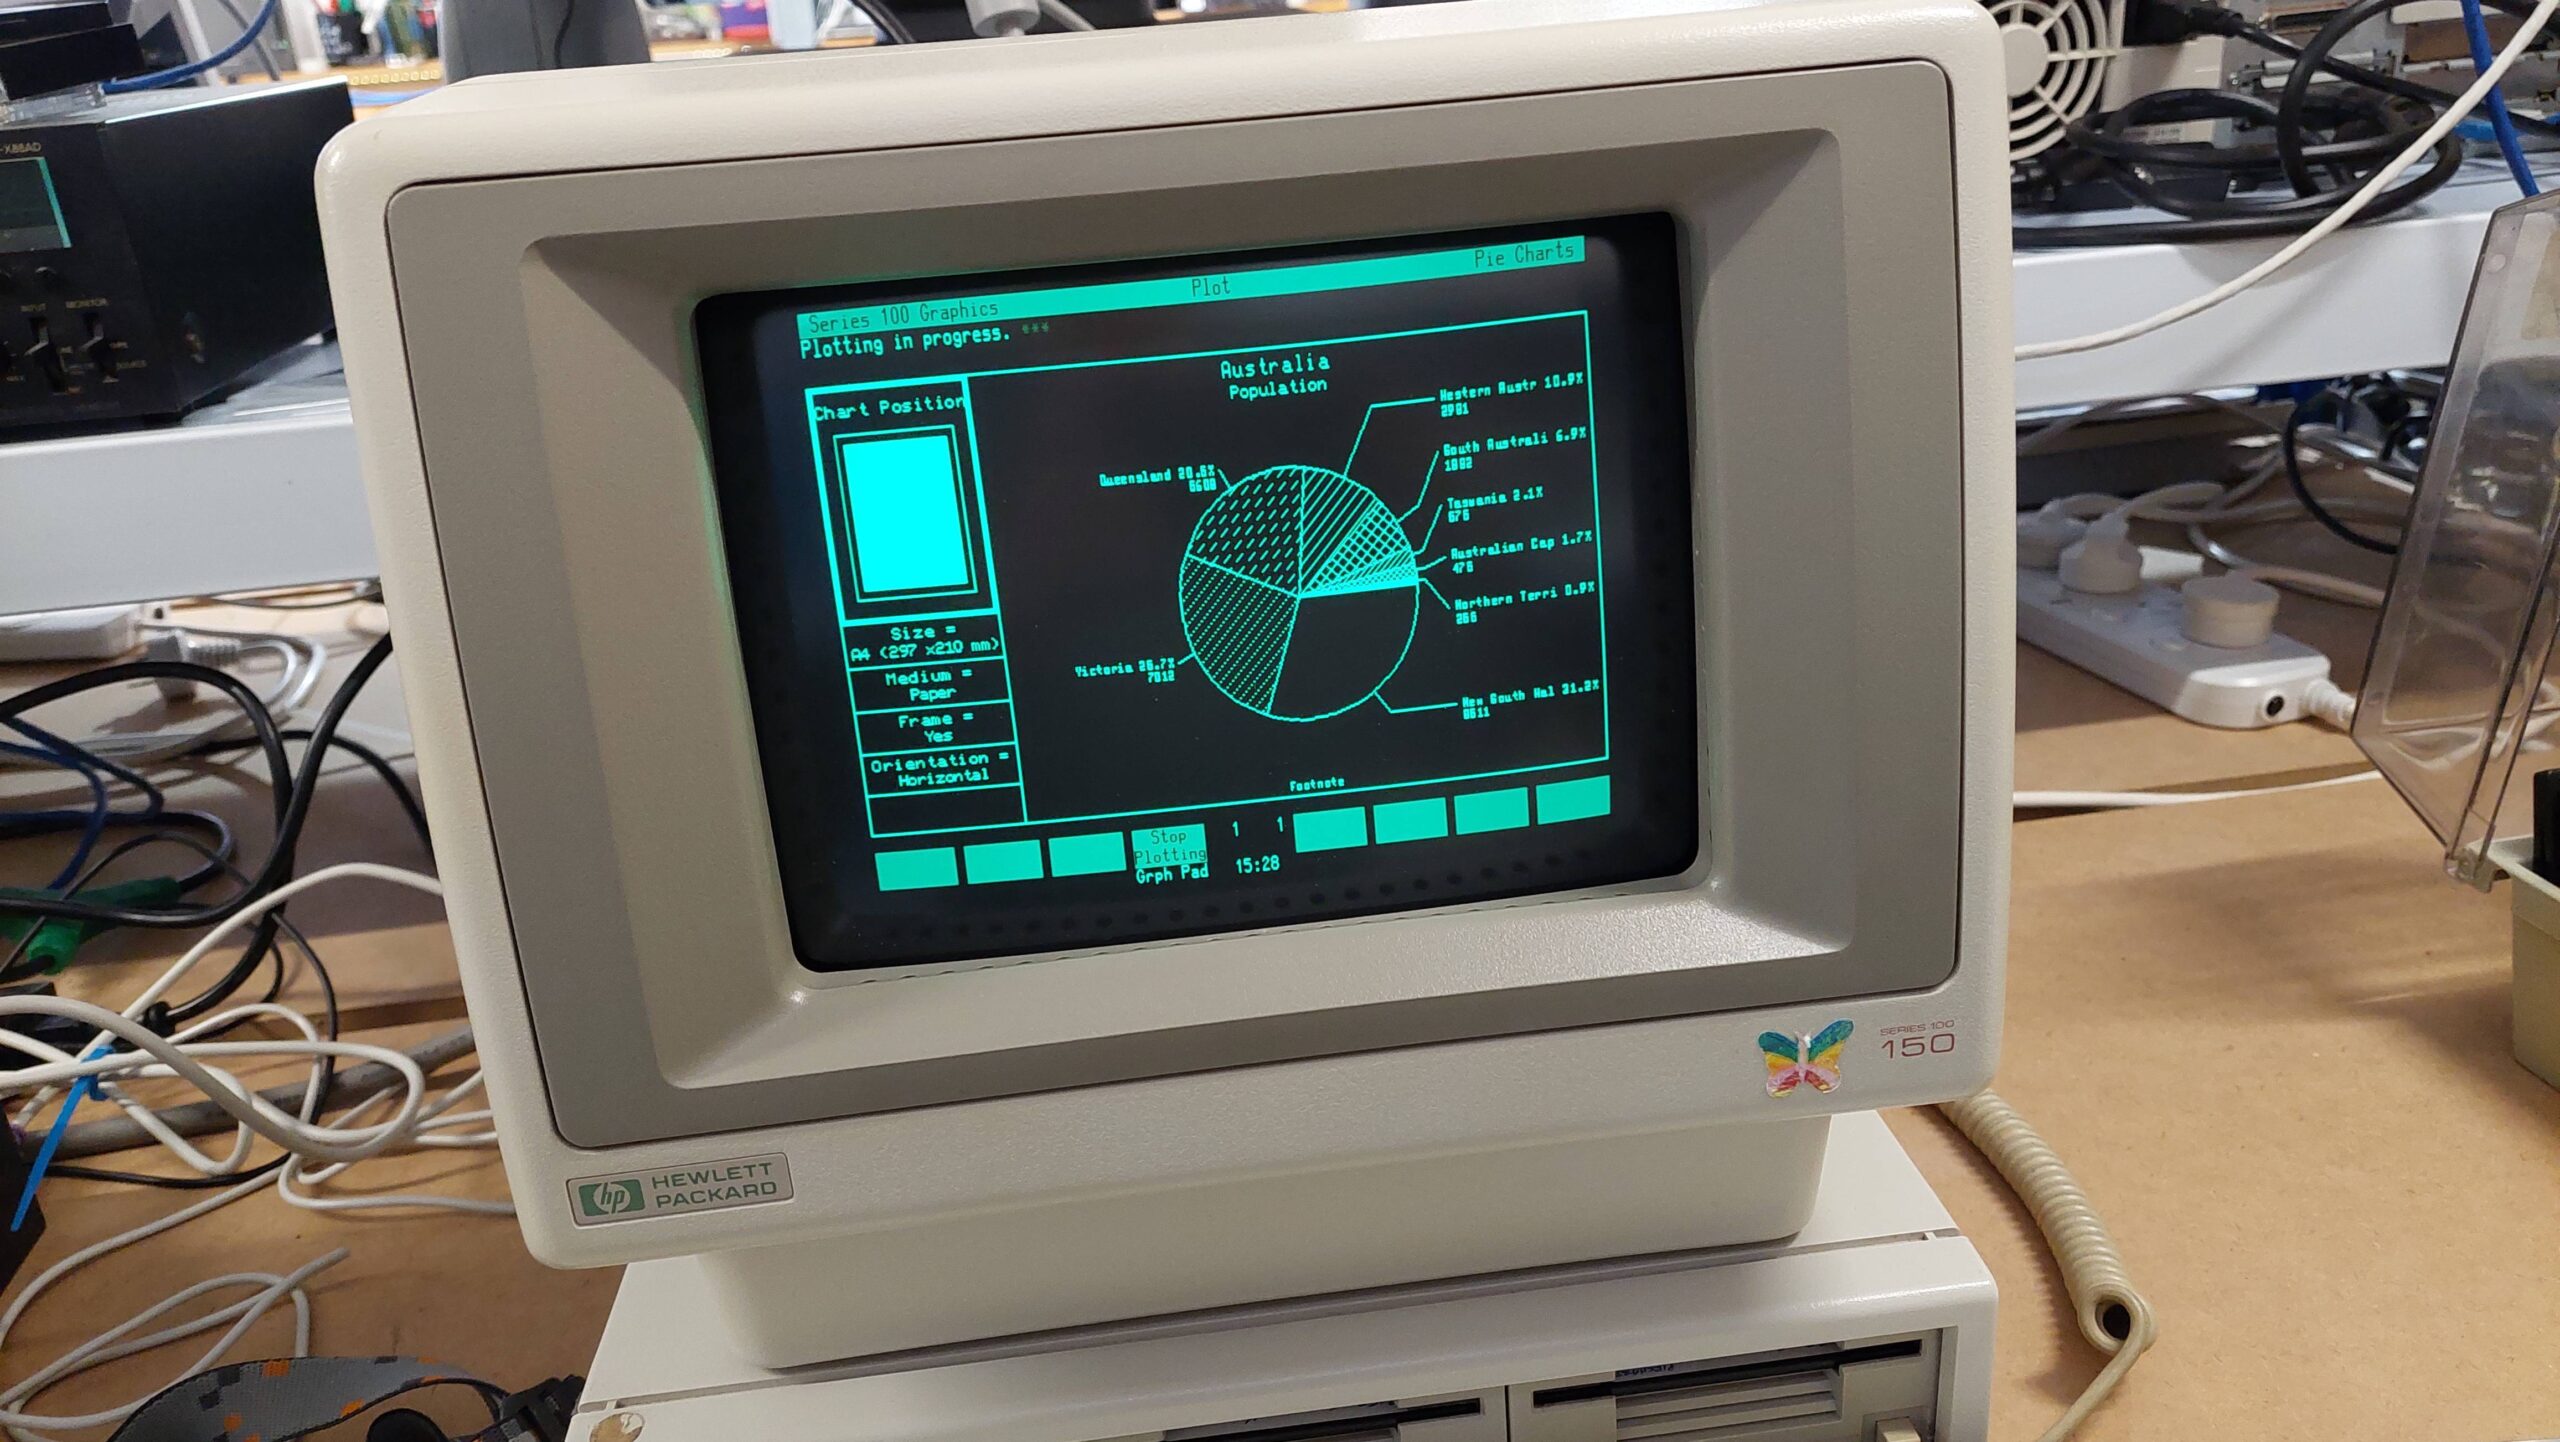
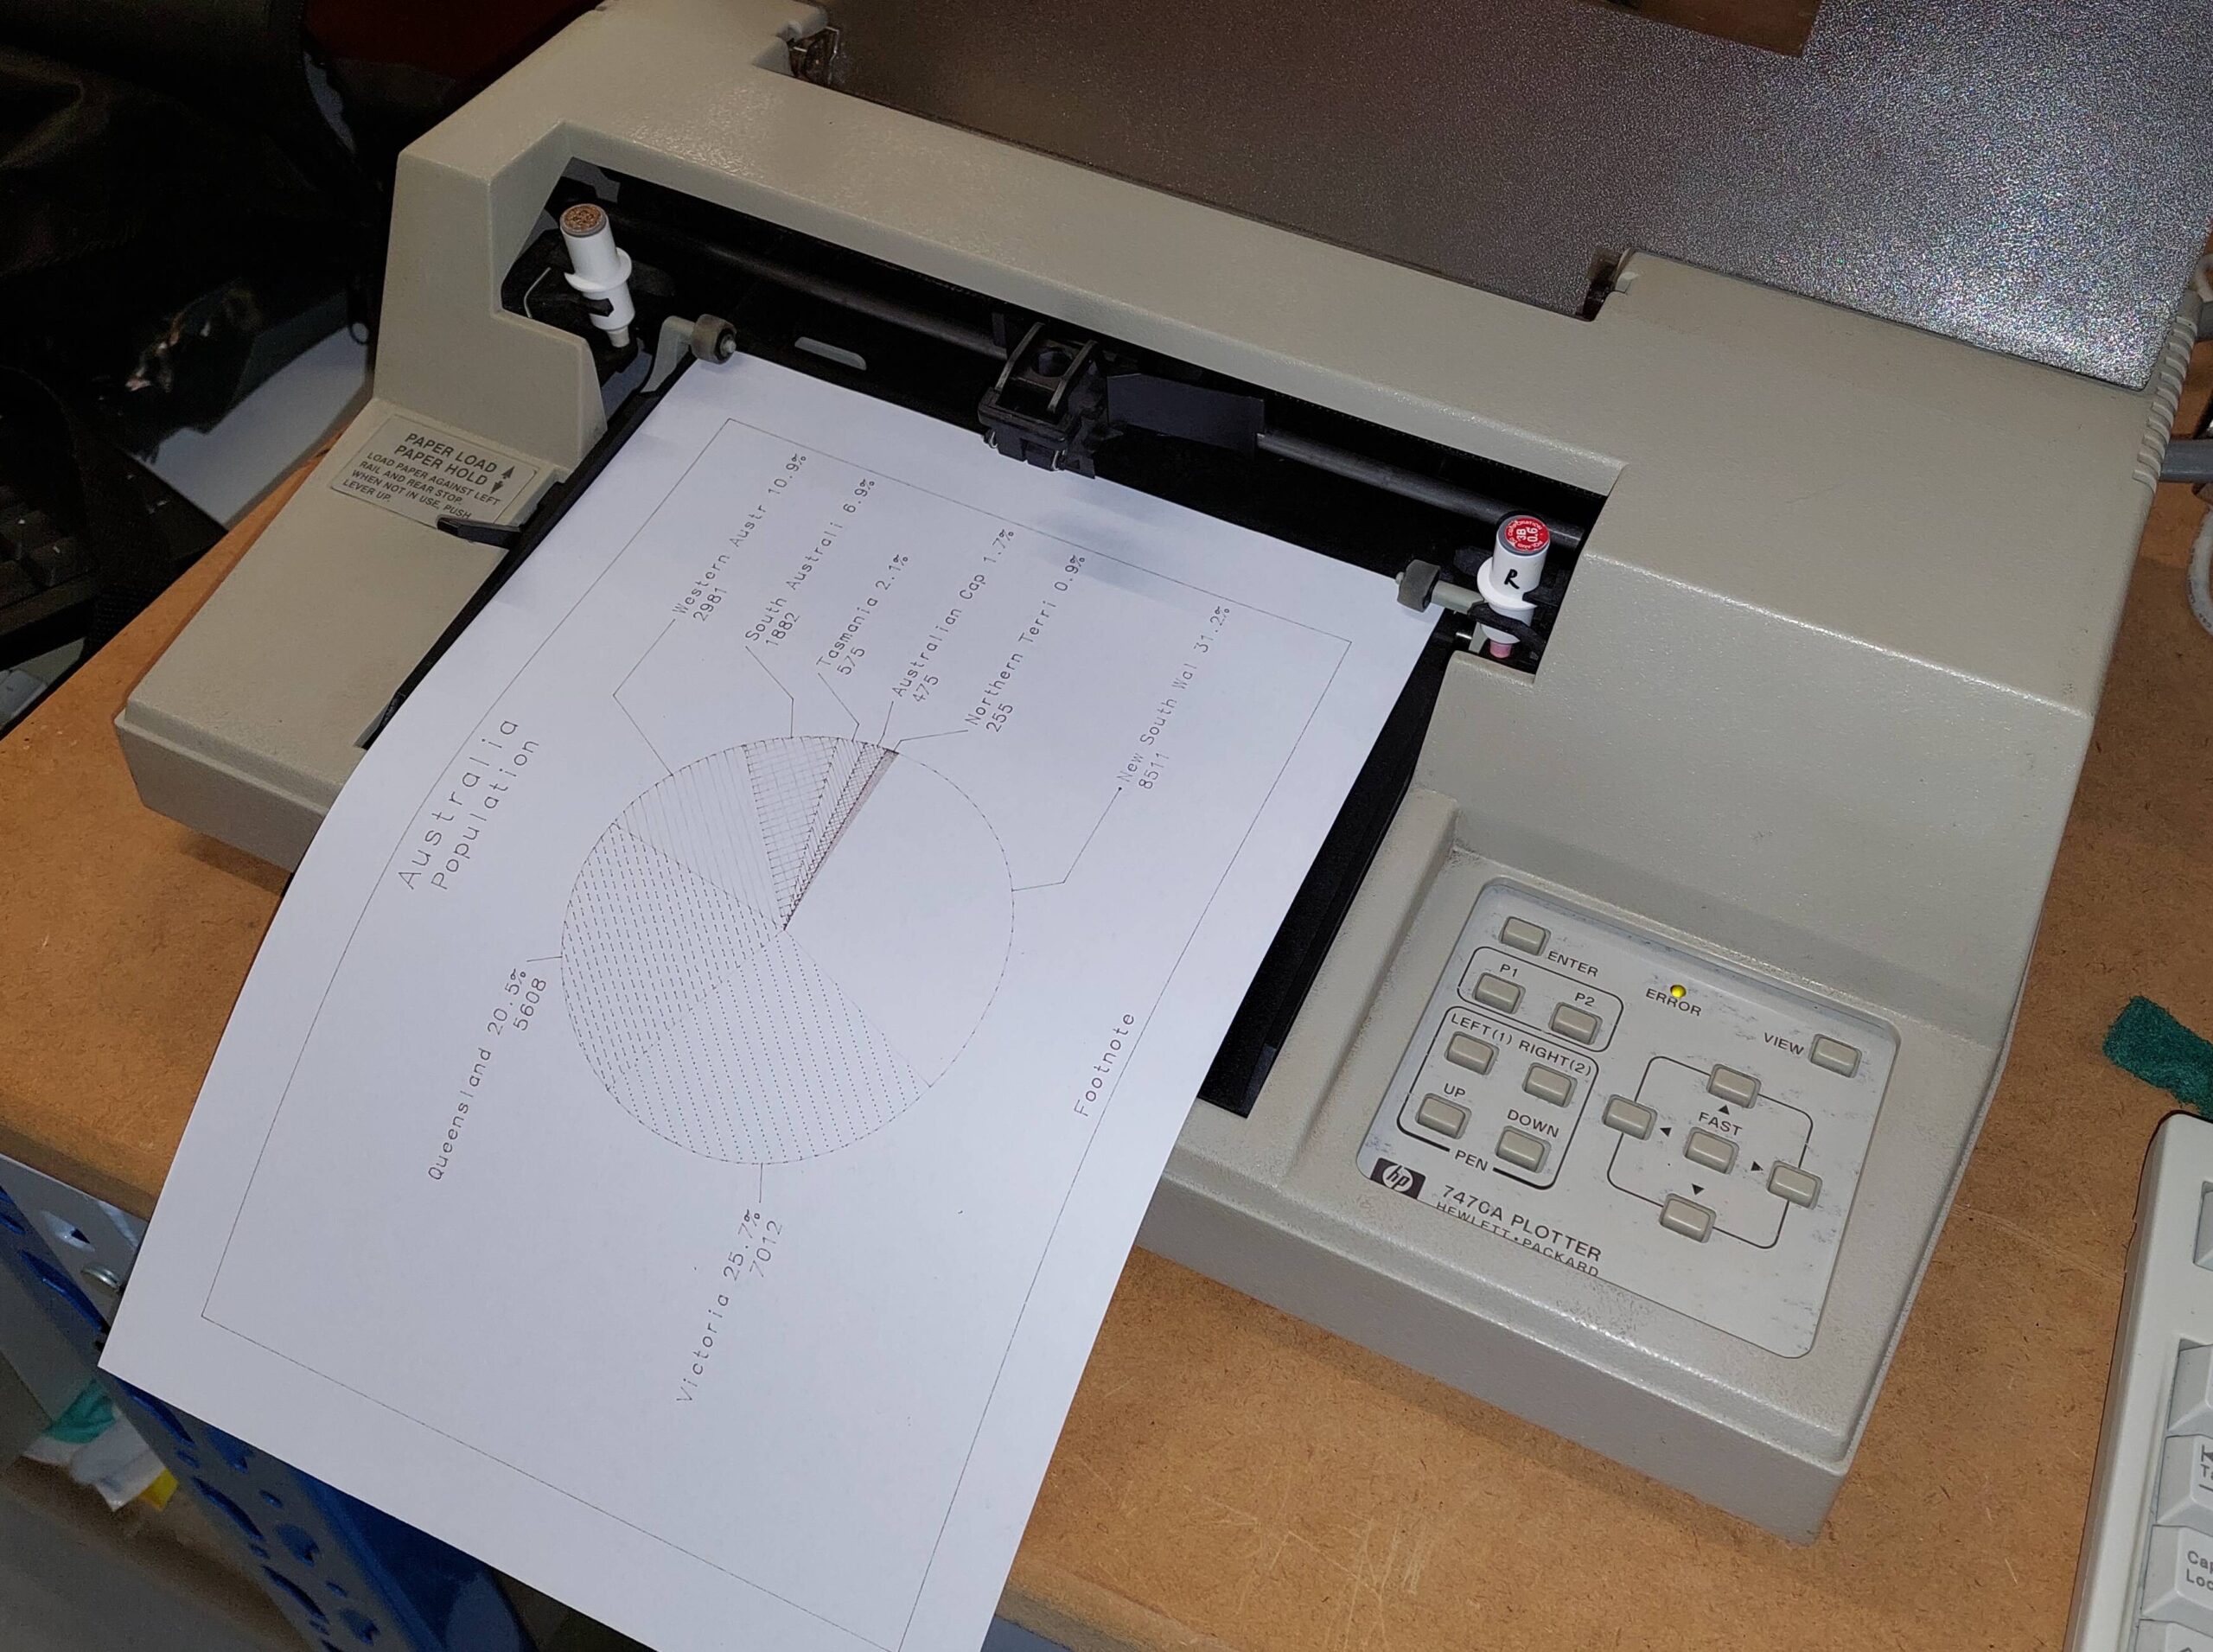
The plot was produced with the Pie Chart software. The paper size has to be set correctly, otherwise the program complains that the plotter is not compatible.

Happy days. I’ll try it out on the HP 85 when i get a moment.

There were about 30 happy days before a fault developed in the carriage servo. This sent the carriage careering into the end-stop where it halted abruptly and blew the fuse.

Unfortunately, i could not resolve this issue. It appears to be in one of the gate arrays, so i won’t be able to resolve this unless a “spares machine” appears – either serial or HP-IB.

At least it got one last chance to perform before departing this mortal coil!

Generic Drive Unit

I have worked on many CP/M and other computers which use 5.25″ 40 track floppy drives. It is often convenient during set-to-work and set-up to be able to access data from reliable sources, including known good floppy disk drives and solid state drives.

It is also useful to be able to augment any existing drives with additional drives. Often i would need to swap a physical drives with a solid state drive.

I often ended up with floppy disk drives and power supply spread out over a bench, and every time i used them i would need to configure them.

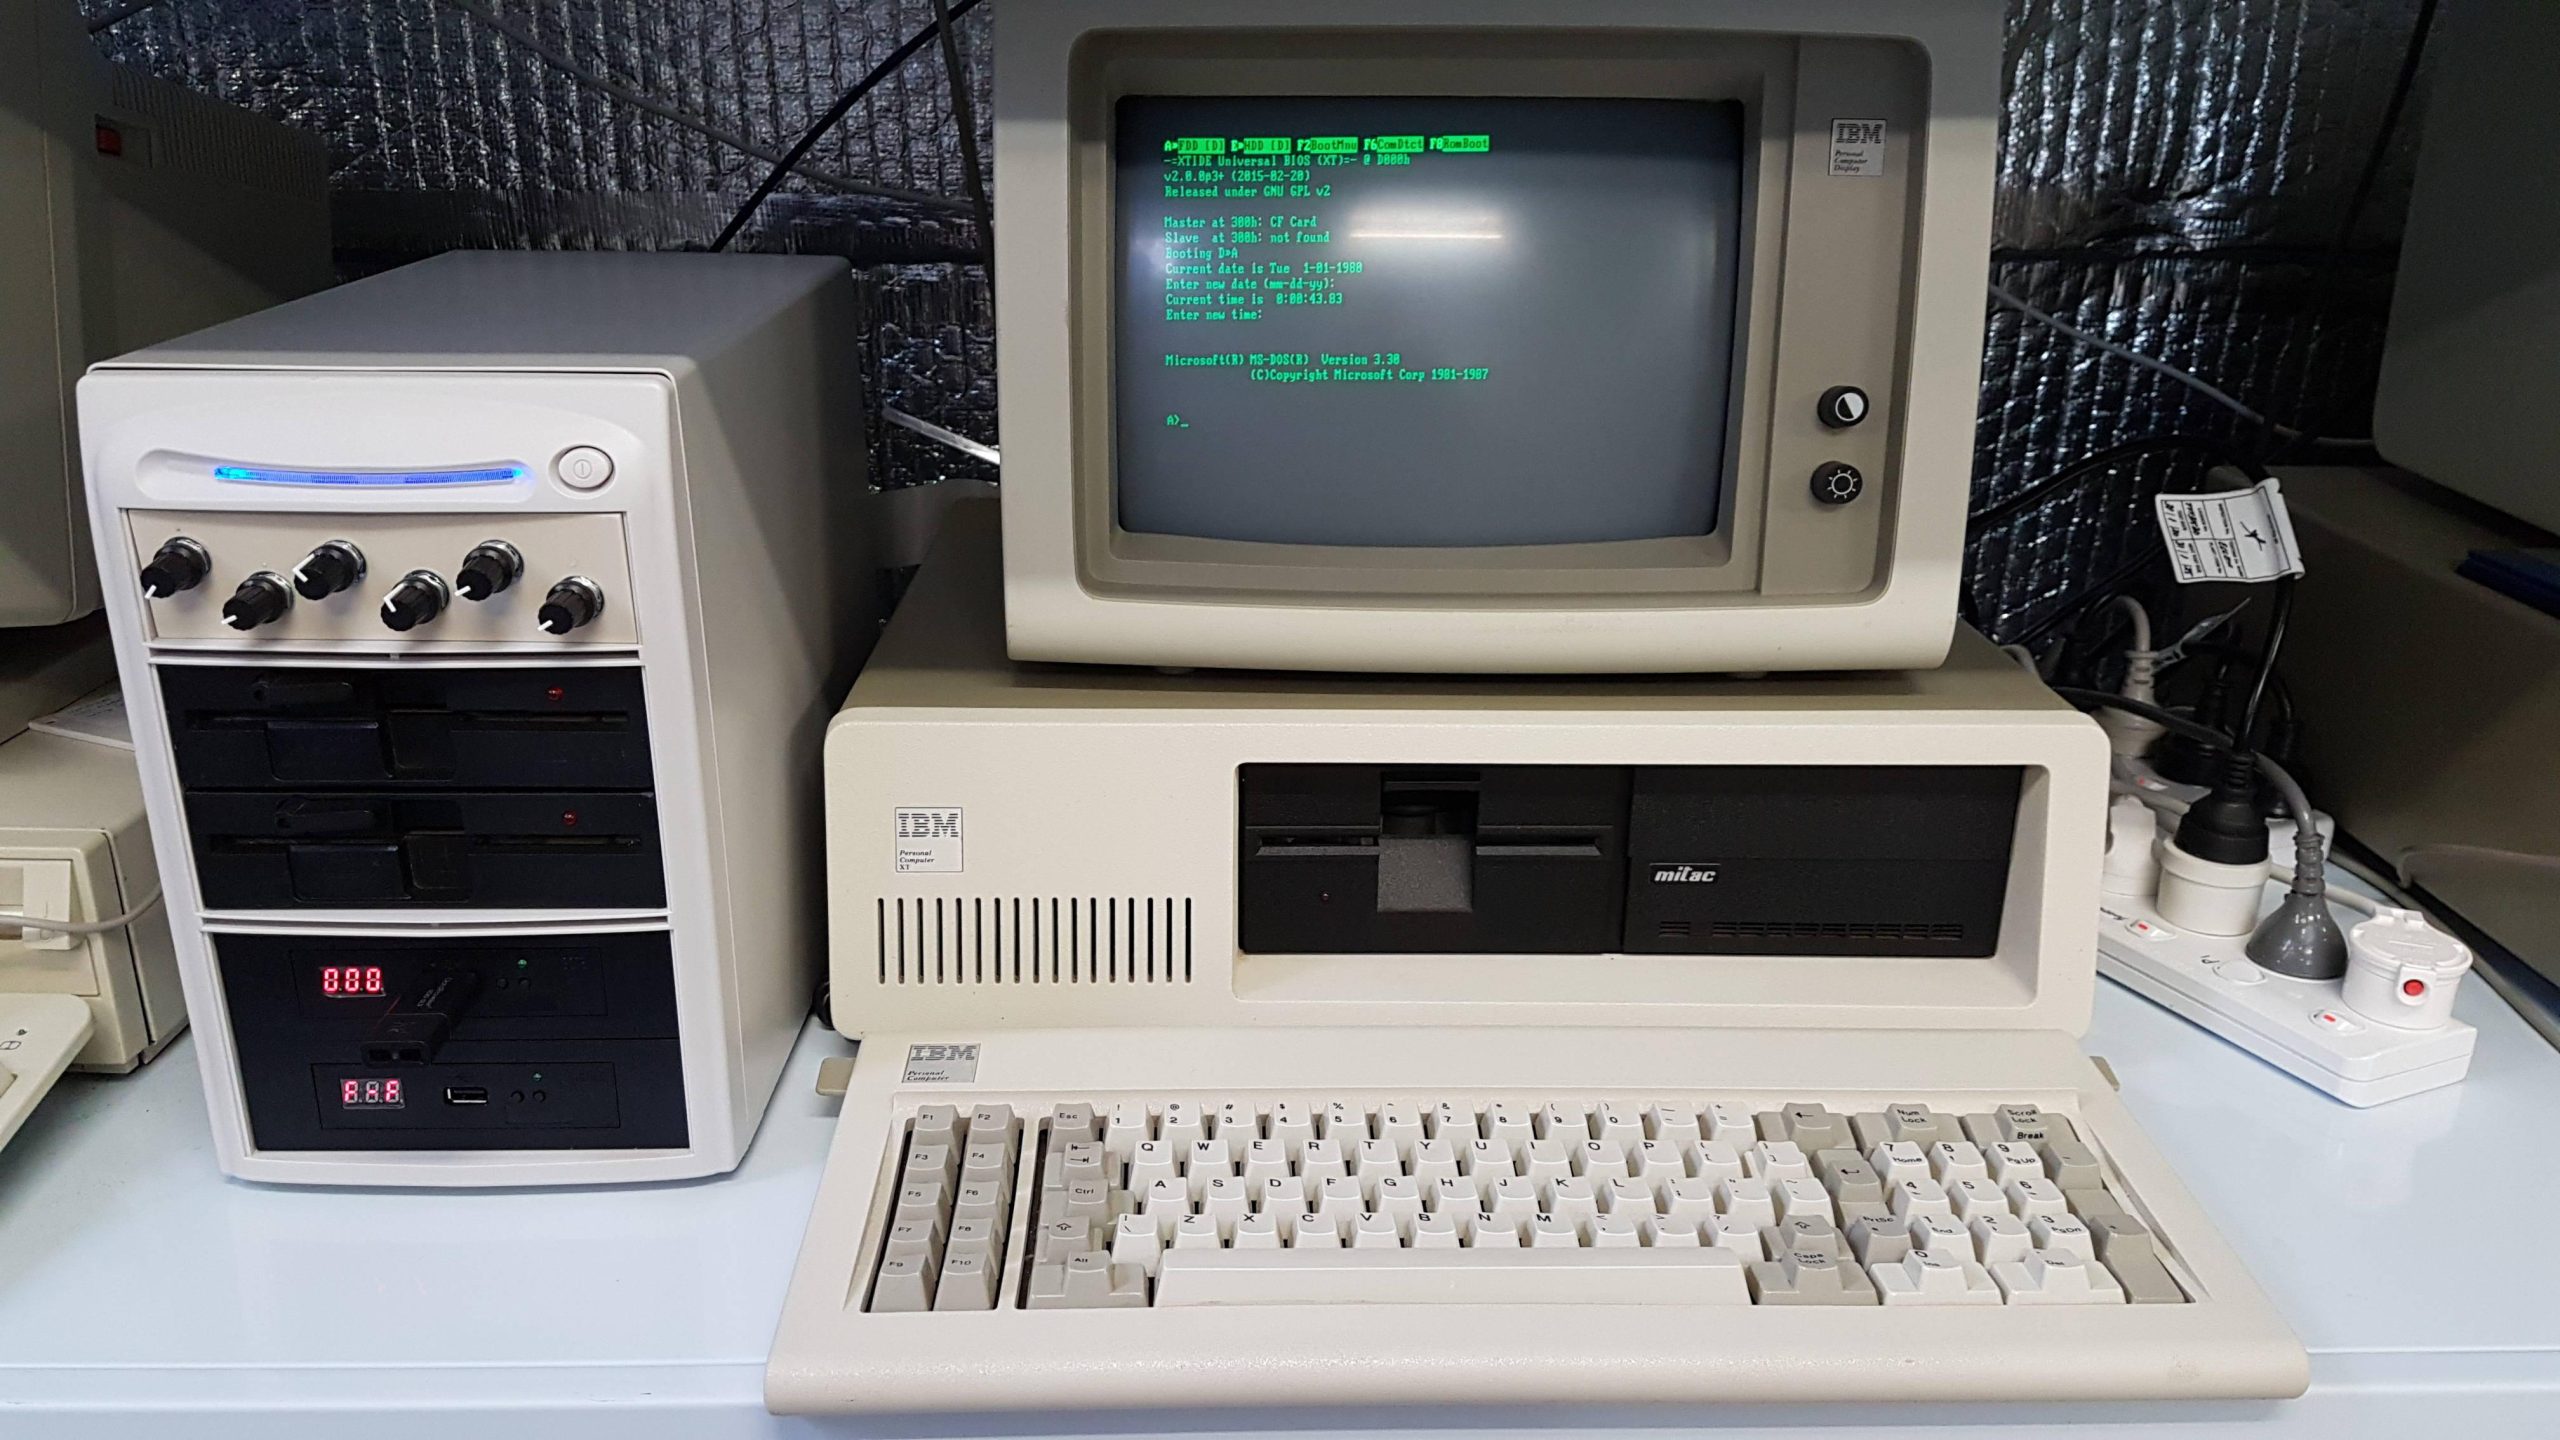
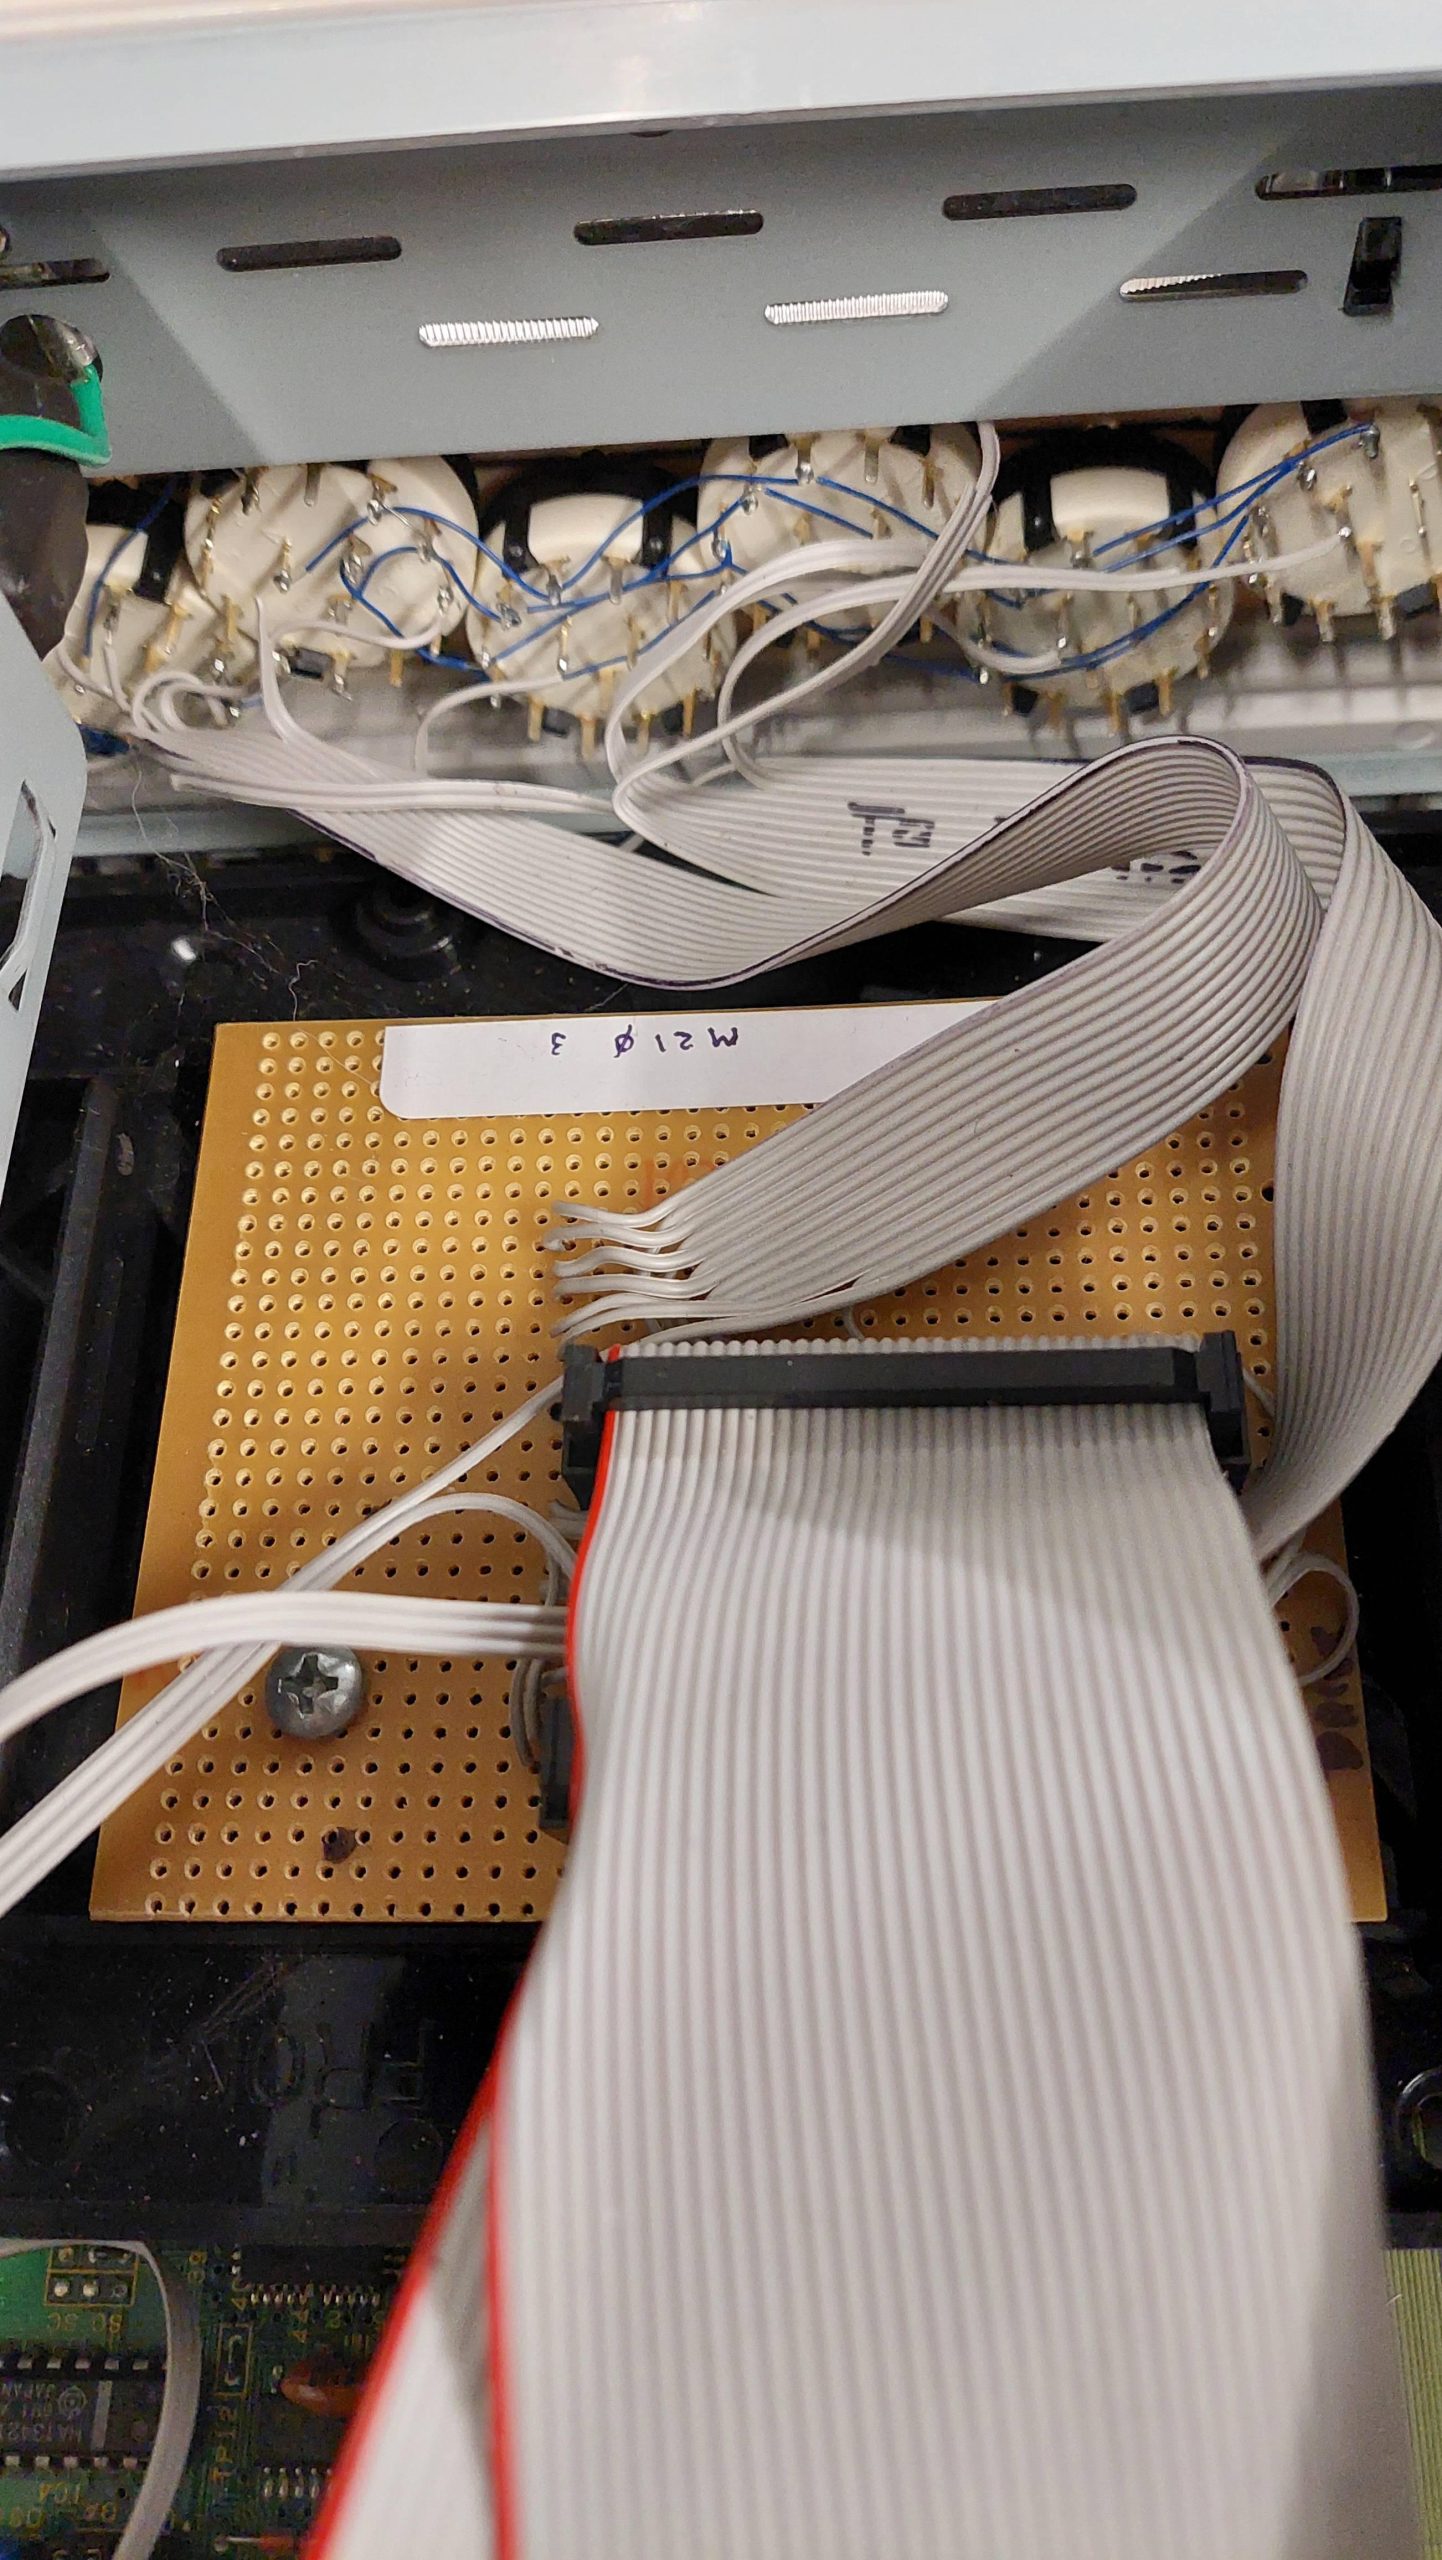
I thought a better solution may be to build up a neat unit with some switches that would allow me to easily reconfigure some drives. I found a relatively cheap CD-ROM duplicator case that had a power supply and enough space for four 5.25″ drives and a small switch panel.

I was doing this again, i would probably use an arduino to perform the various configuration options, but i made it work with some cheap rotary switches. The solution is very much driven by these switches.

The Goteks, modified with FlashFloppy, are also able to emulate 77 track 8″ drives, 80 track 5.25″ drives, and 3.5″ inch drives. In principle, the physical drives could be swapped out for other drive types, but 8″ drives might exceed the available space!

Normally, 5.25″ drives can be configured with 3 or 4 individual drive select lines. With the coming of PCs and the floppy disk drive cable twist, only one was ever used. Subsequent 3.5″ disk drives only provided 1 or 2. The gotek is modelled on a 3.5″ drive, and it has two: DS0 and DS1. Then the two physical drives are DS2 and DS3.

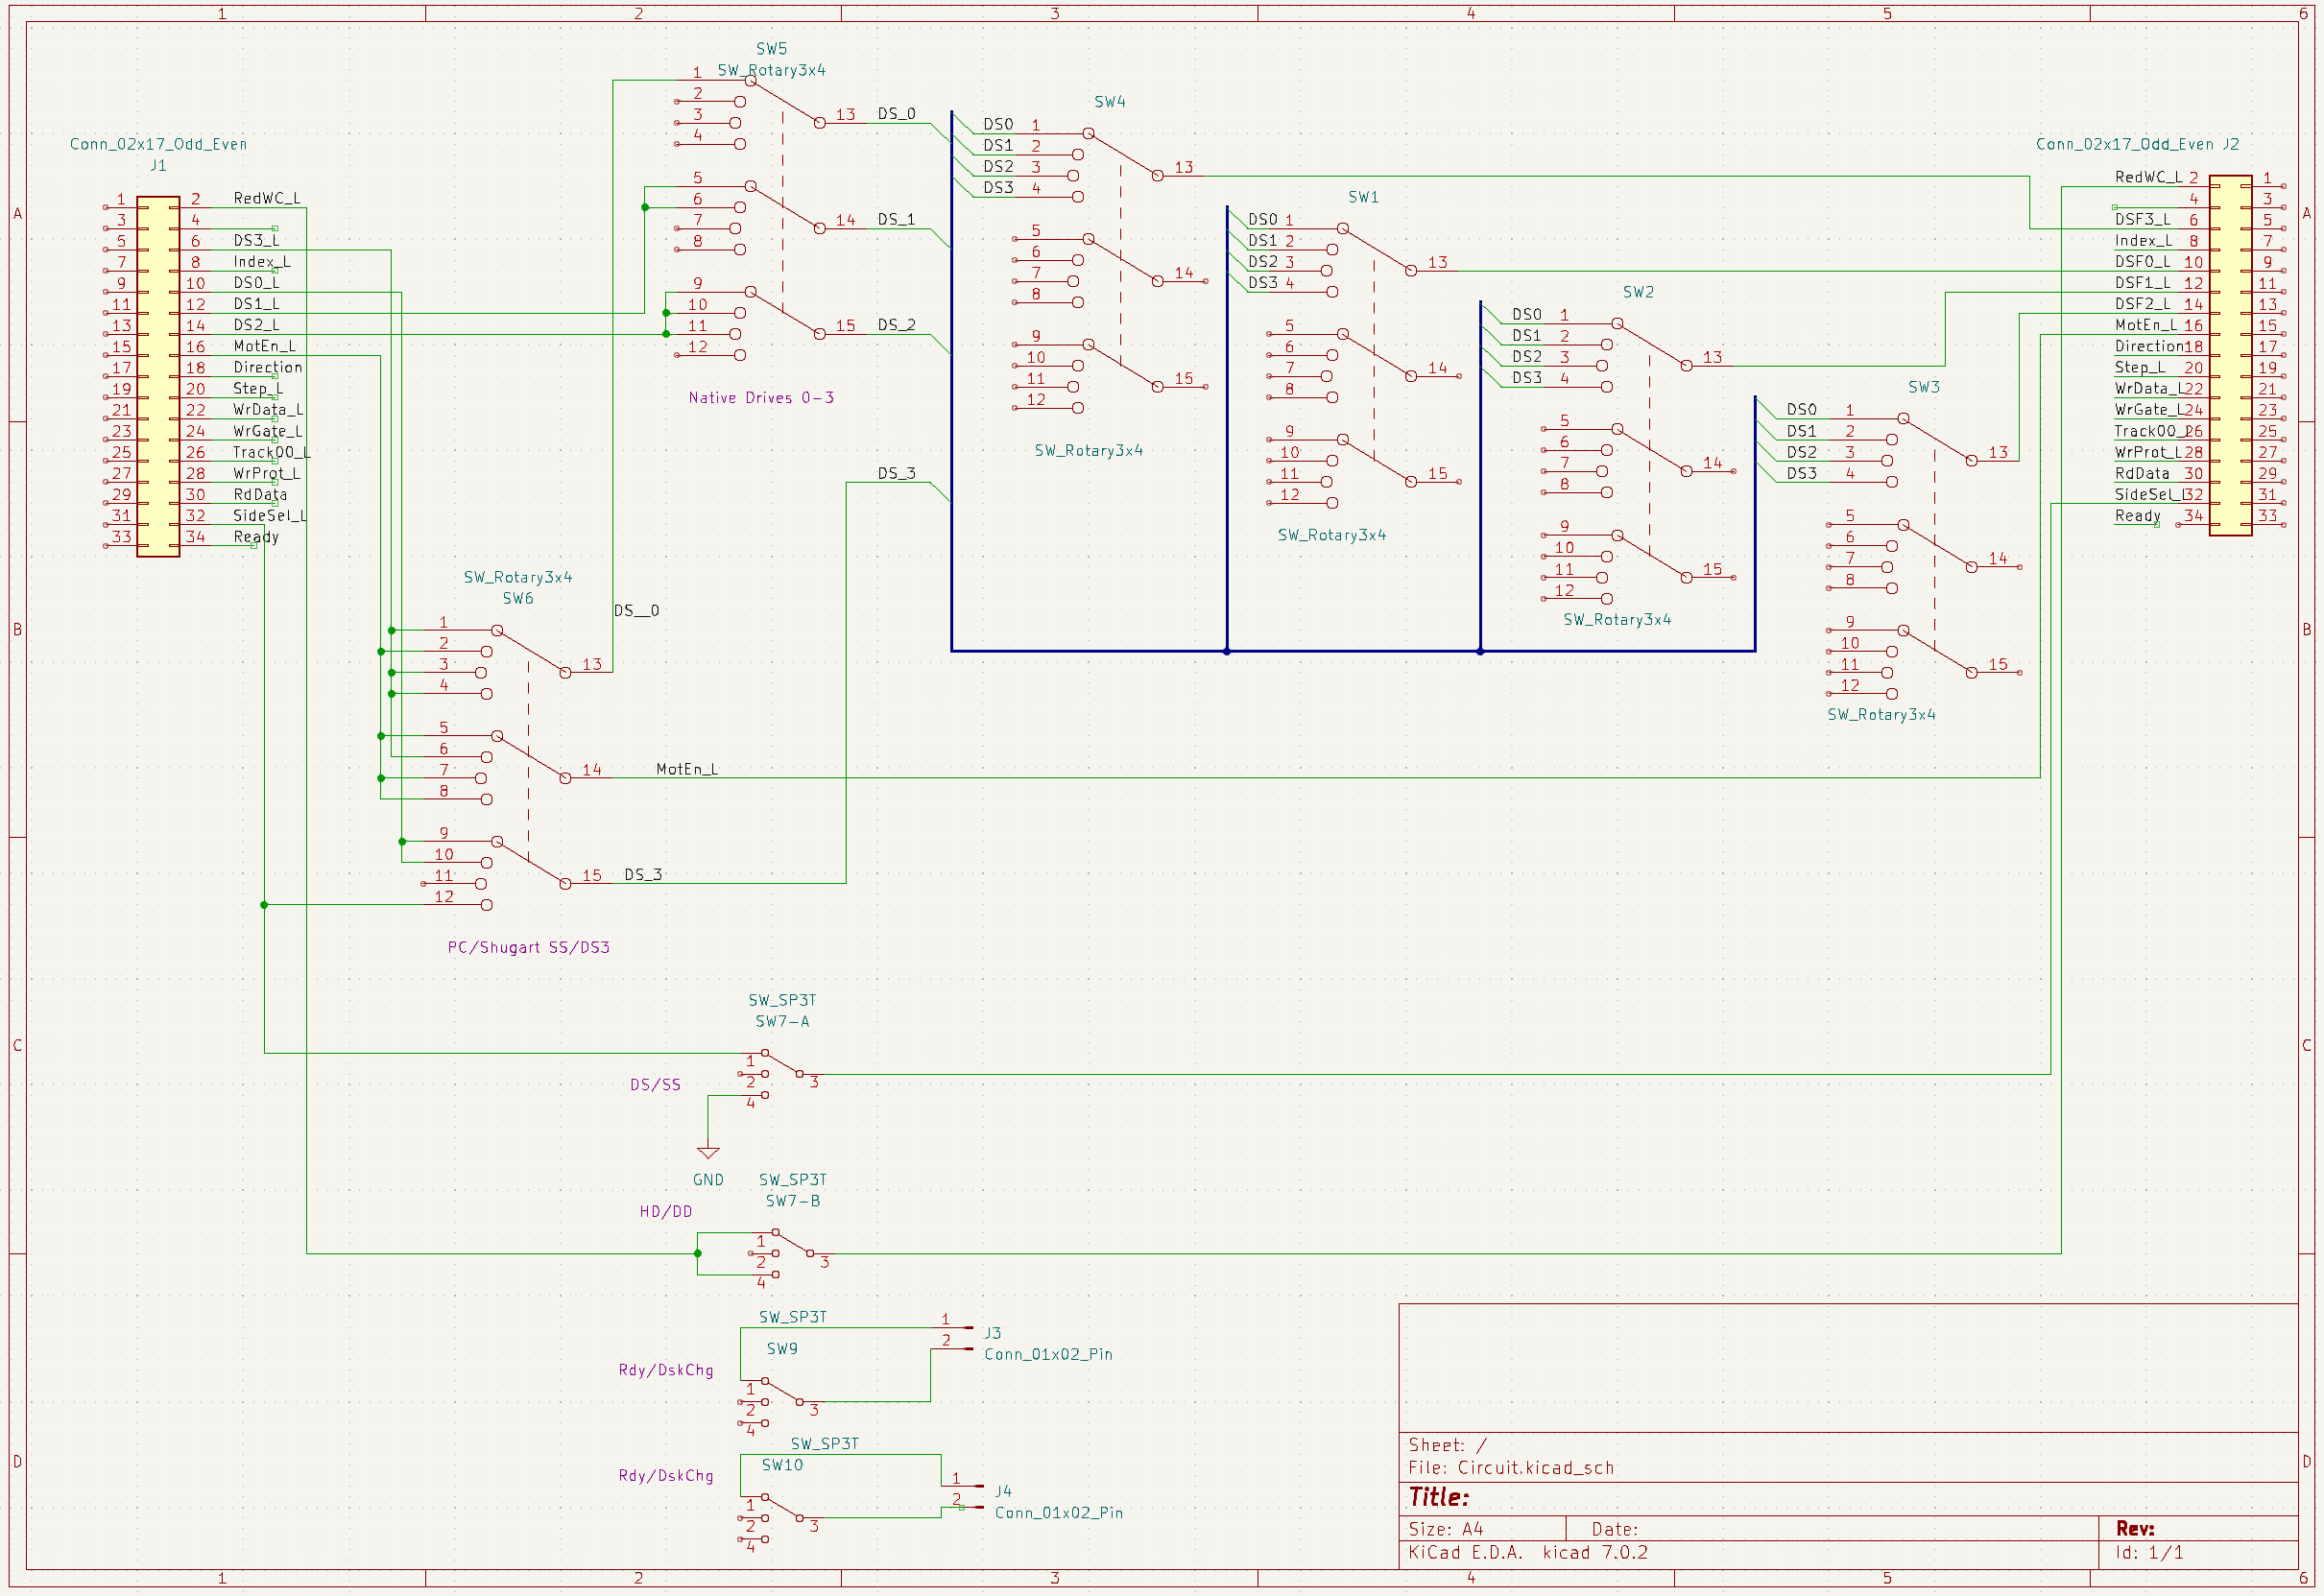
The switches had 3 ganged 4 position switches (poles). The first 4 switches are simply used to connect a computer drive select line to a floppy disk drive select line (it doesn’t matter which, as long as the drive is configured to use it). DS1 is the PC convention.

The next switch complicates matters. It, too, is a drive select intermediary. It is used to accommodate existing drives from 0 to 3. If you have four existing drives, then this unit cannot be used. If the user wants to use 1 existing drive and, therefore, no more than three drives in the unit, then the fifth switch is set to 1. With this setting, DS0 is reserved for the existing drive. The unused drive in the unit should be parked at DS0, but it will never be selected.

My brain was already starting to hurt, but it got much worse with the sixth switch. The floppy disk drive interface has evolved. This covers some of the variations:

https://retrocmp.de/fdd/general/floppy-bus.htm#pin34

Firstly, IBM PC introduced a variation that allowed the A and B drives to be configured identically. This involved twisting part of the cable to swap over the Motor Enable and the Drive Selects. It also uses the Ready signal as a Disk Change signal.

There are other variations regarding Side Select, Drive Select 3 (4th select). I’ve covered some of them as i’ve encuntered them.

Switch 6 position 0 is for most drives. Position 1 is for PCs. Only two drives can be used with a PC. Position 3 replaces Side Select on pin 32 with DS3. This is used on the System 80 which has only single-sided drives.

There are more variations. Switches 7 and 8, on the back of the unit, are double-pole double-throw switches. Switch 7 deals with sides and densities. The Upper position is for double-sided operation and the middle position is for single-sided operation. The bottom position would allow the top head to be used instead of the bottom head; a flippy without flipping.

Switch 8 changes the floppy drive configuration for pin 34: Ready or Disk Change. Up/Middle for a PC but down for other hosts. The TRS-80 Model I liked the PC position; i do not know why.

Implementation is a little ugly, but it seems to be effective.

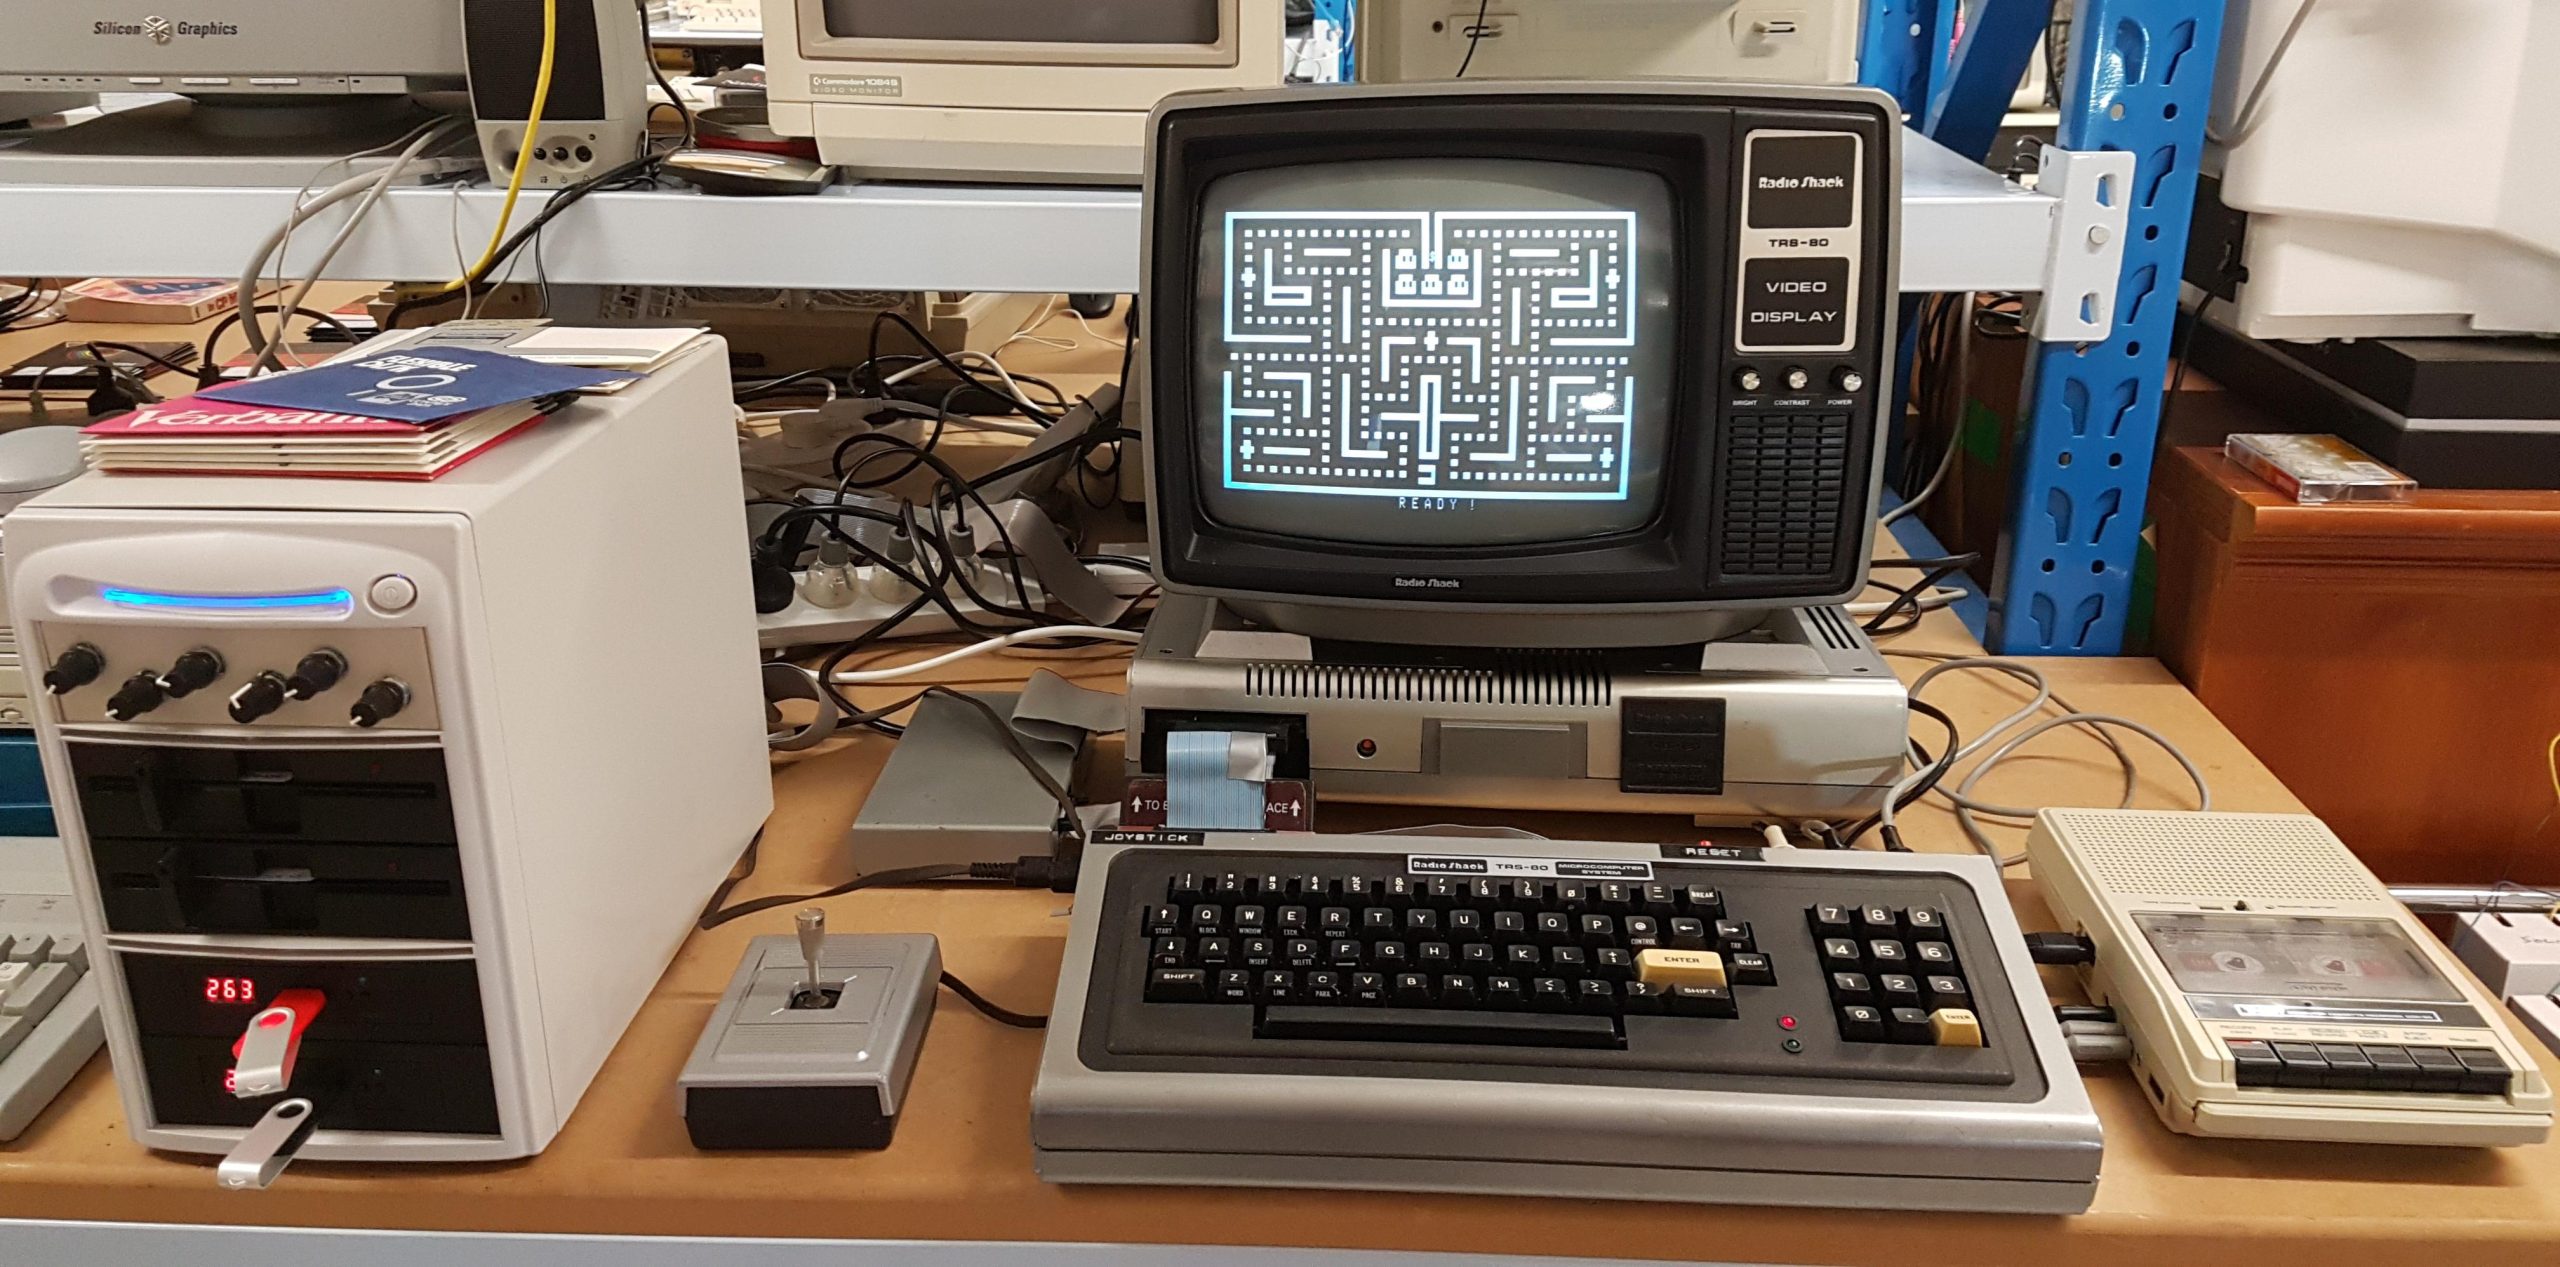
I’ve tried this out with a lot of systems including some that i didn’t anticipate when i built it.

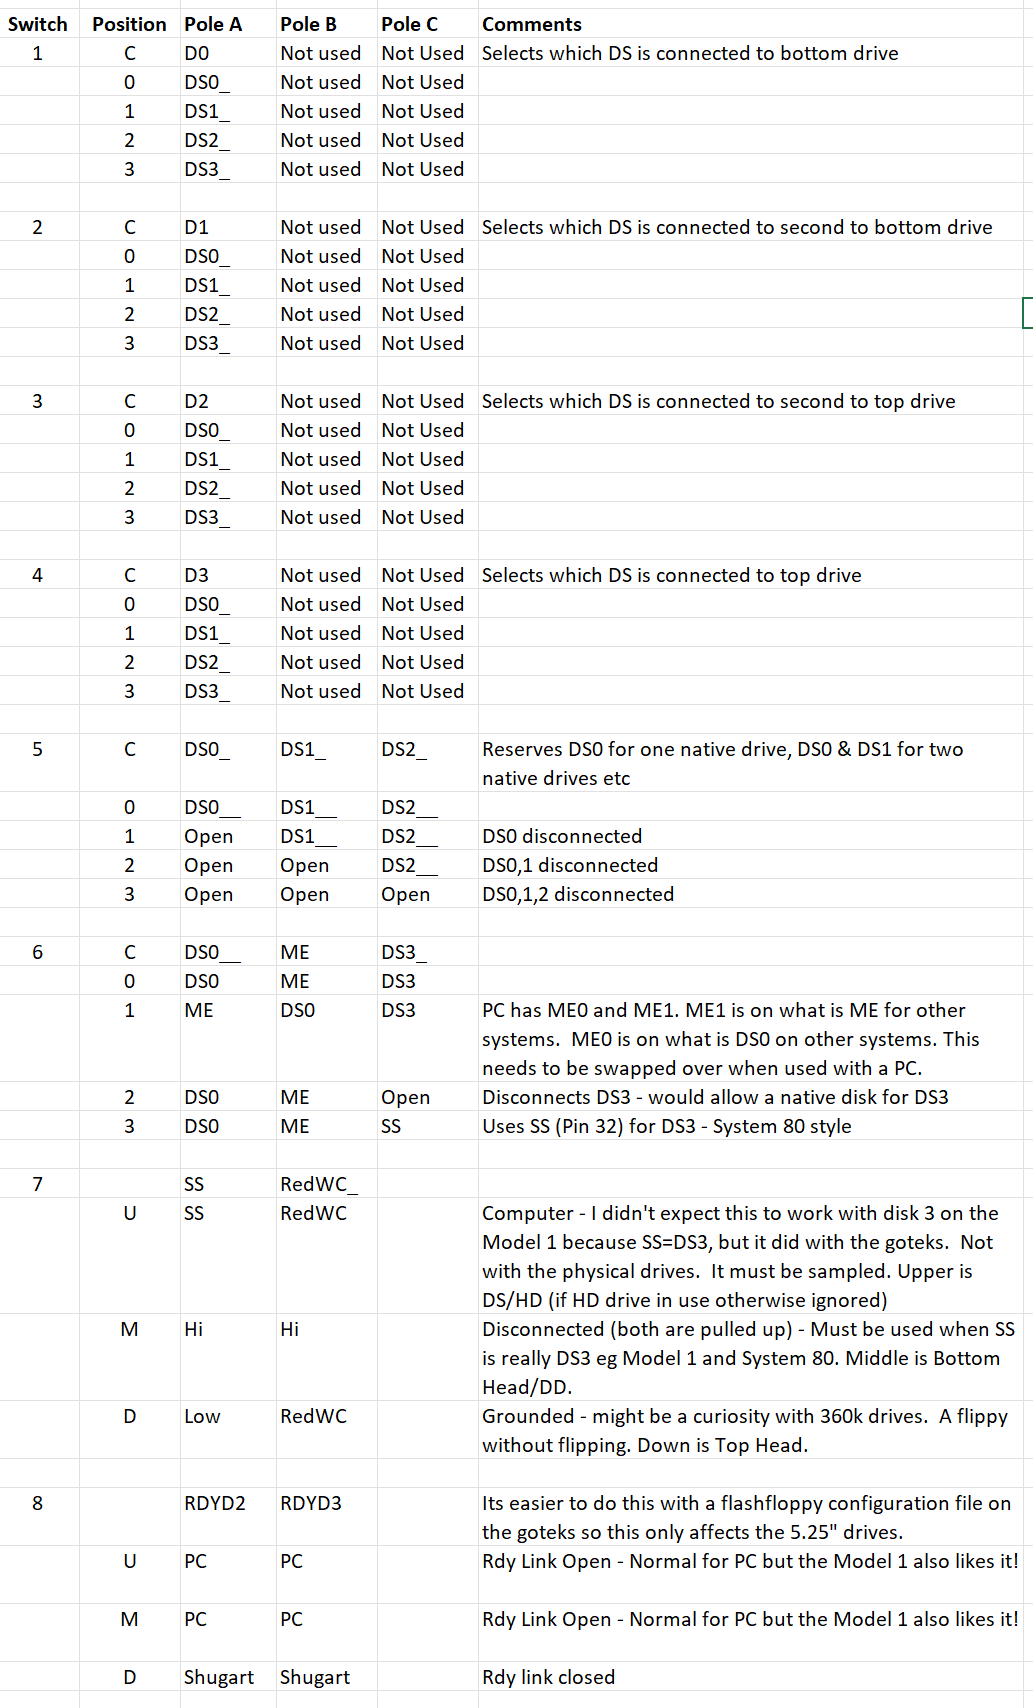
A summary of the switches:

Sun SparcStation IPX

I had a couple of close encounters with Sun workstations back in the early 90s. The first was with a mobile computer system used by the Royal Australian Navy to process laser depth sounding. Two Sparcstation 2 (i think) served as the graphical front ends for a MIPS rack mounted system.

The second was when my employer chose to use Mentor Graphics PCB design software, which ran on Sparcstation IPXs.

This one came up on Facebook marketplace quite early in my hobby back in 2019. I rediscovered the seller as a colleague, Daniel, at the Adelaide Retro Computer Group a year or so later.

The IPX 4/50 unit came with 64MB of memory and an internal 6GB SCSI drive with redhat 6.2 installed.  It also came with a SCSI CDROM, an empty hard drive expansion unit, and an HP 2000 DC DAT tape drive and all the cables required to join them up.

I purchased another spare caddy CDROM unit from Daniel.

It came in pretty good condition and was able to boot Linux from its hard disk as long as the NVRAM parameter were punched in prior to boot. It was very slow with Linux 6.2 though.

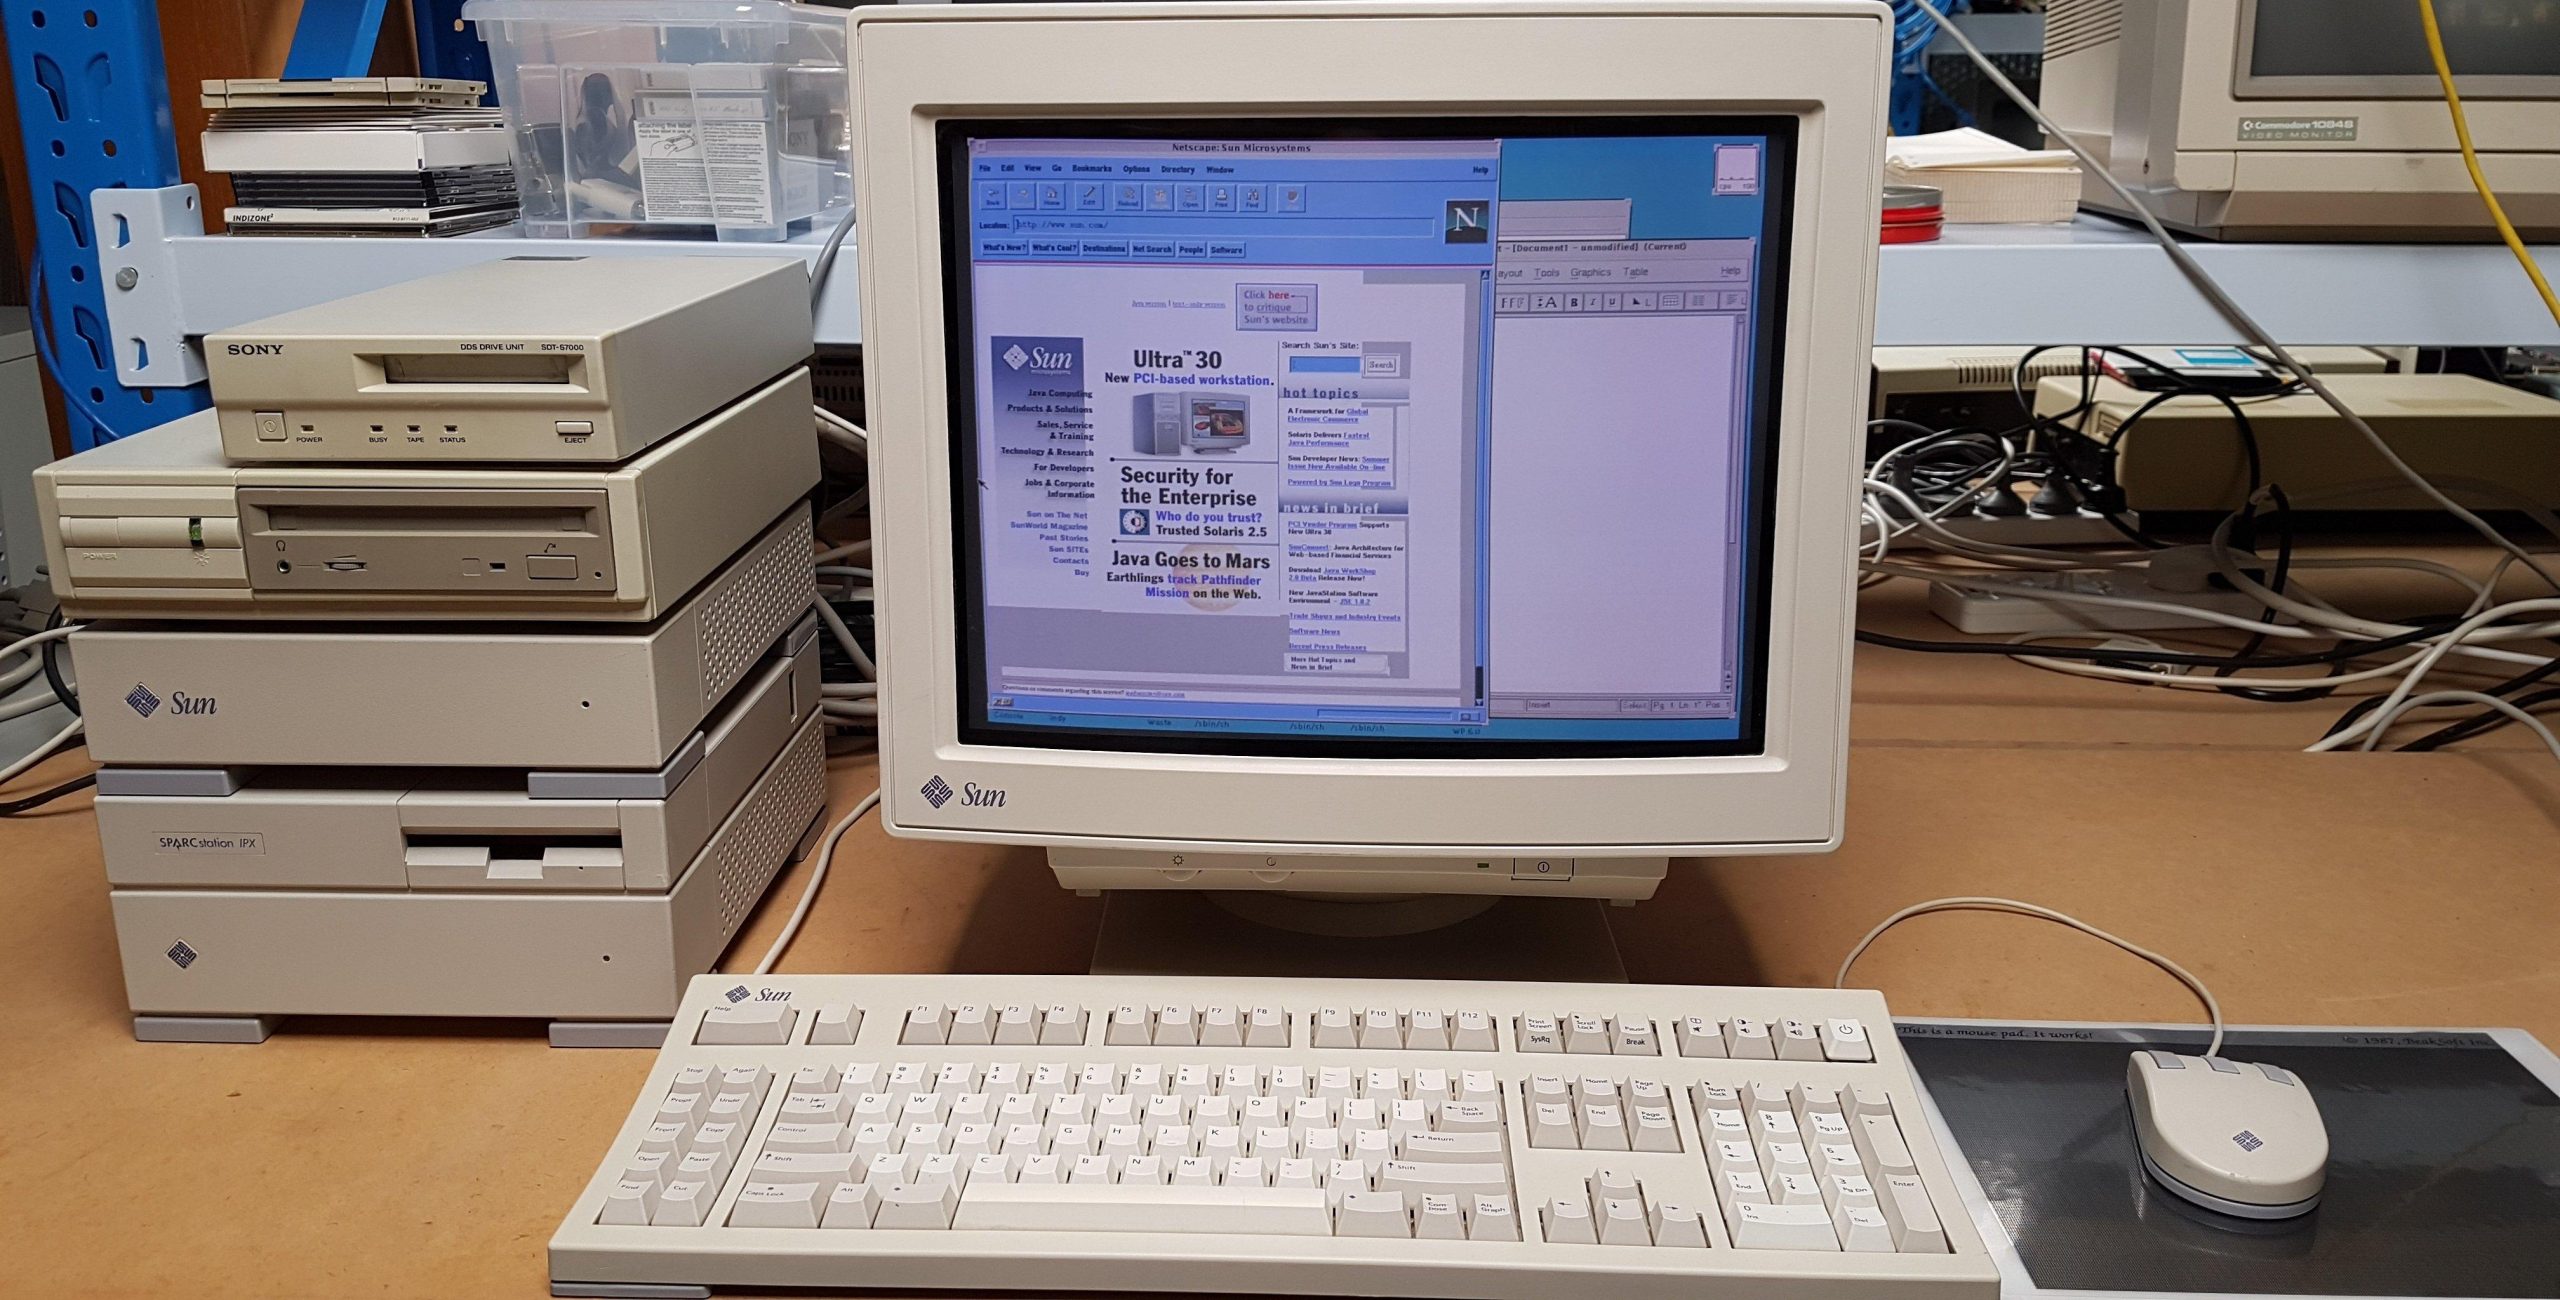
The mouse is one of the optical units that requires a grid over a reflective surface. Daniel sent me a PDF of the grid for me to use to make a mouse mat.

It came with a video cable and adapter for use on a normal VGA screen. The Sun monitor shown above was an addition courtesy of Michael from the Adelaide Retro Computer Group, who saved it from recycling.

Although i’d used similar machines in the past, i have never been a Unix system administrator, so i expected to have some challenges.

Since setting up this machine, i have added an Ultra 5, a Enterprise 2, and an SGI Indy. I am still a very amateurish admin, but i know more than i used to.