I had already cleaned the power supply and tested with a small load.
The enclosure really needs some work and the cards would be hard to access inside the case, so decided to pull all the connectors and cabling out. I gave it all a clean and set it up on the bench.
In preparation for power on, i applied de-oxit to all of the socketed ICs and reseated them.
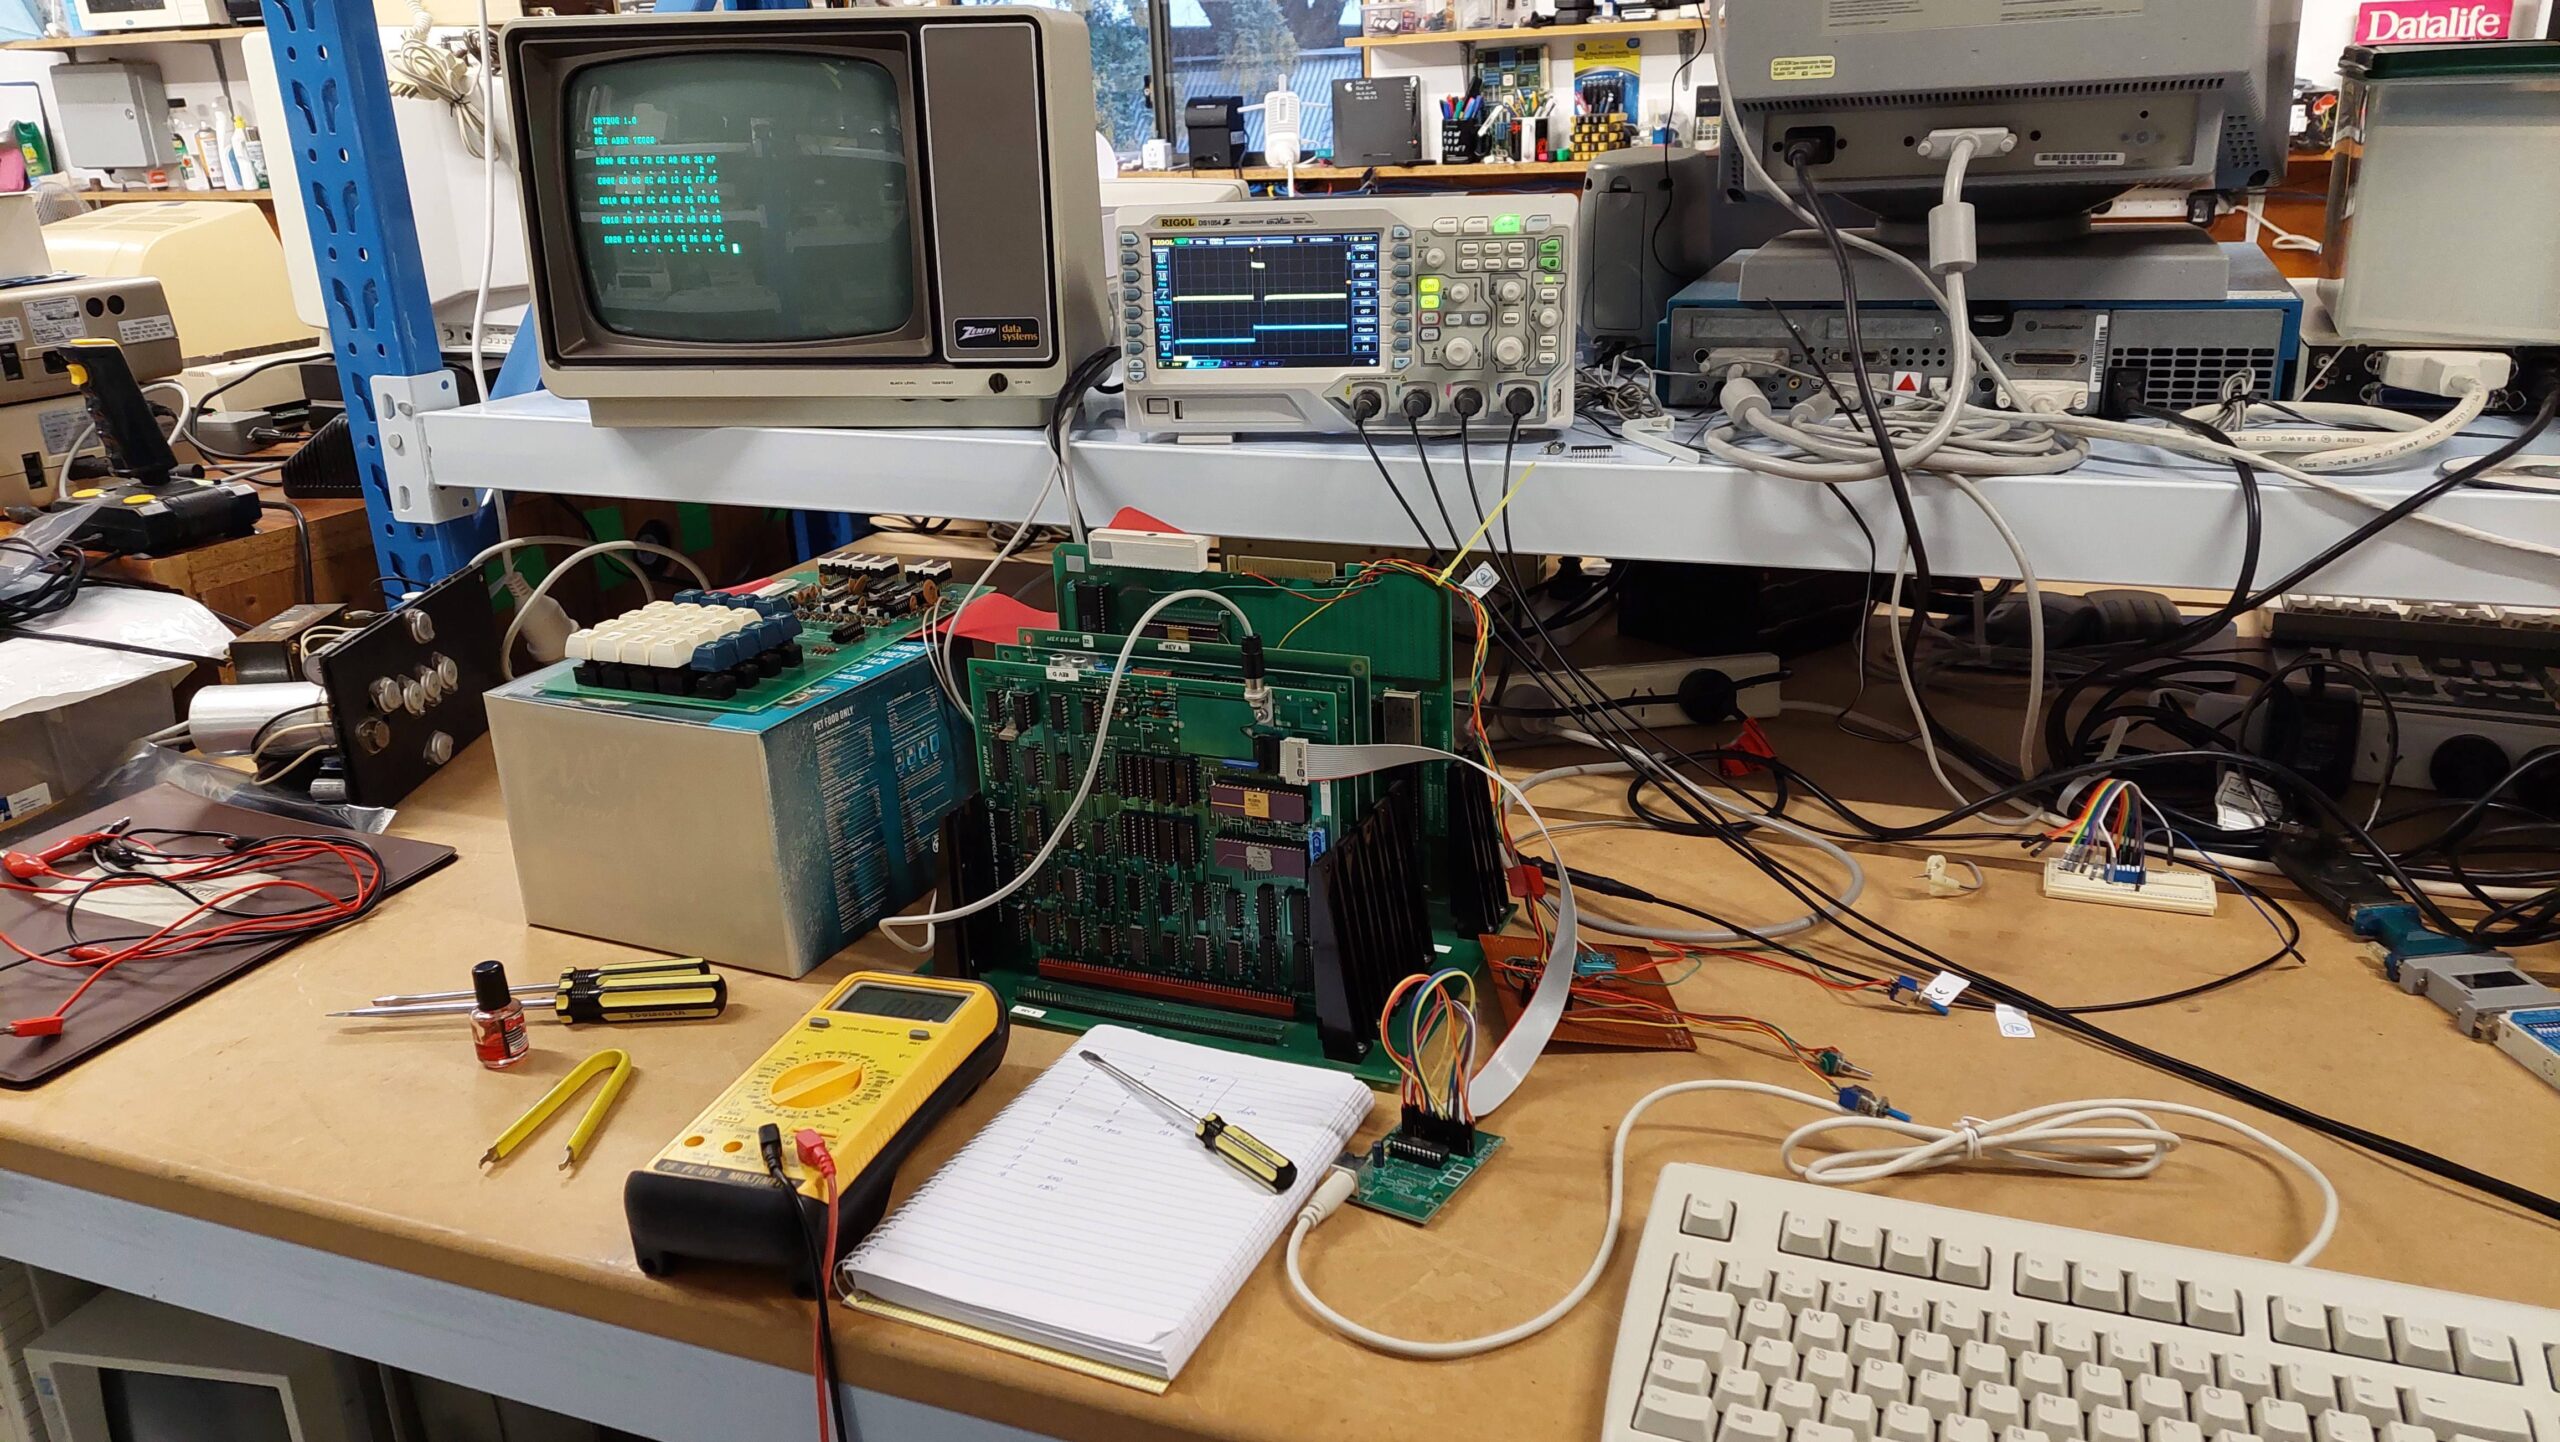
I started with the backplane and power supply. I checked all the power wiring several times, fearing that somehow i would get the voltages muddled. Then i powered up and nothing bad happened with the backplane alone.
Then i added the processor card and checked voltages. Still ok, so i added the keypad/display card. The 5V at this card was starting to get a little low. I think the regulation would be improved markedly if the power supply sense lines were used.
On power up nothing was displayed. I tried the reset. The switch feels terrible but is just working. Still no display. Then i toggled the CRTBUG/JBUG switch and reset again. This go the dash (-) display that was expected. Splendid news indeed.
The requirement for a manual reset at power on seems a little primitive.

I did a crash course on JBUG and was able to enter some commands and edit some memory locations. There was no memory at 0000H, but there was 2kB of memory at A000H. That’s consistent with the mods.

Next i added the 32kB memory card which also seemed to work fine.
Next i added the Video card and connected a monochrome video monitor. This required toggling the CRTBUG/JBUG switch and hitting the reset again. After some adjustment of the horizontal sync on the monitor i got a CRTBUG 1.0 sign on message. This was a lot of progress in a short time.
I was able to start up either monitor using the switch provided for that purpose. I assume it is messing with the chip enables on the two ROMS.
Then i added the ASCII Keyboard and progress ground to a halt. The only key that seemed to work was the space bar. I added the I/O card in the just to confirm it made no difference. It did make no difference.
When i looked closer at the keyboard i noticed that there were no key switches soldered in. I removed the screws and quickly found that the board is a capacitive type similar to that used on the Kaypro II and the Compaq Portable.
These keyboard use foam pads with a conductive layer on plastic. Typically, both the foam and the conductive layer deteriorate and need to be replaced. In this case only a few pads had retained their conductive layer – one of them is the space key.
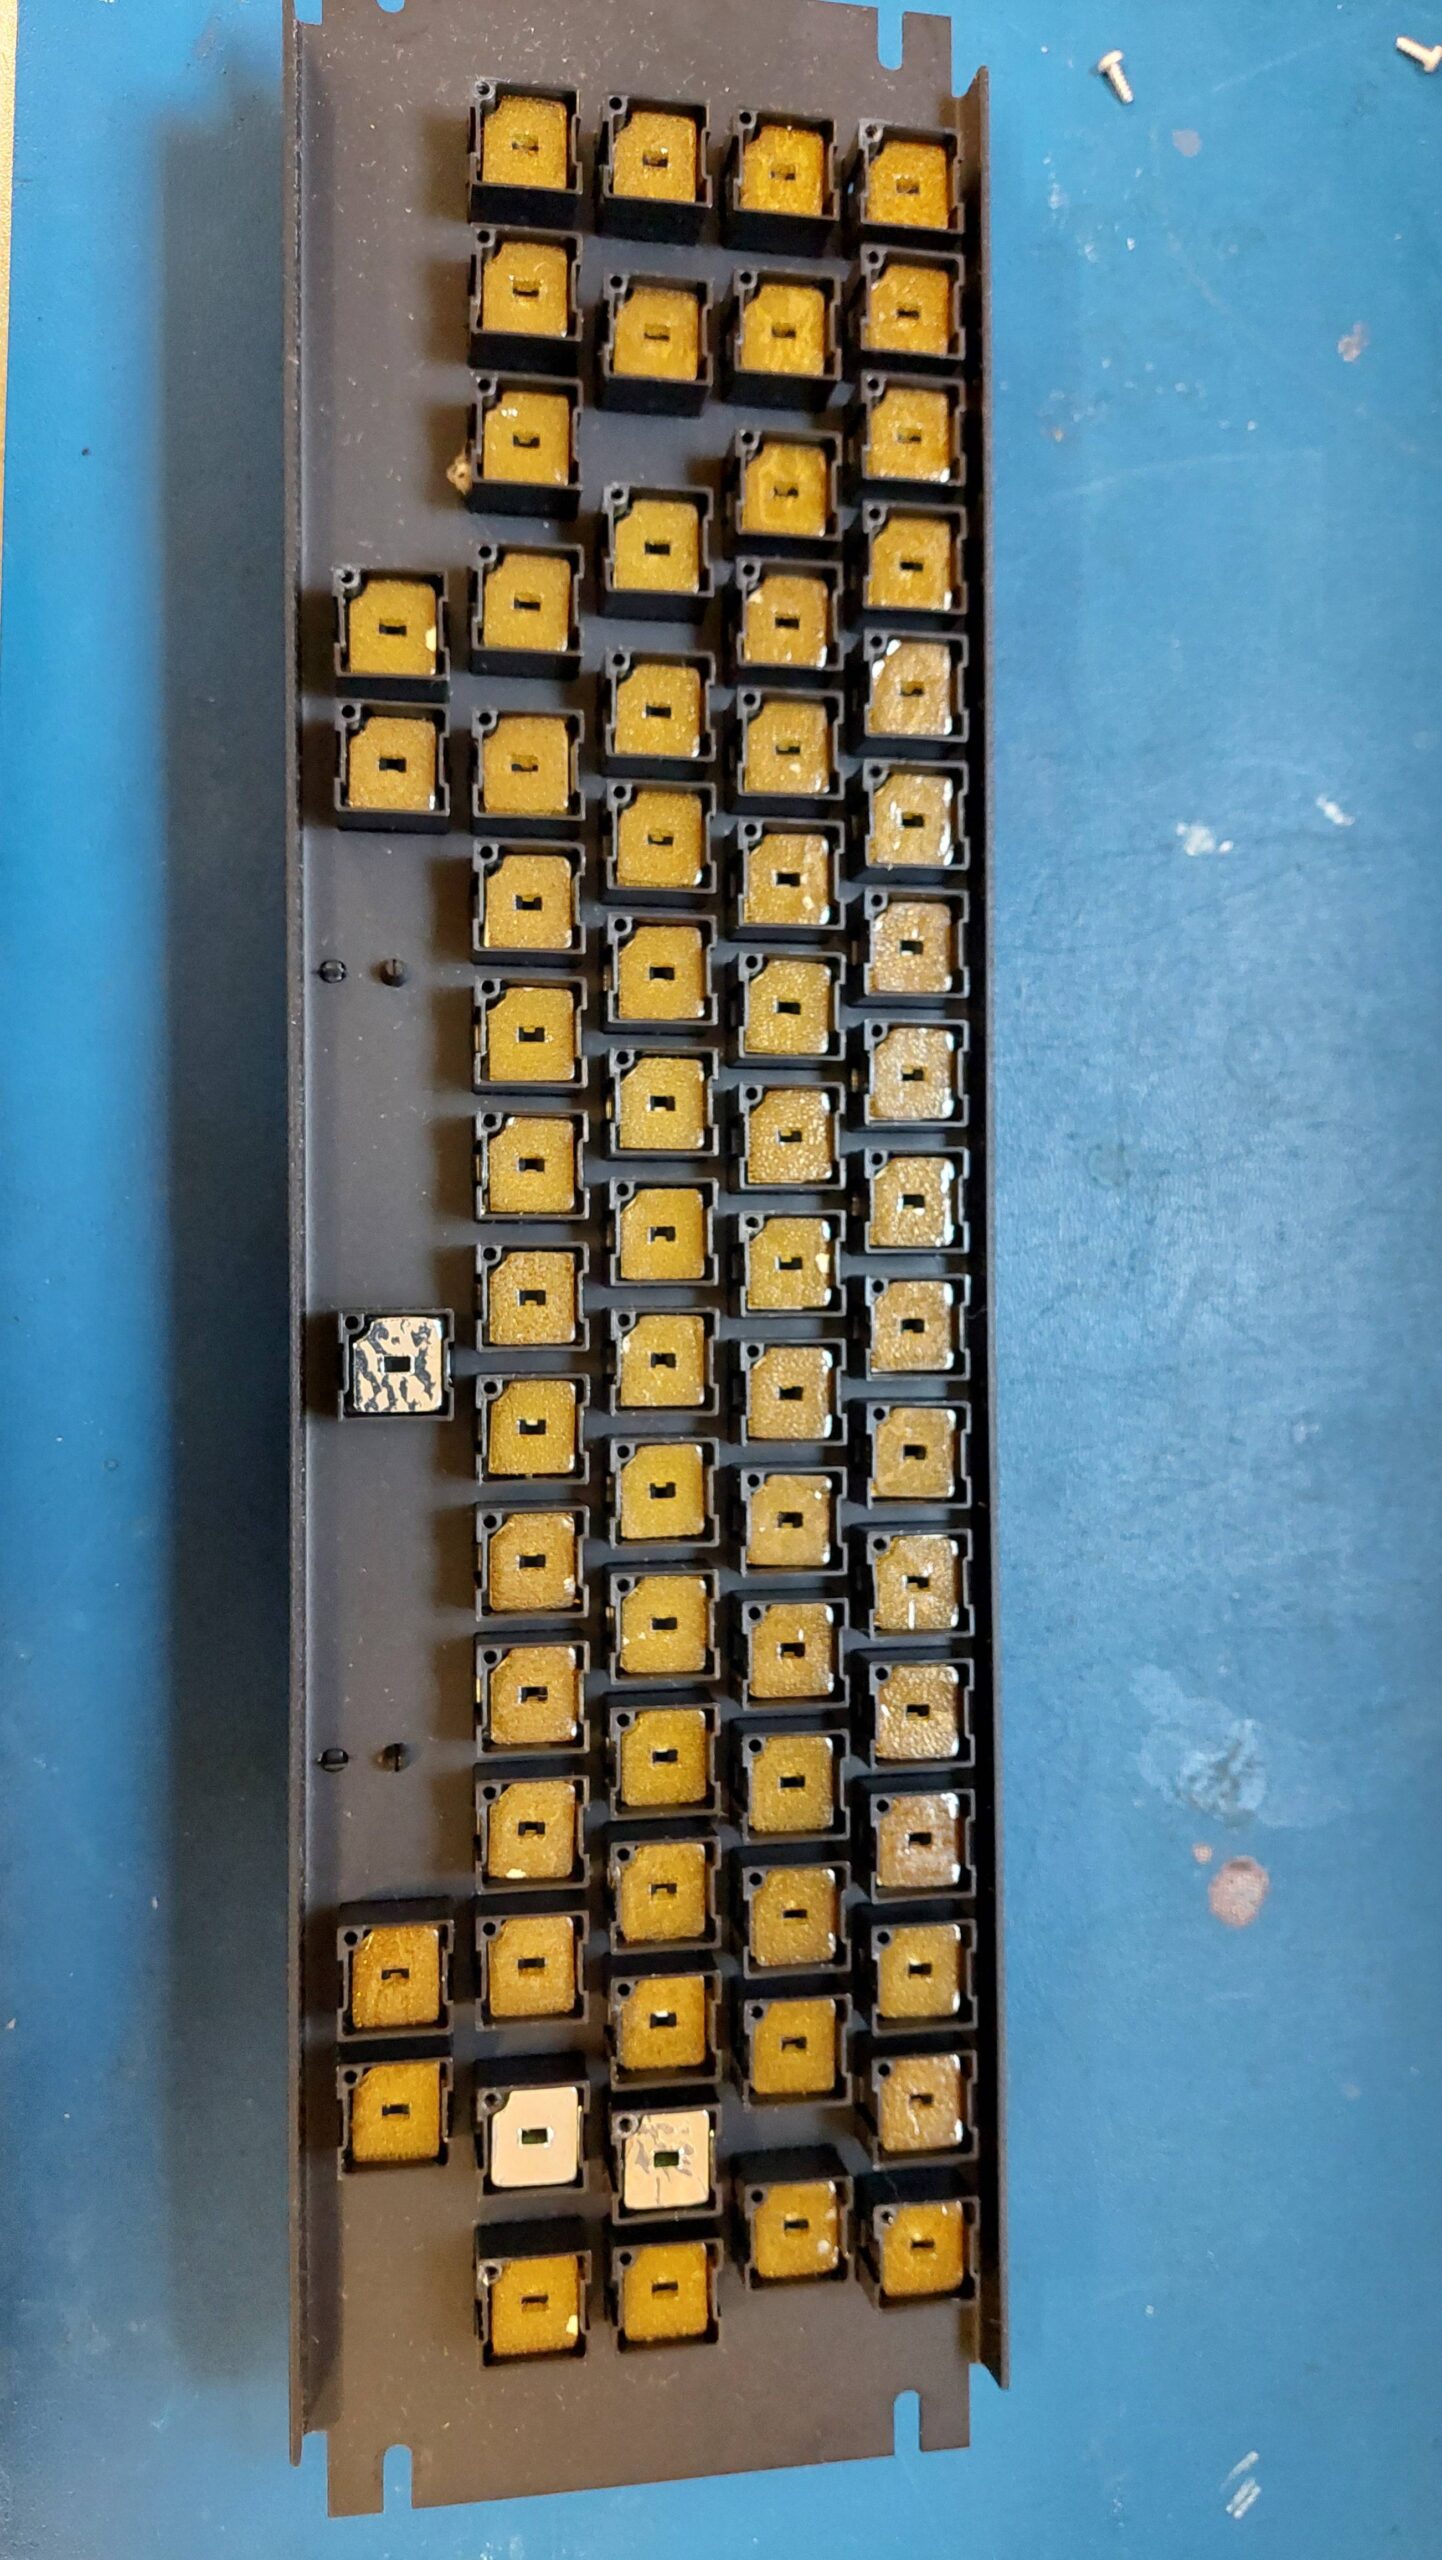
Replacement is laborious and made worse by their complex shape. This is a job that can wait until after i have confirmed that the computer itself is working well.
Until then, i can use a PS/2 keyboard with an adapter to make it appear as an ASCII keyboard. I’ve done this before with a Microlog Little Video Board. Once the pinout was sorted (with some buzzing followed by guesswork) the keyboard was good and i could enter commands using the CRTBUG monitor.

The CRTBUG monitor is a lot easier to use than JBUG so i could do rough write/read tests on the RAM.


I found that the Zenith monitor struggled with the horizontal sync, but the video seems fine on a modern video monitor.

I should see if i can jump to CRTBUG from JBUG.
There are cassette ports on both the processor card and the I/O card. JBUG is made for operation with just the MEK6800D2 so it would use the interface on the processor card. I was not sure what the CRTBUG would do, but when i “punched” to tape it definitely used the one on the processor card.