MicroVAX I Creating a New Image

Noting that some of the available software requires at least MicroVMS 4.5 i thought i would just create a new installation image to install of the physical machine.

This can be done using simh with the benefit of progressive backups. V4.7 seemed like the obvious candidate given that it seems to be well-supported by the VAX/VMS community.

There is a gnarly issue in that the available distribution seems to only be available in TK50 tape format and the Microvax I (even the emulated simh MicroVAX I) does not have a tape drive.

The solution suggested by https://microvax2.org, is to install on an emulated Microvax II and then migrate to the Microvax I. This can be done in one step by doing a standalone backup and restore, or in two steps by moving the disk image to the Microvax I emulation, adjusting it, and then using the standalone backup/restore to migrate to the physical device.

This last step, using the RQDX1 disk controller card and RX50 disk drive in the physical Microvax I, requires about 75 400kB floppy disks. It is a process that grows old quickly!

I opted for the two-step process so i could do some testing on the emulated MicroVAX I before doing the huge backup/restore.

Noting also that the physical Microvax has a 30MB RD52 hard disk and the RQDX1 disk controller i changed the MicroVAX II configuration to use the smaller RD52 drive rather than the RD54.

The migration from MicroVax II to MicroVAX I seemed to work ok. I ran sysgen in the hope that it would tidy up any residual issues.

$ run sys$system:sysgen
SYSGEN>  AUTOCONFIGURE ALL
SYSGEN>  EXIT
I also found that disk space with the RD52 is very tight. I reduced the pagefile.sys and swapfile.sys files to 4000 blocks (2MB) each and bravely ran a purge over the entire disk.
$ sh dev

Device                  Device           Error    Volume         Free  Trans Mnt
 Name                   Status           Count     Label        Blocks Count Cnt
DUA0:                   Mounted              0  MICROVMS          7360    25   1
DUA1:                   Online               0
DUA2:                   Online               0
DUA3:                   Mounted alloc        0  SHARE2         1160898     1   1

Device                  Device           Error
 Name                   Status           Count
OPA0:                   Online               0
RTA0:                   Offline              0
RTB0:                   Offline              0
TTA0:                   Online               0
TTA1:                   Online               0
TTA2:                   Online               0
TTA3:                   Online               0

Device                  Device           Error
 Name                   Status           Count
PUA0:                   Online               1
XQA0:                   Online               0
XQA1:                   Online               0$ sh mem
              System Memory Resources on  6-MAY-2026 15:26:40.61

Physical Memory Usage (pages):     Total        Free      In Use    Modified
  Main Memory (2.00Mb)              4096        1659        2166         271

Slot Usage (slots):                Total        Free    Resident     Swapped
  Process Entry Slots                 27          20           7           0
  Balance Set Slots                   24          19           5           0

Fixed-Size Pool Areas (packets):   Total        Free      In Use        Size
  Small Packet (SRP) List            101          21          80          96
  I/O Request Packet (IRP) List       68           6          62         208
  Large Packet (LRP) List             11           1          10        1584

Dynamic Memory Usage (bytes):      Total        Free      In Use     Largest
  Nonpaged Dynamic Memory         242176       34416      207760       30224
  Paged Dynamic Memory            138240       56528       81712       55520

Paging File Usage (pages):                      Free      In Use       Total
  DISK$MICROVMS:[SYS0.SYSEXE]SWAPFILE.SYS       7040        1056        8096
  DISK$MICROVMS:[SYS0.SYSEXE]PAGEFILE.SYS      12628         164       12792

Of the physical pages in use, 1508 pages are permanently allocated to VMS.
$ run sys$system:sysgen
SYSGEN>  CREATE DISK$MICROVMS:[SYS0.SYSEXE]SWAPFILE.SYS /SIZE=4000
%SYSGEN-I-CREATED, DISK$MICROVMS:[SYS0.SYSEXE]SWAPFILE.SYS;2 created
SYSGEN>  CREATE DISK$MICROVMS:[SYS0.SYSEXE]PAGEFILE.SYS /SIZE=4000
%SYSTEM-W-DEVICEFULL, device full - allocation failure
SYSGEN>  EXIT
$ delete DISK$MICROVMS:[SYS0.SYSEXE]SWAPFILE.SYS;1
$ run sys$system:sysgen
SYSGEN>  CREATE DISK$MICROVMS:[SYS0.SYSEXE]PAGEFILE.SYS /SIZE=4000
%SYSGEN-I-CREATED, DISK$MICROVMS:[SYS0.SYSEXE]PAGEFILE.SYS;2 created
SYSGEN>  EXIT
$ delete DISK$MICROVMS:[SYS0.SYSEXE]PAGEFILE.SYS;1
$ sh dev

Device                  Device           Error    Volume         Free  Trans Mnt
 Name                   Status           Count     Label        Blocks Count Cnt
DUA0:                   Mounted              0  MICROVMS         20260    25   1
DUA1:                   Online               0
DUA2:                   Online               0
DUA3:                   Mounted alloc        0  SHARE2         1160898     1   1

Device                  Device           Error
 Name                   Status           Count
OPA0:                   Online               0
RTA0:                   Offline              0
RTB0:                   Offline              0
TTA0:                   Online               0
TTA1:                   Online               0
TTA2:                   Online               0
TTA3:                   Online               0

Device                  Device           Error
 Name                   Status           Count
PUA0:                   Online               1
XQA0:                   Online               0
XQA1:                   Online               0
$ dir sys$system:*.sys /size

Directory SYS$SYSROOT:[SYSEXE]

PAGEFILE.SYS;2         4000
SWAPFILE.SYS;2         4000

Total of 2 files, 8000 blocks.
$ dir sys$system:*.sys;* /size

Directory SYS$SYSROOT:[SYSEXE]

PAGEFILE.SYS;2         4000
SWAPFILE.SYS;2         4000

$ sh dev

Device                  Device           Error    Volume         Free  Trans Mnt
 Name                   Status           Count     Label        Blocks Count Cnt
DUA0:                   Mounted              0  MICROVMS         23178    25   1
DUA1:                   Online               0
DUA2:                   Online               0
DUA3:                   Mounted alloc        0  SHARE2         1160898     1   1

Device                  Device           Error
 Name                   Status           Count
OPA0:                   Online               0
RTA0:                   Offline              0
RTB0:                   Offline              0
TTA0:                   Online               0
TTA1:                   Online               0
TTA2:                   Online               0
TTA3:                   Online               0

Device                  Device           Error
 Name                   Status           Count
PUA0:                   Online               1
XQA0:                   Online               0
XQA1:                   Online               0

Hopefully, the 10MB or so that is now available is enough to install some languages.

A better solution maybe a second hard drive, but that will involve a very expensive solid state option. An alternative may be to network with an emulated server. That would be a steep learning curve, and it will require a significant investment in an ethernet card.

This gave me a basic working image for MicroVMS 4.7 on the MicroVAX I.

I started by installing the 4 languages that i had chosen: pascal, basic, fortran and C. These were installed automatically on the 8650 emulation so i used following extract from the 8650 installation log as a guide.
 $ @sys$update:vmsinstal basic032 MTA0:


        VAX/VMS Software Product Installation Procedure V4.7    


It is 3-MAY-1998 at 20:01.
Enter a question mark (?) at any time for help.

* Are you satisfied with the backup of your system disk [YES]? yes

Please mount the first volume of the set on MTA0:.
* Are you ready? yes

%MOUNT-I-MOUNTED, BASIC mounted on _795VAX$MTA0:

The following products will be processed:

  BASIC V3.2


        Beginning installation of BASIC V3.2 at 20:01

%VMSINSTAL-I-RESTORE, Restoring product saveset A...
%VMSINSTAL-I-RELMOVED, The products release notes have been successfully moved to SYS$HELP.

                VAX BASIC V3.2 Installation Procedure

   There are three possible installation options. They are described
   as follows: 

   1) Perform a normal installation of BASIC. 

   2) Install VAX/VMS system definitions text library only (10-45 minutes).

   3) Obtain a copy of the BASIC message text for modification. 

* Which option do you want to use [1]: 1
* Do you want to install the BASIC HELP files [YES]? yes
* Do you want to install the VAX/VMS system definitions [YES]? yes
* Do you want to install the sample graphics programs [YES]? yes
* Do you want to purge files replaced by this installation [YES]? yes

%VMSINSTAL-I-RESTORE, Restoring product saveset B...

    ************************************************************************
    If you have VAX GKS V2.0 or later on your system, VAX BASIC V3.2 allows 
    you to use graphics language statements.  The procedure:

        SYS$UPDATE:BASIC$GRAPHICS_IVP.COM

    will verify that VAX BASIC graphics capabilities work on your system.
    You must execute this procedure on a terminal with graphics capabilities.
    ************************************************************************

%VMSINSTAL-I-INSHELP, Installing BASIC Help files
%VMSINSTAL-I-RESTORE, Restoring product saveset C...
%VMSINSTAL-I-INSSTARLET, Installing BASIC system definitions
%VMSINSTAL-I-INSSTARLT1, Requires approximately 10 to 45 minutes
%VMSINSTAL-I-RESTORE, Restoring product saveset D...
%VMSINSTAL-I-INSSAMPLE, Installing sample programs and PICTURE libraries
%VMSINSTAL-I-RESTORE, Restoring product saveset E...
%VMSINSTAL-I-RESTORE, Restoring product saveset F...
%VMSINSTAL-I-SYSDISK, This product creates system disk directory VMI$ROOT:[SYSHLP.EXAMPLES.BASIC].

    *********************************************************************
    A number of sample programs demonstrating BASIC graphics statements
    have been copied to [SYSHLP.EXAMPLES.BASIC].  

    Read [SYSHLP.EXAMPLES.BASIC]BASIC_EXAMPLES.TXT for information on the 
    sample programs provided.
    *********************************************************************

%VMSINSTAL-I-MOVEFILES, Files will now be moved to their target directories...
%VMSINSTAL-I-RUNIVP, Executing installation verification procedure

%VMSINSTAL-I-IVPSUCCESS, VAX BASIC V3.2 Installation test PASSED

        Installation of BASIC V3.2 completed at 20:01


********************************************

        VMSINSTAL procedure done at 20:01


 $ @sys$update:vmsinstal pascal037,passtr034 MTA0:


        VAX/VMS Software Product Installation Procedure V4.7    


It is 3-MAY-1998 at 20:01.
Enter a question mark (?) at any time for help.

* Are you satisfied with the backup of your system disk [YES]? yes

Please mount the first volume of the set on MTA0:.
* Are you ready? yes

%MOUNT-I-MOUNTED, PASCAL mounted on _795VAX$MTA0:

The following products will be processed:

  PASCAL V3.7
  PASSTR V3.4


        Beginning installation of PASCAL V3.7 at 20:01

%VMSINSTAL-I-RESTORE, Restoring product saveset A...
%VMSINSTAL-I-RELMOVED, The products release notes have been successfully moved to SYS$HELP.
 
 
        *-----------------------------------------*
        *    Installation Command Procedure for   *
        *             VAX PASCAL V3.7             *
        *-----------------------------------------*
 
 
* Do you want to purge files replaced by this installation [YES]? yes


    This kit contains a file summarizing the new features, changes,
    restrictions, and compatibility issues in this release of VAX 
    PASCAL.  This file is named PASCAL037.RELEASE_NOTES and is
    placed in SYS$HELP:.  

    This file contains information valuable to VAX PASCAL programmers.  
    Please inform your user community of this file's existence.


    All questions regarding the installation have now been asked.  
    The installation of VAX PASCAL V3.7 will now continue for 
    approximately 5 to 120 minutes depending on your configuration.

%VMSINSTAL-I-RESTORE, Restoring product saveset B...

  Your VMS system will now be updated to include the following new and 
  modified files:

    SYS$HELP:HELPLIB.HLB                   [modified]
    SYS$HELP:PASCAL037.RELEASE_NOTES       [new]
    SYS$LIBRARY:DCLTABLES.EXE              [modified]
    SYS$LIBRARY:LIBDEF.PAS                 [new]
    SYS$LIBRARY:MTHDEF.PAS                 [new]
    SYS$LIBRARY:PASDEF.PAS                 [new]
    SYS$LIBRARY:PASSTATUS.PAS              [new]
    SYS$LIBRARY:SIGDEF.PAS                 [new]
    SYS$MESSAGE:PASCALER1.EXE              [new]
    SYS$MESSAGE:PASCALER2.EXE              [new]
    SYS$SYSTEM:PASCAL.EXE                  [new]

%VMSINSTAL-I-MOVEFILES, Files will now be moved to their target directories...
 
 
        *-----------------------------------------*
        * Installation Verification Procedure for *
        *            VAX PASCAL V3.7              *
        *-----------------------------------------*
 
 
** Successful Installation of VAX Pascal V3.7-254 on  3-May-1998 at 20:01 **

        Installation of PASCAL V3.7 completed at 20:01


        Beginning installation of PASSTR V3.4 at 20:01

%VMSINSTAL-I-RESTORE, Restoring product saveset A...
%VMSINSTAL-I-RELMOVED, The products release notes have been successfully moved to SYS$HELP.
 
 
        *-----------------------------------------------*
        * Installation Command Procedure for VAX PASCAL *
        *     libraries STARLET.PAS and STARLET.PEN     *
        *-----------------------------------------------*
 
 
* Do you want to purge files replaced by this installation [YES]? yes

    This kit contains a file summarizing the new features, changes,
    restrictions, and compatibility issues in this release of the
    VAX PASCAL STARLET library.  This file is named
    PASSTR034.RELEASE_NOTES and will be placed in SYS$HELP:.

    This file contains information valuable to VAX PASCAL programmers.
    Please inform your user community of this file's existence.


    All questions regarding the installation have now been asked.
    The installation of VAX PASCAL STARLET.PAS and STARLET.PEN
    will now continue for approximately 20 to 25 minutes.


    Your VMS system will now be updated to include the following new files.

         SYS$HELP:PASSTR034.RELEASE_NOTES
         SYS$LIBRARY:STARLET.PAS
         SYS$LIBRARY:STARLET.PEN

%VMSINSTAL-I-MOVEFILES, Files will now be moved to their target directories...
 
 
        *-----------------------------------------------*
        *    Installation Verification Procedure for    *
        *            VAX PASCAL STARLET V3.4            *
        *-----------------------------------------------*
 
 
** Successful Installation of VAX PASCAL STARLET libraries **

        Installation of PASSTR V3.4 completed at 20:01


        VMSINSTAL procedure done at 20:01


*****************************************************************


 $ @sys$update:vmsinstal fort048,fhlp048 MTA0:


        VAX/VMS Software Product Installation Procedure V4.7    


It is 3-MAY-1998 at 20:02.
Enter a question mark (?) at any time for help.

* Are you satisfied with the backup of your system disk [YES]? yes

Please mount the first volume of the set on MTA0:.
* Are you ready? yes

%MOUNT-I-MOUNTED, FORT mounted on _795VAX$MTA0:

The following products will be processed:

  FHLP V4.8
  FORT V4.8


        Beginning installation of FHLP V4.8 at 20:02

%VMSINSTAL-I-RESTORE, Restoring product saveset A...

        +-------------------------------------------------------+
        |          Installation of VAX FORTRAN V4               |
        |                     FORTRAN HELP                      |
        +-------------------------------------------------------+


        This  kit  contains two separate  HELP  files,  a  large
        version (approximately 600 blocks) including information
        on FORTRAN  language  features,  and  a  smaller version
        (approximately 100 blocks)  describing only the  FORTRAN
        command.  Both versions contain on-line release notes.

* Do you want to install the larger version of FORTRAN HELP [YES]? yes

        Your  VMS  system  will now be updated  to  include  the
        following new and modified file(s):

        SYS$HELP:HELPLIB.HLB            [modified]

%VMSINSTAL-I-MOVEFILES, Files will now be moved to their target directories...

        Installation of FHLP V4.8 completed at 20:02


        Beginning installation of FORT V4.8 at 20:02

%VMSINSTAL-I-RESTORE, Restoring product saveset A...
%VMSINSTAL-I-REWIND, The tape will be rewound to try again.
* Do you want to purge files replaced by this installation [YES]? yes
* Do you wish to have the VAX FORTRAN compiler installed [YES]? yes

        +-------------------------------------------------------+
        |          Installation of VAX FORTRAN V4               |
        |                       Compiler                        |
        +-------------------------------------------------------+


        This kit contains an Installation Verification Procedure
        to  verify the correct installation of the  VAX  FORTRAN
        compiler.

* Do you want to run the IVP after the installation [YES]? yes

        This kit contains a file, VAXFORUPD.MEM, summarizing the
        changes made  to the VAX FORTRAN compiler since its last
        release.

* How many copies would you like to print [0]: 0

        A new FORSYSDEF.TLB is available with this installation.

        In order to build your FORSYSDEF library, this procedure
        requires at least 5500 blocks of available  disk  space,
        most  of  which  is  used for temporary work files.  The
        FORSYSDEF library itself will  take  approximately  1500
        blocks  of  disk space upon completion of this procedure
        and will be placed in your SYS$LIBRARY area. 

                                  Note

        Before installing the kit, be sure to have read  section
        1.5.1.1, UPDATING FORSYSDEF.  It addresses  the question
        of when a new FORSYSDEF.TLB should be built.  

* Do you wish to build a new FORSYSDEF.TLB [NO]? yes

        Building FORSYSDEF.  This should take about 20 minutes.


        Your  VMS  system  will now be updated  to  include  the
        following new and modified file(s):


        SYS$SYSTEM:FORTRAN.EXE          [new]
        SYS$MESSAGE:FORTERR1.EXE        [new]
        SYS$MESSAGE:FORTERR2.EXE        [new]
        SYS$LIBRARY:FORTV4CLD.CLD       [new]
        SYS$TEST:FORTTEST.COM           [new]
        SYS$TEST:FORSYSDEFTST.COM       [new]
        SYS$LIBRARY:DCLTABLES.EXE       [modified]
        SYS$UPDATE:VAXFORUPD.MEM        [new]
        SYS$LIBRARY:FORSYSDEF.TLB       [new]

%VMSINSTAL-I-MOVEFILES, Files will now be moved to their target directories...

        +-------------------------------------------------------+
        |           Verification Command Procedure for          |
        |                      VAX FORTRAN                      |
        +-------------------------------------------------------+

VAX FORTRAN V4.8-276 TEST PASSED

        Installation of FORT V4.8 completed at 20:02


        VMSINSTAL procedure done at 20:02


*******************************************************************************
 $ @sys$update:vmsinstal vaxc024 MTA0:


        VAX/VMS Software Product Installation Procedure V4.7    


It is 3-MAY-1998 at 20:29.
Enter a question mark (?) at any time for help.

* Are you satisfied with the backup of your system disk [YES]? yes

Please mount the first volume of the set on MTA0:.
* Are you ready? yes

%MOUNT-I-MOUNTED, VAXC02 mounted on _795VAX$MTA0:

The following products will be processed:

  VAXC V2.4


        Beginning installation of VAXC V2.4 at 20:29

%VMSINSTAL-I-RESTORE, Restoring product saveset A...
%VMSINSTAL-I-RELMOVED, The products release notes have been successfully moved to SYS$HELP.
 
        VAX C V2.4-026 Installation is commencing ...
 
* Do you want to run the IVP after the installation [YES]? no
* Do you want to purge files replaced by this installation [YES]? yes
* Do you want to extract .H files from the text library [YES]? yes

 
 All the questions regarding the installation have 
 now been asked.  The installation will now continue
 for another 20 minutes.
 
%VMSINSTAL-I-RESTORE, Restoring product saveset B...
        VAX C V2.4-026 : copying images, libraries and release notes.
        VAX C V2.4-026 : extracting .H files.
 
        A summary of the Software Performance Reports (SPRs) for this release
        can be found in the file SYS$LIBRARY:VAXCSPR.DAT.
 
 
        VAX C V2.4-026 Installation is completed.
 
 
        Your VMS system will now be updated to include the following new
        and modified files:
 
        SYS$SYSTEM:VAXC.EXE             [new]
        SYS$LIBRARY:VAXCDEF.TLB         [new]
        SYS$LIBRARY:VAXCSPR.DAT         [new]
        SYS$MESSAGE:VAXCERR.EXE         [new]
        SYS$HELP:VAXC024.RELEASE_NOTES  [new]
        SYS$HELP:HELPLIB.HLB            [modified]
        SYS$LIBRARY:DCLTABLES.EXE       [modified]
        SYS$EXAMPLES:VAXCIVPP.C         [new]
        SYS$EXAMPLES:VAXCIVPC.C         [new]
%VMSINSTAL-I-MOVEFILES, Files will now be moved to their target directories...

        Installation of VAXC V2.4 completed at 20:29


        VMSINSTAL procedure done at 20:29

VAX Basic and VAX Fortran played nicely right from the start. VAX pascal 3.7 failed test compilations with an internal error. VAX C 2.4 required configuration files to link – apparently because of the absence of a library in a particular format. I tried different versions but got the same result. The C issue does have a workaround; it seems that the VMSCRTL.OBJ file is absent from the system – perhaps because i am using MicroVMS rather than VMS.

$ create test.c
#include <stdio.h>

int main() {
    printf("Hello, World! In C\n");
    return 1;
}
 Exit
$ cc test


$ link test
%LINK-W-NUDFSYMS, 2 undefined symbols:
%LINK-I-UDFSYM,         C$MAIN
%LINK-I-UDFSYM,         PRINTF
%LINK-W-USEUNDEF, undefined symbol C$MAIN referenced
        in psect $CODE offset %X00000006
        in module TEST file SYS$SYSROOT:[SYSMGR]TEST.OBJ;2
%LINK-W-USEUNDEF, undefined symbol PRINTF referenced
        in psect $CODE offset %X00000013
        in module TEST file SYS$SYSROOT:[SYSMGR]TEST.OBJ;2

$ create test.opt
SYS$LIBRARY:VAXCRTL/SHAREABLE

$ link test, test/options

$ run test
Hello, World! In C

The pascal issue was a mystery; i wondered if it was related to using a MicroVAX II installation on a MicroVAX I. I started reading about autogen and sysgen, and found a myriad of options described in what felt like a foreign language. It was overwhelming.

I am not proud, but i chose a 2026 solution in the form of AI – Gemini. It was not always correct, but i was able to paste in screen dumps which it used to make further corrections. In a couple of cases it broke the system, but that was ok because, working with an emulator, it is easy to take system disk snapshots and backtrack. Gemini gave quite specific instructions about what parameters to change and the process for updating the system. After a couple of hours it had seemingly resolved the issue with the pascal compiler internal issue.

The changes were as follows.
Comparing files working_params.dat and OLD_PARAMS.DAT
***** working_params.dat
!
VERSION="V4.7    "
CPUTYPE=7
SID=117441793
WSTYPE=0
MEMSIZE=4096
DISKSPEED=1
***** OLD_PARAMS.DAT
!
VERSION=" KG     "
CPUTYPE=8
SID=134217728
WSTYPE=0
MEMSIZE=32768
DISKSPEED=1
*****

***** working_params.dat
DISKSIZE=60480
NUM_DISK=4
NUM_TAPE=0
NUM_SCOM=2
NUM_CARD=0
NUM_TERM=7
NUM_LP=0
***** OLD_PARAMS.DAT
DISKSIZE=60480
NUM_DISK=3
NUM_TAPE=0
NUM_SCOM=1
NUM_CARD=0
NUM_TERM=15
NUM_LP=0
*****

***** working_params.dat
NUM_REALTIME=0
NUM_BUS=1
NUM_MAILBOX=0
***** OLD_PARAMS.DAT
NUM_REALTIME=0
NUM_BUS=2
NUM_MAILBOX=0
*****

***** working_params.dat
NUM_CI=0
NUM_ETHERNET=2
NUM_SERVER=1
NUM_HOST=1
DRIVER_NPAGEDYN=93886
DECNET="true"
***** OLD_PARAMS.DAT
NUM_CI=0
NUM_ETHERNET=1
NUM_SERVER=2
NUM_HOST=1
DRIVER_NPAGEDYN=107671
DECNET="true"
*****

***** working_params.dat
PEDRIVER_LOADED="false"
! Parameters specified in SYS$SYSTEM:OLDSITE2.DAT
! Parameters specified in SYS$SYSTEM:OLDSITE3.DAT
ACP_SWAPFLGS=14
TIMEPROMPTWAIT=65535
! Parameters specified in SYS$SYSTEM:OLDSITE4.DAT
DISK_QUORUM="                "
SCSNODE="        "
TTY_DEFCHAR2=4106
! Parameters specified in SYS$SYSTEM:VMSPARAMS.DAT
***** OLD_PARAMS.DAT
PEDRIVER_LOADED="false"
! Parameters specified in SYS$SYSTEM:VMSPARAMS.DAT
*****

***** working_params.dat
VMS$ACP_DATACHECK=2
VMS$ACP_MAXREAD=6
VMS$ACP_SWAPFLGS=14
***** OLD_PARAMS.DAT
VMS$ACP_DATACHECK=2
VMS$ACP_MAXREAD=12
VMS$ACP_SWAPFLGS=14
*****

***** working_params.dat
VMS$ACP_SYSACC=4
VMS$DUMPFILE=0
VMS$GBLPAGES=1415
VMS$GBLSECTIONS=52
VMS$IJOBLIM=8
VMS$IRPCOUNT=30
VMS$IRPCOUNTV=800
VMS$LGI_BRK_TMO=0
***** OLD_PARAMS.DAT
VMS$ACP_SYSACC=4
VMS$IRPCOUNT=30
VMS$IRPCOUNTV=2000
VMS$LGI_BRK_TMO=0
*****

***** working_params.dat
VMS$LGI_HID_TIM=0
VMS$LOCKIDTBL=40
VMS$LRPCOUNT=8
***** OLD_PARAMS.DAT
VMS$LGI_HID_TIM=0
VMS$LRPCOUNT=8
*****

***** working_params.dat
VMS$MPW_LOLIMIT=120
VMS$NPAGEDYN=120000
VMS$NPAGEVIR=256000
VMS$RESHASHTBL=20
VMS$RJOBLIM=10
VMS$SCSBUFFCNT=3
VMS$SCSRESPCNT=20
VMS$SRPCOUNT=60
VMS$SRPCOUNTV=1200
VMS$SWPOUTPGCNT=80
***** OLD_PARAMS.DAT
VMS$MPW_LOLIMIT=120
VMS$SRPCOUNT=60
VMS$SRPCOUNTV=3000
VMS$SWPOUTPGCNT=80
*****

***** working_params.dat
VMS$VMSIMAGES_GBLSECTIONS=17
! Parameters specified in SYS$SYSTEM:MODPARAMS.DAT
ADD_VIRTUALPAGECNT = 10000  ! Give the compiler more "virtual" room
MIN_PGFLQUOTA = 10000       ! Ensure your user account can use it
MIN_GBLPAGES = 3000
MIN_GBLSECTIONS = 100
MIN_VIRTUALPAGECNT = 12000
!
***** OLD_PARAMS.DAT
VMS$VMSIMAGES_GBLSECTIONS=17
!
! This data file should NOT be modified.  Users wishing to alter the
! data in this file should modify SYS$SYSTEM:MODPARAMS.DAT instead.
!
*****

***** working_params.dat
! This data file should NOT be modified.  Users wishing to alter the
! data in this file should modify SYS$SYSTEM:MODPARAMS.DAT instead.
!
***** OLD_PARAMS.DAT
*****

Memory size and CPU Type were obvious ones, but others were beyond me. MIN_GBLSECTIONS=100 was the last change that i made to get the Pascal compiler working.

But then, maybe it was not actually fixed. At random the error would return, and then, just as randomly, fix itself. A different conversation with Gemini suggested that the emulation was potentially part of the issue.

Throttle SIMH (The "Race Condition" Fix):If your host PC is very fast, SIMH can process instructions faster than the emulated VMS 4.7 clock/interrupt handlers expect, causing internal timing errors in the compiler's memory management.In your SIMH configuration file (or at the sim> prompt), try:

textsim> SET THROTTLE 1M

Use code with caution.(This slows the virtual VAX down to ~1 MIPS, closer to a real MicroVAX I speed, which often stabilizes older compilers).

Remarkably, this does seem to have settled the issue down. I have set the throttle to 300k as per the option in the microvax1.ini file. I cannot be sure whether the various other “optimisations” mattered at all!

I ended up sticking with earlier versions of C and Pascal just to minimise consumption of disk space.

I turned off networking via the SYS$SYSTEM:SYSTARTUP.COM file. The networking component could be removed. Practically, the system is already struggling so it is unlikely that i will add a network card unless i find more disk space and memory at a sensible cost.

I have less than 5MB of disk space left, but that should be enough to play with the compilers.

For the record, my microvax1.ini file is:
; ================================================
; microvax1.ini
; ================================================
;
; KD32 CPU
; 2 MSV11-QA = 2MB Memory (or 4 MSV11-PL)
; DZV11 Four-Channel Asynchronous Serial Interface
; RQDX1 Floppy/Fixed Disk Controller
; RX50 400KB 5.25" Dual Floppy Drive
; RD52 31MB 5.25" Fixed Disk
; DEQNA Ethernet Network Adapter

SET QUIET

SET CONSOLE LOG=uVMS_gen_installed_001.log

SET CPU IDLE=VMS

; Uncomment the next line if you want a more realistic MicroVAX I speed
SET THROTTLE 300K 
; This seems to help reduce pascal compiler errors.

SET CPU 2M

; The RD52 at 30MB is the largest drive supported by the RQDX1 Floppy/Fixed Disk Controller
SET RQ0 RD52
; Becomes DUA0:   
        
ATT RQ0 MicroVMS_47.rd52 
; This originally came from the MicroVAX II emulation.

SET RQ1 RX50
; Becomes DUA1:

SET RQ2 RX50
; Becomes DUA2:

SET RQ3 ENABLE
SET RQ3 RD52
; Becomes DUA3:

; This image is a copy of a drive on the 8650 emulation.  
; It has the software kits.

ATT RQ3 share2_795.vhd 

SET DZ ENABLE  
; The real machine does not have this card.
SET DZ LINES=4
ATT DZ 6666

SET LPT DIS
SET RL DIS 

SET XQ ENA    
; The real machine does not have this card.
SET XQ TYPE=DEQNA

BOOT RQ0

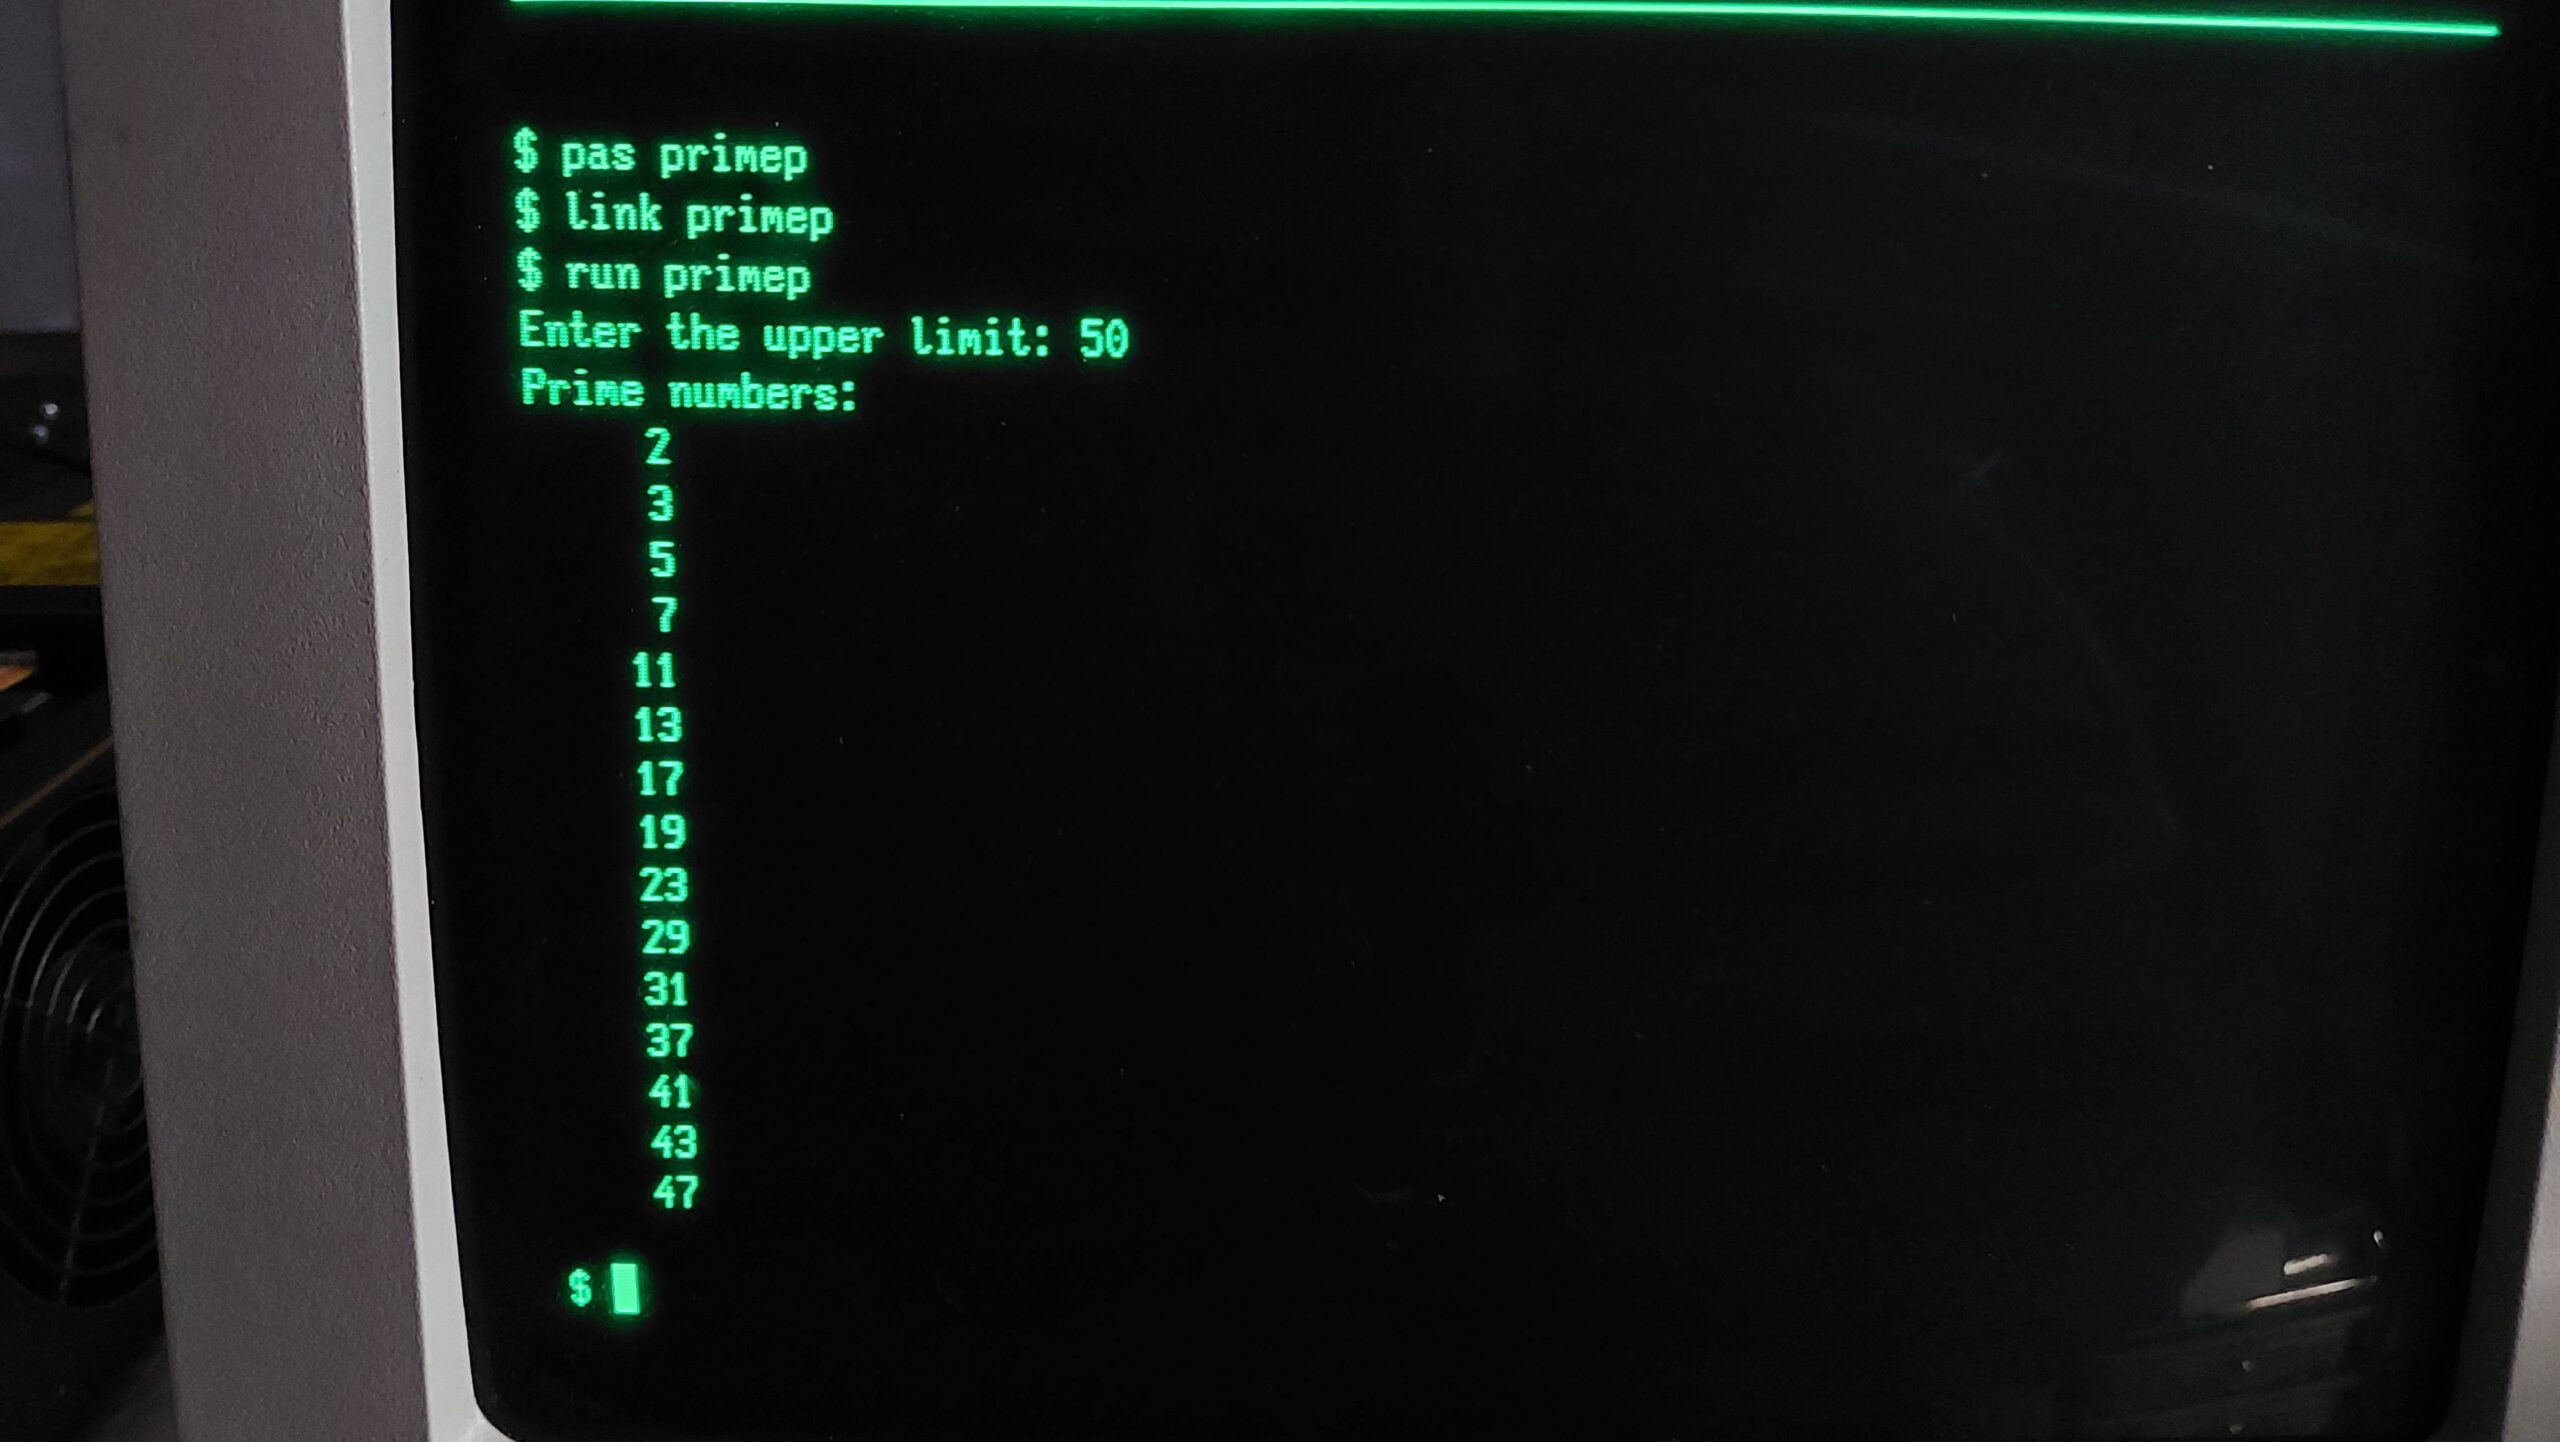
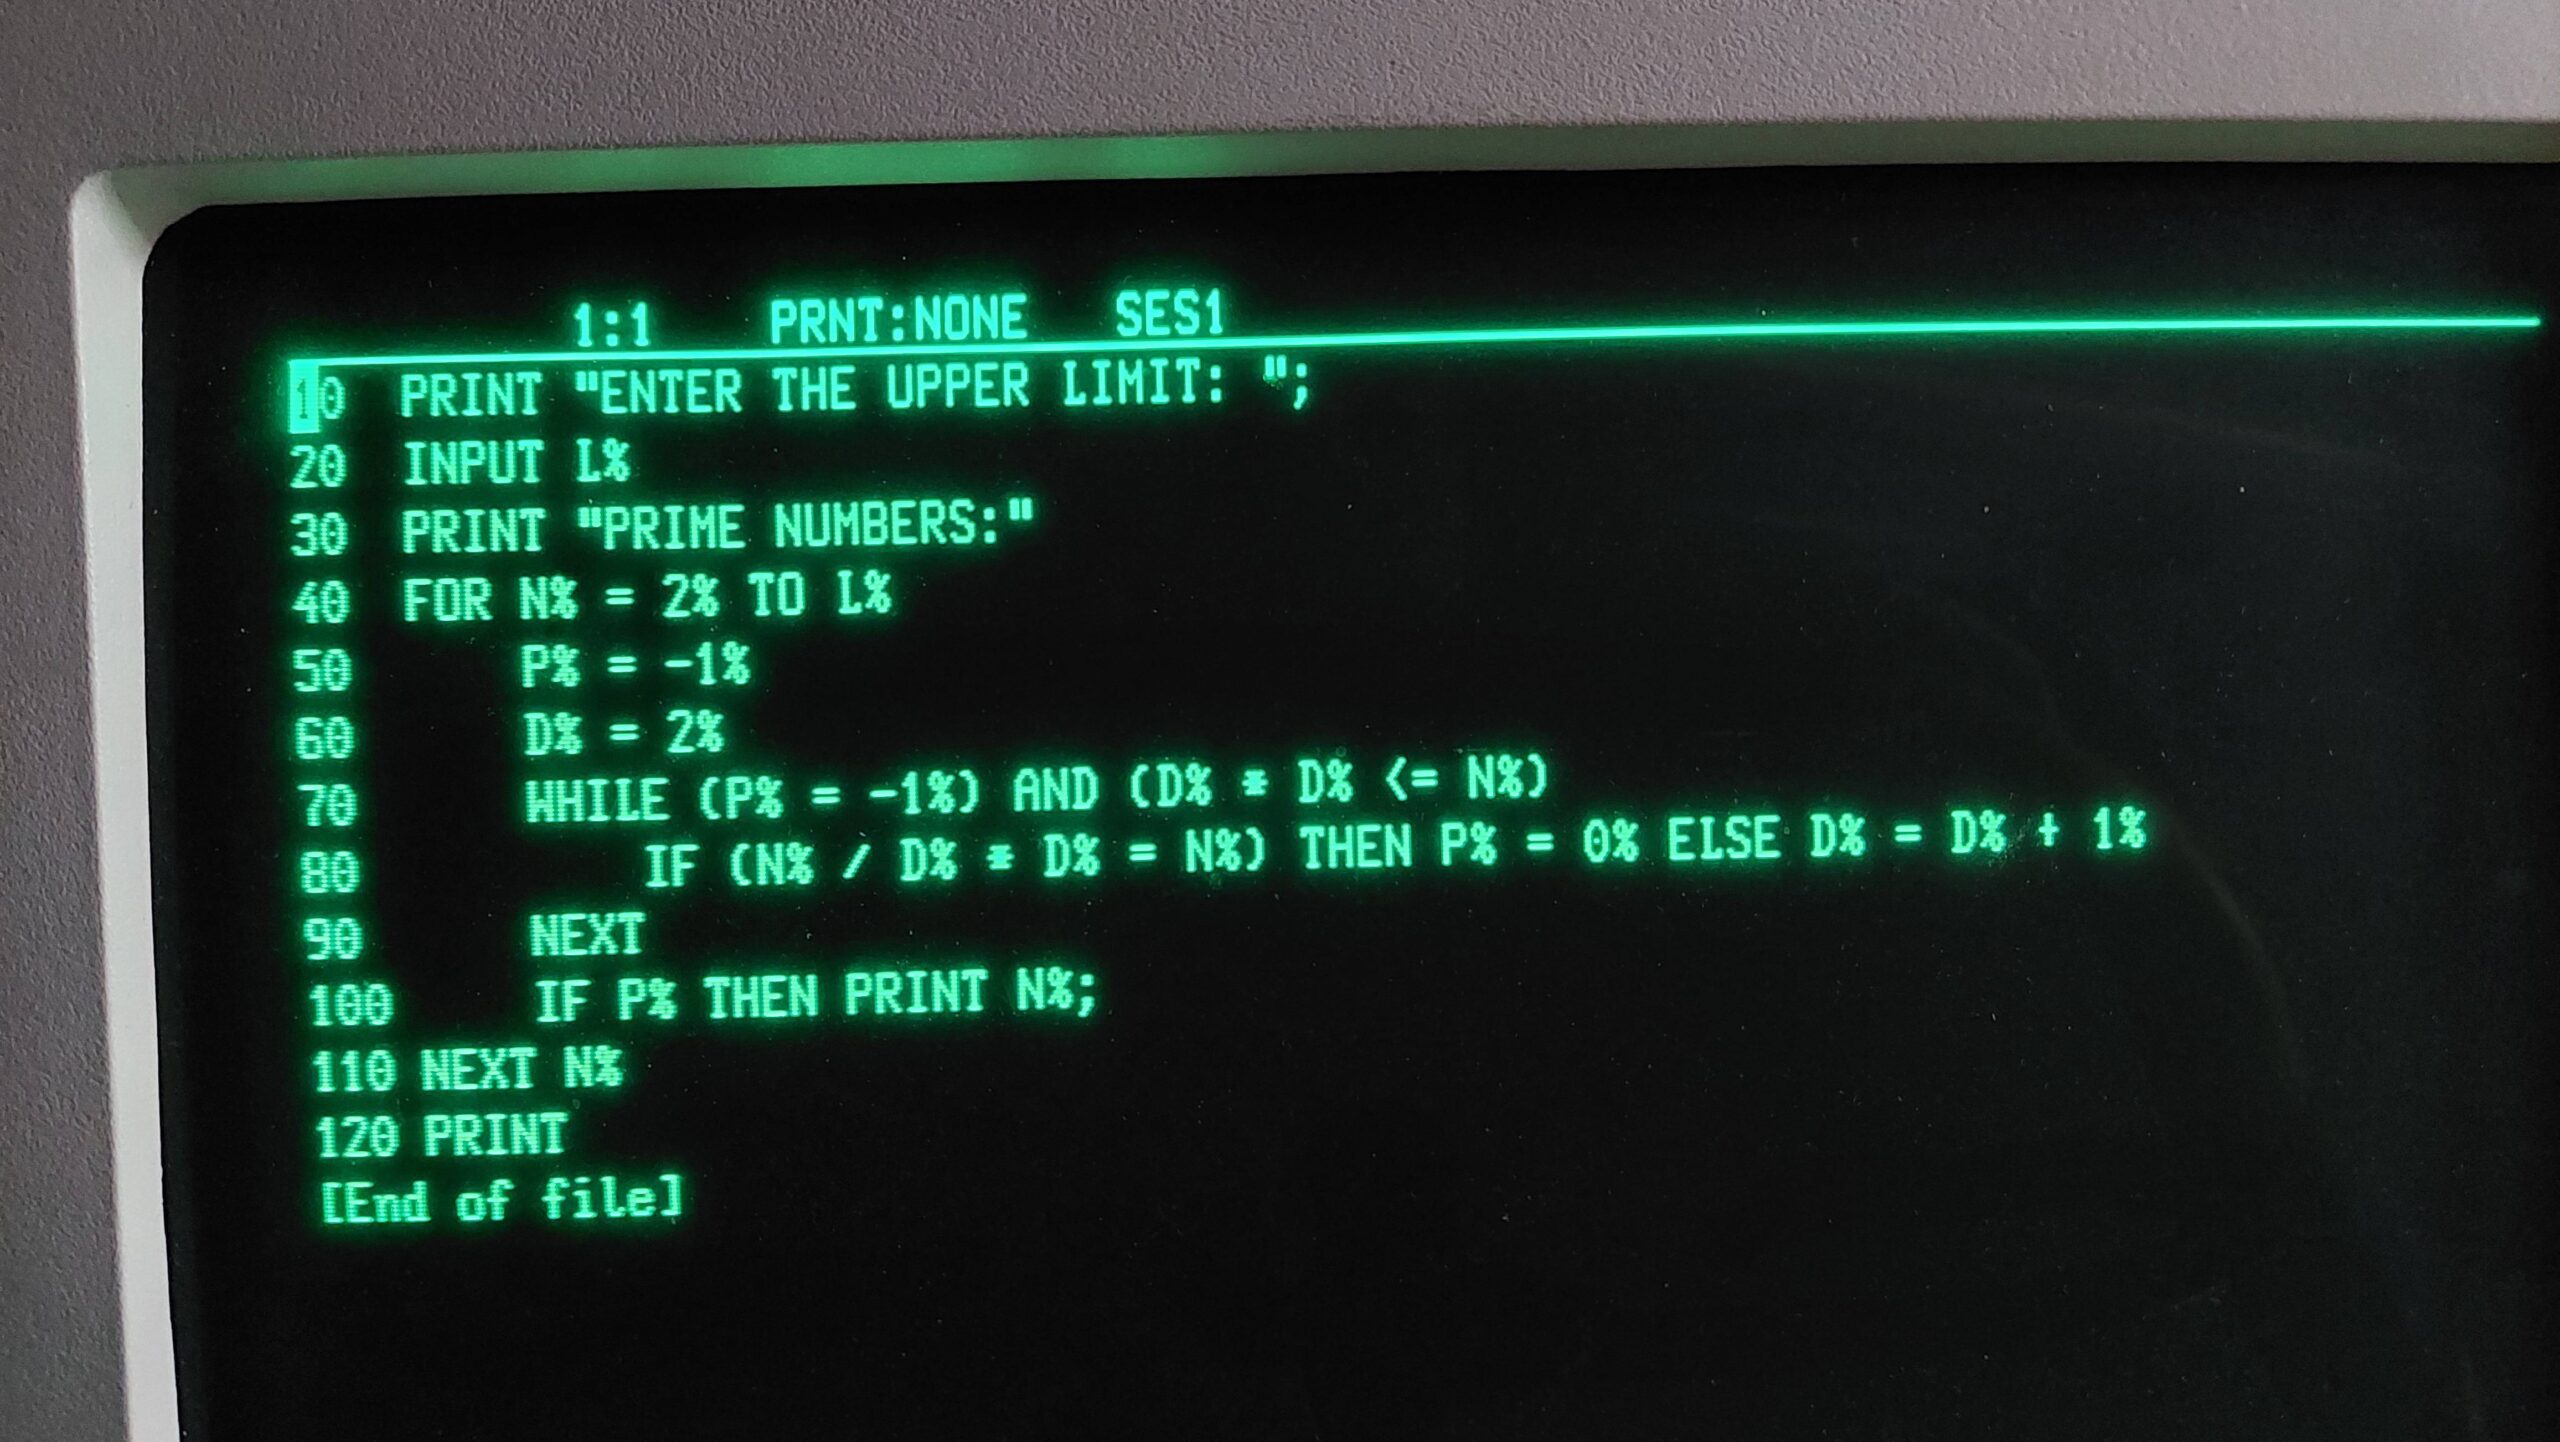
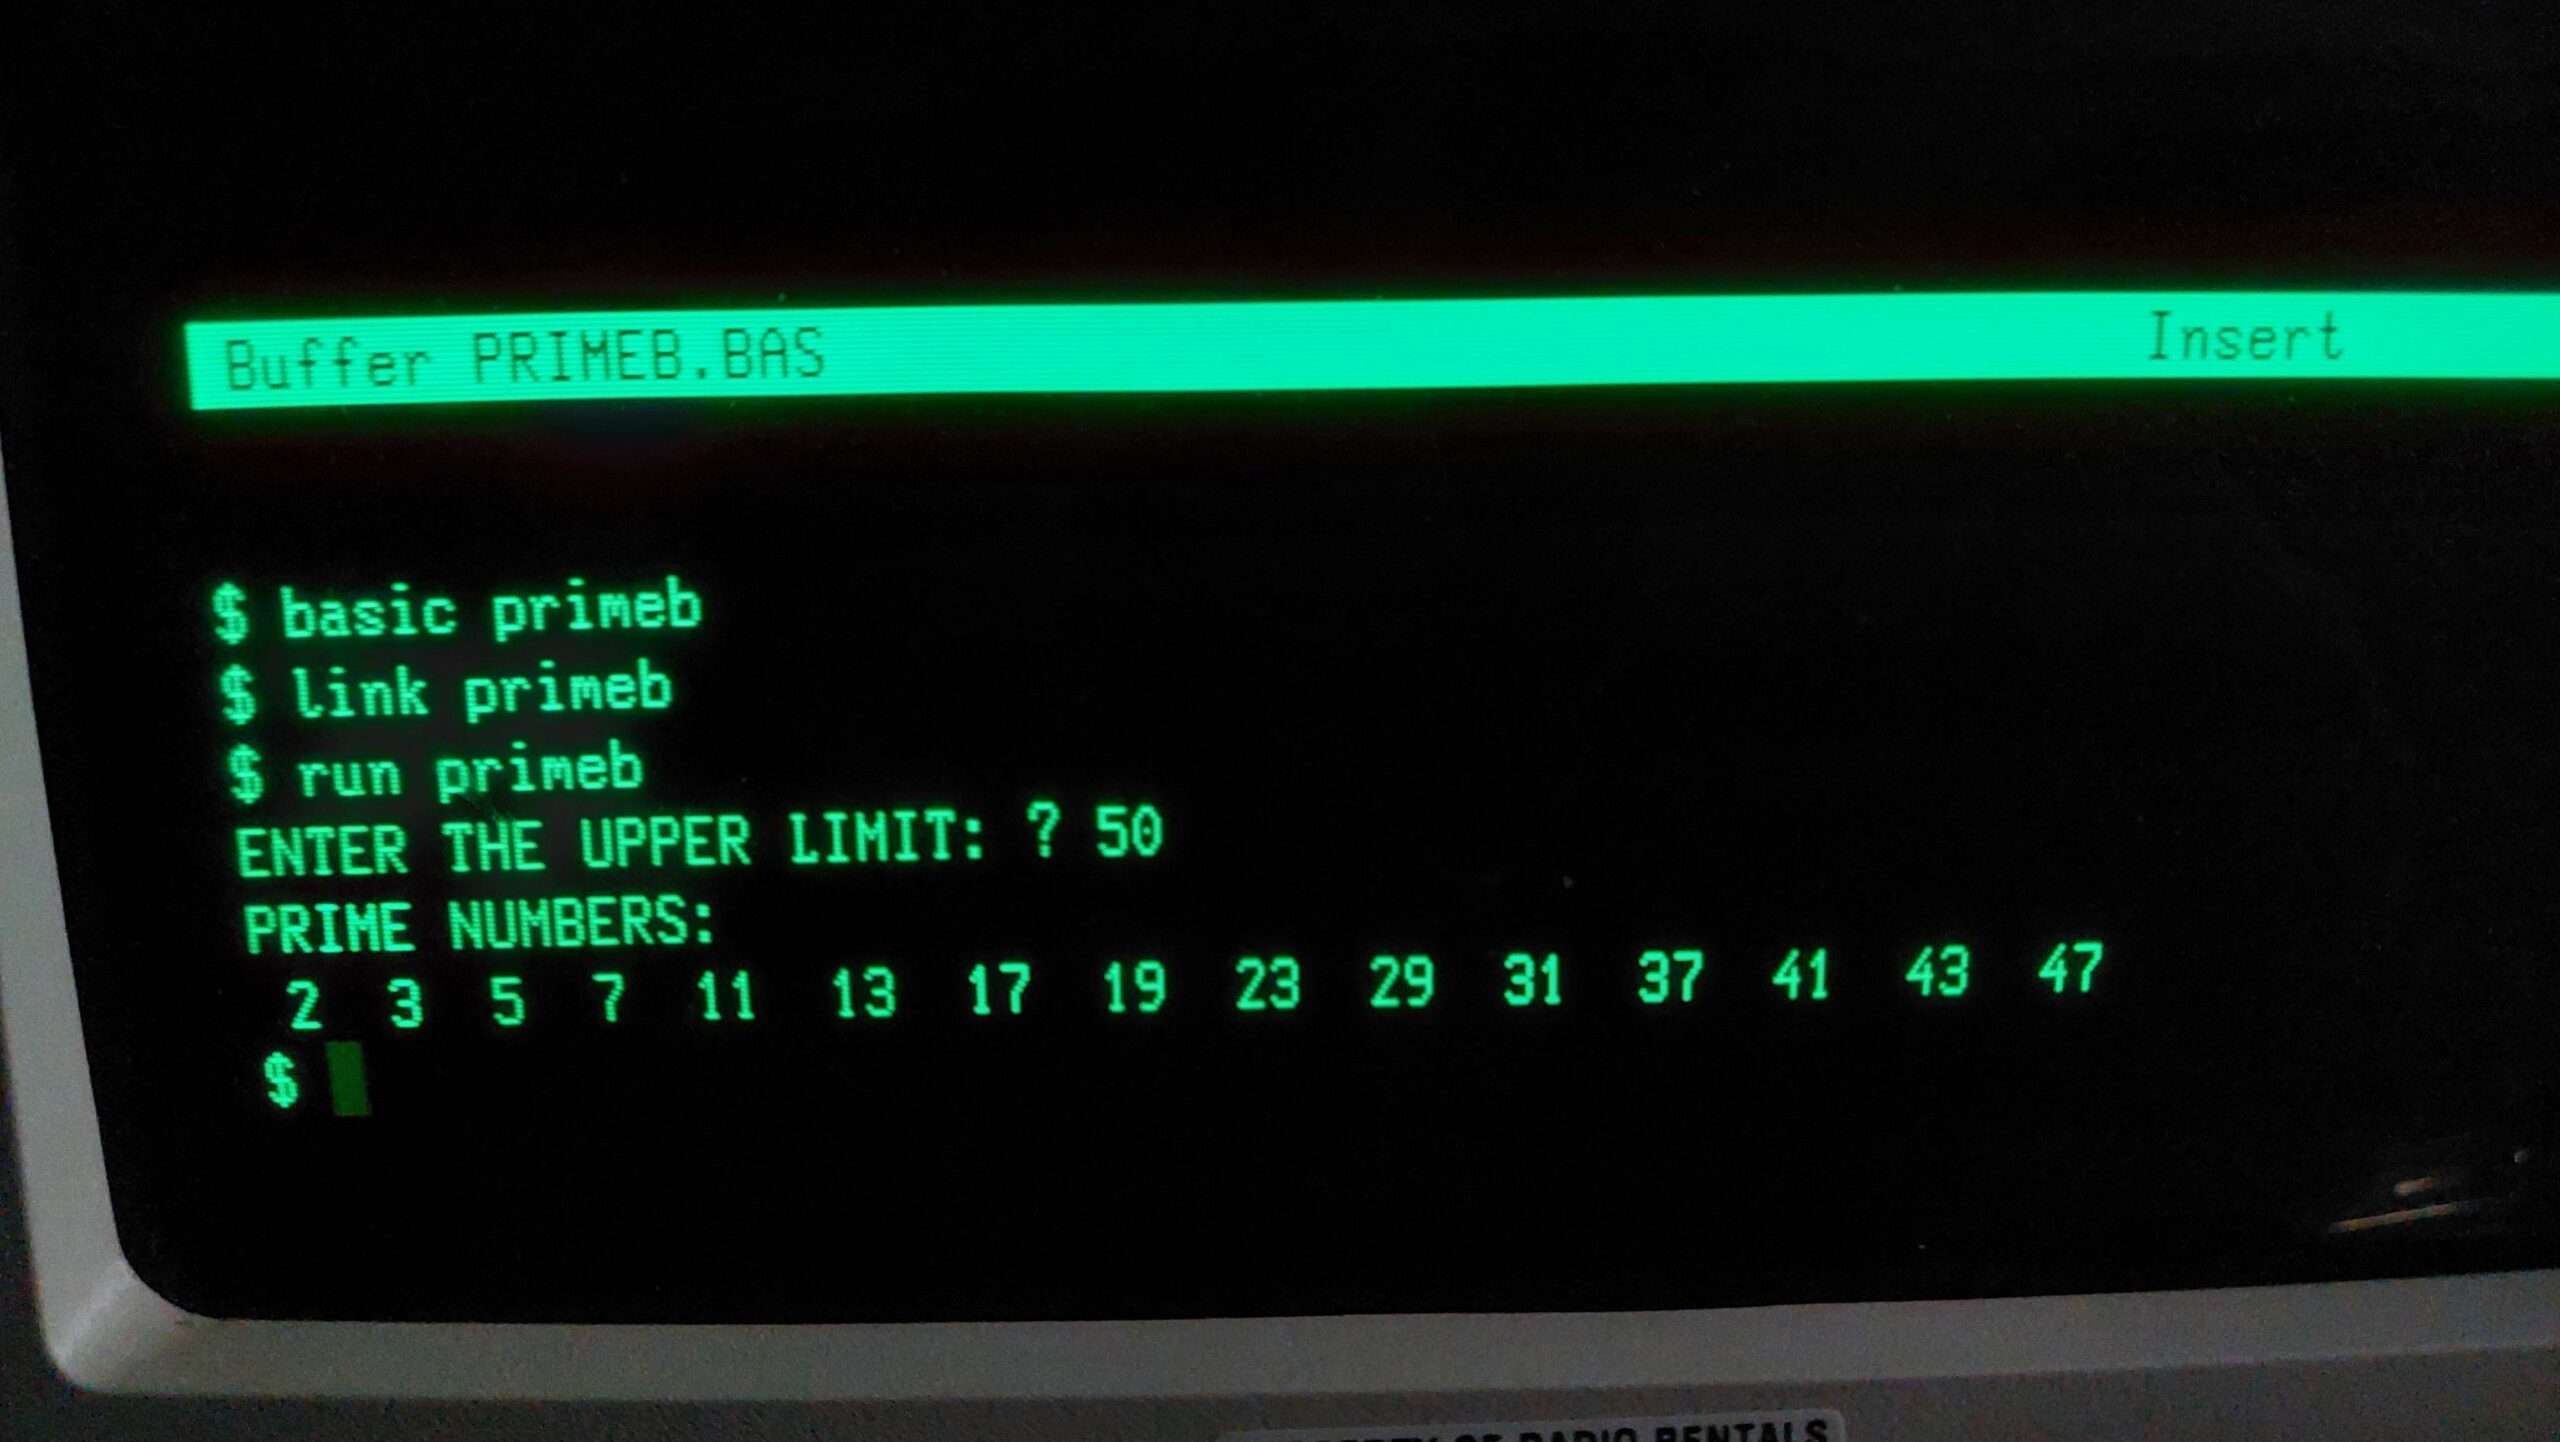
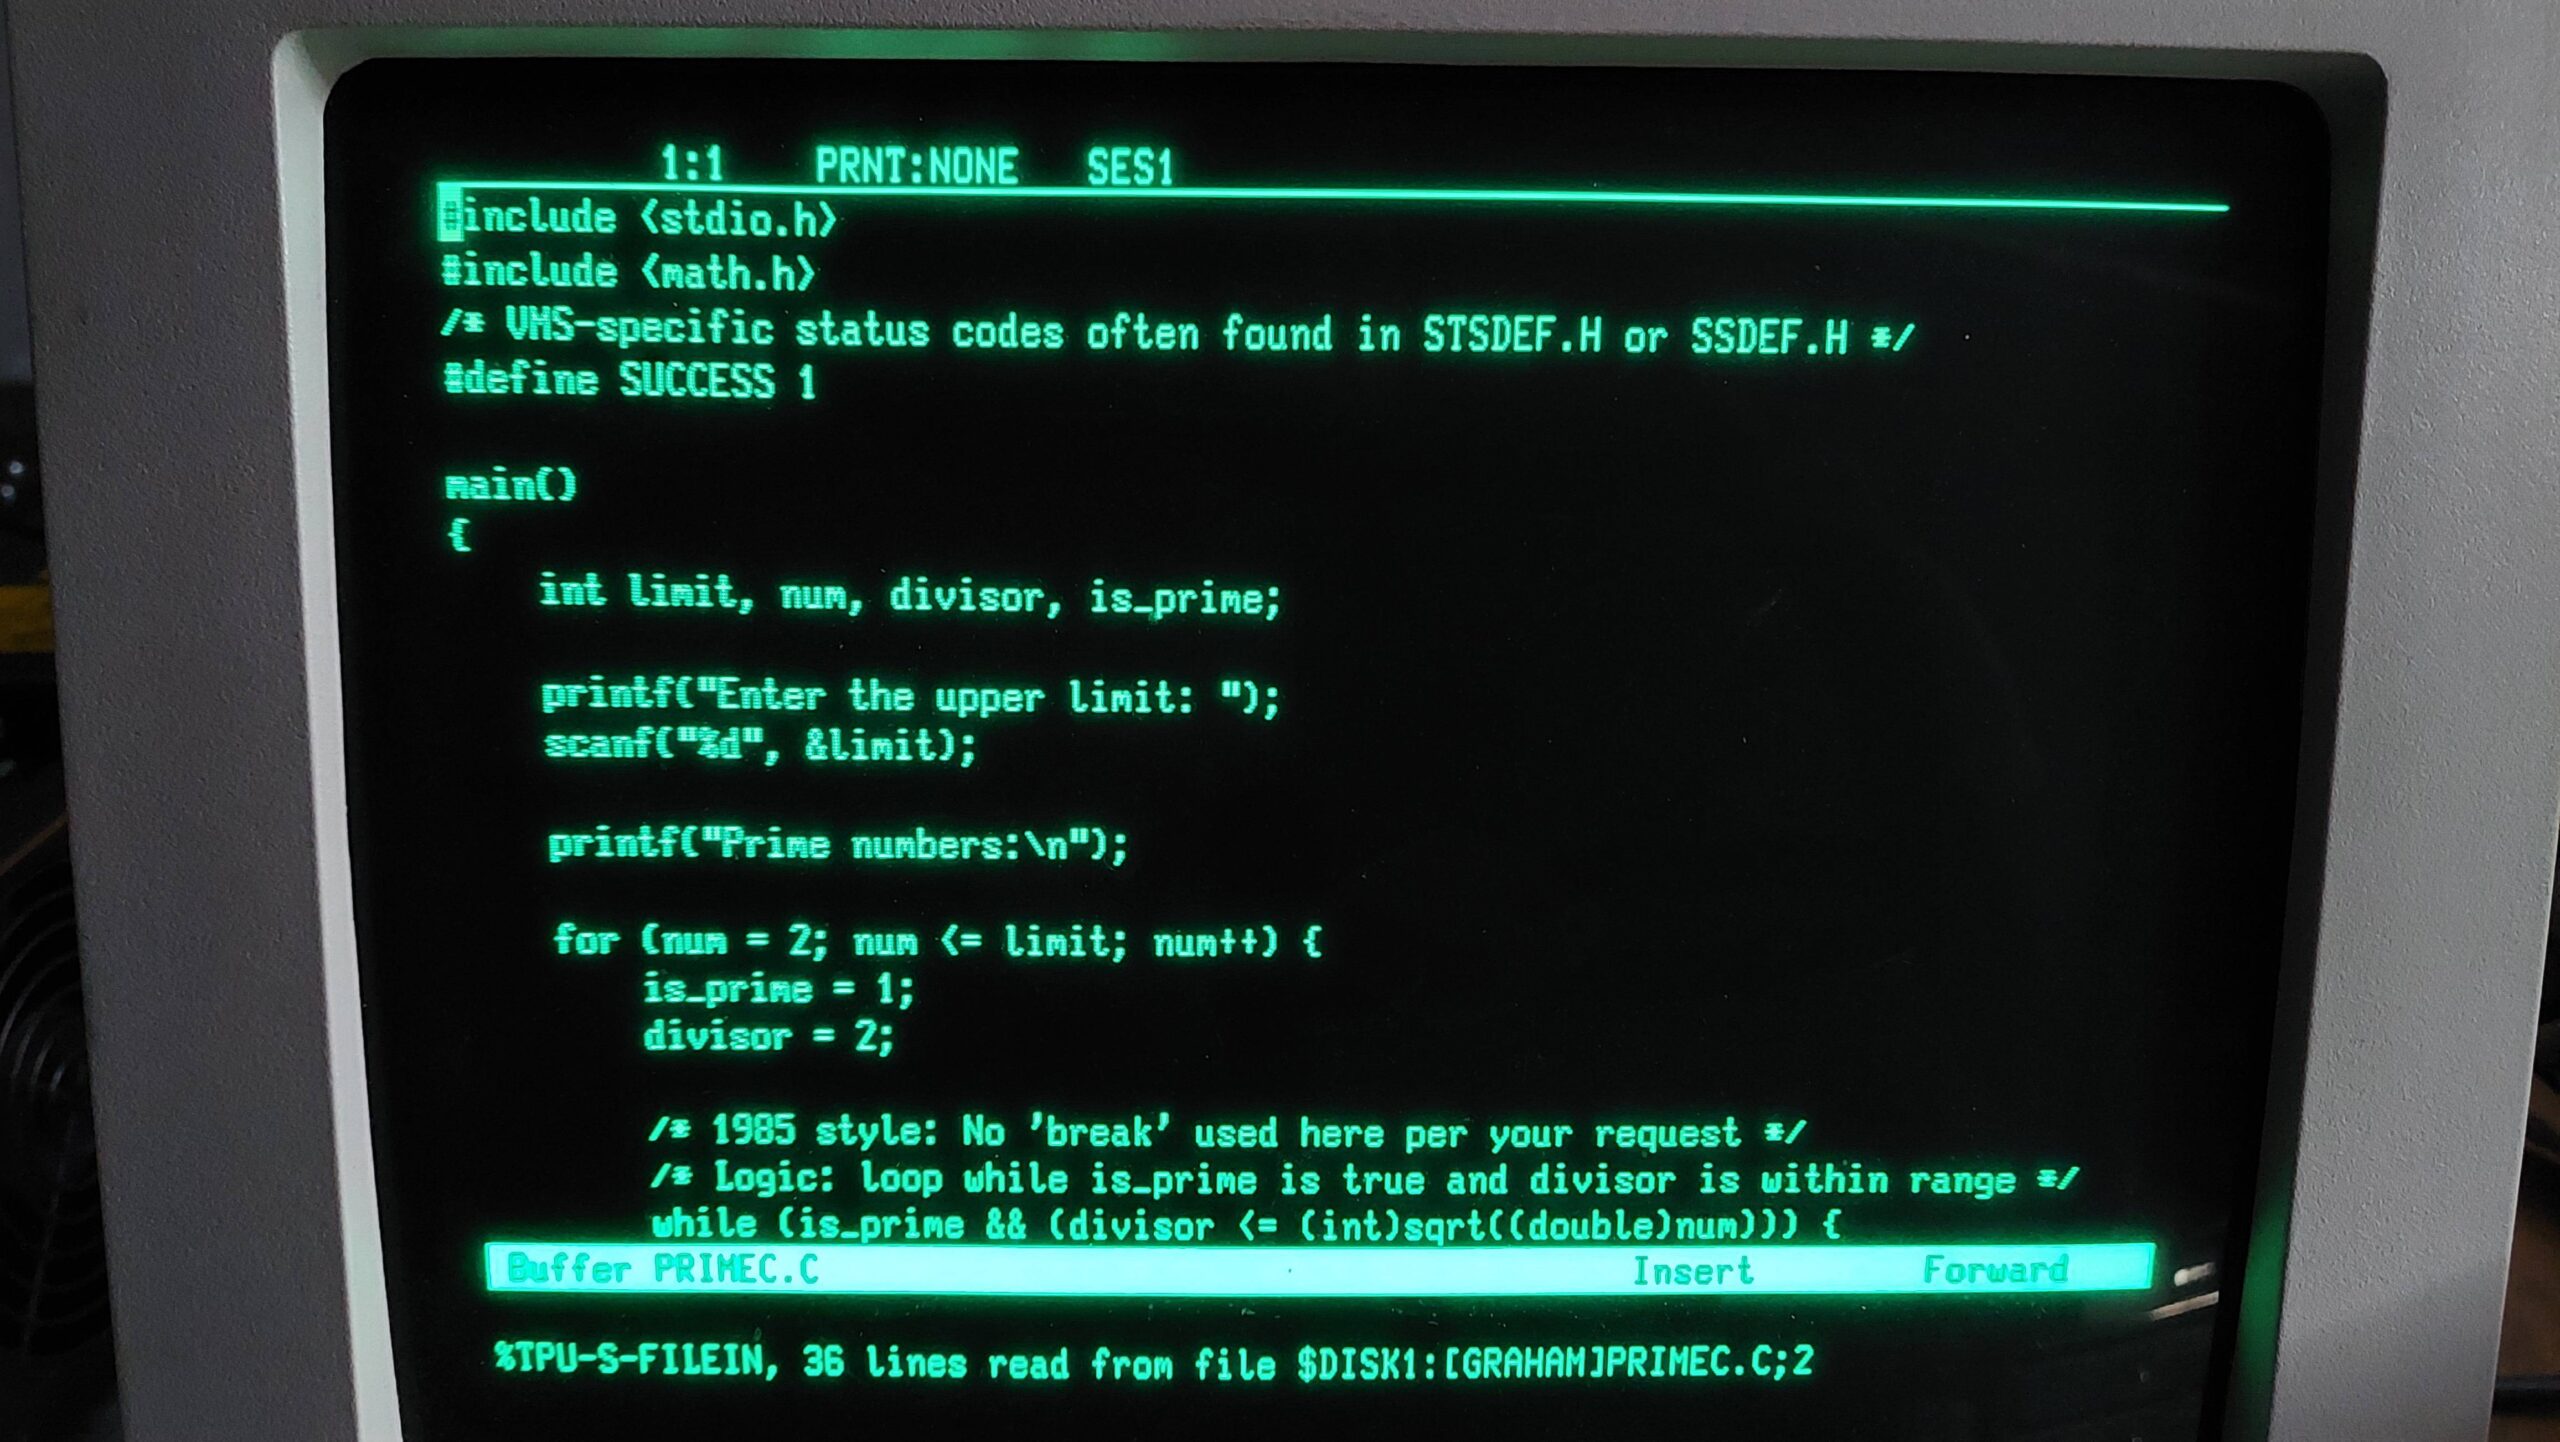
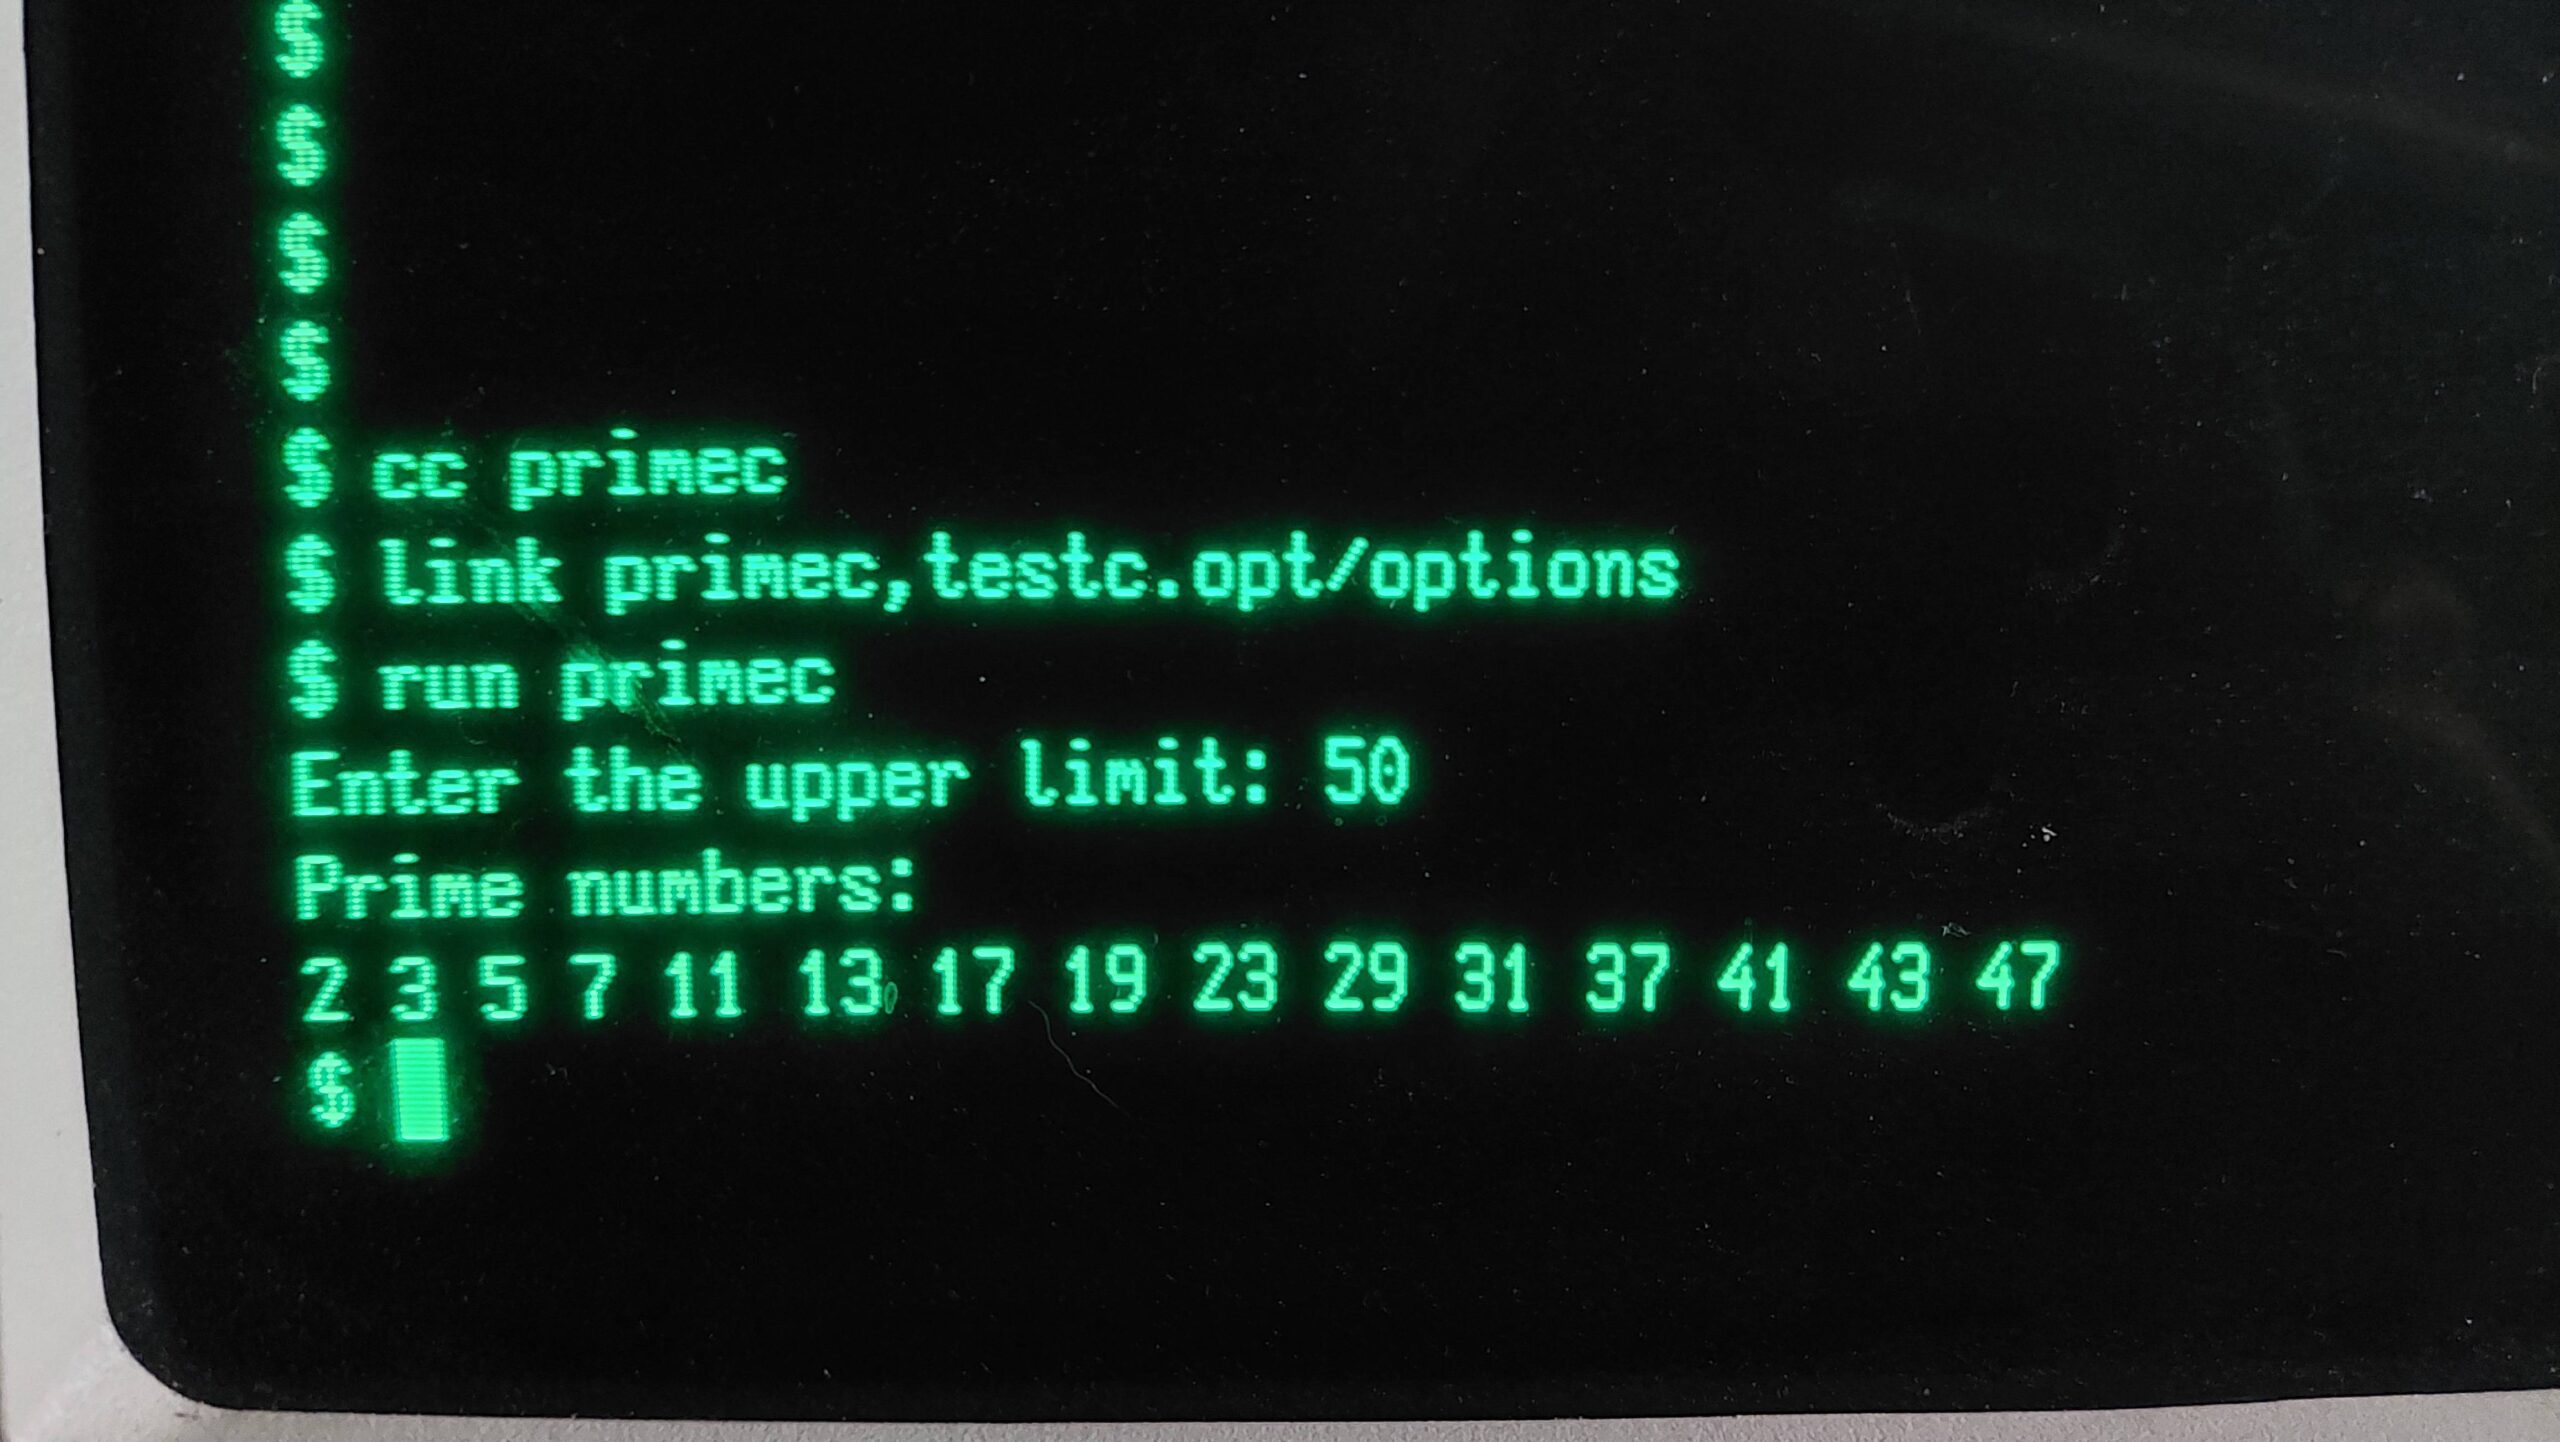
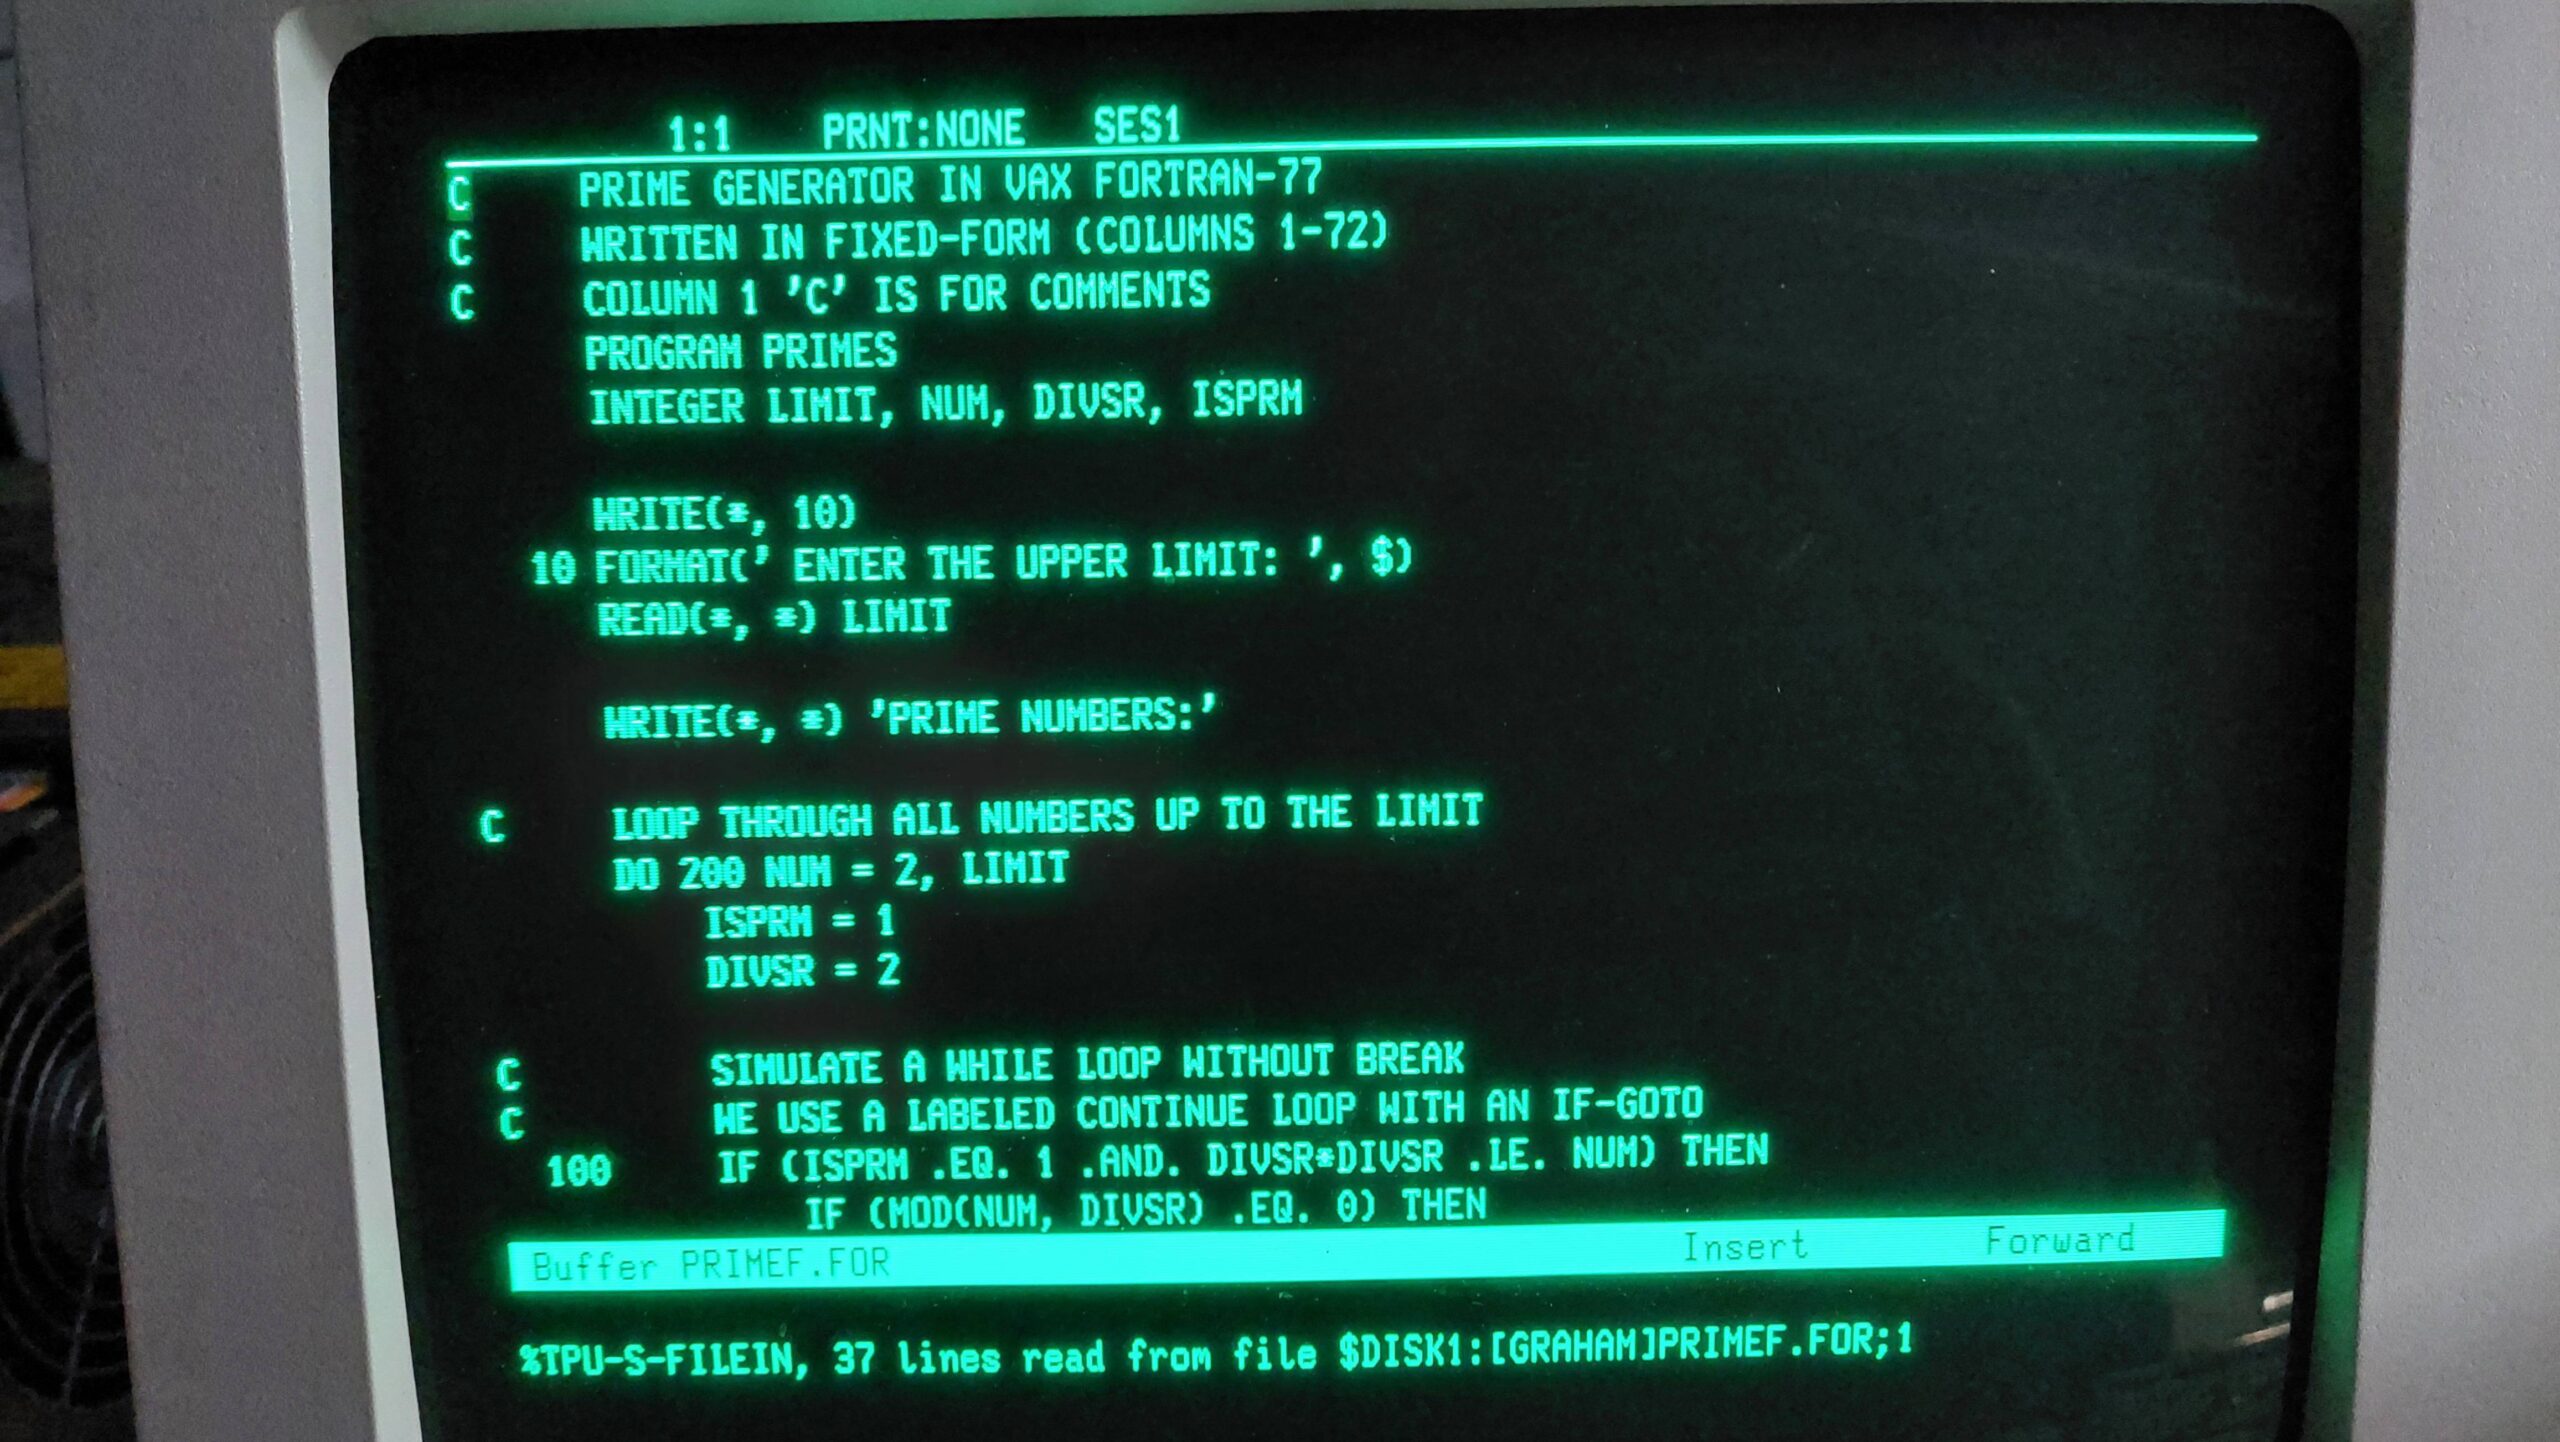
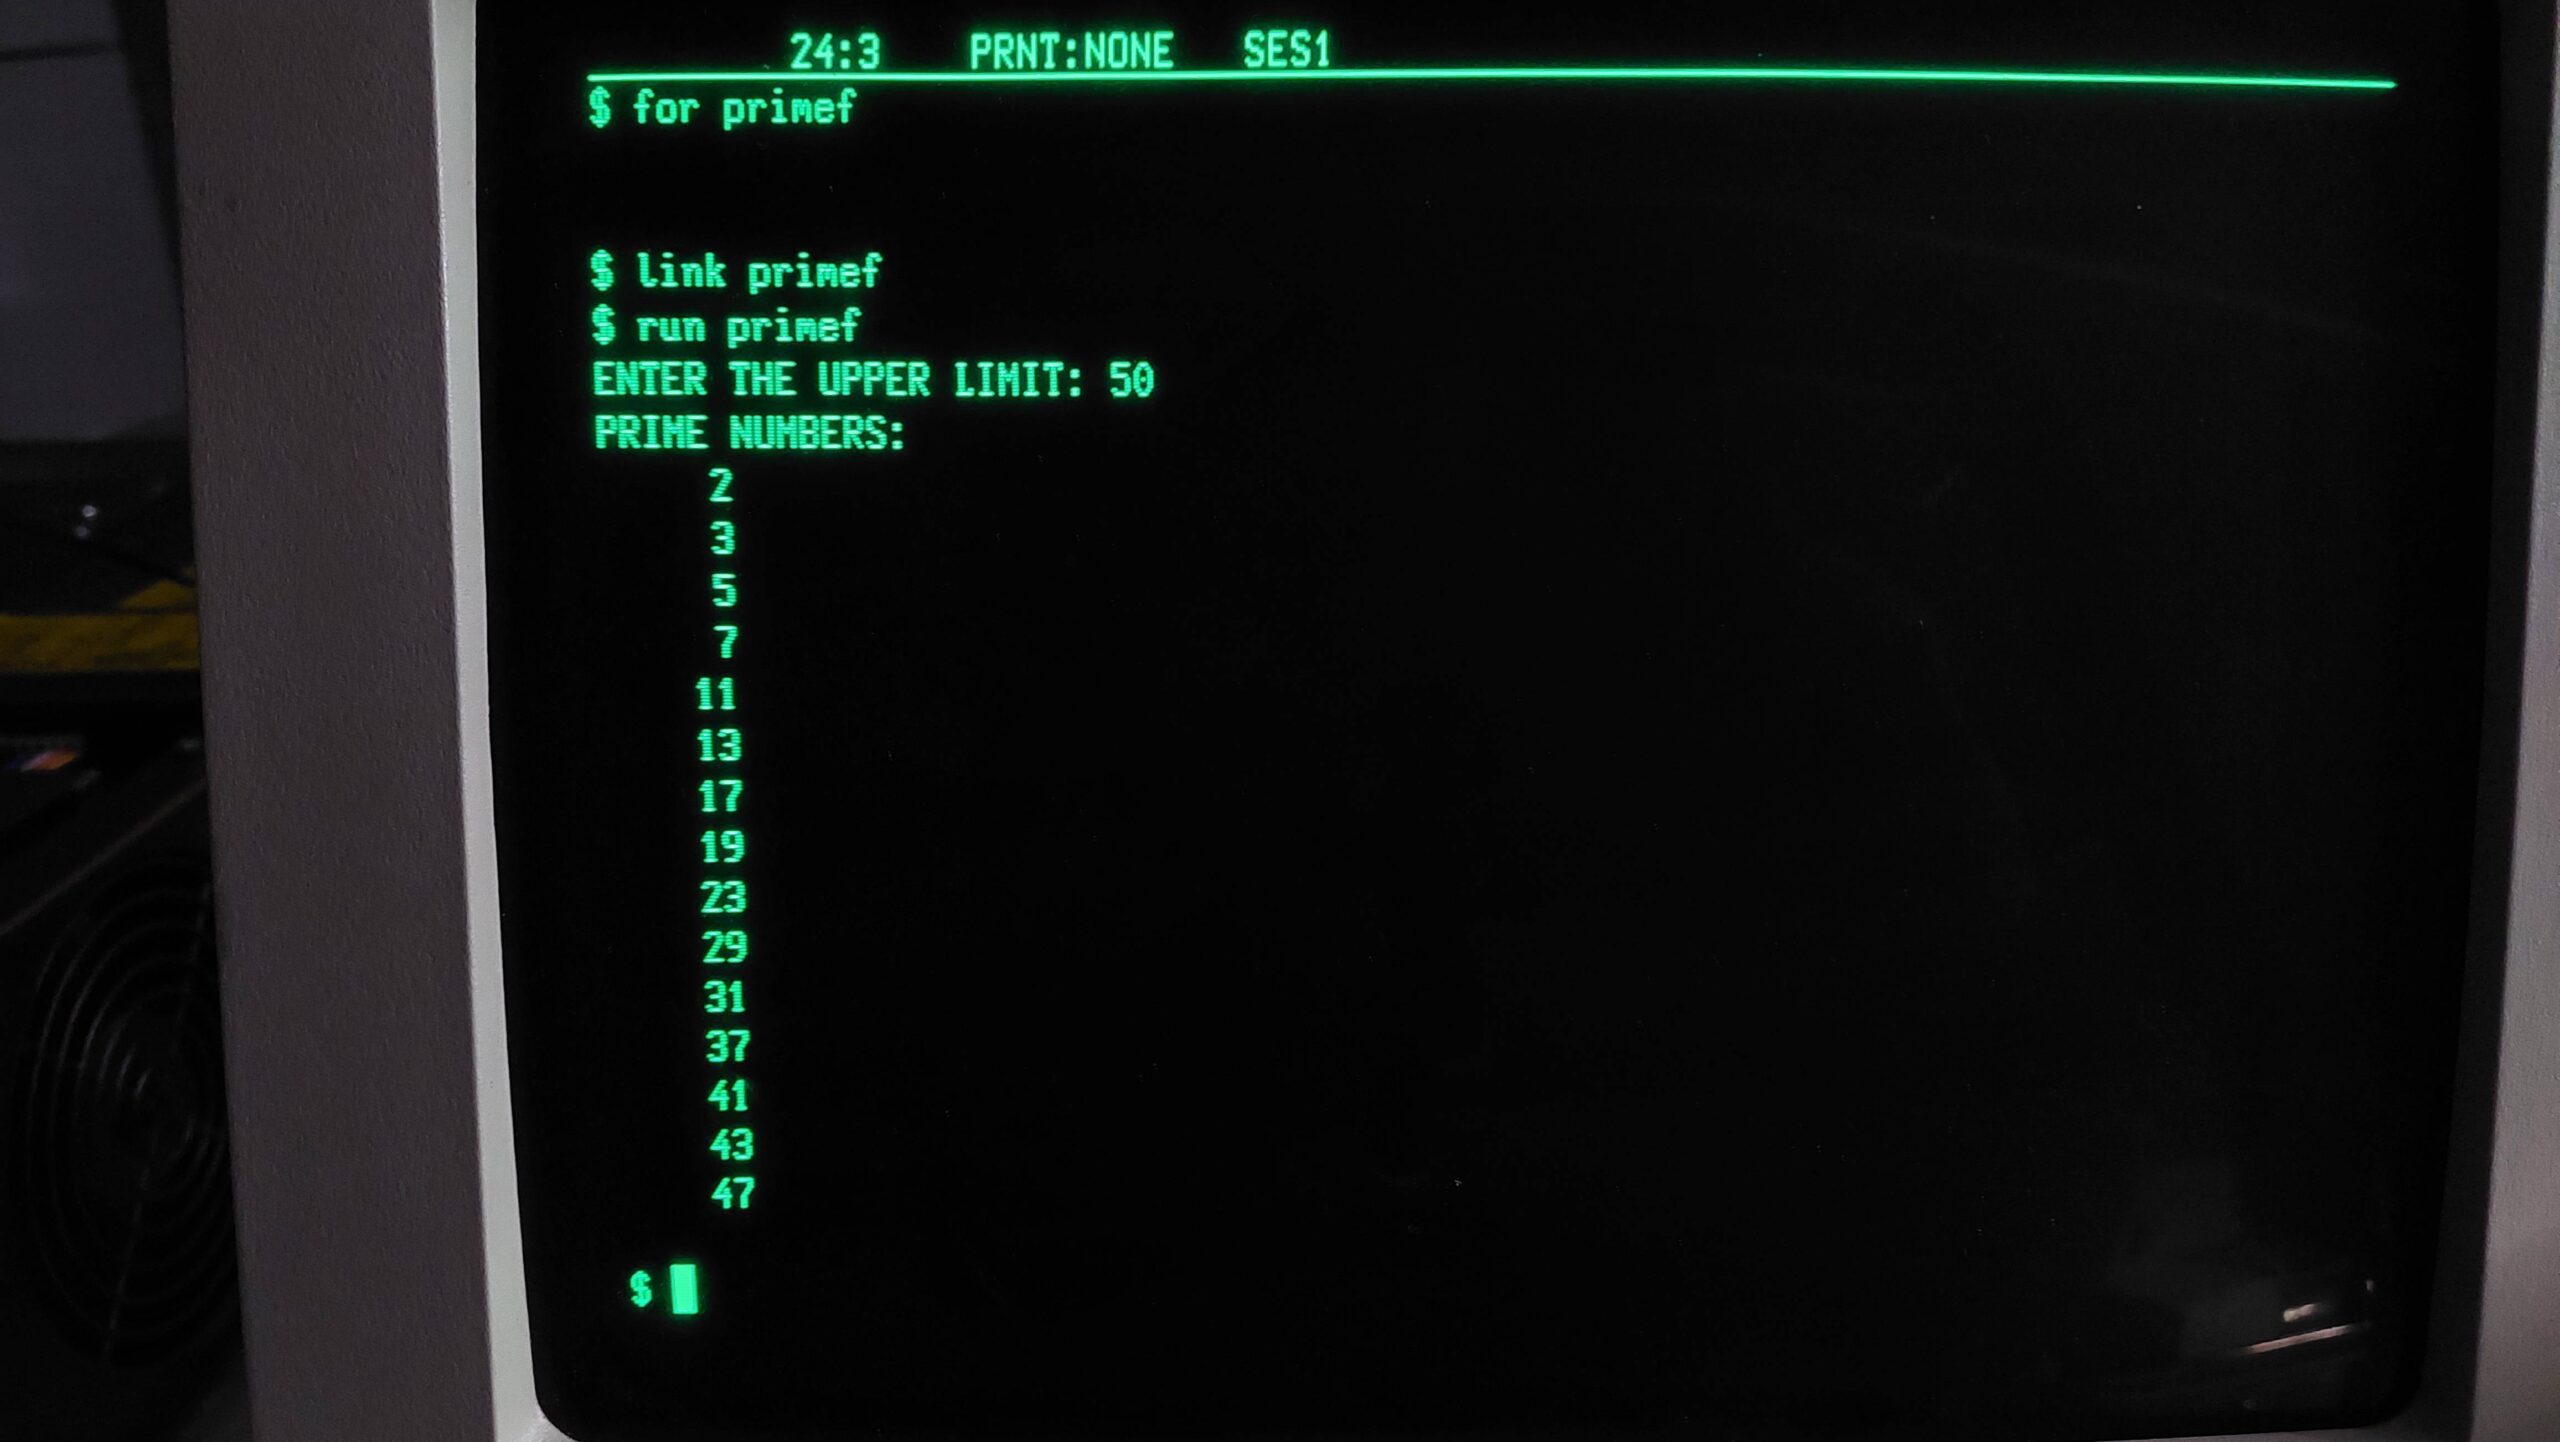
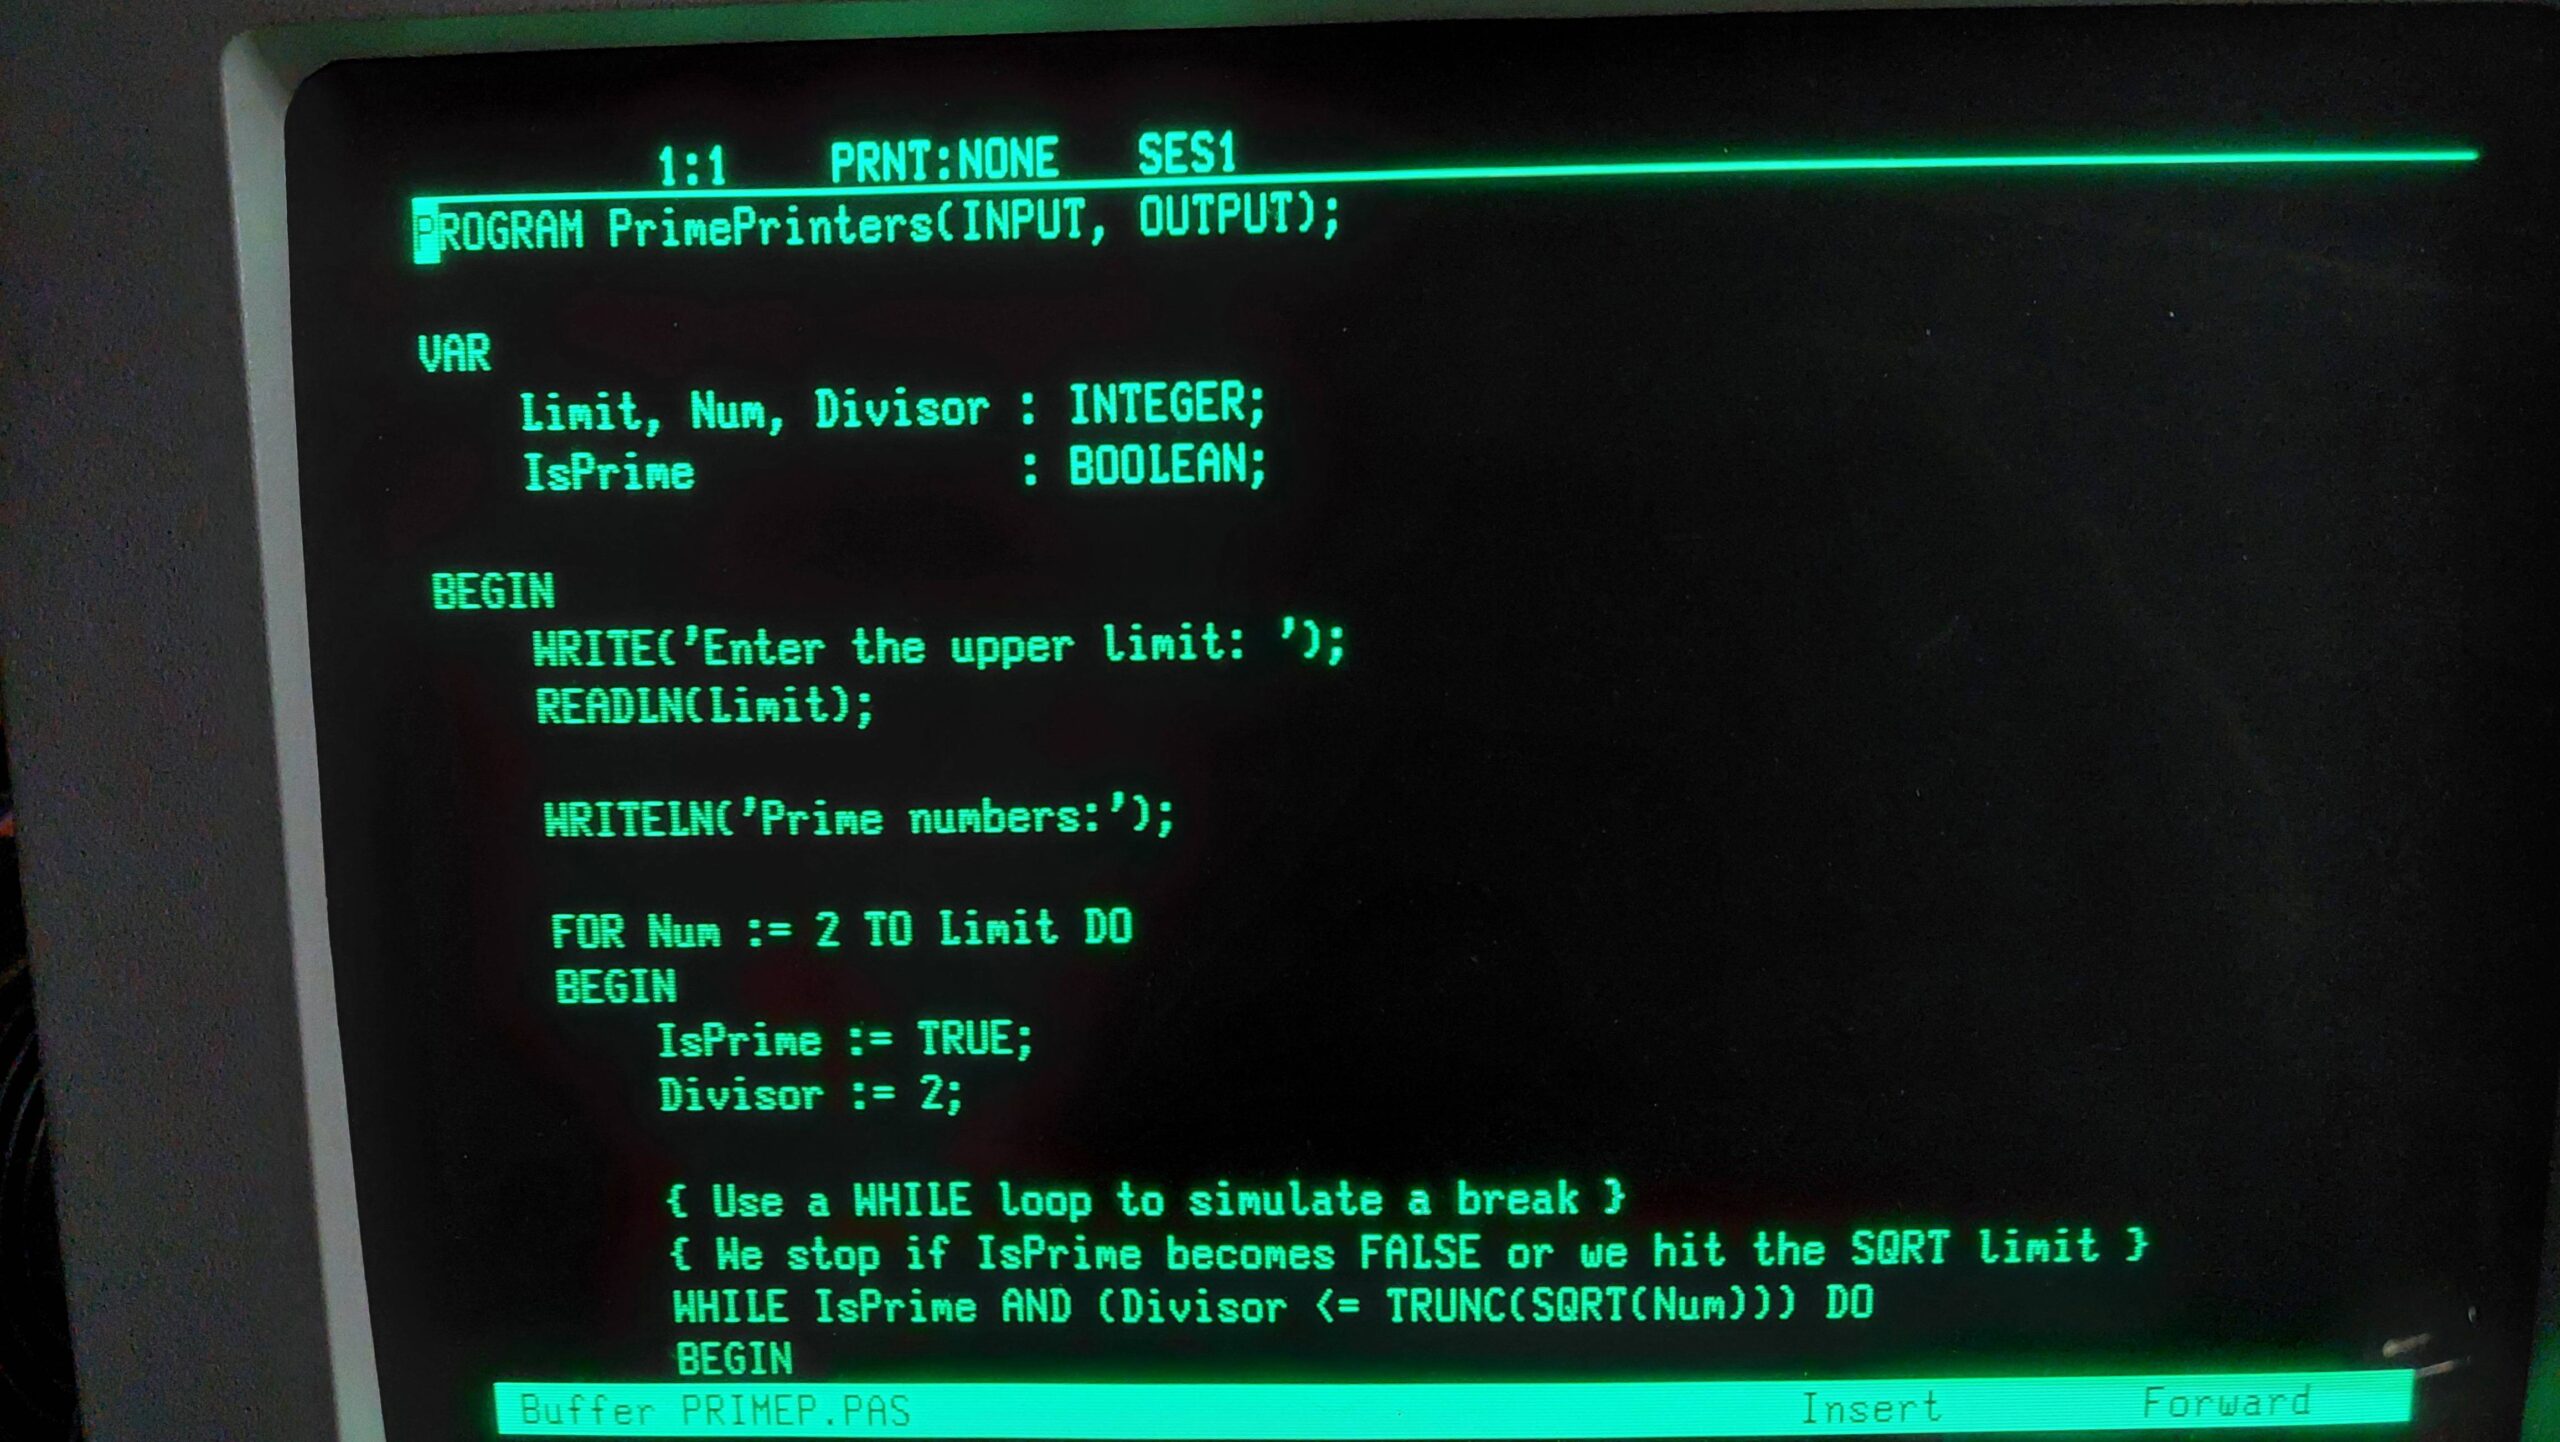
I created (ok AI created) a program to calculate prime numbers in Pascal, C, Fortran, and Basic. They all compile, link, and run just fine which is rather pleasing. Curiously, Basic is a compiler, but has an editing mode that looks and behaves much like an interpreter. The macro assembler that ships with MicroVMS is also present, so there are a total of 5 languages to choose from.

I think this is now ready for the long journey to the physical Microvax I.
MicroVAX I Transfer of New Image

This is really the step that would show whether i had completely wasted my time!

Much of this is the same as the process used to create an image of the original hard disk.

I created a new standalone backupkit on the MicroVAX I /MicroVMS 4.7 emulator. Then i completed a full backup of the system disk

$ backup/image/log dua0: dua2:newhdimage.bck/save_set

This backup consisted of 63 floppy disk images.

These disks (including the standalone backup kit) were then converted from the DSK to IMG to DSK using simh2dsk.py as described here. These images were copied to USB sticks for the Gotek/Flashfloppy.

I booted the MicroVAX I using the new standalone backup kit in drive 1 (dua1:) and then restored from the disk images on drive 2 (dua2).

$ backup/image/log dua2:newhdimage.bck/save_set dua0:

It was very cheering to reboot and have the new image come up and run just as it had on the emulator.

When the management menu came up after logging in as system the menu was mashed. This turned out to be just because the terminal had no tabs set up.

I was able to compile programs which, after all, was my goal.

NEC PC-8201A

I first used one of these machines back in the 1980s. Back then i used it as a very portable serial terminal. A few lines of basic allowed it to be stretched to serial conversations for running tests. This was very handy for the embedded computing kit that i was working on at the time.

I bought this machine a few years ago and have used it for much the same purposes and will continue to do so. It’s capable of more though, and with some additional software i thought it might have more of a chance to shine.

This machine is similar to the Tandy Model 100; they share the same Kyocera base design. The Model 100 was very successful and there is a lot of software available for it. The NEC was less successful and has smaller software catalogue. It will run some of the Model 100 software, but there are hardware and firmware differences that limit compatibility. In some cases this can be overcome with some utility programs.

My unit came with 16k of RAM which can be used to store text files and basic programs. These files can be created on the machine but can also be loaded via the serial port using the ROM based terminal program. There is also provision for a floppy disk drive but i don’t have one. Programs can also be saved to and loaded from tape.

The easiest way to demonstrate the capabilities of the machine is to store programs on the machine so that they are read to go. 16k is very limiting though so, practically, more memory is required. An expansion pack is out of reach, but the unit does have provision for another 48k of memory using 8kB memory modules.

These modules are unobtainium, but a kind soul has designed a modern replacement and has made the design available to all:

https://www.pcbway.com/project/shareproject/Model_T_RAM.html

A bought some PCBs and the required components, and set about applying my awful surface mount skills to their construction. Don’t look too closely!

The expansion of bank #1 from 16kB to 32kB was immediate but recognition of the second bank of 32k proved troublesome. It requires a Shift-Bank command followed by Shift-Ctrl without lifting the Shift and with just the right timing. I got there in the end.

I could then transfer in some more programs from the interwebs (https://www.club100.org and https://www.web8201.net) via the serial port using a PC.

The machines were connected with a null model cable. I set up both machines to use 1200 baud with Xon/Xoff flow control. For the PC that looked like:

mode com1: baud=1200 parity=N data=8 stop=1 to=off xon=on odsr=off octs=off dtr=off rts=off idsr=off

On the 8201A it looked like:

stat 5n81xs

The transfer just requires Term followed by Download on the 8201A and then a file copy on the PC. The copied file must be text – binaries won’t work with Term. The file extension given to Download must be DO ie a document.

After receiving a basic program as a document, invoke BASIC and then convert it to tokenised basic by:

load "wumpus.do"
save "wumpus"

The DO file can be deleted afterwards to save space. It does not take long to fill the available space on both banks. It takes less than 10 minutes to fill 64k even at 1200 baud. The storage relies on batteries, so there is every chance that this exercise will be repeated regularly!

Wumpus went the same way as normal.

Starfighter was fun.

Frogger requires graphics characters to loaded for Model 100 compatibility by running chr100. I’m really not sure that the characters are quite right, but the game seemed to play ok.

Fireworks

Cromemco Bytesaver

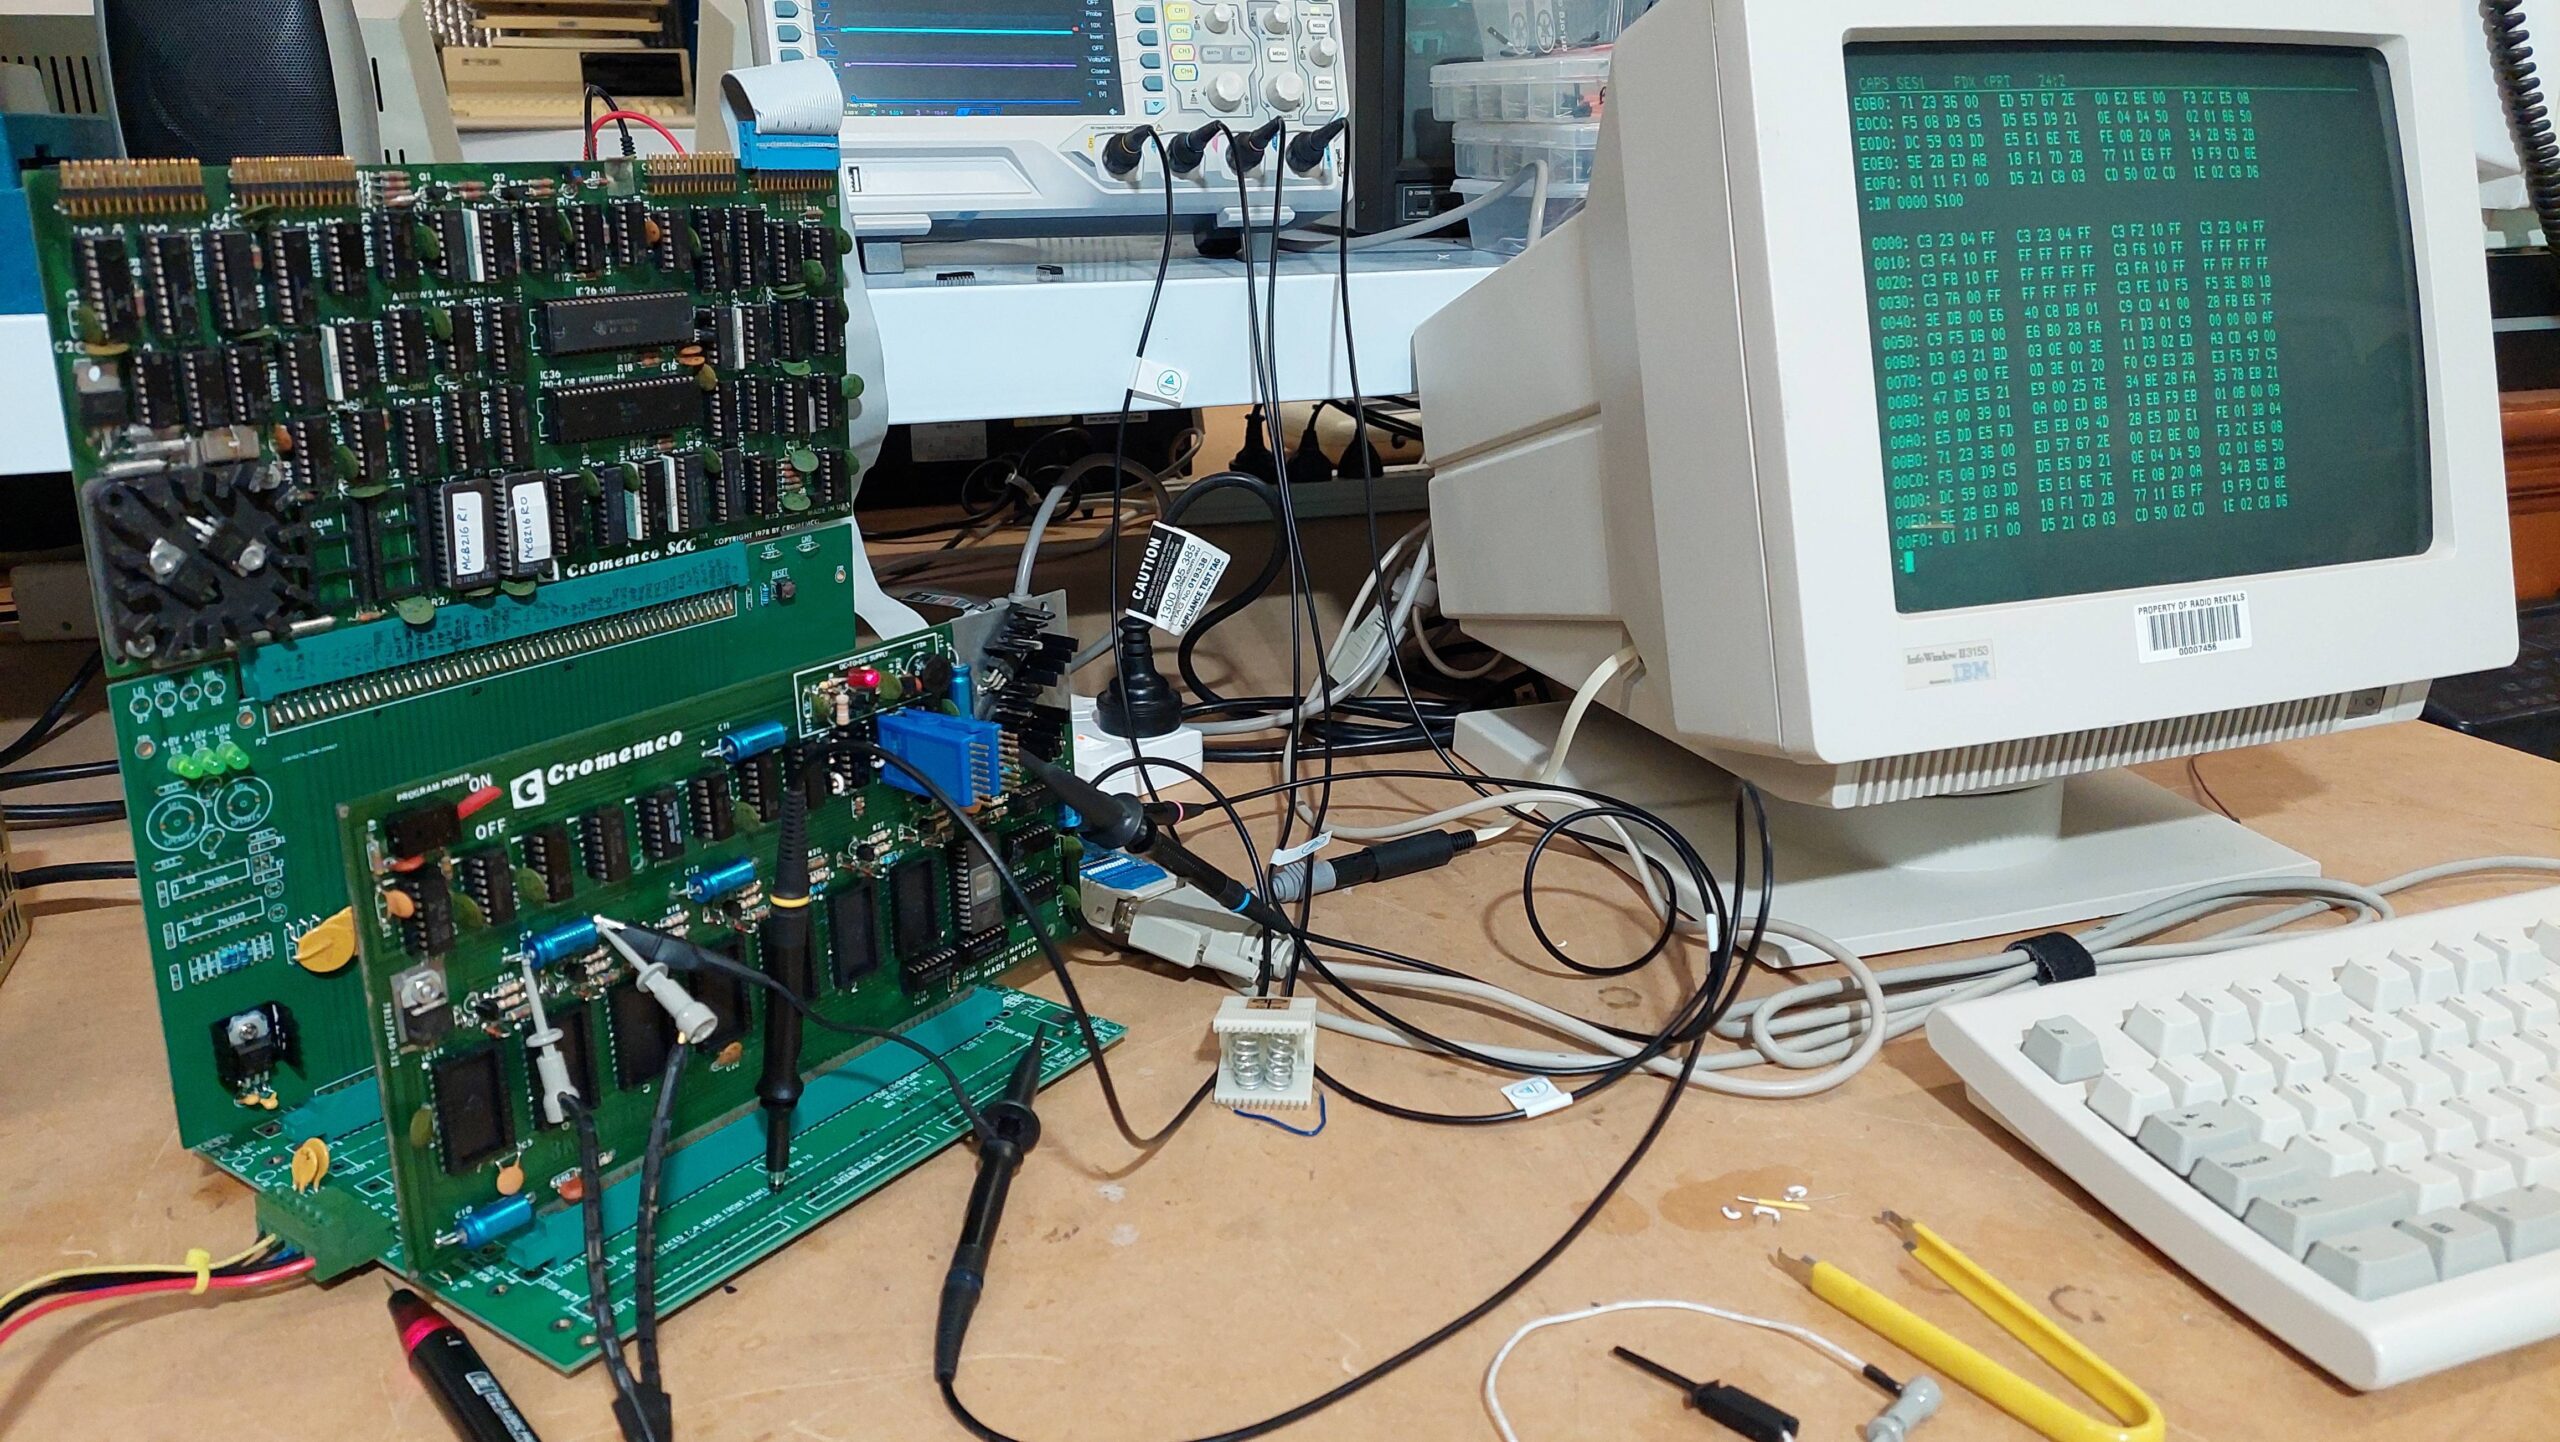
I had been quite intrigued by the idea that the Cromemco Z80 Monitor and 3k Basic could save programs to EPROMs instead of, for example, paper tape, magnetic tape, or floppy disk.

I was thinking particularly of my Cromemco Single Card Computer (SCC) but the same trick is possible using a Cromemco ZPU Card.

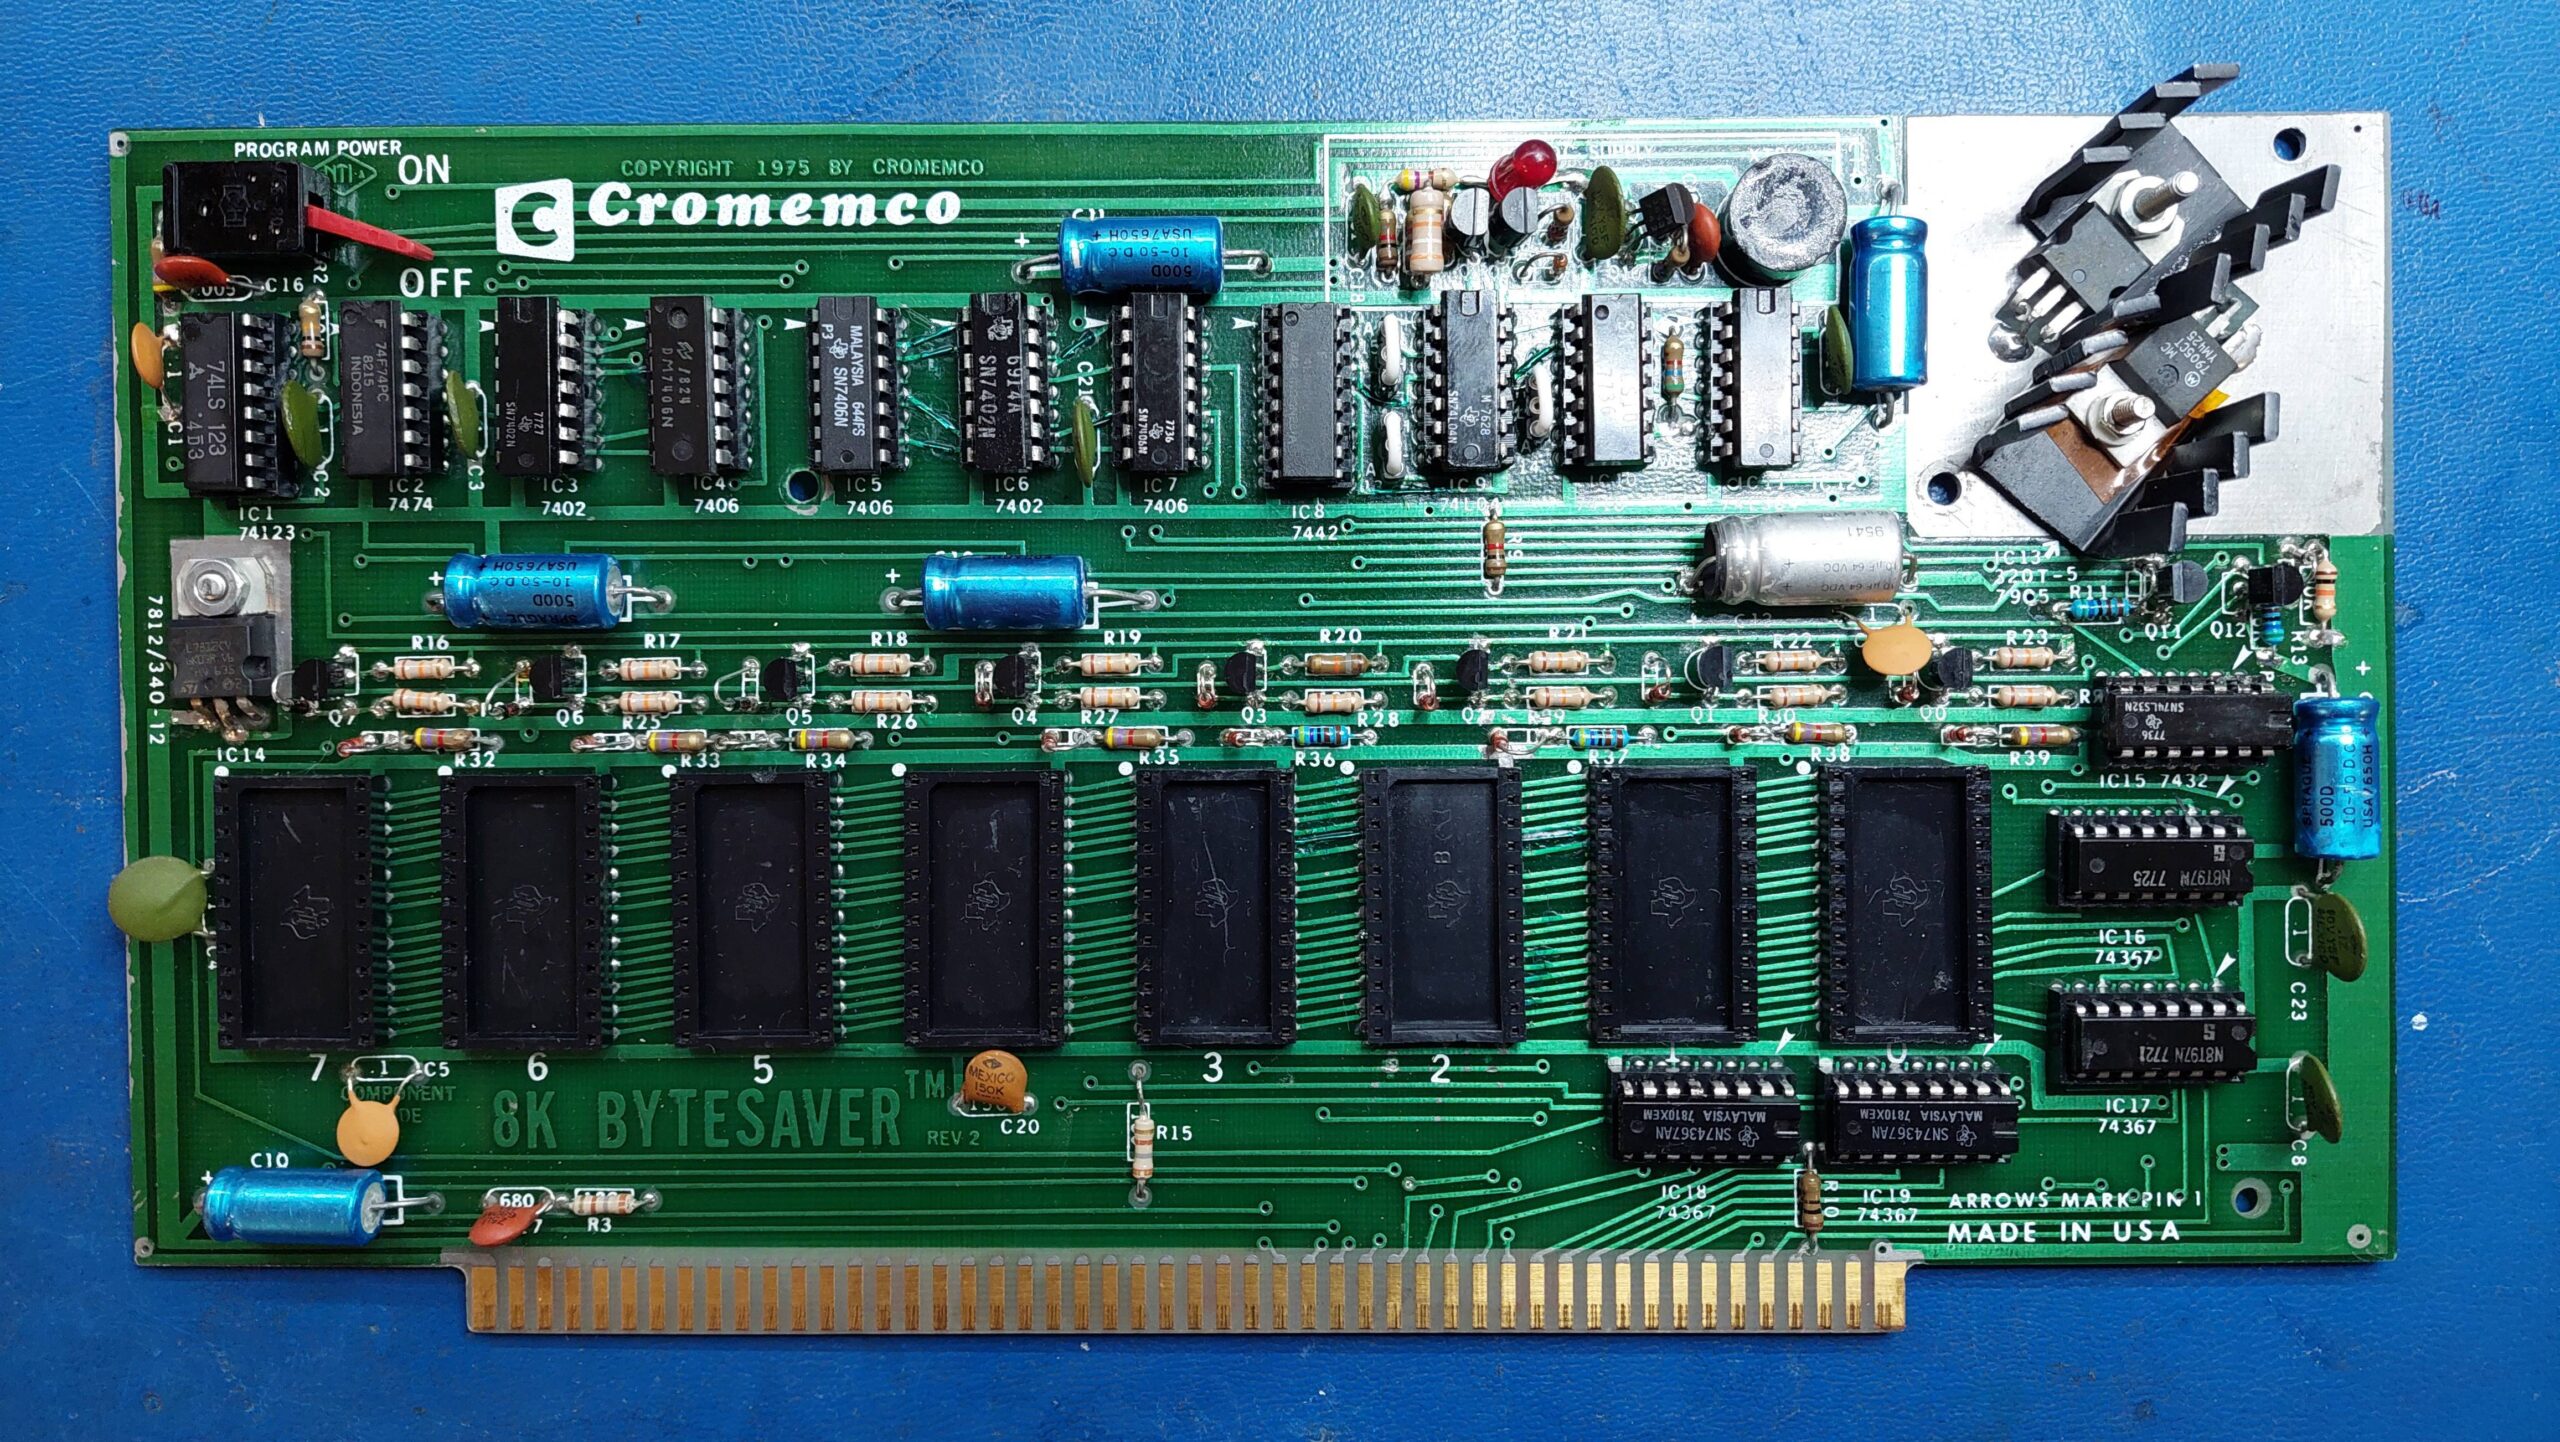
To do this requires a card capable of programming an EPROM eg Cromemco 8k Bytesaver, 8k Bytesaver II, or a 32k Bytesaver.

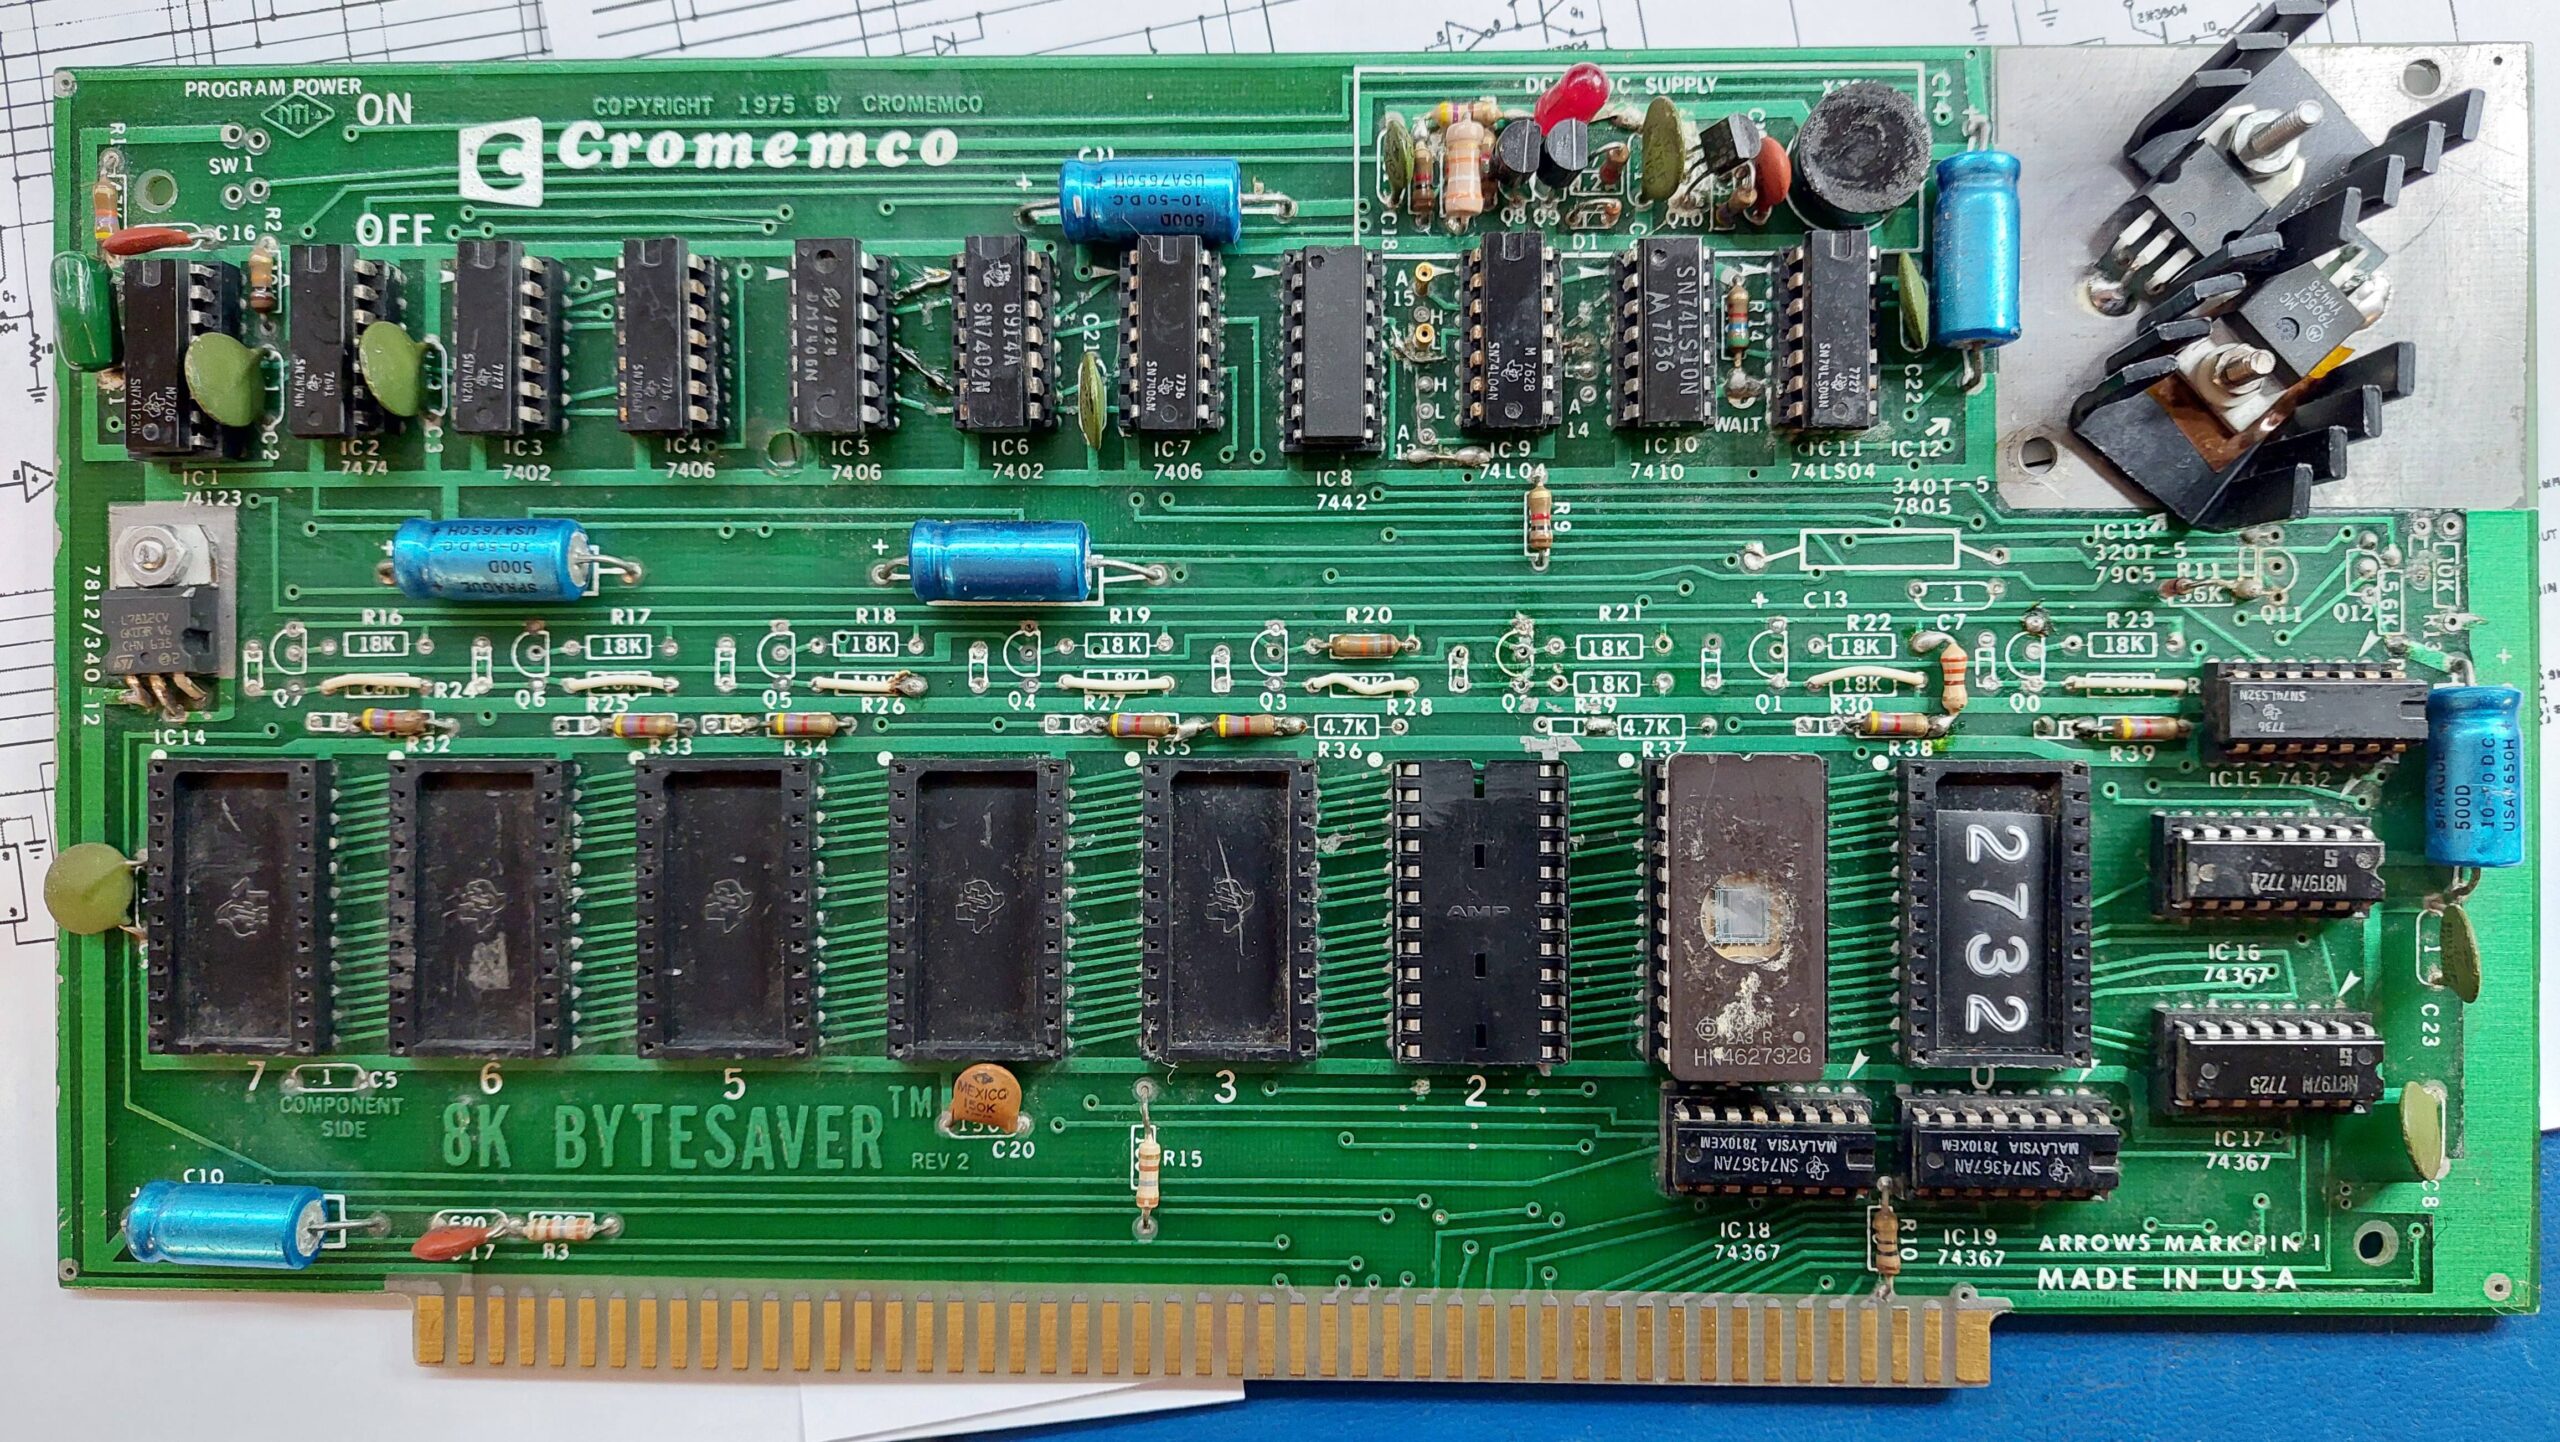
The cards that i had seen on ebay were in the States and were prohibitively expensive, even before adding the postage. Fortunately, though, an 8k Bytesaver come up for sale in Adelaide. Despite its poor condition and significant price, i acquired the card so that the itch could be scratched.

The 8k Bytesaver was a milestone card; the first S-100 card to provide EPROM storage. Prior to this, machines were typically bootstrapped by entering a boot-loader at the front panel. This card was released in 1976 shortly after Intel released the device that made it possible, the 1k x 8 bit 2708 EPROM.

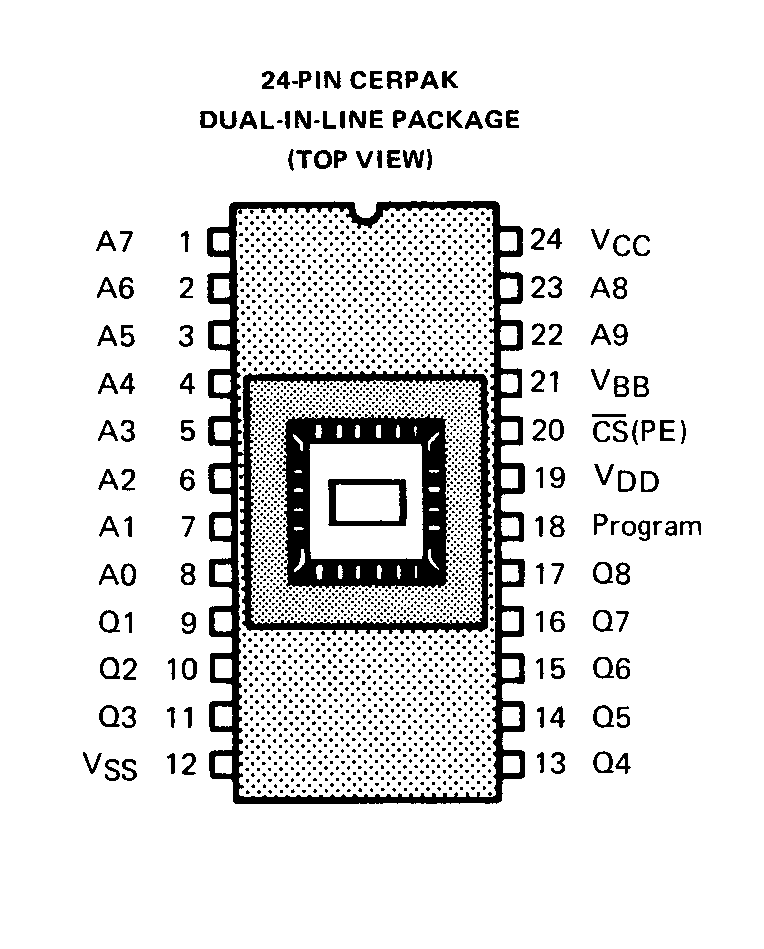
The 2708 is not as easy to work with as later EPROMs. Even for reading it requires +5V, +12V, and -5V supplies. For programming, it requires CS to be taken to 12V and an additional programming voltage at 26V.

The EPROMs themselves are not particularly common, but i have a bunch that i have previously imaged, and they can also be purchased for about AU$6 each.

I wasn’t sure that the 8k Bytesaver would work with the SCC (the SCC manual was a little ambiguous), but i also had the option of using a ZPU.

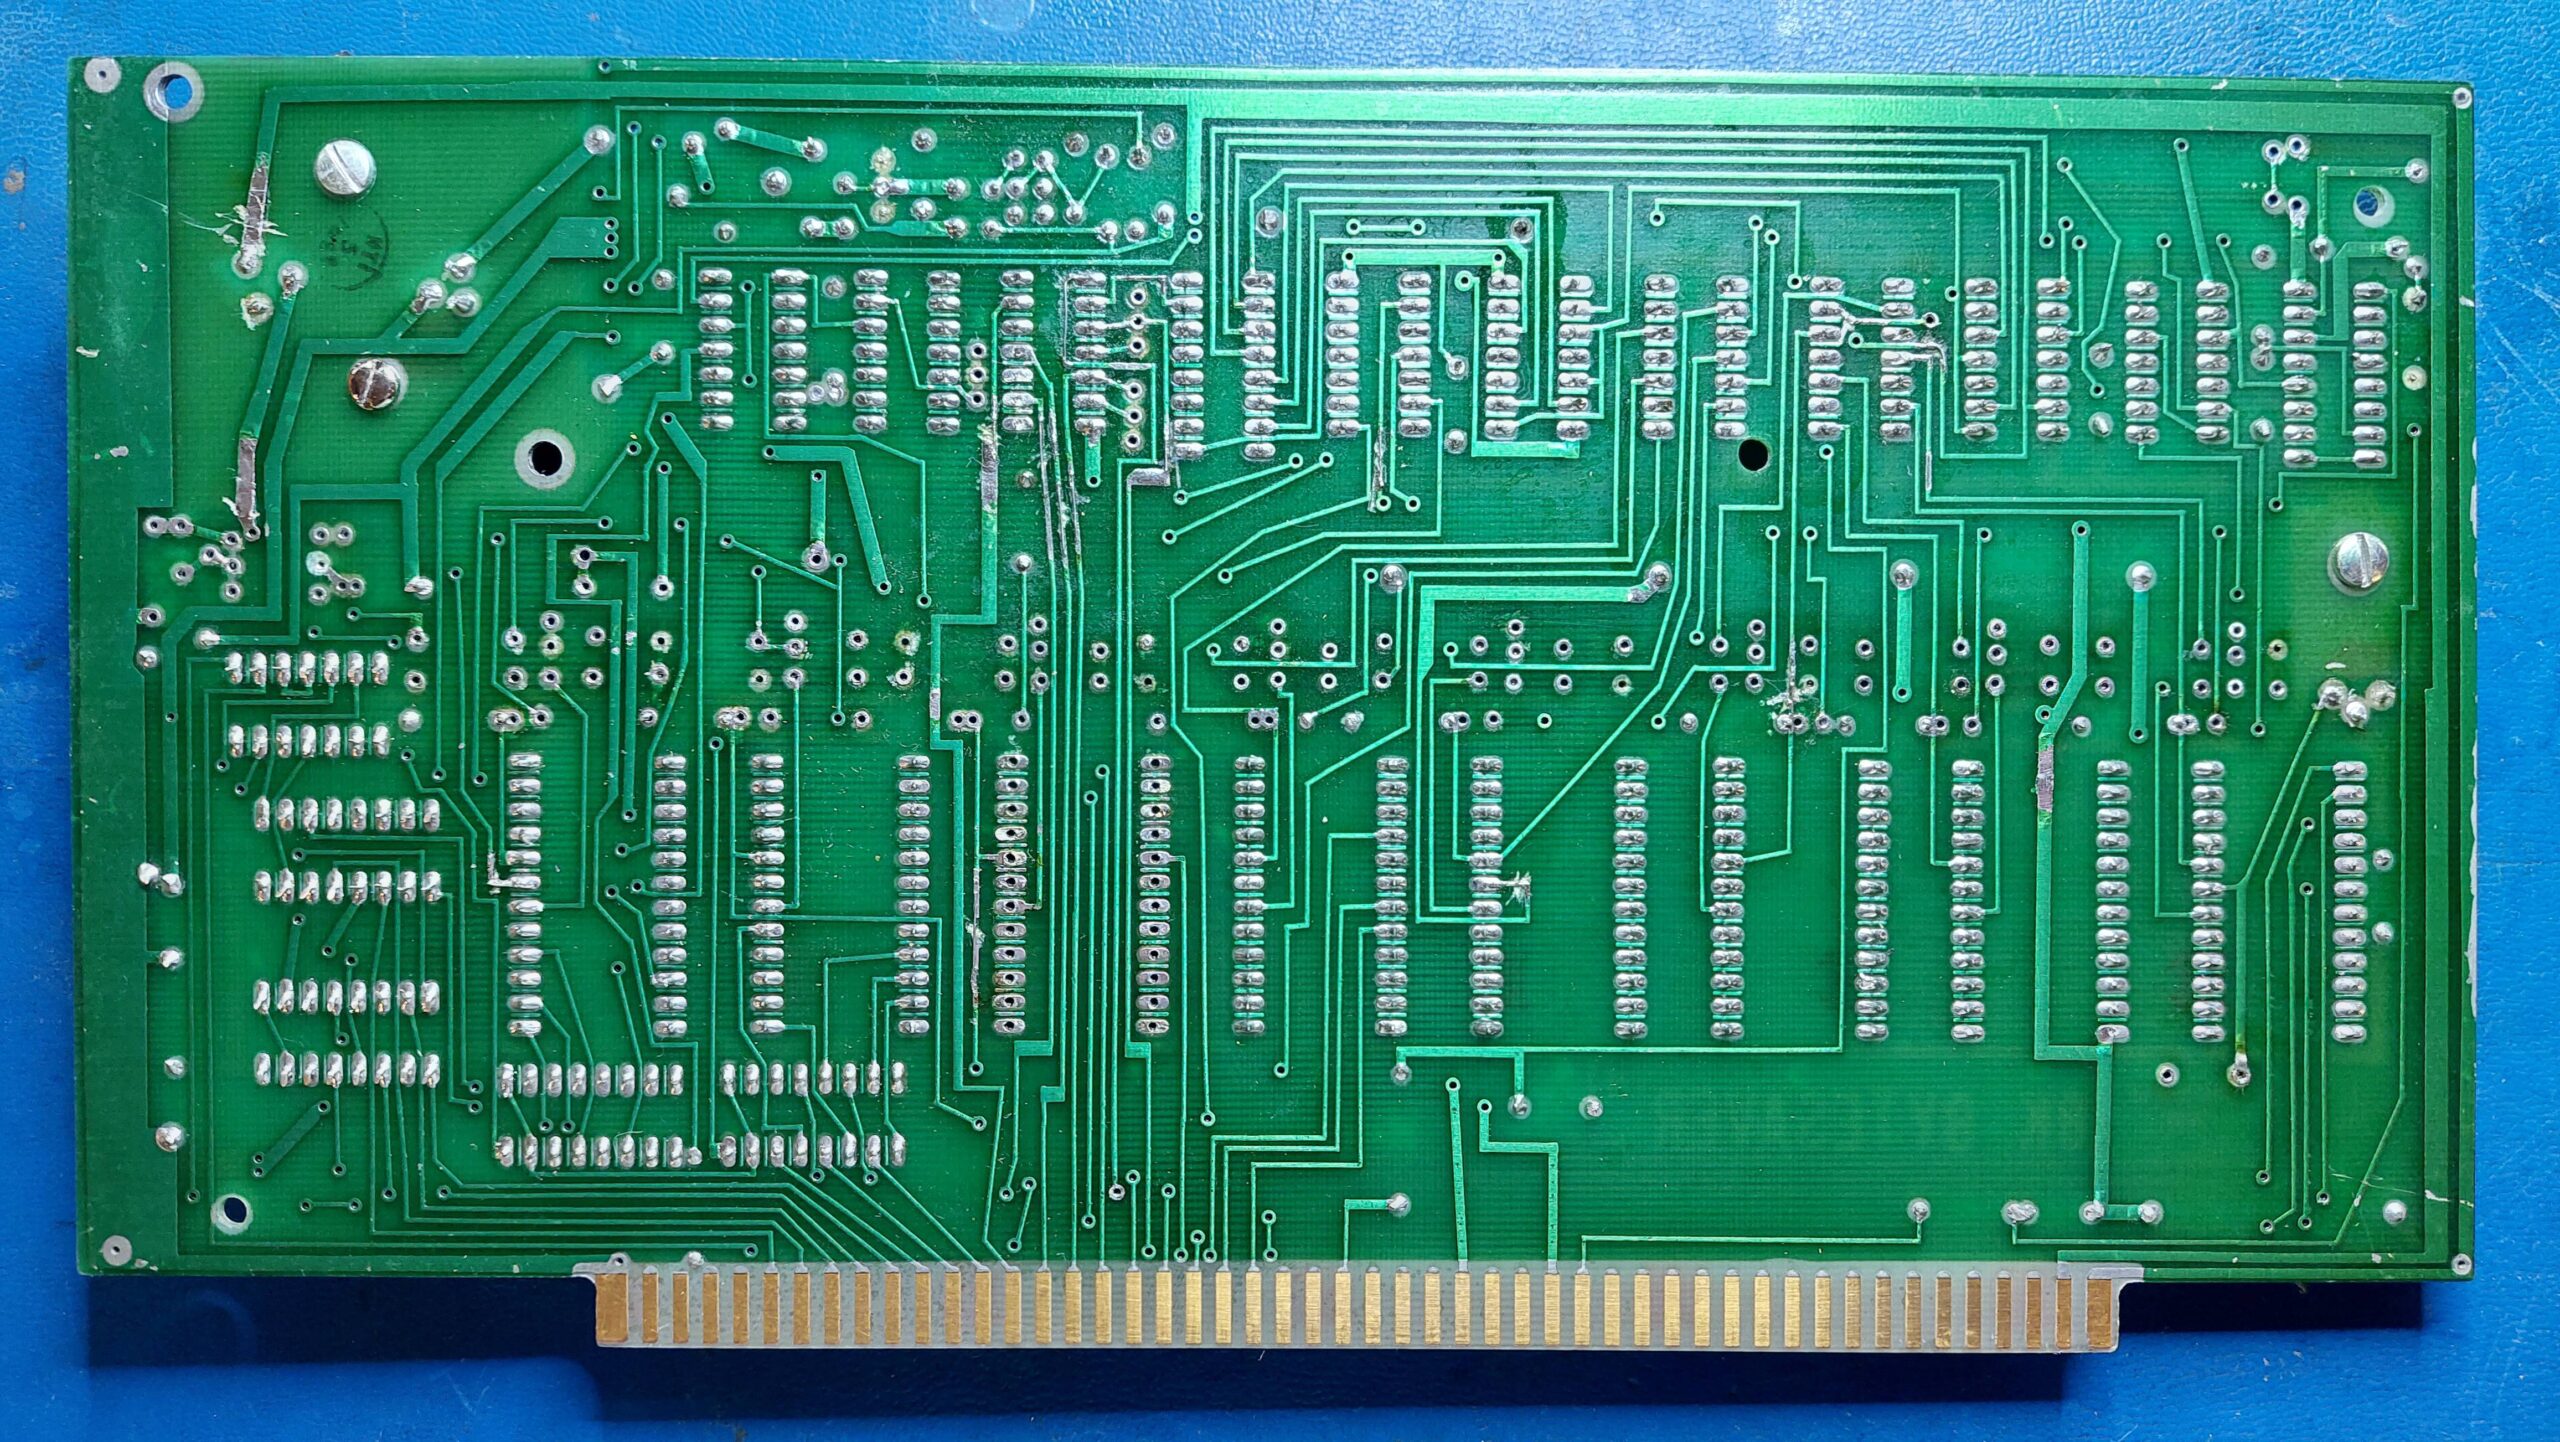
The purchased card had been modified to use 2732 EPROMs with, as far as i could see, no ability to program the EPROMS. Many tracks had been cut and components removed. Even the original heatsink had been replaced with a lesser version.

As a 2732 EPROM card it was useful, but it was nothing i couldn’t put together on a prototype card as i had done once before. Fully restored it would be far more interesting so that’s what i decided to do.

Cromemco sold the card as a kit, it looks like it was assembled by an amateur, it had been modified (probably twice) by an amateur, and was now about to be restored by an amateur. Some cards are born to a life of hardship.

I checked the programming power supply first; a terminal fault would mean there was no point proceeding. It worked fine.

The programming switch had been stolen, so i stole one from a faulty Lexitron floppy disk controller board. Not sure what to do about the heatsink.

One socket had been replaced with a different type. I found a donor board with the matching type and swapped it out.

I started by removing everything that wasn’t supposed to be there and tidied up the original soldering.

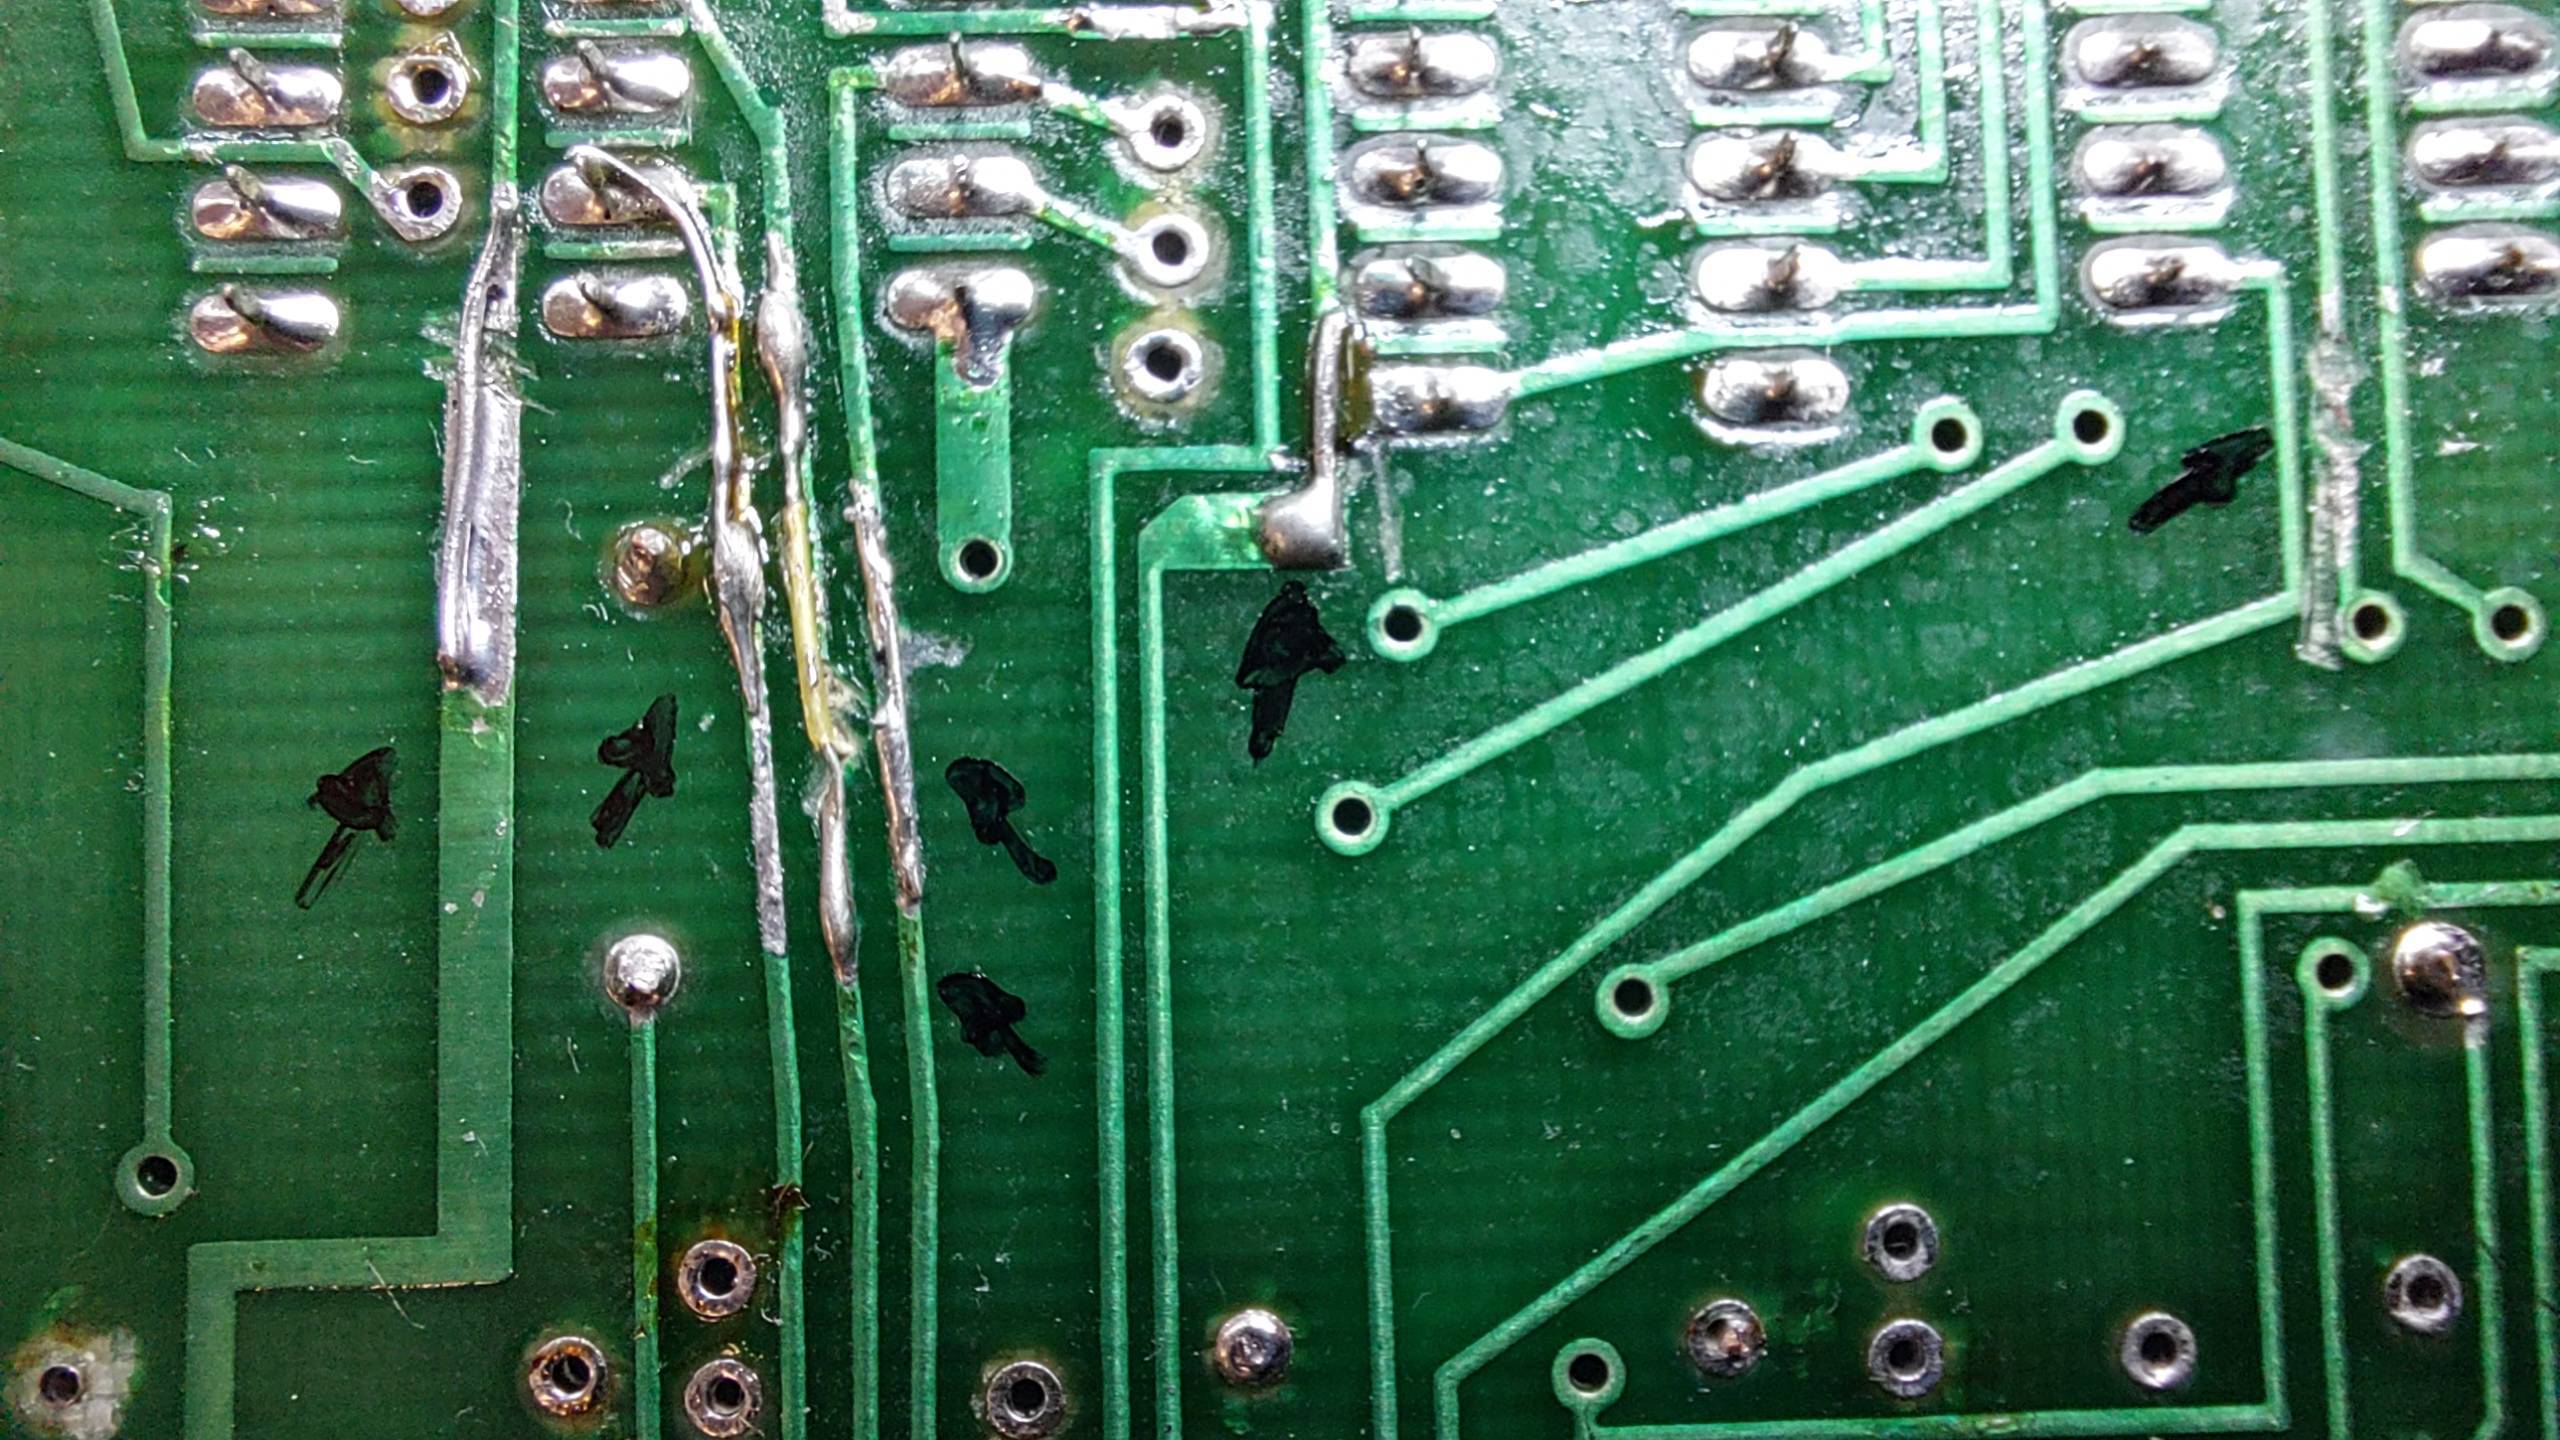
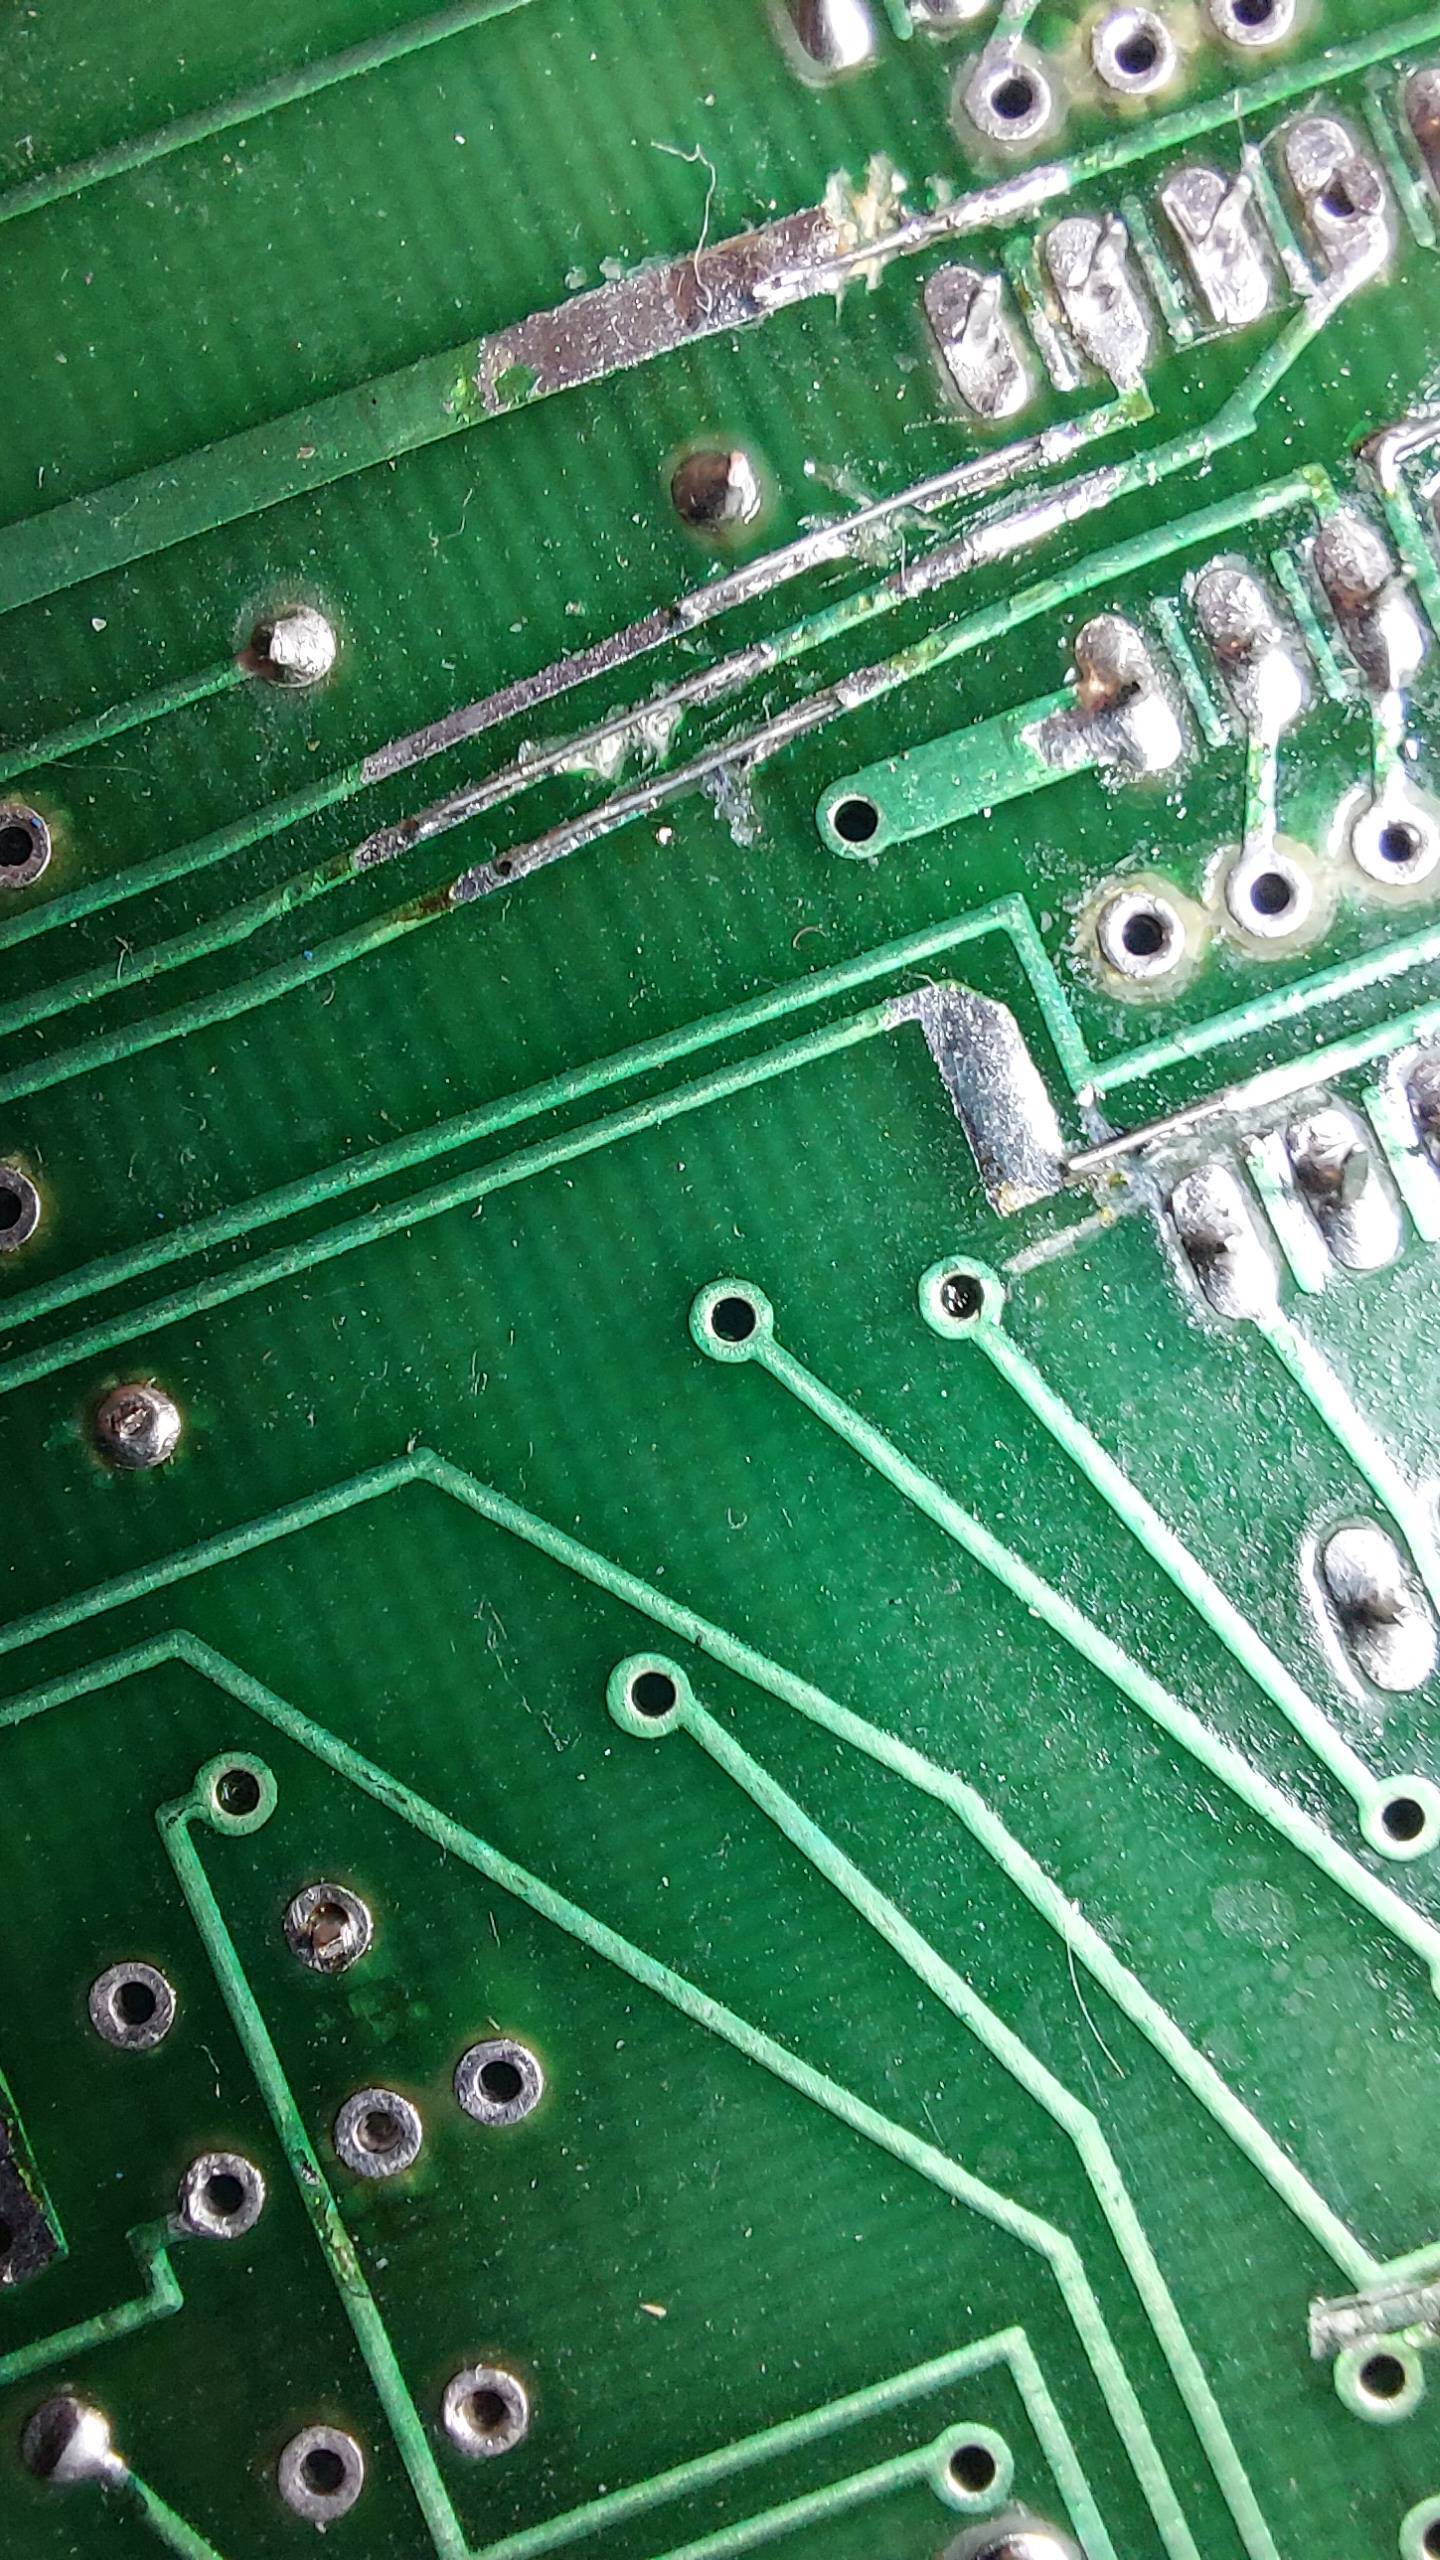
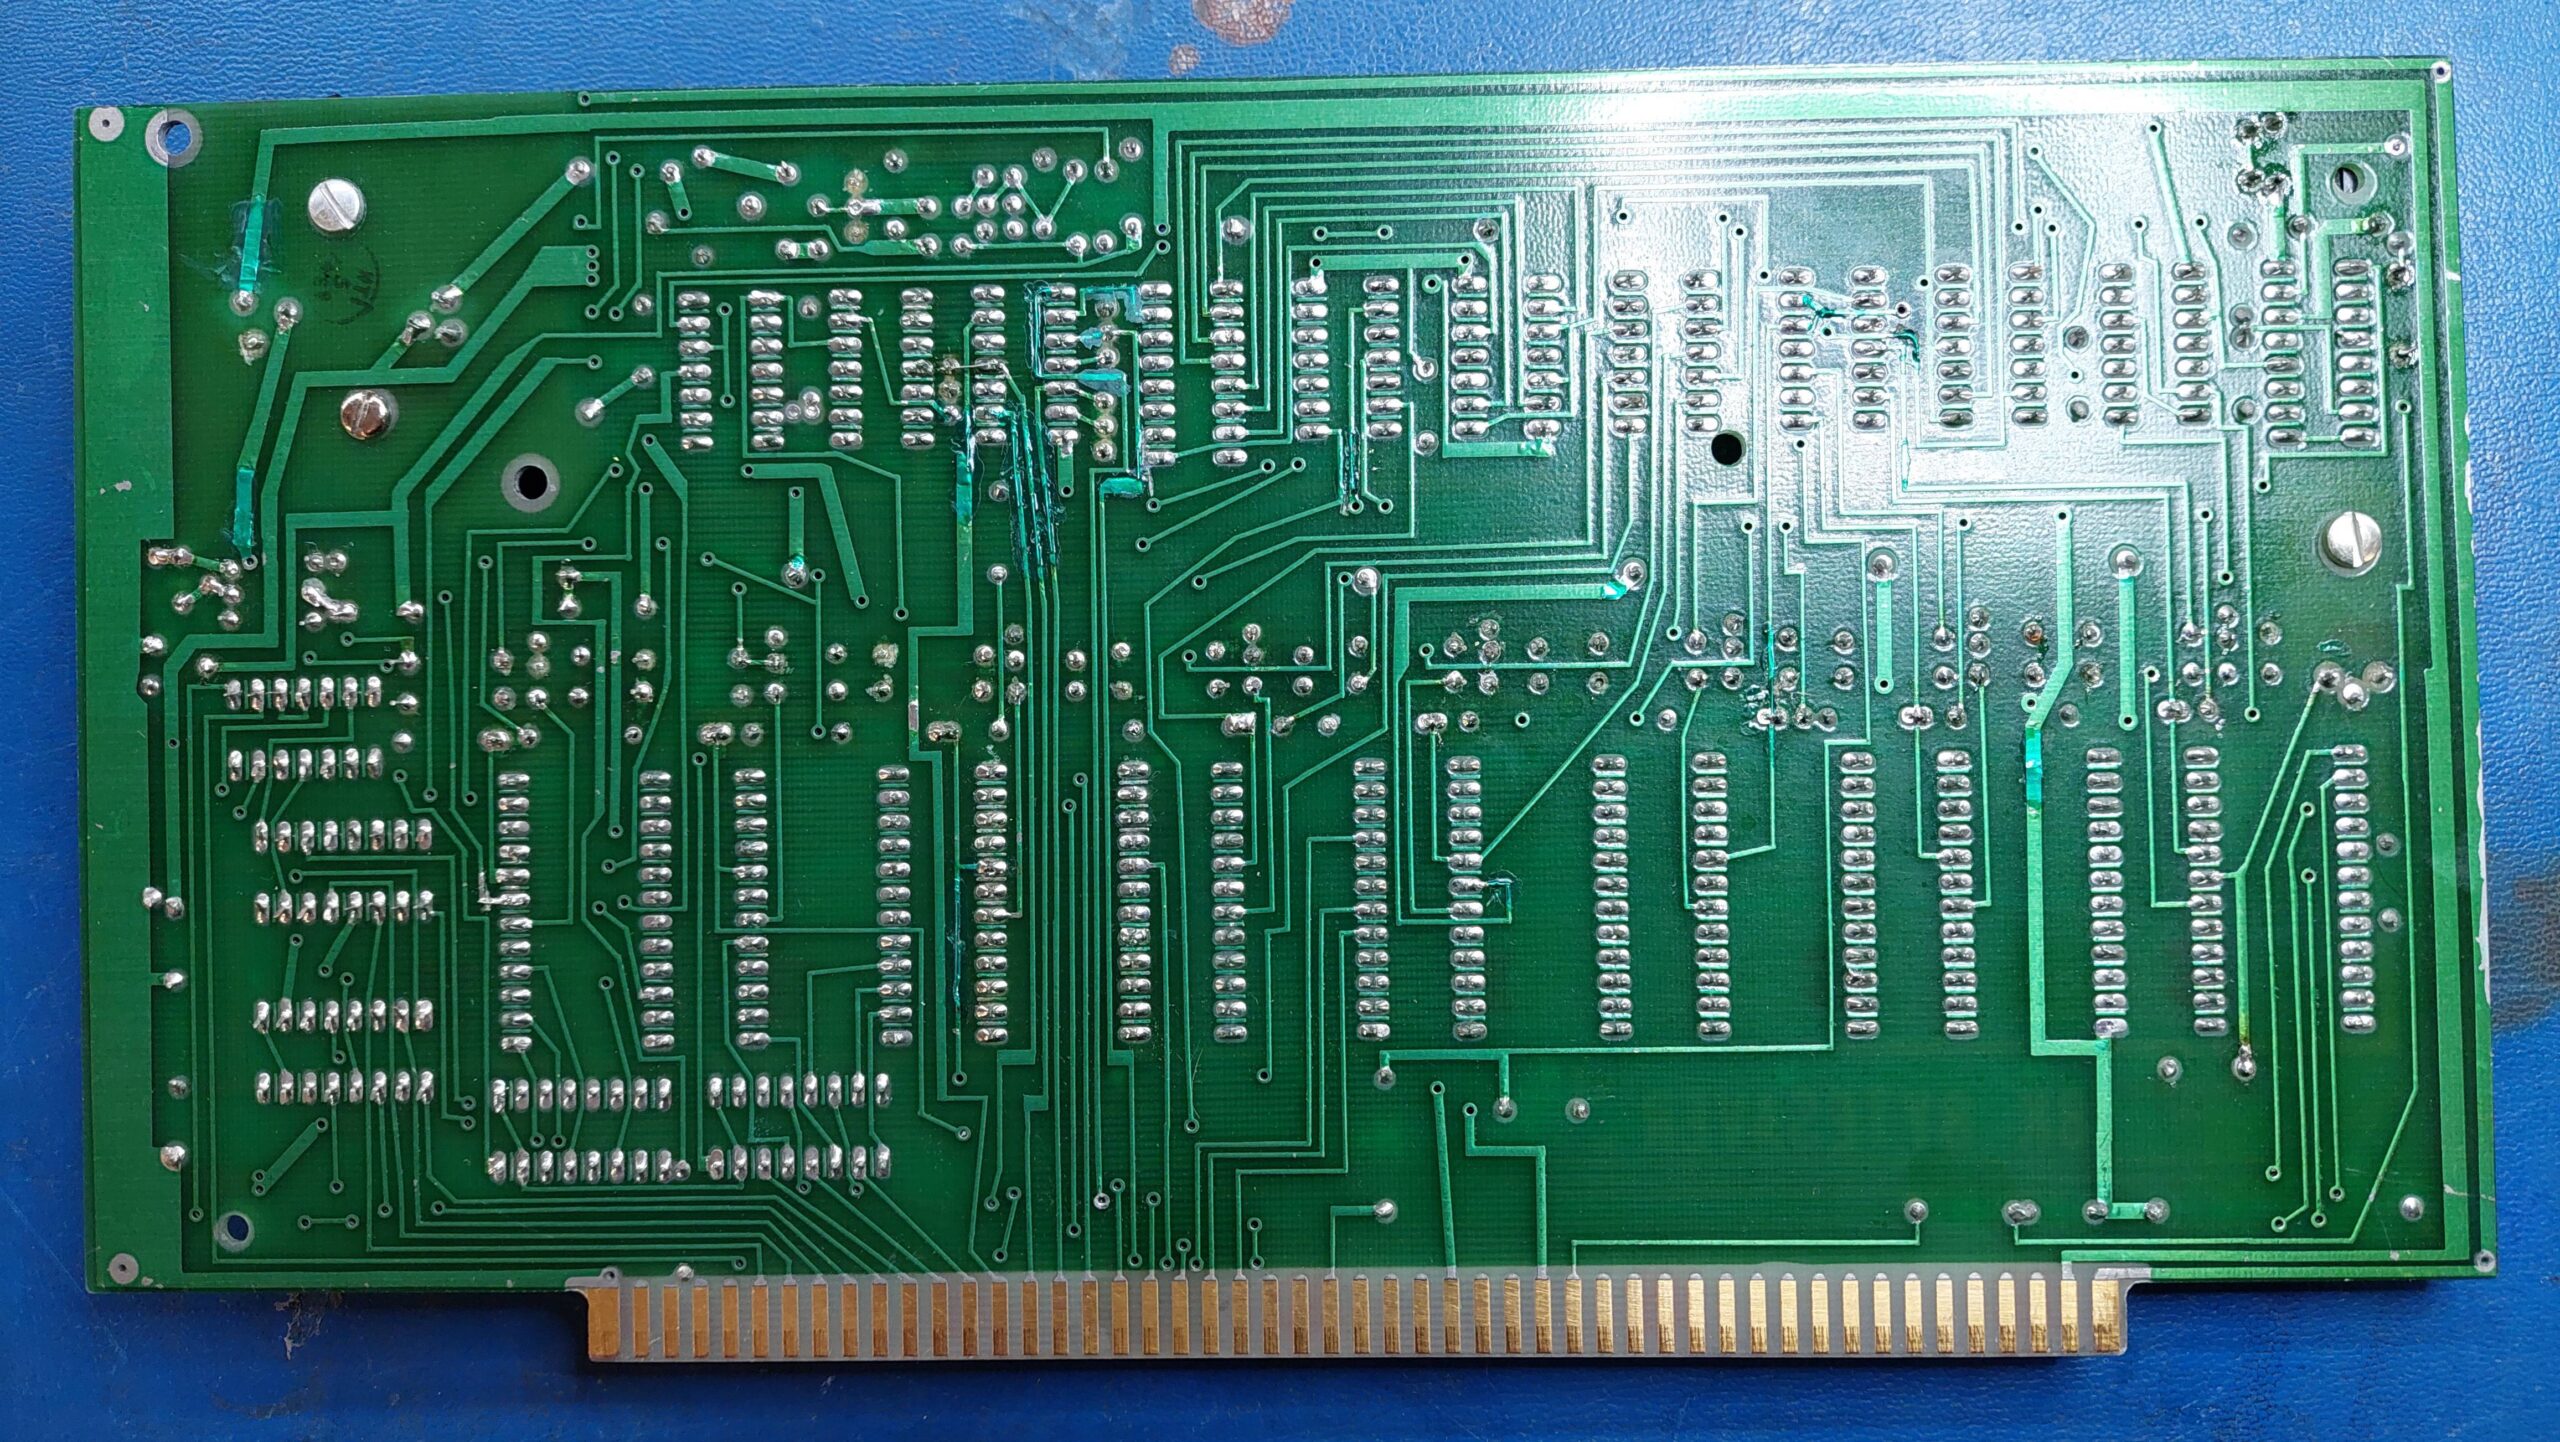
Then i started looking for the track cuts. There were a lot of them on both sides of the board. Many cuts had been made and then repaired. They were a bit rough with deep gouges to the fibreglass and large gaps in the copper.

Each was made good as neatly as possible with the available skill.

I covered the mods with UV cured solder resist just for appearances. It can’t be perfect, but it is a lot better.

I replaced all the missing components, which were fairly generic.

I gave the board a good wash and all the sockets and ICs were given a couple of rounds of deoxit. Many of the ICs had very black legs – i suspect that many of them had silver-plated legs.

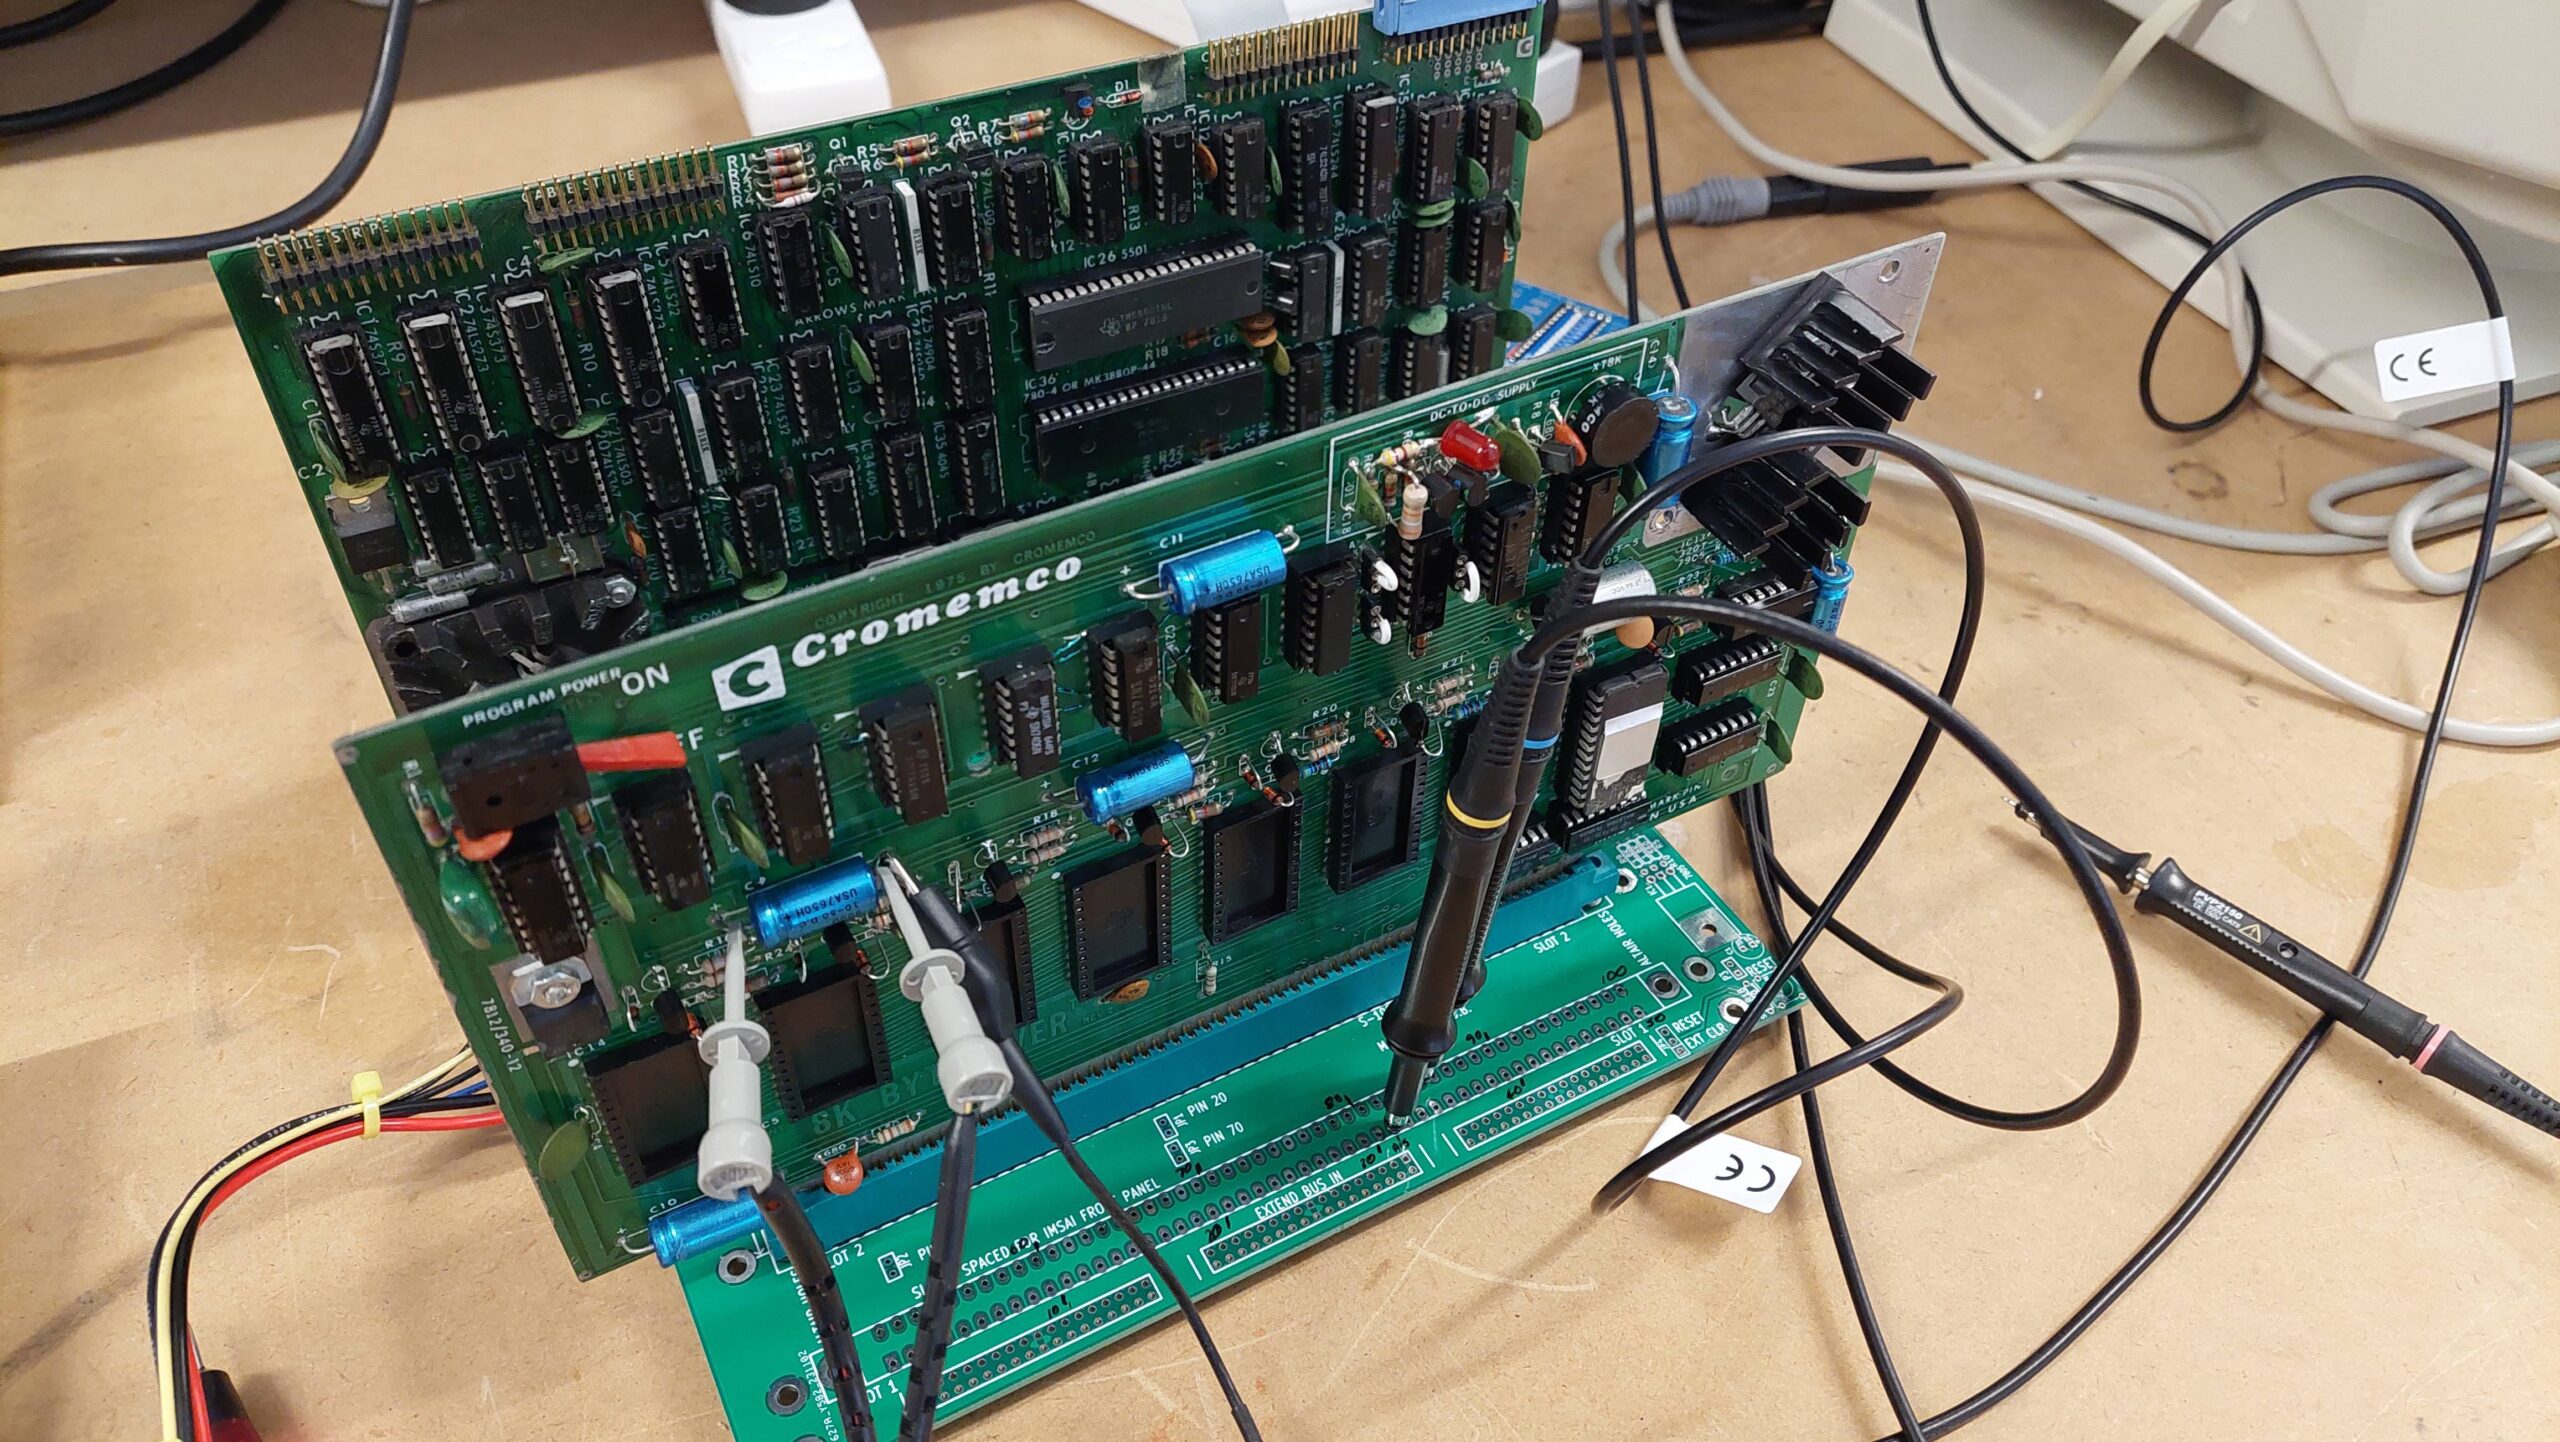
With my only two racks in use, i needed to get around to building up a third backplane. This one is based on the S100 Computers 9 slot backplane. Being lazy, i added just the two connectors that i needed.

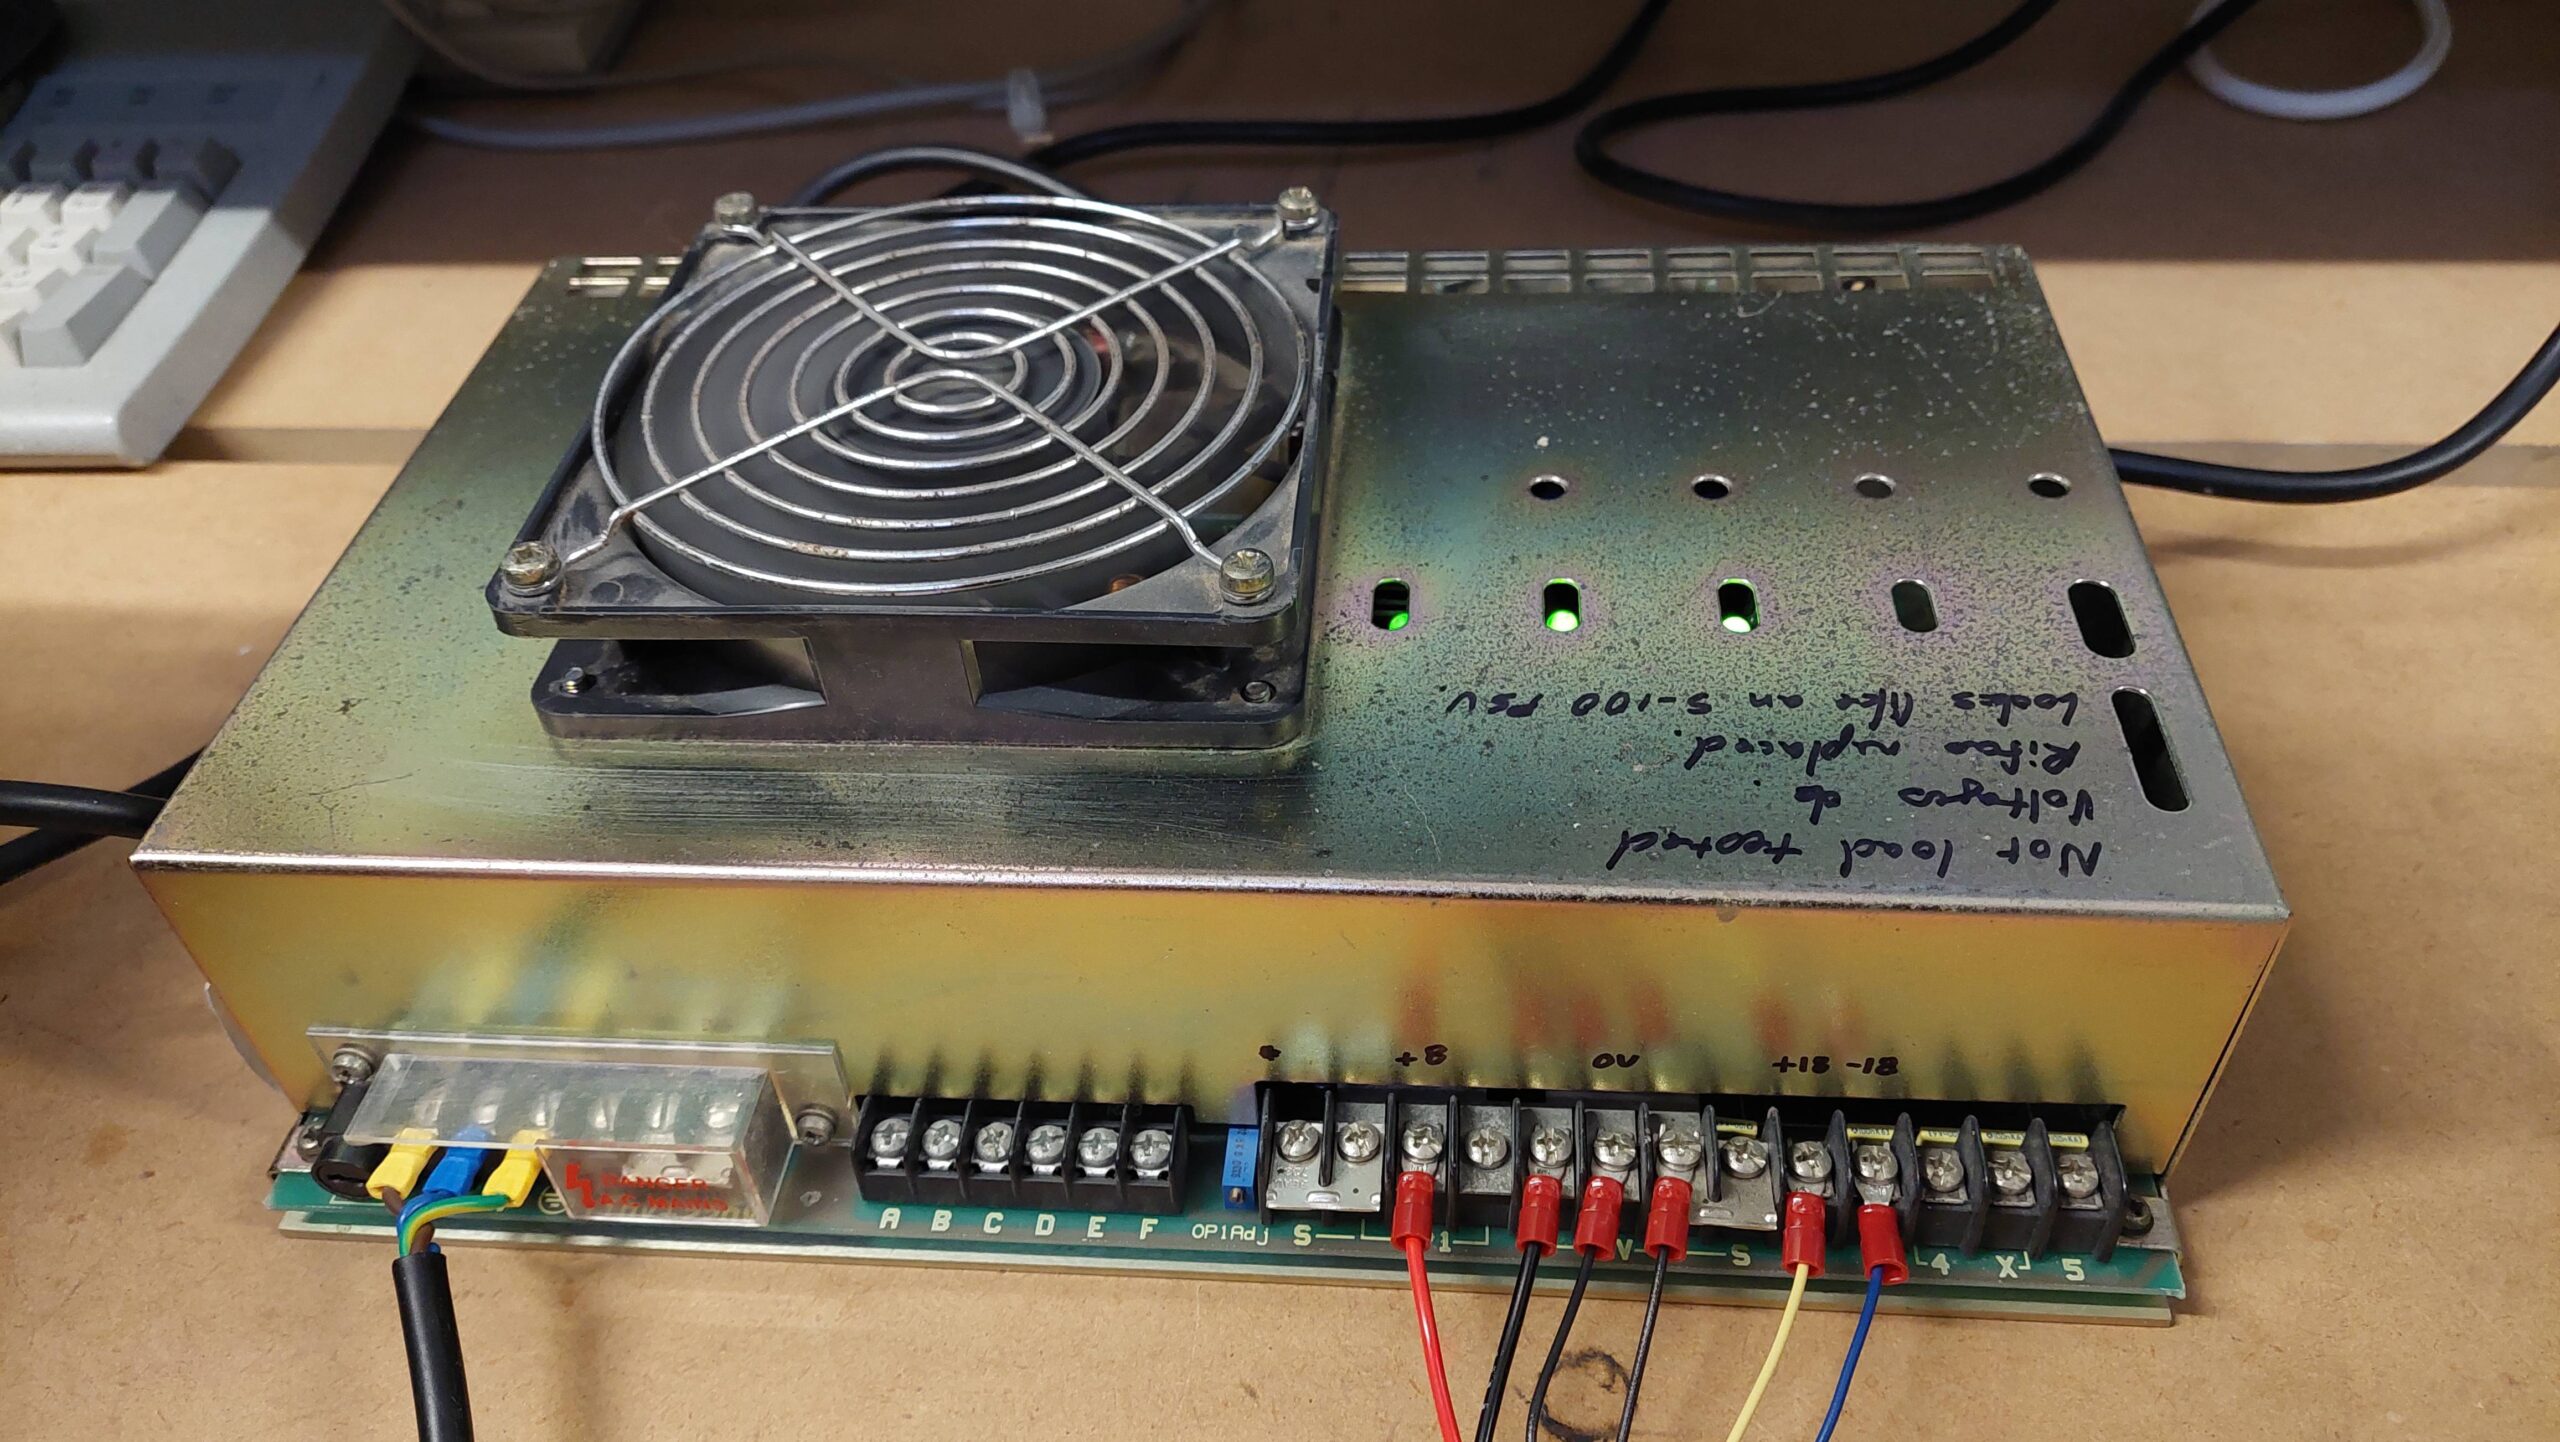
I was fortunate to have picked up a monster of an S-100 power supply off FB marketplace a while ago. With the power loom made, it was ready to go.

I checked the supplies without any ICs inserted. All good. Then i added the ICs.

The simplest test option for me was the Cromemco SCC. It had been a while, so i had to re-acquaint myself with its operation. It has 2 x 2kB EPROMs holding 3k Basic and the Z80 monitor. The SCC talks with a user via a serial monitor.

On power up, the user has to send a couple of carriage returns so that it can detect the baud rate.

I configured the Bytesaver to be at E000H which is well away from the SCC EPROM/RAM space. It uses no I/O space. Attempts to write to the card are treated as programming cycles with lengthy wait states inserted.

There are several manual scans available, and they do contain schematics, but the resolution is such that they are very difficult to read. This is not helped by Cromemco’s policy of prioritising low sheet count over clarity!

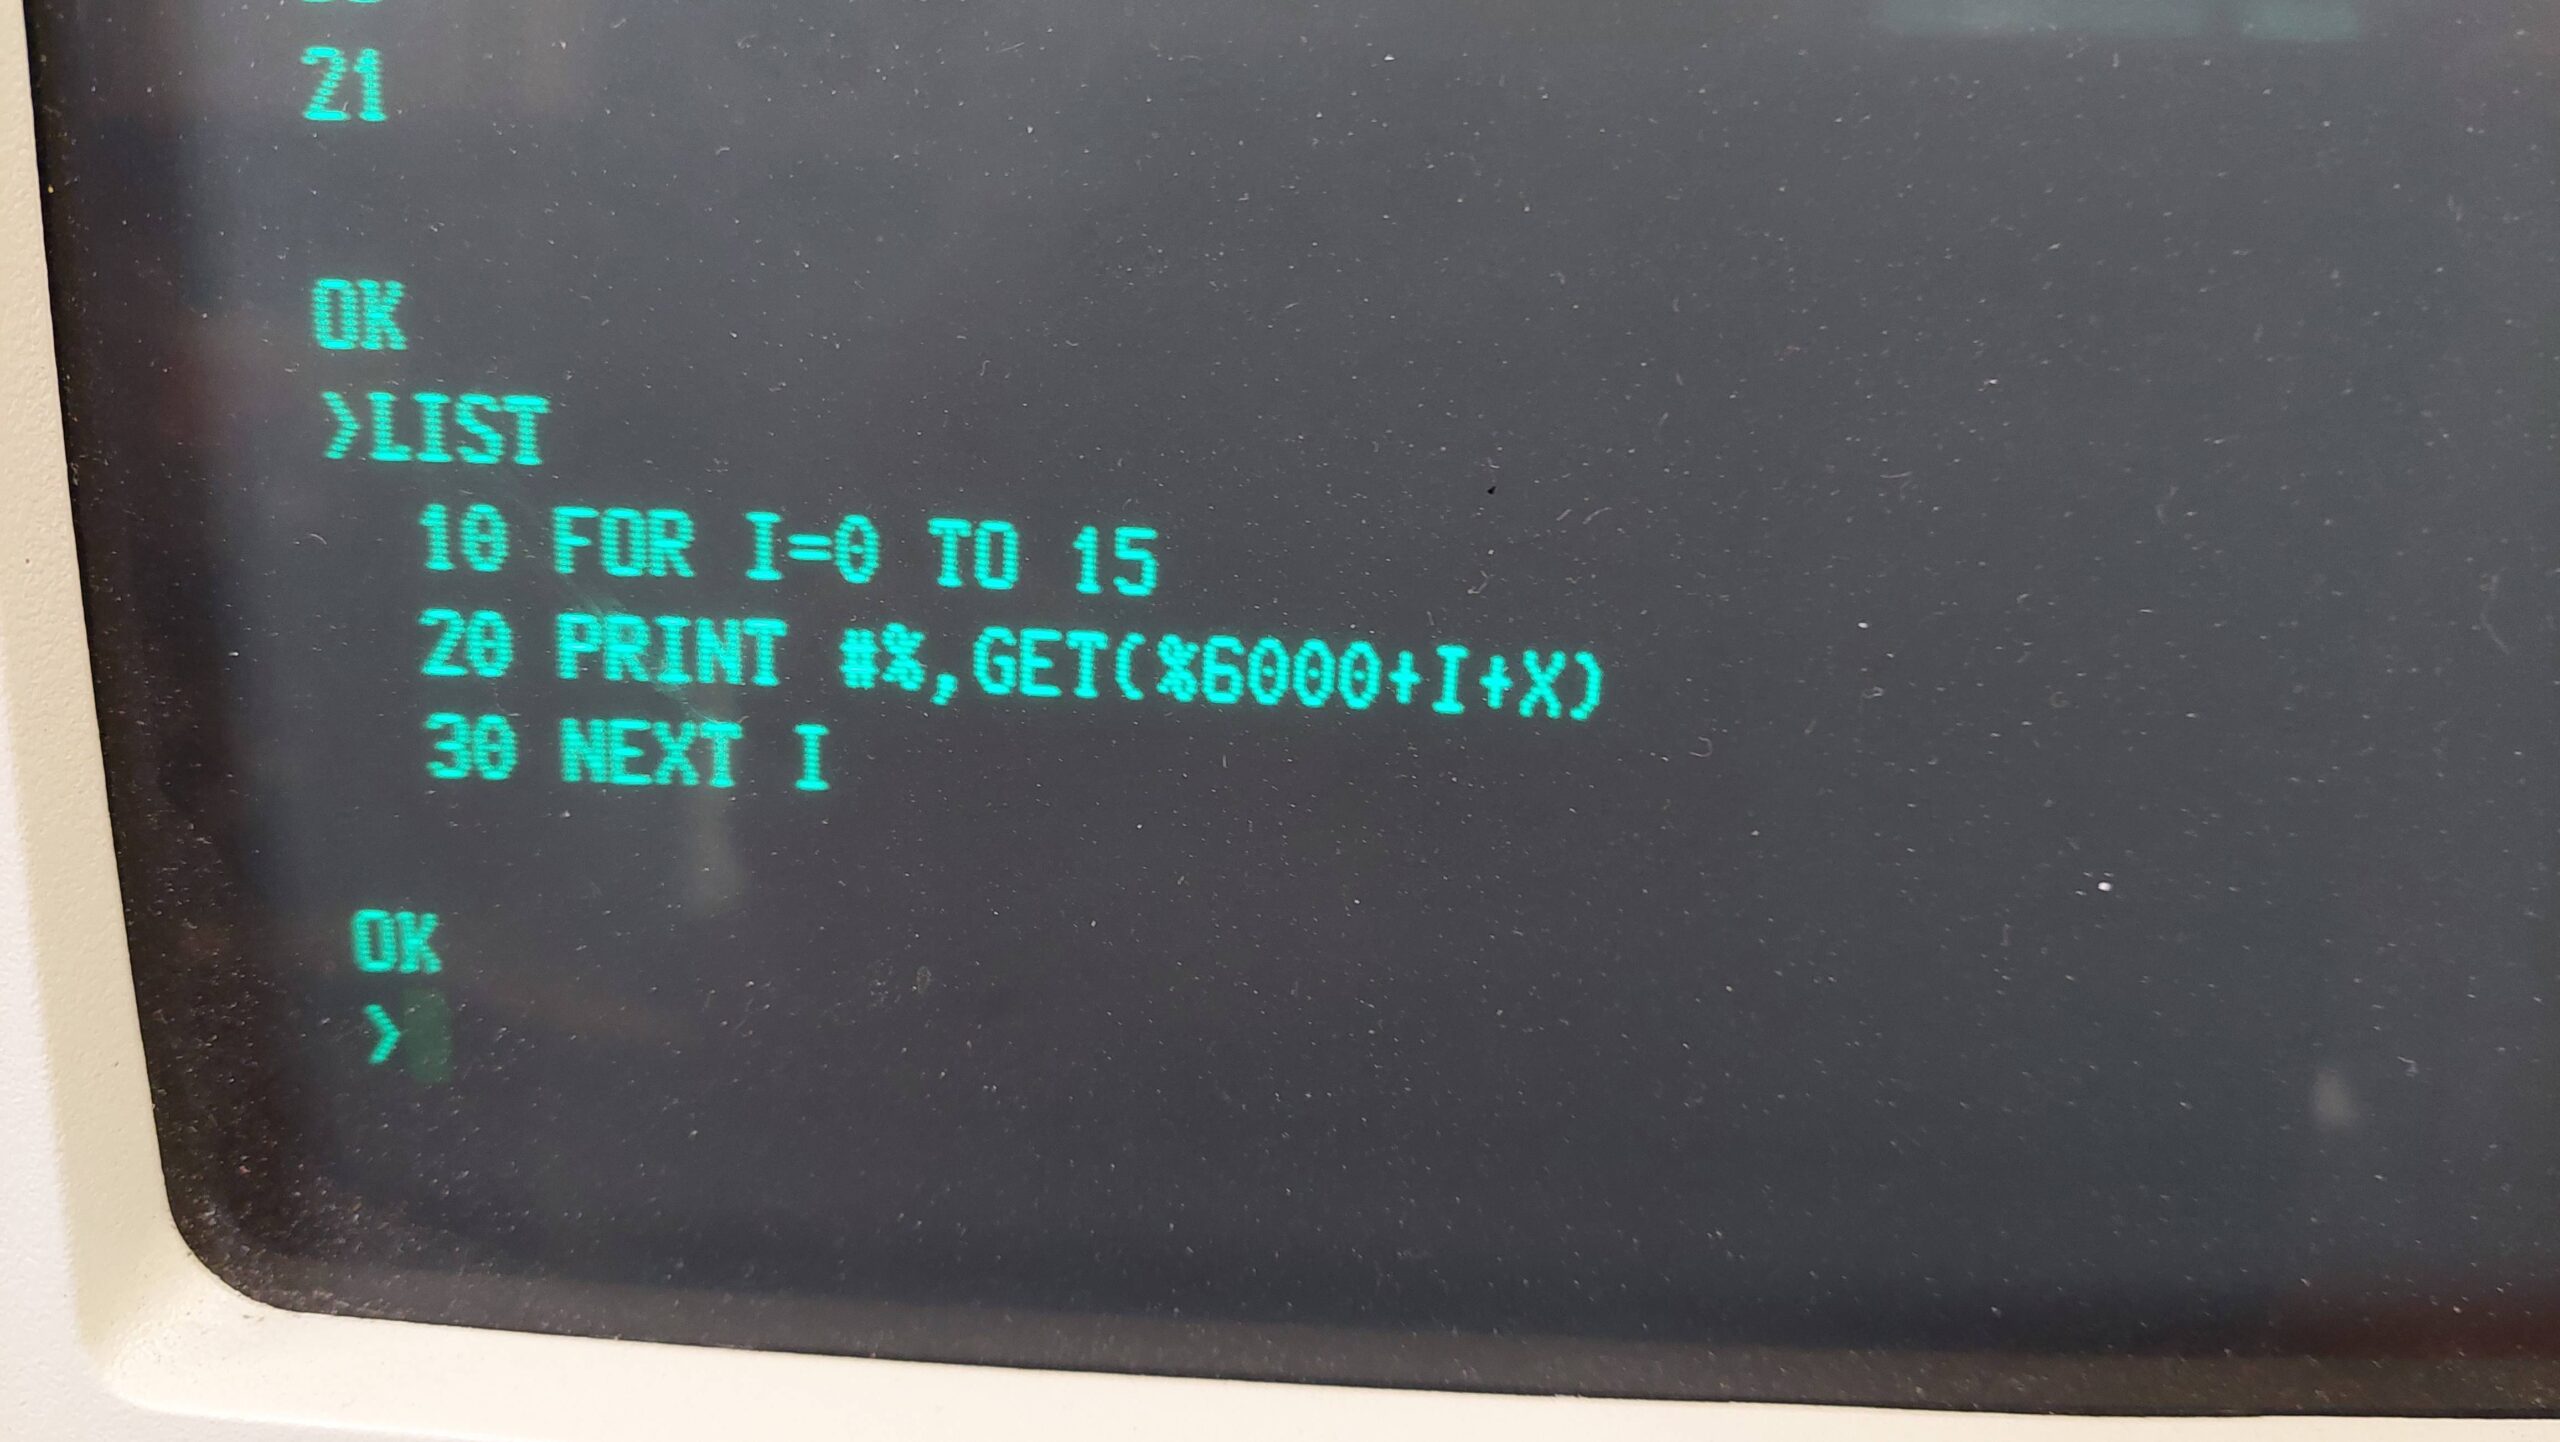
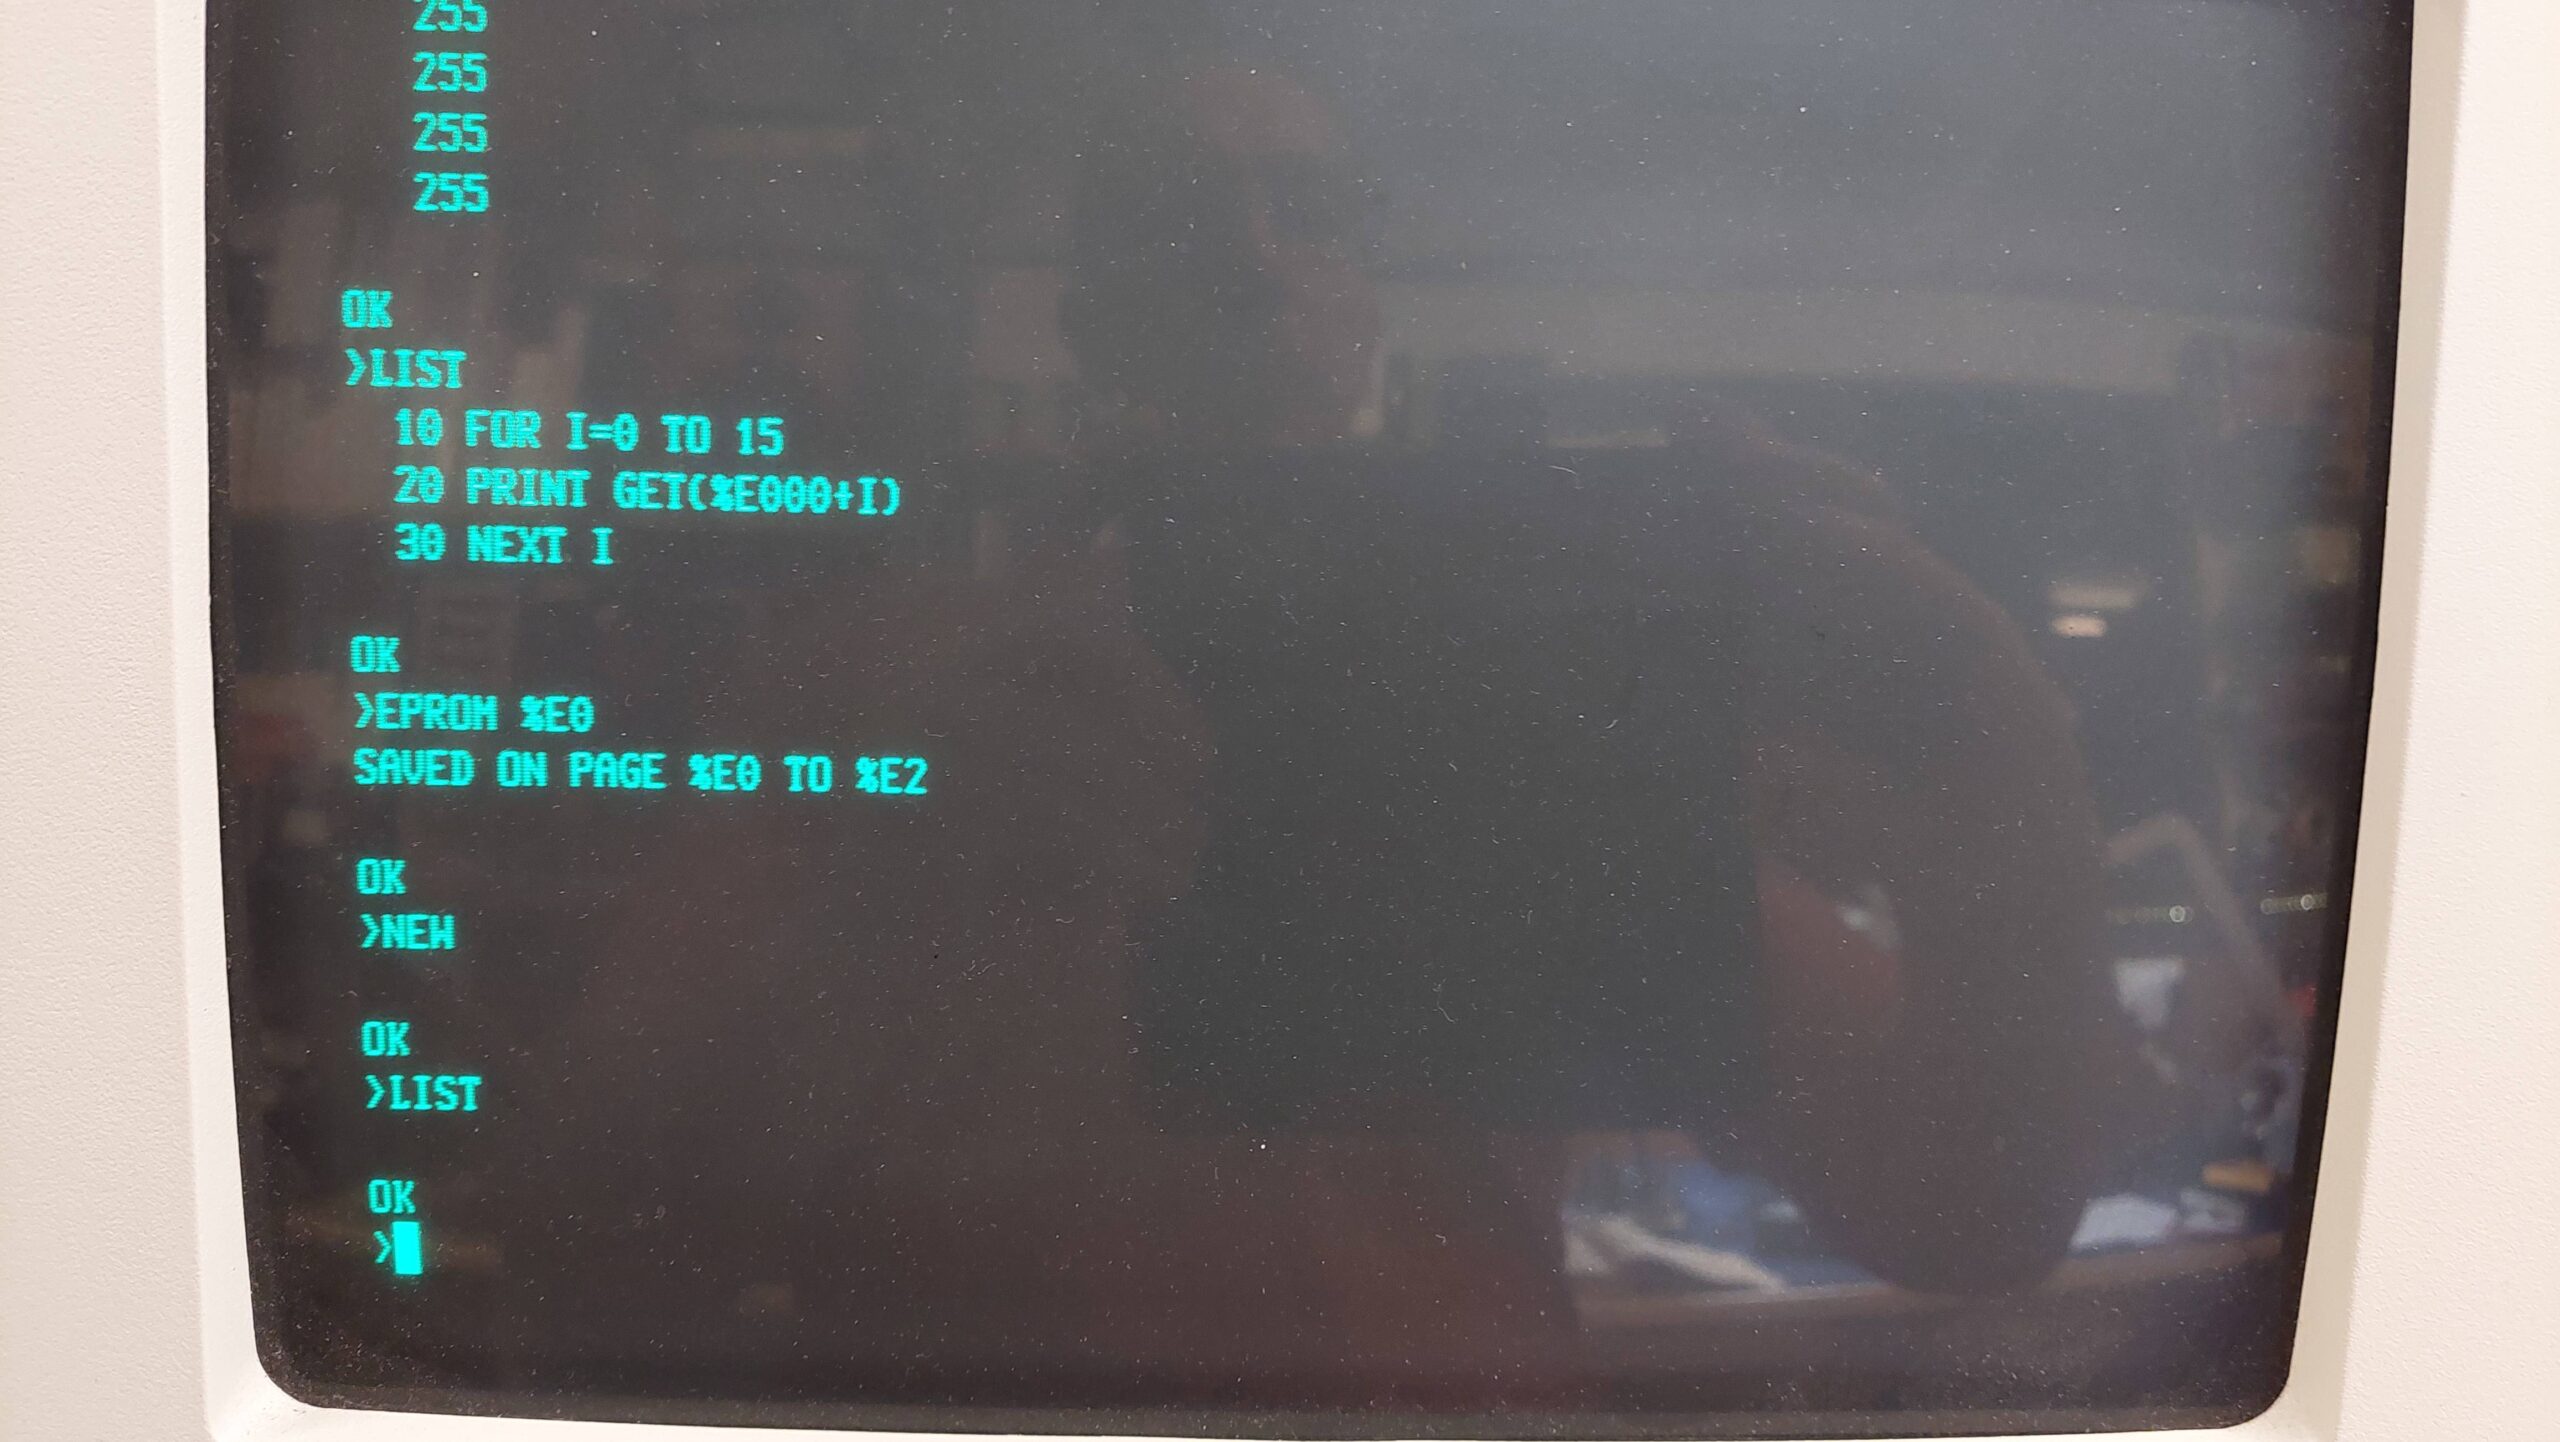
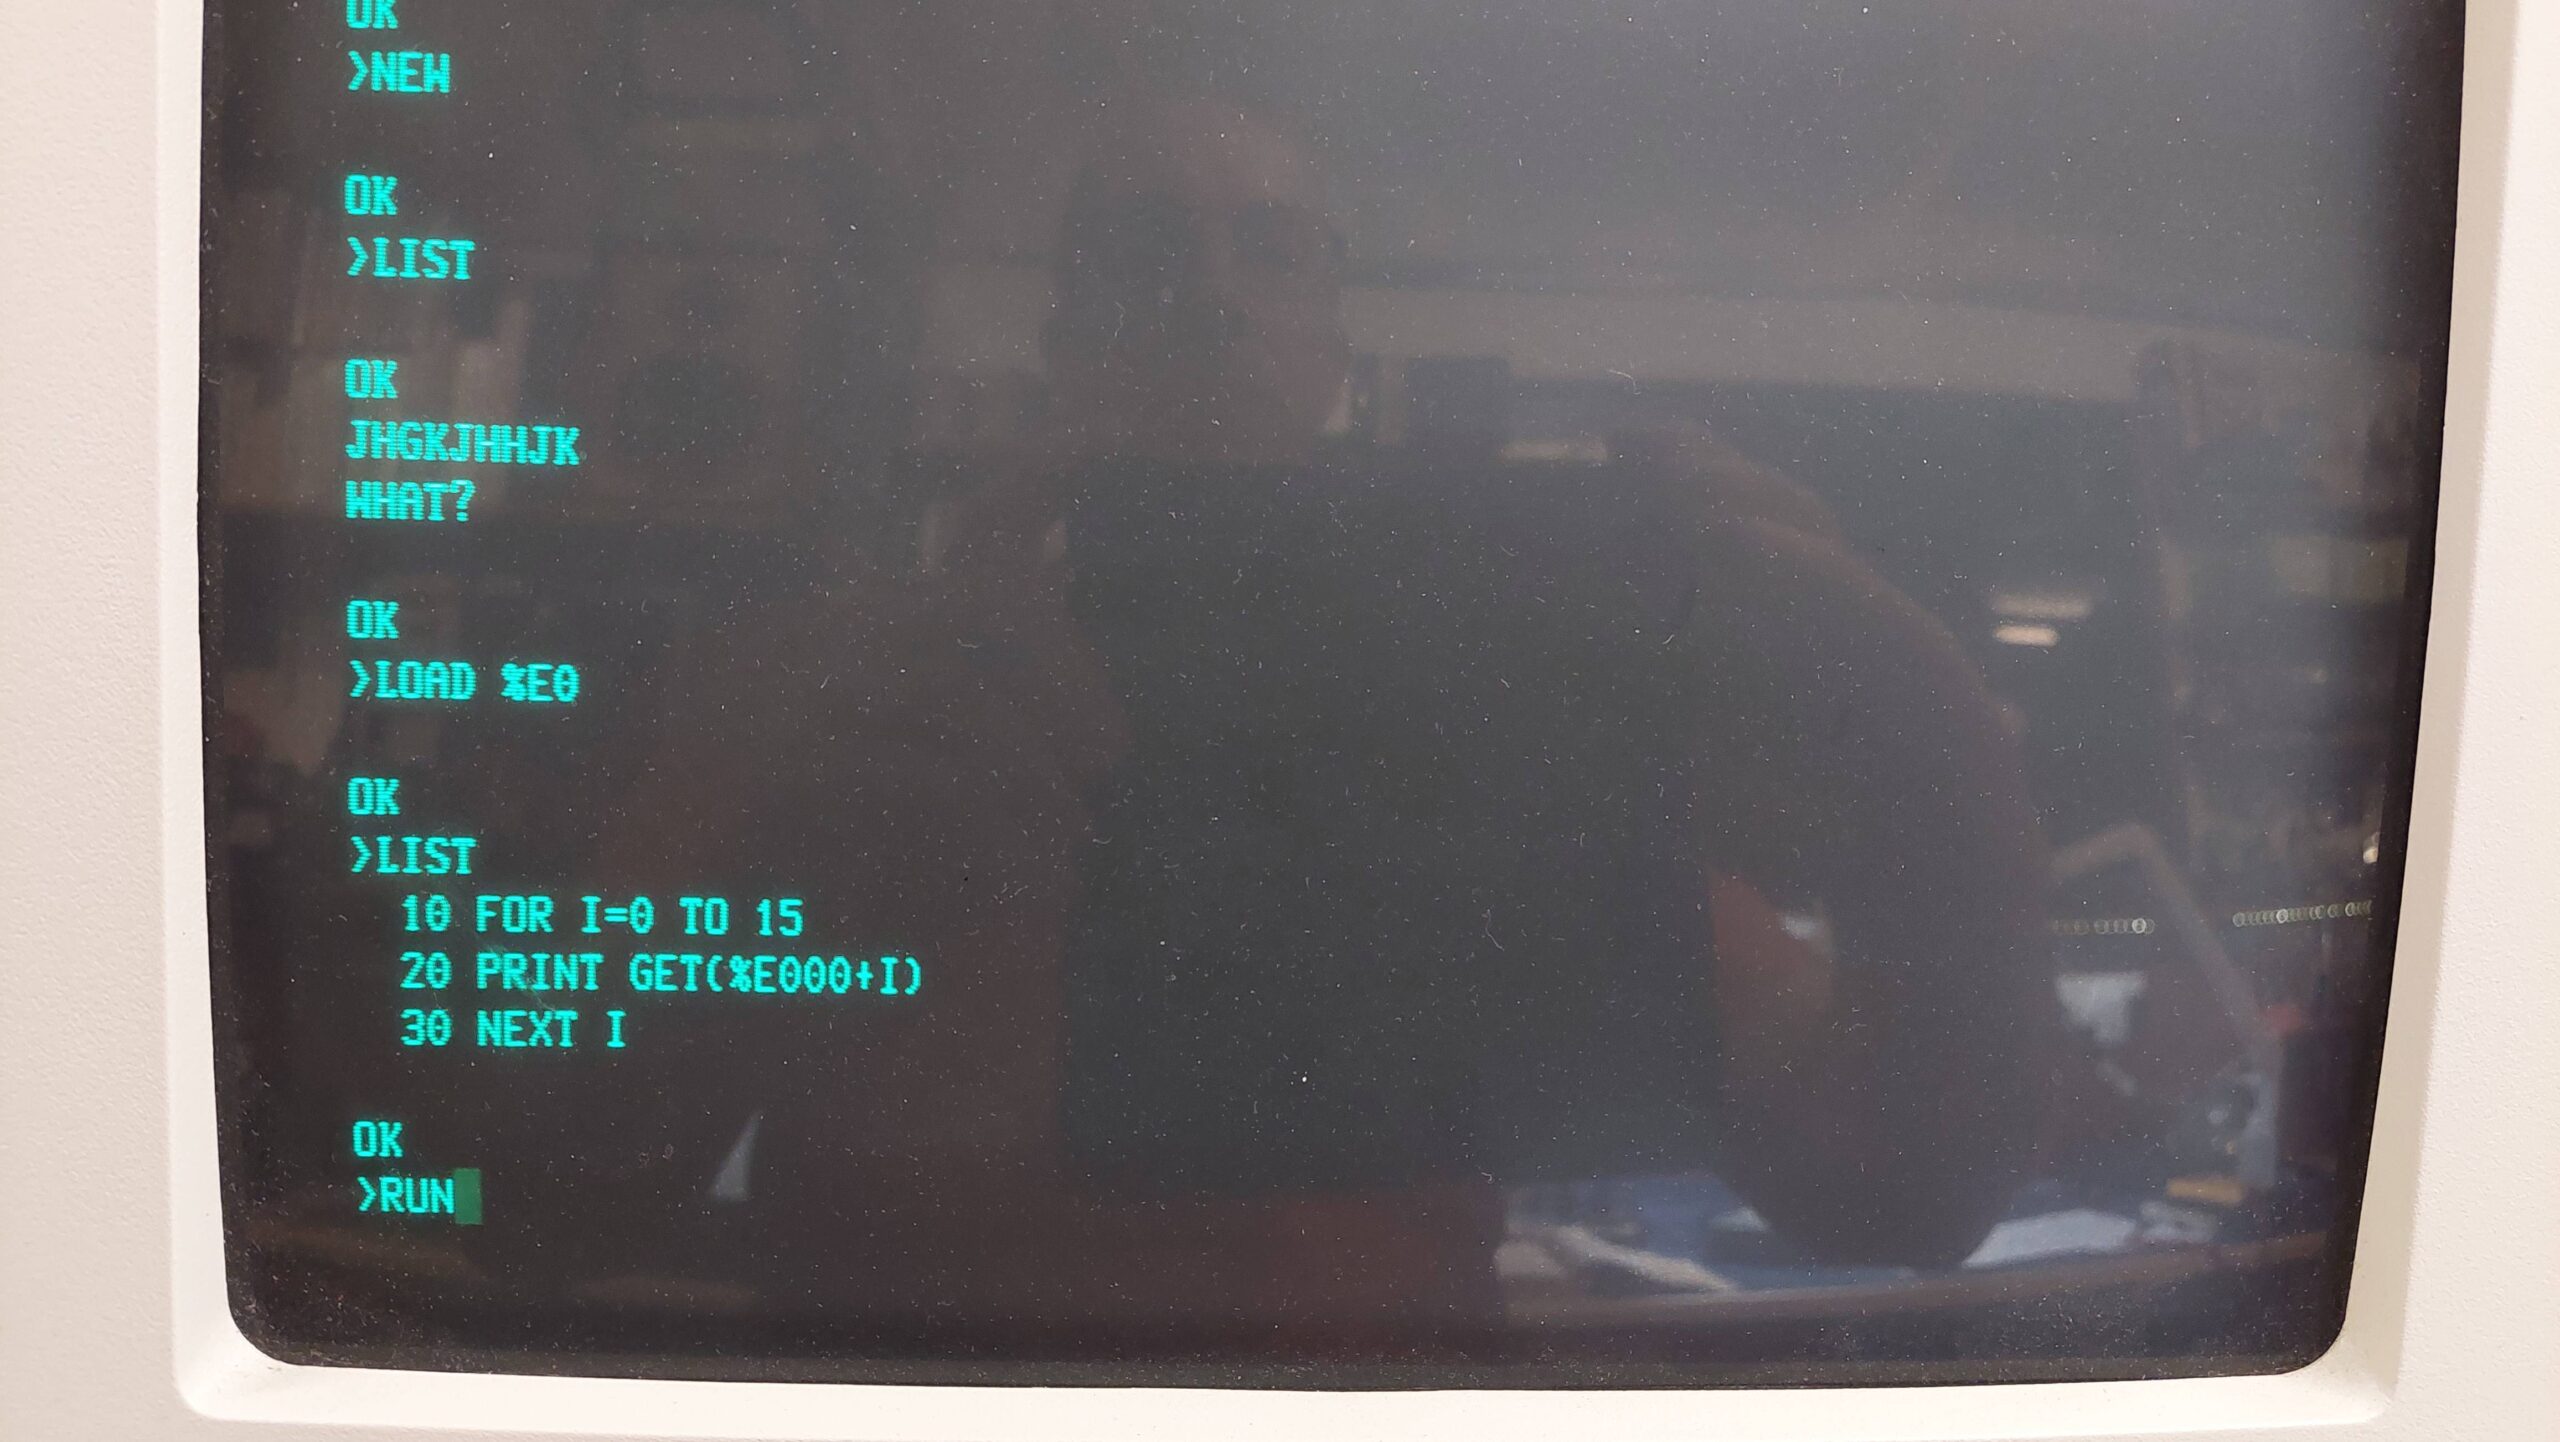
I was not able to reliably quit from the 3k Basic to the Z80 monitor so i did a lot of the debugging in Basic (pic with base address at 6000 rather than E000).

I checked a few signals without EPROMs, and then tried reading some EPROMs that had previously been imaged. I found the fifth EPROM overlapped with the first (a bad address line from the SCC) but once that was corrected (IC48 74LS244) it all looked good.

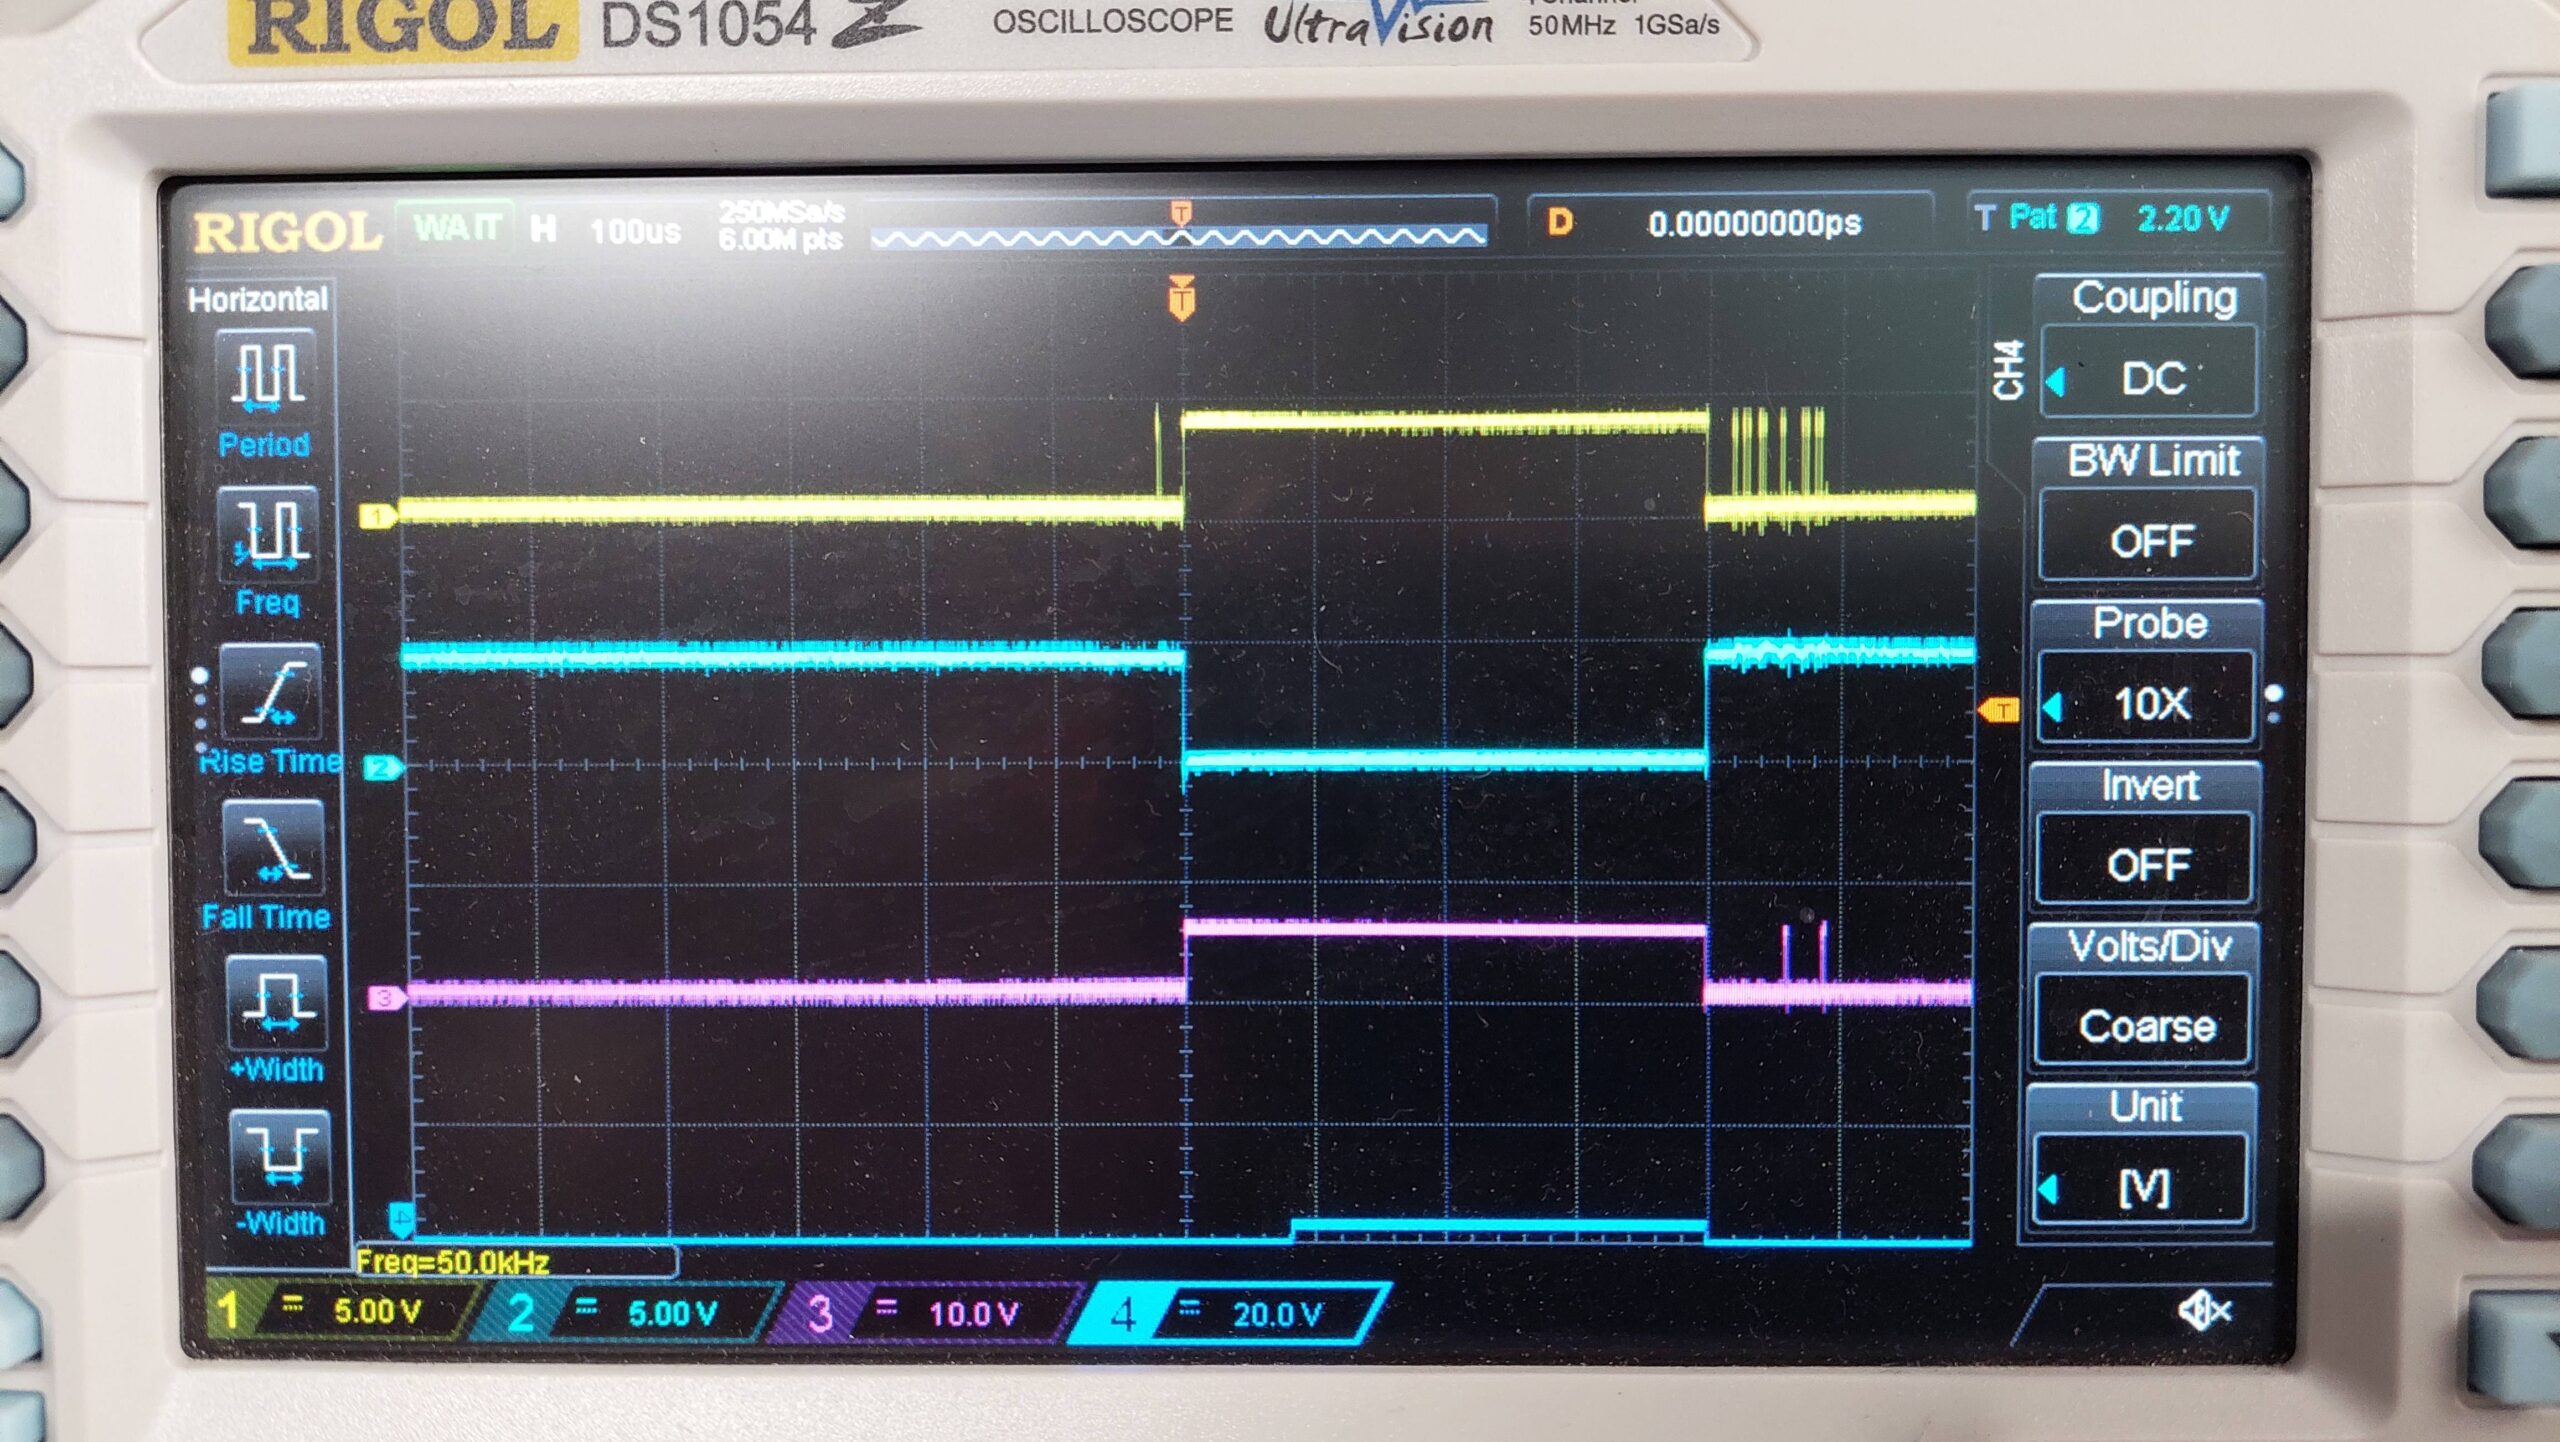
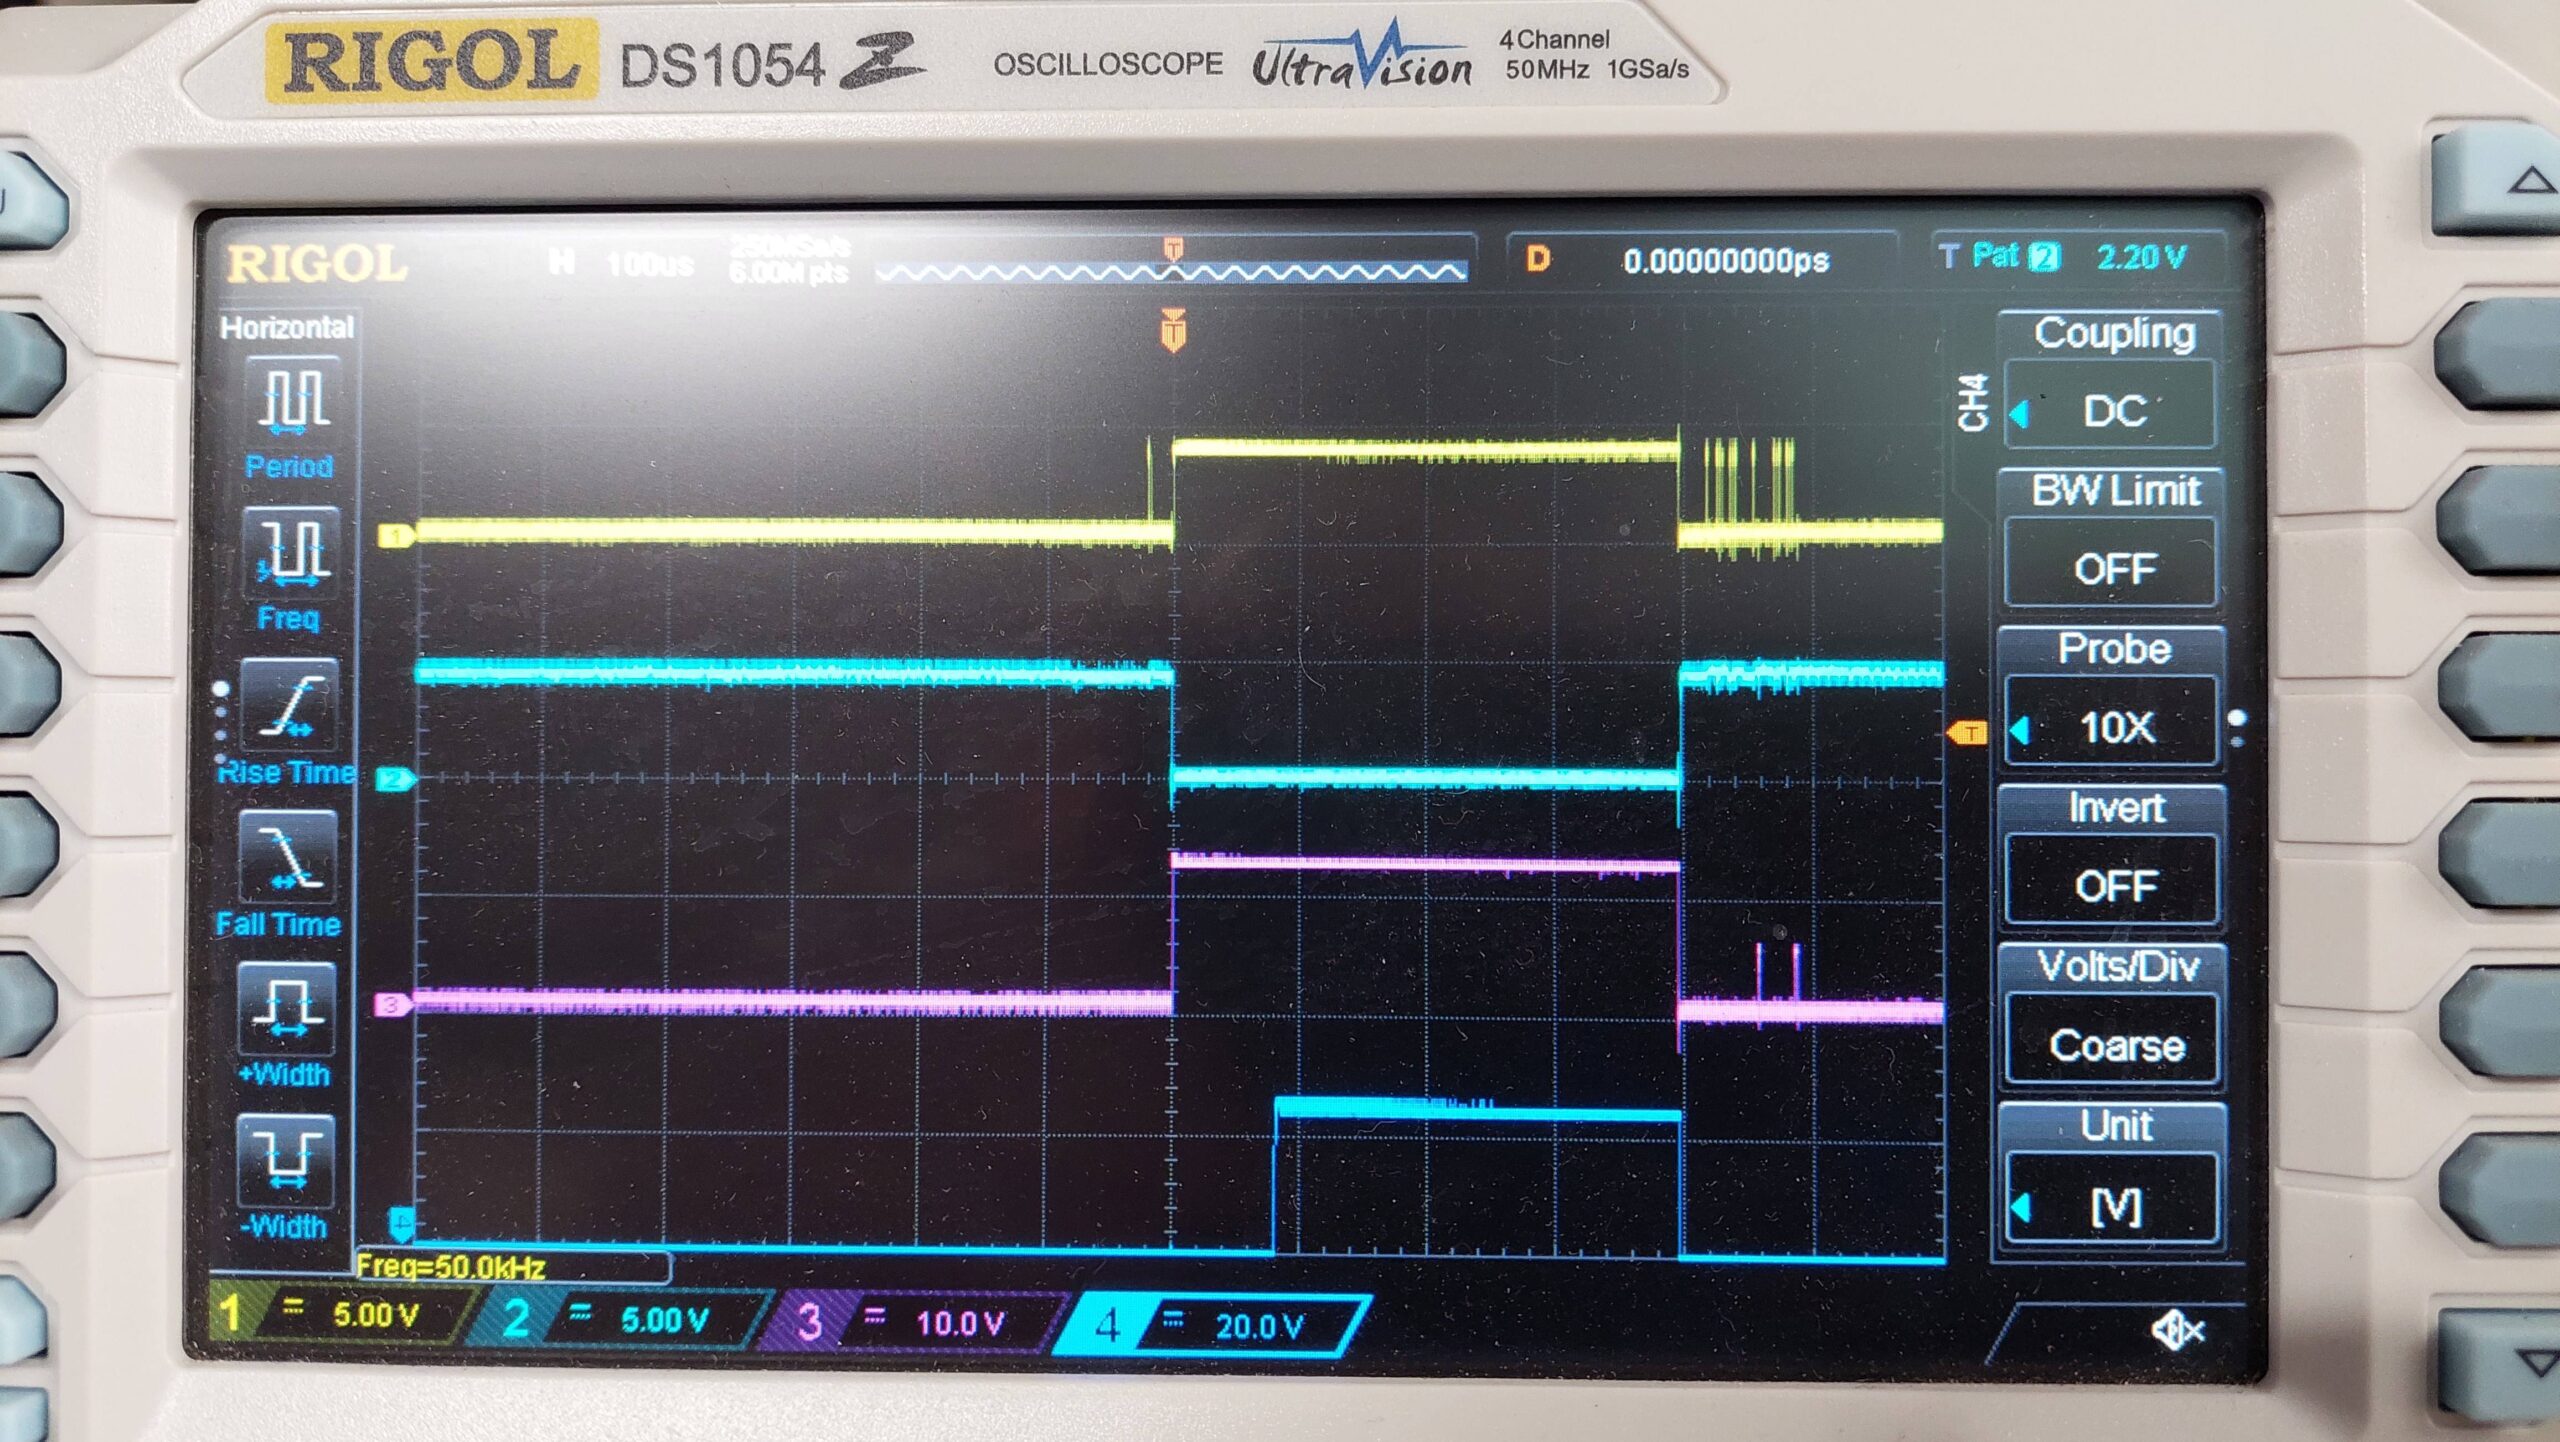
Then i removed the EPROMs and had a look at the programming cycle. This cycle relies on monostables to do the timing and they weren’t. I replaced the IC1 74LS123 and got some cycles that looked good.

Write cycle with switch OFF:

MWRT, Board_Select, EPROM CS (pin 20), EPROM Program (pin 18)

Write Cycle with switch ON:

This is how it should work according to the manual. With the programming switch on the CS pin rises to 12V and then a short time later the programming voltage is applied.

I looked further at the issue with the transition to the Z80 monitor. I found that it is fine if the PRDY signal is disconnected during the transistion, eg remove IC16-3 and connect with lead after transitioning. This is not a long term solution!

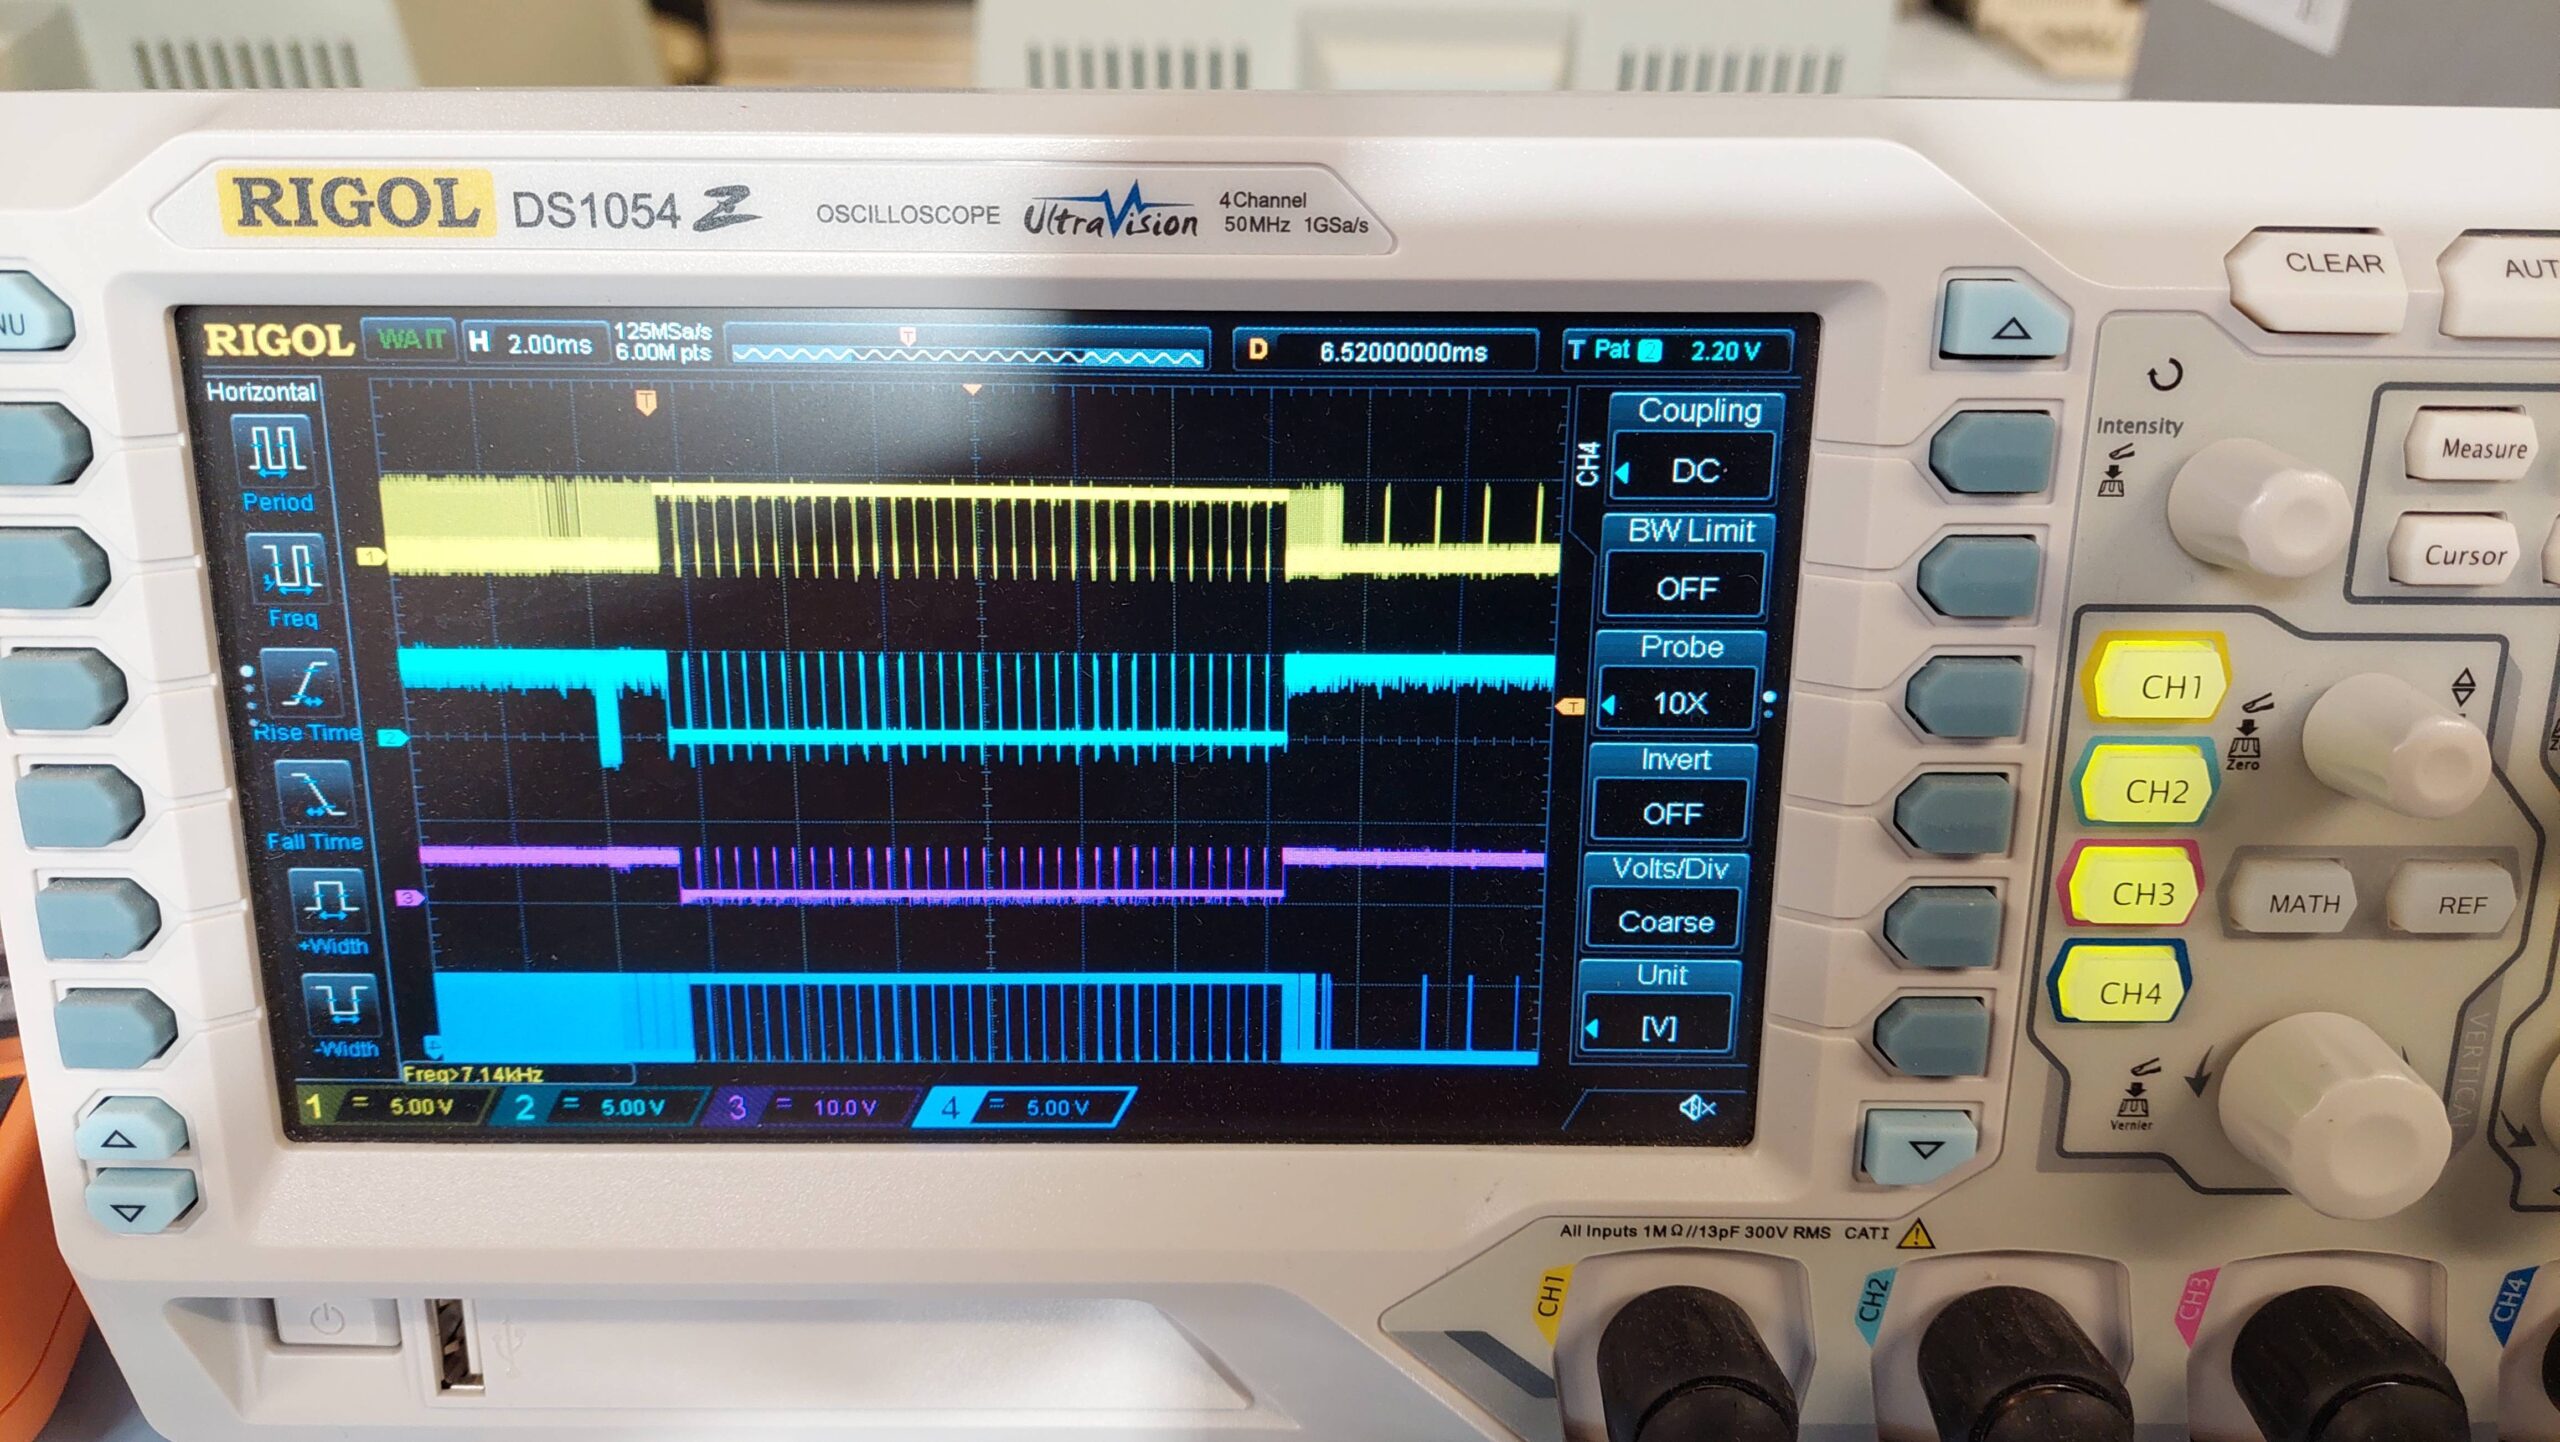
This is what it looks like when QUIT works:

WRT, Board_Select, EPROM CS (pin 20), PRDY

It seems to do 32 writes – is it scanning for available RAM with a write/read check?

I tried replacing the 74367 that drives PRDY. This seemed to have an effect. The transition would work repeatedly. And then it didn’t work repeatedly. And so on and so forth.

I then replaced all the 74367s without any very good reason. It will take some time to work out whether the issue has been resolved.

I tried programming an erased 2708. Remarkably, it programmed just fine! I used the Z80 monitor to copy the first 1k of the SCC ROMs to the blank 2708:

P 0000 S400 E000

I think it verifies during programming, but i verified it anyway:

V 0000 S400 E000

I eyeballed some of the data because i didn’t quite believe it.

It takes about 6 minutes to program a 2708, so a large program would take some patience.

After erasing the EPROM, i tried saving a program in 3k Basic. Victory!

It is worth noting that it is fairly easy to accidentally overwrite an eprom. Just the random check for RAM that seems to occur when the Z80 monitor is invoked would be enough to do it. The programming switch should be set to ON only for the act of programming.

It probably doesn’t look like a big deal, but it has been a fairly painstaking effort to achieve this goal.

Apart from monitoring the reliability issue, i think the next step is to repeat the exercise with the older version of the Monitor & Basic: CB-308. This will require the binary to be programmed into two 2716 EPROMs and placed in the spare sockets of the SCC. Then the binaries can be copied into a set of 4x 2708s. This should also work on the SCC. After that, i can attempt to use the ZPU card together with some RAM and a TUART.

Other Notes:

  • Top left hand blue capacitor is good for Logic Probe power. It is also good for a scope ground connection.
  • A modern socket plugged into the old sockets is more accessible for buzzing out connections.
  • Board_Select AND sMEMR can be picked up at IC16-1.
  • MWRT can be picked up at S100-68
  • CS is pin 20 on the EPROM socket
  • BASIC won’t successfully quit to the Z80 monitor if the RDY signal is connected. Remove IC16-3 and connect with lead after transitioning. This needs to be resolved.
  • The row of 4.7k resistors should be 18k but, this may have been due to a change for Revision 2.

Data General One

This machine came from Craig M of the ARC group. It is a Data General One from 1984. It is often credited as being the first battery powered IBM compatible(ish) laptop.

The impressively large LCD screen with its unimpressively low contrast is its Achilles heel. If not for that, it probably would have been a very successful machine.

The machine arrived with an expansion box, some disks, and lots of old-school manuals. Much of the software was packaged specifically for the One.

The Data General One Systems Programmer’s Manual contains a lot of technical detail about the machine include specific compatibility issues.

I also found this comprehensive and well-written article very helpful:

https://oldvcr.blogspot.com/2024/03/refurb-weekend-data-generalone-and.html

My story is different in that the machine came with a battery and an expansion unit, but did not come with a power supply. Somewhere along the way i also acquired the external 5.25″ drive unit but not the attachment cable.

Looking at the images in the article and comparing with my unit, i think the screen on mine seems to be somewhat clearer. It does seem to have what looks like some dust behind the panel, and it certainly needs good light (a camping headlamp works quite well) but it is quite useable if that’s all you have. It’s so much better, and clearly has a shade of green, that i wonder if the LCD is the same.

The expansion unit includes a floppy disk controller and 5.25″ floppy disk, a hard disk controller and a IMI hard disk built like a brick dunny, and a printer card. The manual indicated that it was possible for the system to use a CGA card in the expansion unit together with a CGA monitor to provide an external display – a blessed relief from the built-in LCD although far from portable.

The battery is charged from an external power pack, but it came as a surprise to learn that this was not intended to power the computer as well – although, as it transpired, it did do that job with some help from the battery. I couldn’t see this being sustainable.

Without an external supply or even the mating connector, i was forced to jump start it using a bench supply and some croc cables. Later i made up a power supply using an old laptop power supply and an adjustable DC/DC converter. The connector is a bit rough at present.

With power, the computer gave a beep and then, after a delay, it gave a further two beeps. The screen was blank initially but could be adjusted with the contrast buttons (command page-up and page-down). A carriage return allowed the system to boot from the front floppy drive.

Both symptoms were related to the backup battery being very flat. The battery was just a 2025 in a battery holder under the internal modem card.

The system reported a full 464kB of RAM – sadly, 48kB of the physical 512kB is lost to graphics memory. I have no idea whether another 128k can be added in the expansion unit.

I can confirm that the LCD screen is quite awful. It’s curious to me that Amstrad used a similar screen in its PPC512 a couple of years later. It was similarly awful, but at least external CGA was available on the Amstrad base machine.

The expansion unit connects to the computer via a cable and “dock”. The dock plugs into the expansion connector on the back of the computer and is held in place by two screws. When i tried to mount the dock, one of the mating nutserts released itself from the computer, and being worried that some debris may have been fallen inside the machine, i decided to open the unit. I had to anyway, to replace the battery.

Through this process, i learned that it is not necessary to remove the floppy disk drive screws or the keyboard screws.

<picture>

The remainder do need to be removed, together with the 6 metal clips – three on each side. The LCD cable can be released via the battery compartment by pulling up on the top half of the connector. Then the top half of the computer can be lifted and completely removed if the power switch is disconnected.

You have to be impressed with the amount of electronics crammed into the unit. There is a lot of surface mount technology for 1984 and the line sizes on the PCBs are very small.

The top card in the stack is the internal modem card. This seems to be controlled through a parallel interface and seems only to be available to the ROM resident terminal program.

The next card is the I/O card with floppy disk controller, real time clock, and the two serial ports. There’s a ton of surface mount on the back, which i neglected to photograph. The offending 2025 real-time clock battery was replaced.

And that’s the main board with the 8088. Most of the cabling has been done with a flexible PCB which is very space efficient. I fear for its longevity, though, as the bends are quite severe.

The memory expansion unit is very cute with three 128MB cards.

After all that, there was no debris, and i cannot see any way to restore the nutsert. I did a full disassembly to clean the keyboard and to have a look at the innards.

Care has to be taken with the main board – the ground springs need to hook under the plastic insulating layer.

I was somewhat aghast to see some scratching on the main board. This is caused by a metal cable retaining clip under the DC/DC converter on the rear panel. I inspected this pretty thoroughly to make sure that no tracks had broken. I added some tape to the metal clip to protect the board. Not great design.

I have not resolved the issue with the dock mechanics, but i pressed on.

DG One Power Supply

The power arrangements for the machine are a little unusual. It can run from mains power adapter or from a large nicad battery pack. The battery pack is charged in the machine from a separate battery charger – not from the mains supply.

The mains supply, is according to ?????, a 30W 5.8V DC supply provided on a two pin connector of unknown type. I initially “jump started” the machine with a bench supply and some alligator clips.

The actual power drawn by the unit seemed to be no more than a couple of amps – perhaps the optional thermal printer takes power from the machine.

That seemed to be easily within the realms of a DC/DC converter. I found a simple one that could take a wide input voltage and could be adjusted to 5.8V. I’m yet to put it in a box, but it should be easy enough.

The DG One power connector is probably impossible to find but i did find some contacts that were close enough. I’ll need to craft a shell for the contacts.

As for the Nicad battery and charger – well, i think they can be relegated to exhibits.

DG One Expansion Unit

With the base machine seemingly working well, it was time to try my luck with the expansion unit. I really should have inspected the power supply first because it let out quite a lot of smoke from a line filter capacitor self emolliating.

Accessing it involved removing the cover, removing the fan cowling, and then releasing the supply which, conveniently, has connectors at both the mains and DC ends. I replaced both line filter caps.

The hard disk drive did spin up, but that seemed to be all it did. There didn’t seem to be any calibration activity. On power-down it sounded like it ground to a halt. I think it’s unlikely to be viable. I removed it – a very chunky full height IMI 18MB unit.

The floppy disk drive did work, which was good because that meant that the link to the expansion box was working and, of course, the floppy disk controller was also working. The 5.25″ drive appears as drive C. The CMOS settings need to be changed to 3 drives for it to work.

The expansion unit also had a printer card to accommodate a centronics style printer. The printer port on the computer is serial and maybe specifically set up for the data general printer. Both the serial ports on the computer are incompatible with IBM ports.

I added a spare CGA card and connected a CGA monitor. With the computer settings set to MONO the external CGA monitor becomes the default screen. The mode can be set to BW40, BW80, CO40, and CO80. If the mode is set to MONO the LCD is reactivated. Without the expansion unit connected, all of these modes work with the LCD. The external monitor makes life much easier.

I thought that an XTIDE card might work with the One. I just took one from an XT and plugged it into the expansion unit. DOS 5.0 booted, but there were some issues during the autoexec. That was enough to show the potential, though.

The system will also boot from the 5.25″ drive in the expansion unit. It will not boot from the rear floppy disk drive, which unfortunately doesn’t seem capable of formatting, although i have been able to write with it. Perhaps a gotek candidate.

I have been able to boot later generic versions of MS-DOS but they may have incompatibilities, eg the real time clock does not work.

I added an XTIDE card and programmed it with the large XT BIOS. The behaviour was a little unexpected, probably because the floppy disk implementation is not 100% compatible with an IBM PC. The Universal BIOS has trouble associating the drive with drive letters often confusing the flash disk with the third floppy. Selecting floppy drives by letter at startup also resulted in boot failures.

The XTIDE Universal BIOS does seem to be a little befuddled by the machine. Selecting the boot drive by typing a letter sometimes worked, but at other times produced baffling results. Curiously, invoking the menu and then using the arrow keys to select the boot drive from that menu worked fine. Perhaps the relevant data is reread at that point; only a universal BIOS expert would know.

Also, fortunately, the Universal BIOS will allow the system to boot from any of the floppy drives – as long as it is selected from the Universal BIOS menu.

MS-DOS 3.2 is limited to 32MB partitions, which is a little tight. This is probably not a major issue for this machine which is likely to have only occasional use. I could not get the card to boot, but it worked fine otherwise.

I set up a second CF card with DOS 5.0. I was able to make this one bootable and i could set up a full 512kB partition. There is no specific version of MS-DOS 5.0 for the One, so there are a few places where IBM incompatibility rears its head. Firstly the battery backed real time clock does not work, and secondly MS-DOS 5 seems to politely ignore the incompatible serial ports.

With XTIDE and Universal BIOS there are a variety of oucomes depending on the operating system and the boot drive:

OSBoot DriveNotes
MS-DOS 2.1A 3.5″ Front InternalBoots. Can access floppy drives A(front), B(rear), C(5.25″). Appears to not have hard disk support. Was unsuccessful formatting C.
MS-DOS 2.1B 3.5″ Rear InternalBoots. Can access floppy drives A(rear), B(front), C(5.25″). Appears to not have hard disk support. Was unsuccessful formatting C.
MS-DOS 2.1C 5.25″ ExternalNot attempted.
MS-DOS 2.1CF CardAppears to not have hard disk support.
MS-DOS 3.2A 3.5″ Front InternalBoots. Can access CF card with 32MB disk as D. Can access floppy drives A(front), B(rear), C(5.25″). Can write to rear drive but not format. Can format 5.25″ drive and write.
MS-DOS 3.2B 3.5″ Rear InternalBoots. Can access CF card with 32MB disk as D. Can access floppy drives A(rear), B(front), C(5.25″). Can write to rear drive but not format. Can format 5.25″ drive and write.
MS-DOS 3.2C 5.25″ ExternalBoots. Can access CF card with 32MB disk as C. Can access floppy drives A (5.25″), B(front), D(rear). Can write to rear drive but not format. Can format 5.25″ drive and write.
MS-DOS 3.2CF CardDoes not boot. Have to boot from floppy. Then card can be accessed. See above.
MS-DOS 5A 3.5″ Front InternalBoots. Can access CF card with 512MB disk as C. Can access floppy drives A(front), B(rear), D(5.25″). Can write to rear drive but not format. Can format 5.25″ drive and write.
MS-DOS 5B 3.5″ Rear InternalBoots. Can access CF card with 512MB disk as C. Can access floppy drives A(rear), B(front), D(5.25″). Can format 5.25″ drive and write.
MS-DOS 5C 5.25″ ExternalBoots. Can access CF card with 512MB disk as C. Can access floppy drives A(5.25″), B(rear), C(front). Can format 5.25″ drive and write.
MS-DOS 5CF CardBoots. Can access CF card with 32MB disk as C. Can access floppy drives A(front), B(rear), D(5.25″). Can format 5.25″ drive and write.

The rear drive seems to have a strange fault that allows writes but prevents format. May just be in the detail of the format program. The drive system is not 100% IBM compatible.

When formatting DOS 5 seems to treat all drives as 360kB by default. It may be possible to use format options to override but i found it very reluctant. Use driver.sys in config.sys to create new drives E and F that are 720k. Required on any DOS 5 boot disk.I thought that an XTIDE card might work with the One. I just took one from an XT and plugged it into the expansion unit. DOS 5.0 booted, but there were some issues during the autoexec. That was enough to show the potential, though.

The system will also boot from the 5.25″ drive in the expansion unit. It will not boot from the rear floppy disk drive, which unfortunately doesn’t seem capable of formatting, although i have been able to write with it. Perhaps a gotek candidate.

I have been able to boot later generic versions of MS-DOS but they may have incompatibilities, eg the real time clock does not work.

All up, it’s a pretty complex picture!

I thught there may be a performance hit from using the expansion unit so i ran the performance test that is in checkit. The video speed is a little faster on the internal screen. Of course this may be due to the graphics implementation.

DG One XTIDE

I added an XTIDE card and programmed it with the large XT BIOS. The behaviour was a little unexpected, probably because the floppy disk implementation is not 100% compatible with an IBM PC. The Universal BIOS has trouble associating the drives with drive letters often confusing the flash disk with the third floppy. Selecting floppy drives by letter at startup also resulted in boot failures.

Curiously, invoking the menu and then using the arrow keys to select the boot drive from that menu worked fine. Perhaps the relevant data is reread at that point; only a XTIDE Universal BIOS expert would know.

But, fortunately, the Universal BIOS will allow the system to boot from any of the floppy drives – as long as it is selected from the Universal BIOS menu.

MS-DOS 3.2 is limited to 32MB partitions, which is a little tight. This is probably not a major issue for this machine which is likely to have only occasional use. I could not get the card to boot, but it worked fine otherwise.

I set up a second CF card with DOS 5.0. I was able to make this one bootable and i could set up a full 512kB partition. There is no specific version of MS-DOS 5.0 for the One, so there are a few places where IBM incompatibility rears its head. Firstly the battery backed real time clock does not work, and secondly MS-DOS 5 seems to politely ignore the incompatible serial ports.

With XTIDE and Universal BIOS there are a variety of outcomes depending on the operating system and the boot drive:

OSBoot DriveNotes
MS-DOS 2.1A 3.5″ Front InternalBoots. Can access floppy drives A(front), B(rear), C(5.25″). Appears to not have hard disk support. Was unsuccessful formatting C.
MS-DOS 2.1B 3.5″ Rear InternalBoots. Can access floppy drives A(rear), B(front), C(5.25″). Appears to not have hard disk support. Was unsuccessful formatting C.
MS-DOS 2.1C 5.25″ ExternalNot attempted.
MS-DOS 2.1CF CardAppears to not have hard disk support.
MS-DOS 3.2A 3.5″ Front InternalBoots. Can access CF card with 32MB disk as D. Can access floppy drives A(front), B(rear), C(5.25″). Can write to rear drive but not format. Can format 5.25″ drive and write.
MS-DOS 3.2B 3.5″ Rear InternalBoots. Can access CF card with 32MB disk as D. Can access floppy drives A(rear), B(front), C(5.25″). Can write to rear drive but not format. Can format 5.25″ drive and write.
MS-DOS 3.2C 5.25″ ExternalBoots. Can access CF card with 32MB disk as C. Can access floppy drives A (5.25″), B(front), D(rear). Can write to rear drive but not format. Can format 5.25″ drive and write.
MS-DOS 3.2CF CardDoes not boot. Have to boot from floppy. Then card can be accessed. See above.
MS-DOS 5A 3.5″ Front InternalBoots. Can access CF card with 512MB disk as C. Can access floppy drives A(front), B(rear), D(5.25″). Can write to rear drive but not format. Can format 5.25″ drive and write.
MS-DOS 5B 3.5″ Rear InternalBoots. Can access CF card with 512MB disk as C. Can access floppy drives A(rear), B(front), D(5.25″). Can format 5.25″ drive and write.
MS-DOS 5C 5.25″ ExternalBoots. Can access CF card with 512MB disk as C. Can access floppy drives A(5.25″), B(rear), C(front). Can format 5.25″ drive and write.
MS-DOS 5CF CardBoots. Can access CF card with 32MB disk as C. Can access floppy drives A(front), B(rear), D(5.25″). Can format 5.25″ drive and write.

The rear drive seems to have a strange fault that allows writes but prevents format. May just be in the detail of the format program. The drive system is not 100% IBM compatible.

When formatting DOS 5 seems to treat all drives as 360kB by default. It may be possible to use format options to override but i found it very reluctant. Use driver.sys in config.sys to create new drives E and F that are 720k. Required on any DOS 5 boot disk.

All up, it’s a pretty complex picture!

My XTIDE card does not have a rear facing slot to allow the CF cards to be easily changed. Often, i have to make do with what we can economically get in Australia. XTIDE does support two cards though, and there is plenty of space in the hard drive bay to house them. MS-DOS 3.2 does not see the 32MB drive, but DOS 5 sees both.

With a large hard disk, the first directory listing can take a long time. This is particularly noticeable on my PCs that have 2GB partitions. This effect seems accentuated on this machine and is very noticeable with the 512MB partition. I suspect that the bandwidth using the expansion unit is much lower than with the built-in expansion bus of the IBM PC and similar machines. Nevertheless, it is quite useable.

DG One Multifunction Card

The Expansion unit only has 6 slots and one of those is occupied by the connection to the One. One is required for the Floppy Disk Drive controller and another was occupied by the Hard Disk Controller, but that has been swapped for an XTIDE. Another was occupied by a printer card. Then i added a CGA card. One slot remained.

I really wanted to add a game port and a couple of IBM compatible serial ports (ideally one for a mouse and one for Kermit serial communication); the native com ports are not compatible. The easiest way to do this is to replace the original printer card with a multifunction card and an additional I/O panel. It may be possible to use the multifunction card’s floppy disk controller in place of the original, but i have disabled it for now.

I have used a CA9342 multifunction card. This card is 16 bit, but i expect that the 16 bit operation is limited to IDE, which i won’t be using. I disabled IDE and FDC. Obviously it is from a later era, but so is the XTIDE card. It could be replaced with an older card – one that could provide another 128kB of RAM would be interesting.

The Serial Ports were set to COM3 and COM4. This will provide two PC compatible com ports. The printer is set to LPT1 and the game port is also enabled. The second serial port and the game port connectors are mounted on a second I/O panel.

Parallel port enabledJP2
pins 1 & 2 closed
Parallel port disabledJP2pins 2 & 3 closed
Serial port 1 address 3F8 – 3FFh selectJP3pins 1 & 2 closed
Serial port 1 address 3E8 – 3EFh selectJP3pins 2 & 3 closed
Floppy drive interface enabledJP4

pins 1 & 2 closed
Floppy drive interface disabledJP4pins 2 & 3 closed
Serial port 2 enabledJP5pins 1 & 2 closed
Serial port 2 disabledJP5pins 2 & 3 closed
Parallel port address 378 – 37Fh selectJP6pins 1 & 2 closed
Parallel port address 278 – 27Fh selectJP6pins 2 & 3 closed
Serial port 2 address 2F8 – 2FFh selectJP7pins 1 & 2 closed
Serial port 2 address 2E8 – 2EFh selectJP7pins 2 & 3 closed
Game port enabledJP8pins 1 & 2 closed
Game port disabledJP8pins 2 & 3 closed
Serial port 1 enabledJP9pins 1 & 2 closed
Serial port 1 disabledJP9pins 2 & 3 closed
IDE interface enabledJP10pins 1 & 2 closed
IDE interface disabledJP10pins 2 & 3 closed
Serial port 1 interrupt is IRQ3JP11pins 2 & 3 closed
Serial port 2 interrupt is IRQ3JP11pins 1 & 2 closed
Serial port 2 interrupt is IRQ4JP12pins 1 & 2 closed
Serial port 1 interrupt is IRQ4JP12pins 2 & 3 closed
Serial port 1 interrupt is IRQ5JP13pins 2 & 3 closed
Serial port 2 interrupt is IRQ5JP13pins 1 & 2 closed
Serial port 1 interrupt is IRQ2JP14pins 2 & 3 closed
Serial port 2 interrupt is IRQ2JP14pins 1 & 2 closed
Parallel port interrupt is IRQ7JP15pins 1 & 2 closed
Parallel port interrupt is IRQ5JP15pins 2 & 3 closed

I ran checkit to check the configuration.

MS-DOS 5 does support COM3 and COM4 but can’t see the native One ports, so it labels COM3 and COM4 as COM1 and COM2, respectively. Checkit calls them by names based on their addresses. COM4 (that’s what you type into Kermit) works under MS-DOS 5 but COM3 does not. It only transmits.

MS-DOS 3.2 does not support COM3 and COM4 but Kermit still allows them to be selected, albeit with assumptions about addresses. I found the COM3 worked fine, but curiously COM4 would only transmit.

Once again the IBM incompatibility makes everthing flaky. Checkit reports a missing interrupt. It is what it is.

The joystick shows up and tests fine in Checkit. It does not always work in practice. It works great, for example, with Cosmic which is a space invaders style game.

DG One Software

The software situation is quite amazing – not so much for the quantity of it, but for the associated manuals which are substantial.

All the original disks have been imaged. The Flight Simulator II disk is copy protected so an IMD/IMG is not good enough; an SCP is required. The Overhead Express disk that i grabbed from the web needs to be written from the IMD; it is not enough to just grab the files.

PackageDisksManualNotes
MS-DOS 2.1 OEM2 original disks2 manuals
1 key overlay
Tested and works.
Diagnostics1 original diskTested an works. Has a hard disk formatter.
MS-DOS 3.2 OEMDisk images available on internet3 manualsTested and works.
GW-Basic OEMOn OS Disk1 manual
Micropro Wordstar 3.3 OEM3 original disks6 manuals,
2 reference cards
Tested and works but limited to mono display. A generic copy of wordstar works with CGA as well.
Sorcim/IUS Supercalc 31 original disk1 manual,
3 reference cards
Tested and works.
Sorcim/IUS Easywriter II1 original disk1 manualTested and works.
Ashton-Tate Framework 1.1 OEM5 original disks2 manuals,
1 key overlay
Micropro Infostar+Only a Sanyo MBC 550 OEM version downloaded4 manuals
2 reference cards
BPS Overhead ExpressData General Version downloaded1 manual, 1 reference cardTested and works. The floppy disk must be in drive A even when running from hard disk.
subLogic Flight Simulator II OEM1 Original diskmanual, maps, reference cardTested and works. Run from a floppy written from SCP.
SSI WordPerfect OEMOnly a generic version 3 download.1 manualTested and works.
Digital Research CP/M OEM1 manual

A full list of software is here, but it is not easy to tell if all of these are OEM versions and to what degree they may have been modified to work with the One:

The DG OEM version of wordstar always changes to the MONO screen mode when it executes which means it can’t be used on the external CGA screen. The non-OEM version works in either mode.

I have not found a CP/M-86 disk although i have seen it mentioned in forums. There is a CP/M programmers guide amongst the manuals that i have.

Some of the Data General communications mention a version of Unix but i have not found that either.

Most of the manuals do not seem to be online so i have some scanning to do!

Many generic IBM compatible apps work fine.