The system came with about 15 floppy disks which were archived using a Greaseweazle. Several were a high density format, one was not a VMS disk, and the rest were RX50 format. The first thing i wanted to do was to archive these disks.
There is some basic information on the rx50 format here:
I wasn’t sure if the disks were RX50 disks so i started by reading them as SCP files using greaseweazle.
An 80 track 96 TPI drive capable of writing double density disks is required. One option is the rx50 itself, but there are other drives that work fine as well. I have previously used a Panasonic JU-475-5 drive for making 80 track disks for the Sirius One and the BBC Master. I’d expect other drives to work as long as they observe the density select pin including changing the rotational speed to 300rpm for double density disks.
These disks can be archived with greaseweazle simply by reading the flux into an SCP file.
gw read --revs=5 --tracks="c=0-79:h=0" <file>.scp
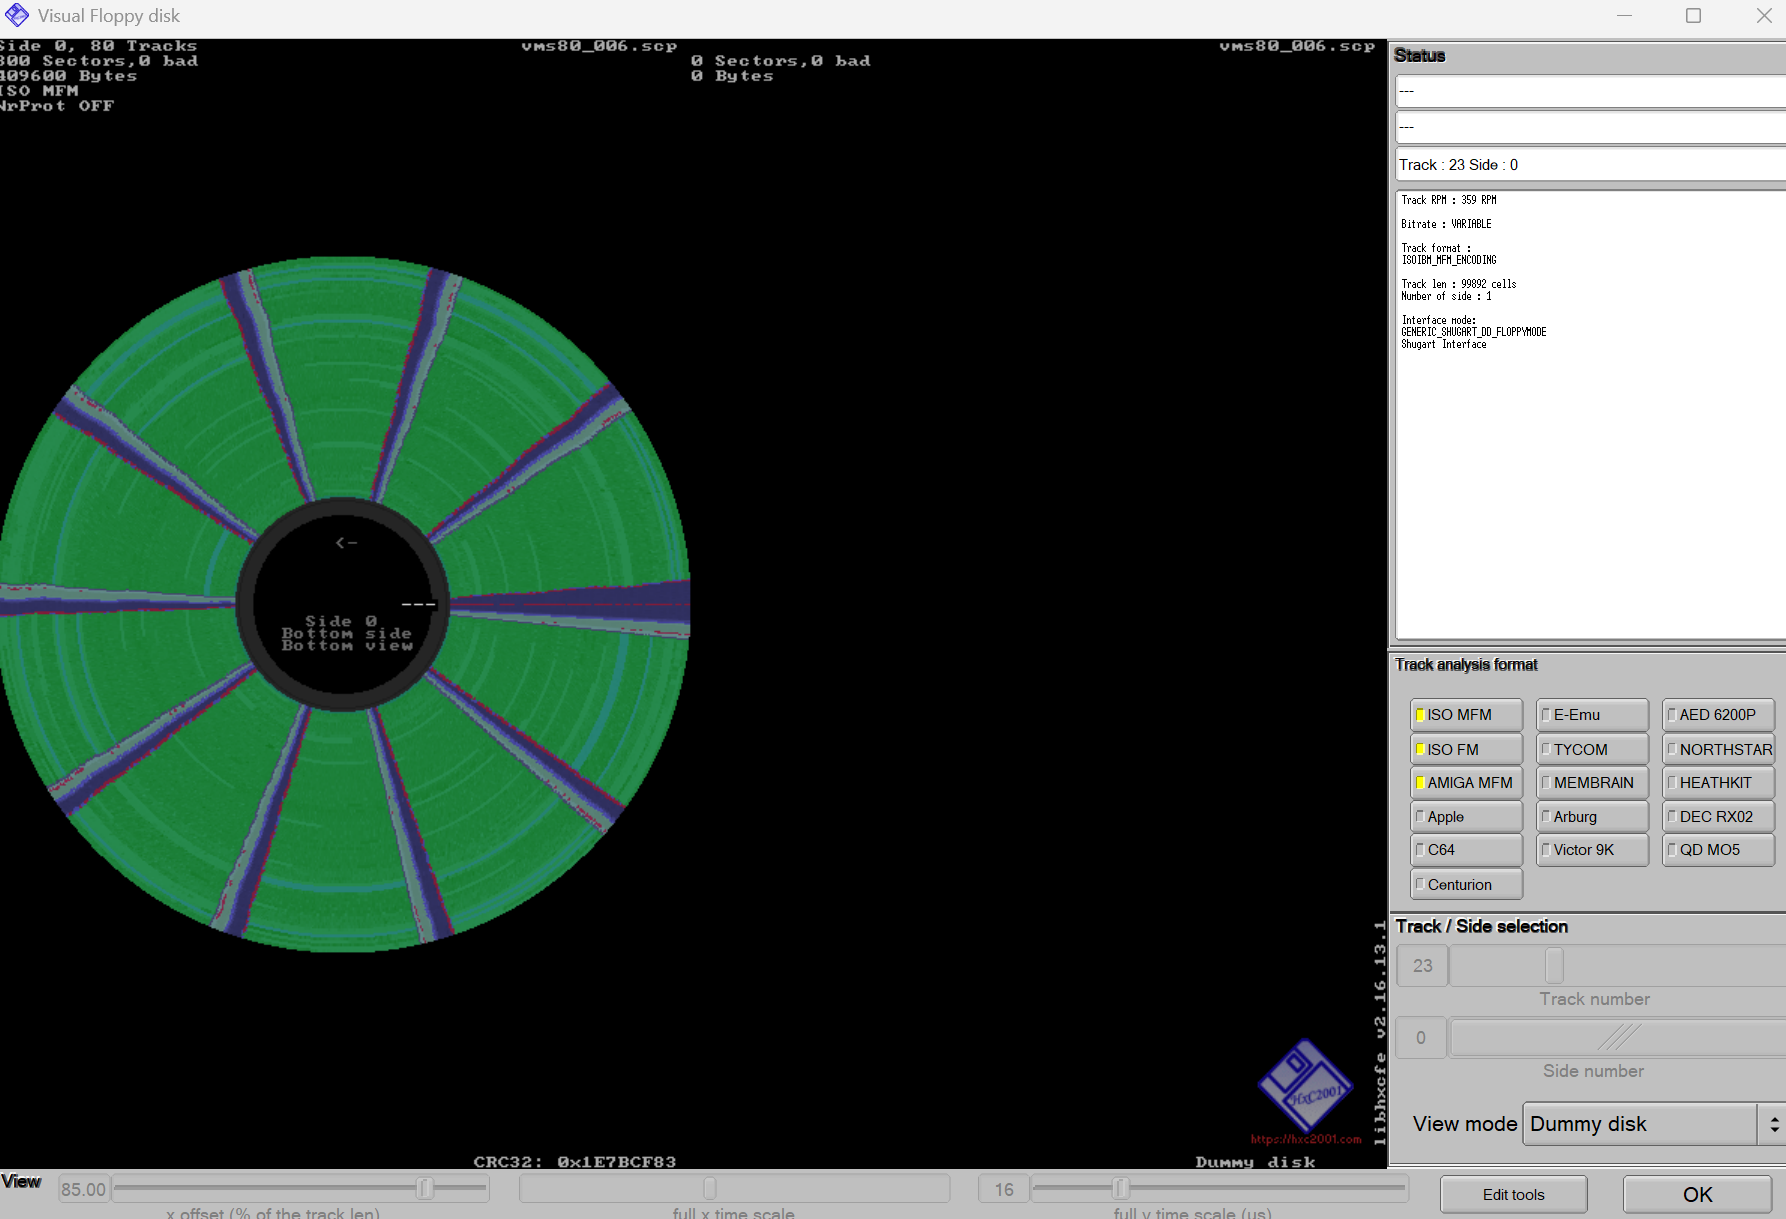
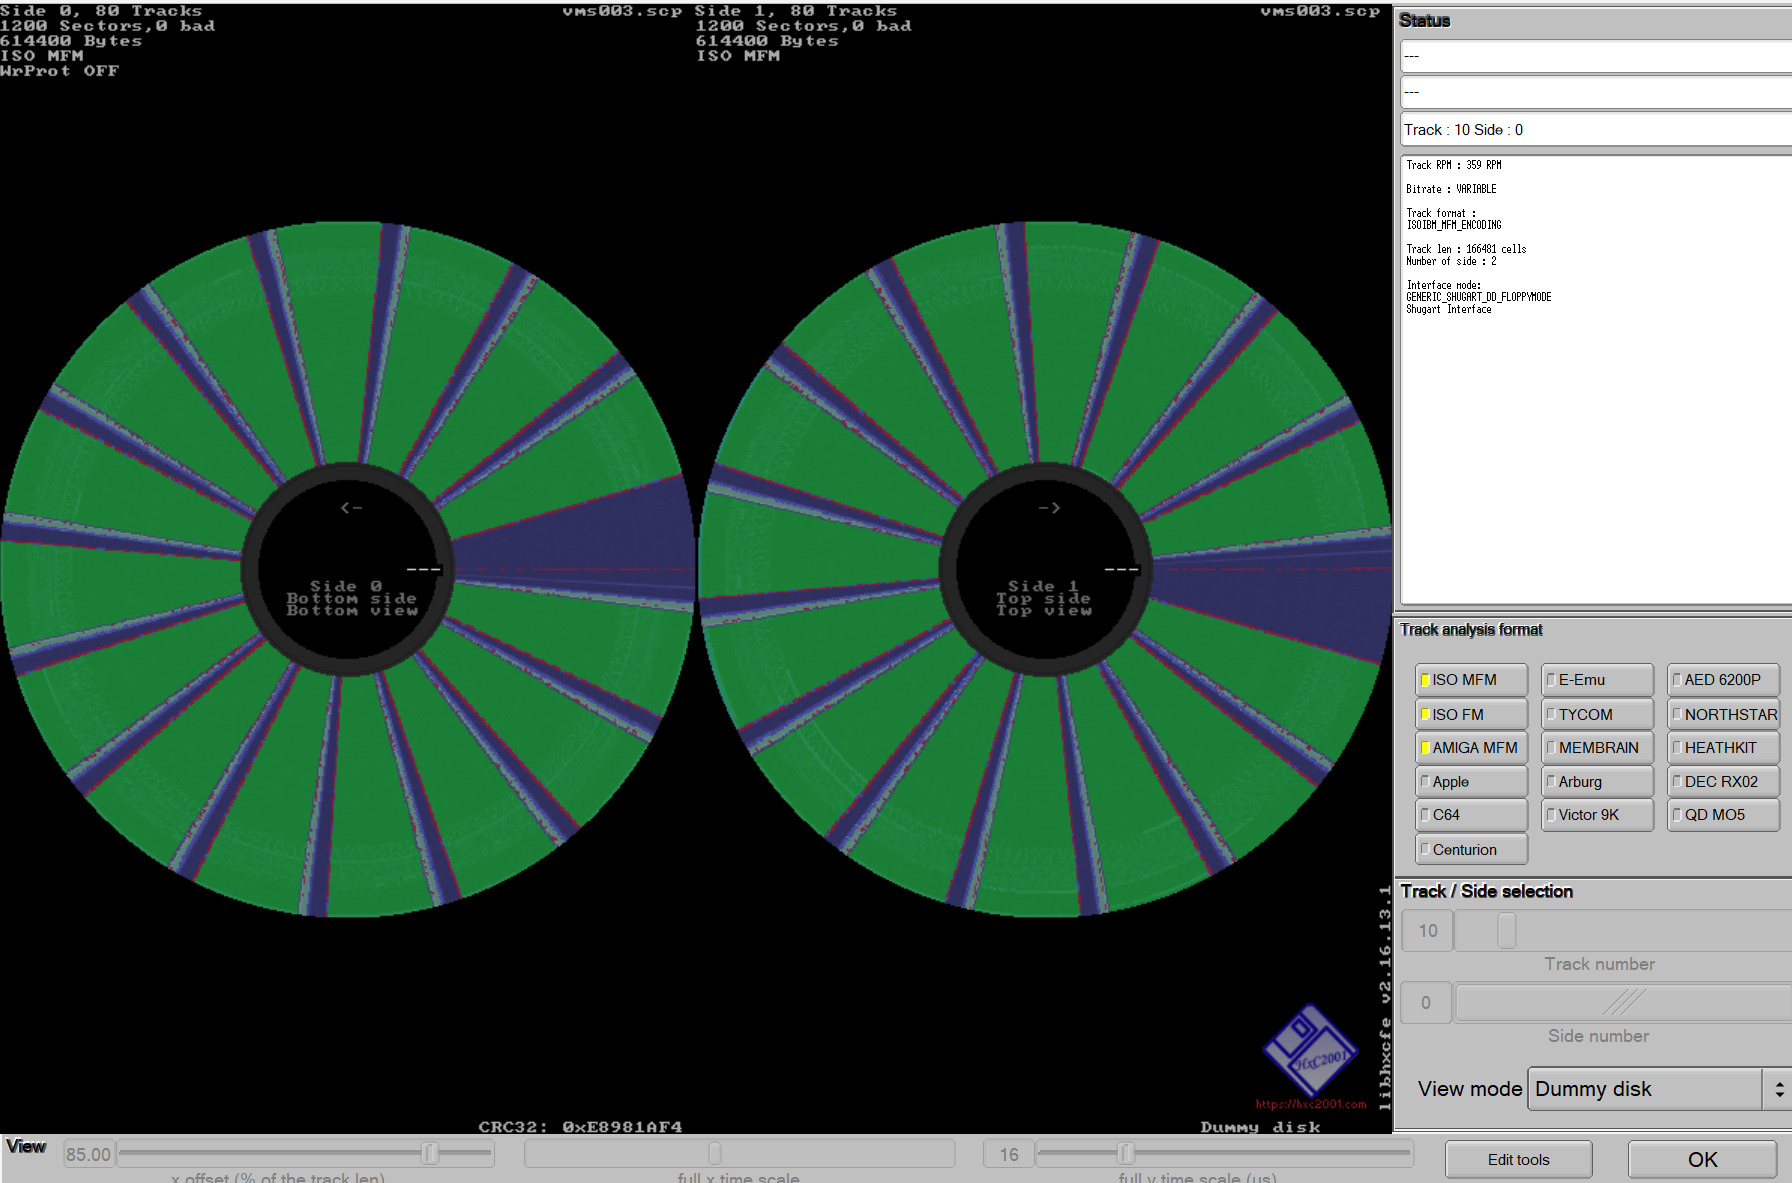
I could then load them into the HxC software for a look.
Then i exported them to IMG.
Greaseweazle is also capable of doing the conversion using a custom disk format and this is the more efficient approach if you already know the disk format.
# Example custom.cfg
disk RX50
  cyls       = 80
  heads      = 1
  tracks * ibm.mfm
    secs       = 10
    bps        = 512
    interleave = 1
    rate       = 250
    rpm        = 300
  end
end
Greaseweazle could attempt the deinterleave here by setting interleave=2, but it turns out to be more convenient to not do this.
There was nothing particularly notable about the media. Given the format is 80 track 96 TPI single-sided disks i expect DEC would have insisted on quad density disks, but generally this was a labelling/certification exercise rather than any fundamental difference from normal double density (or single density) media. The disks that were labelled were single sided double density.
As it turned out, some of the disks were high density disks (probably RX33 compatible) and one was not for the MicroVAX at all.
I was hopeful of retrieving some games from them, but it turns out that the first disk in the backup set is rotten.
Having archived the disks i tried to mount them on the Microvax.
Each disk has a “label” written to it. I didn’t know the labels for these disks but if you put in a random word it will fail and tell you the actual label. I found most would not mount regardless.
$ mount dua1: <label>
I also tried to initialize a fresh disk but this also failed which didn’t seem like a good sign. I even tried a disk that had been erased with the Greaseweazle erase function. No joy.
$ initialize dua1: test
It was the same with the second drive. The RX50 dual drive is a curiosity in that it has only one hub motor and one head position motor shared by the two drives. The disk is inserted upside down in the bottom drive.
At this point i thought it would be worth pulling the drive, giving it a good clean, and testing it out with ImageDsk on an old PC. I found enough commentary on the web to believe that the interface was generally consistent with the shugart interface – noting that there are a few variations.
This allowed the alignment to be checked and some read/write tests to be done. Alignment relies on reference disks and with the drive being 80 track double density my commercial DOS disks weren’t going to cut it. Instead, i just used the disks that came with the machine.
One of the pressure pads was loose and the other seemed to be worn. I re-glued the good one and replaced the other with a handcrafted felt.
The rotational speed was good, but the drive was a little out of alignment. Adjustment is by loosening the head position motor screws and rotating the body a little. DEC have made this more awkward than it needed to be:
Remove the rear side plate screws and loosen the middle ones.
Remove the rear PCB
Loosen the screws on the body motor – but just a little
Reassemble
Test and adjust (it is hard to get a good grip) using the Image disk alignment function
Repeat steps 1-2. Tighten the motor body screws.
Reassemble
After this i could mount all the DDSS disks that came with the unit. They generally have backup files on them so i have not had time yet to install.
I still found there was a problem initialising disks. I could only initialise disks that had been previously initialised. I think this may be a DEC thing. I suspect that they sold pre-formatted disks rather than providing a genuine format program. Lexitron pulled a similar swifty with their word processors.
It is easy enough to work around this by writing an archived disk using greaseweazle and then initialising it. Once that’s done the freshly initialised disk can be archived and used to write more formatted disks.
I’m interested in writing third party images to physical floppy disks for use in the MicroVAX. Images available via the net are often used with simh eg
They often have an extension of DSK, but it is not the only extension used. On the face of it these images contain the raw sector data.
In my naivety, i thought that i would be able to take these images and write them with greaseweazle in much the same way as i had read the disks that came with the machine.
# Example custom.cfg
disk RX50
  cyls       = 80
  heads      = 1
  tracks * ibm.mfm
    secs       = 10
    bps        = 512
    interleave = 1
    rate       = 250
    rpm        = 300
  end
end
I attempted this and achieved an epic fail. The MicroVAX could not make sense of them. Sometimes it recognised the label, other times it recognised an unexpected label, but it could never find its “home block”.
I was able to “initialise” these disks though, and it was interesting to read these back and compare the resulting IMG file with the original.
The first track ie the first 10x512byte sectors are the same. It is as-if the MicroVAX ignored the first track when it initialised the disk. The original label remains on this track.
Once the disk is re-initialised, the MicroVAX sees the new label which is on the second track. This gives the impression that there is a search order ie it looks for a label on the second track and then, if it does not find one, it tries the first track and perhaps all tracks. It gives the appearance of searching the whole disk.
Is it possible that the track zero sensor is out by a track? If there is a problem then the disks that came with the unit must have been written with that fault because they all work.
Or is there some track numbering magic going on eg 0 to 79 vs 1 to 80?
This post on VCF provided some insight (and, even better, solutions):
The first track is only used by the DEC Rainbow – a CP/M machine that also uses the RX50 floppy disk drive. It also says that images used with simh have the first track moved to the end of the image. Important info.
This is not the only difference though. The position of the sector that holds the root directory on the original image is in the third sector of the first track whereas the disk formatted in the MicroVAX has this directory in the sixth sector of the third track. This hints that the downloaded files may have the sectors in a logical order. Several sources state that the disk controller uses an interleave of 2. Just changing the interleave to 2 when creating the img does not resolve the problem.
But the above post does contain a solution in the form of two python scripts that handle the conversions between a raw image and the images used by simh. Inspection of them reveals some detail regarding the interleave.
I would never have worked out the rotation. Bravo to shirsch for solving it and coding the translators!
Depending on direction of conversion:
skewtab = [8, 0, 2, 4, 6, 9, 1, 3, 5, 7]
skewtab = [1, 6, 2, 7, 3, 8, 4, 9, 0, 5]
So we have two different image/binary formats.
The first represents the sectors in the order in which they are occur on the disk surface. The first track is unused. I am using the IMG extension for these files.
The second has the unused first physical track moved to the end of the file, and the sectors in logical order. I will use the DSK extension for simh style disk image files. Naturally, this is the opposite of the author’s assumption so:
Using these scripts, i have been able to move floppy disk images easily between the simh and physical environments.
The IMG files can be read from, and written to, disk by greaseweazle using the definitions near the top of this page.
I haven’t found a way to move files in and out of images. There are some programs that appear to do this, but they may not support the Files-11 Structure Level 2 that is used by the MicroVAX. If the available tools support file extraction (and i’m thinking of cpmtools for the DEC rainbow) they may not support directories, for example. I would have to give it a whirl.
I was keen to find a way to archive files from the MicroVAX hard disk. In time i may acquire a hard drive emulator or even get Kermit up and running, but with the disk being a time-bomb i need to get the critical stuff off now.
The 30MB disk is about 90% full so it would take a lot of floppies to do the lot – about 75! A lot of it is system files, but i can still easily see 30 disks being required. Practically it is easier to use solid state storage even if it is still limited to 400kB at a time.
Flashfloppy on a gotek supports the RX50 disk format. A configuration file is required. The key lines are:
interface = shugart
host = dec
I found this worked well with the IMG files that i read with Greaseweazle. The Microvax was happy to initialize disks and copy over data.
The simplest approach, although arduous, is to backup to floppy disk. The hard disk is close to full. With a disk capacity of 400kB this will about 75 disks.
The machine has a RD52-A hard disk with a capacity of about 30MB. Ideally this would be backed up using an image backup to a solid state drive with a matching configuration. Maybe one day i will have such a drive but presently i do not.
Doing this with real floppy disks would be unlikely to succeed – there would inevitably be a bad sector and the process would grind to a halt. The odds improve with solid state storage but i would still run the risk of a bad sector on the hard disk causing a halt.
Instead, of doing one single backup i thought it might be more practical to do it in sections requiring less than 20 disks.
I started by working out where stuff was stored in the directory structure. This means running a bunch of directory commands eg.
dir dua0:[000000] /size /grand_total
dir dua0:[sys0] /size /grand_total
This revealed a tree as follows:
Directory (- is one level) (> is a file)
Size (blocks)
Approx Floppy Disks (800 blocks)
dua0:[000000]
55863
70
-development
7782
10
-v5_development
1680
3
-security
3187
4
-sys0
36244
46
–syslib
9640
13
–sysexe
21915
28
–>pagefile.sys
6800
Not backed up
–>swap.sys
3836
Not backed up
—the rest of sysexe
11279
15
–the rest of sys0
4689
6
–the rest of root
6970
9
I backed up the bolded folders above. This required using the exclude option for some backups and that gets quite complicated (for me).
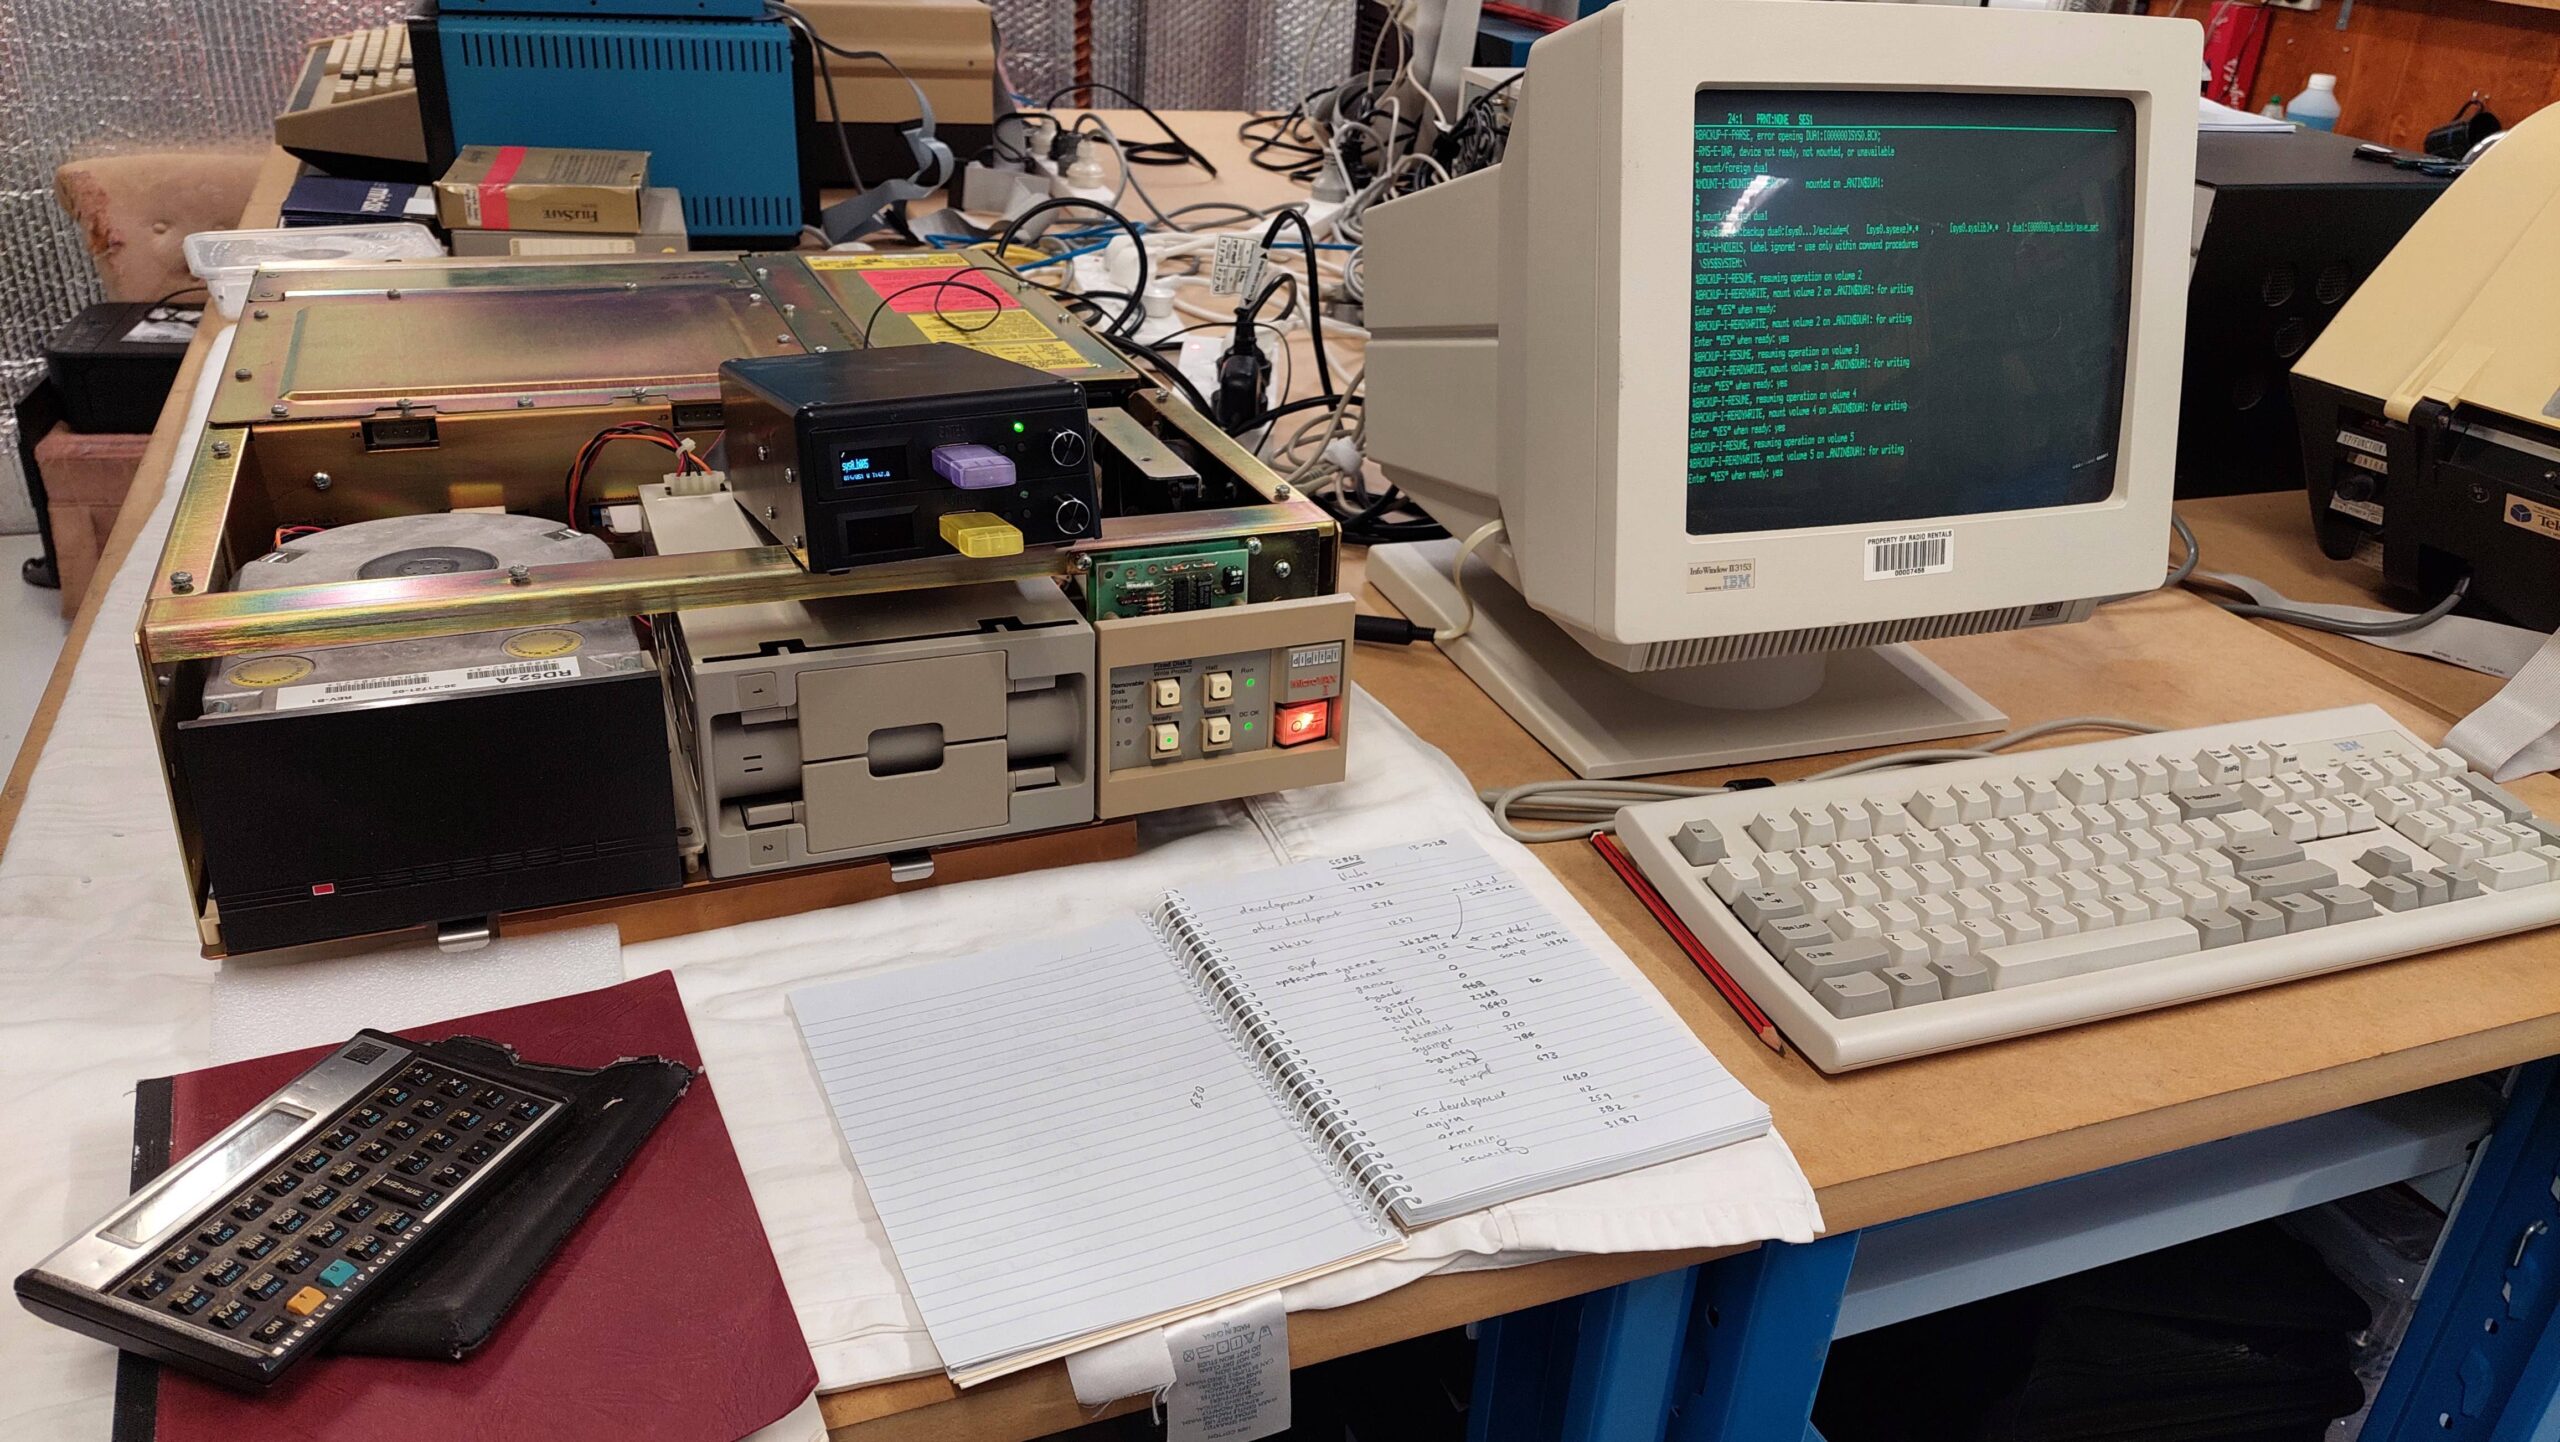
Along the way i learnt that the first disk needs to be initialised and mounted as foreign. The backup command to floppy disk is of the form:
It took a lot of experimenting to get the hang of the backup command. Some of the commands became very long, so i changed the terminal settings to use 132 columns. Commands and qualifiers can be abbreviated as long as uniqueness is unaffected.
Directory
Approx Floppy Disks (800 blocks)
Actual Disks
-development
10
13
-v5_development
3
3
-security
4
5
–syslib
13
16
—the rest of sysexe
15
18
–the rest of sys0
6
10
–the rest of root
9
9
Several files were not copied because they were locked including accounting.dat and operator.log. Pagefile.sys and swap.sys were excluded but probably would have been locked.
Backing up sysexe gave an error re a bad block in dua0:[sys0.sysexe]set.exe and stopped the backup. I can’t see this file so i just excluded it. Perhaps a disk integrity issue.
It will prompt for each disk. It was curious to see that some disks seemed to be more full than others. Perhaps it splits files across disks. Not sure.
I believe i have now taken a copy of everything that matters from the hard disk. I don’t think this would be sufficient to rebuild the disk as it stands right now; i have no boot track.
Image Backup
To achieve this i would need to do an image backup. Given the number of disk required, that looked daunting at the start, but it seemed possible after getting some confidence in the backup process. I tried it.
I created about 100 blank floppy disk images and loaded them on to a gotek.
I created a standalone backup kit using three blank floppy disk images on the gotek. The MicroVAX was then booted with the standalone backupkit and the image backup was done with the blank images.
The backup used 68 disk images and took about 100 minutes.
These disks (including the standalone backup kit) were then converted from the IMG to DSK using dsk2simh.py as described here.
I created a new instance of the simh MicroVAX I and attached an empty disk to dua0:. I used the same standalone backup kit to restore the original disk image to the emulation.
The restoration was faster because simh runs faster than the real hardware, but is more tedious because of the convoluted process for changing media.
It was a great relief to see it come up. There was one reported issue, but otherwise it seems to behave in much the same way as the physical system. This ticks two boxes: firstly the backup seems to be good, and secondly i have a good emulation of the physical MicroVAX I as received (more or less).
The reported issue was:
%%%%%%%%%%%  OPCOM  28-APR-2026 20:37:46.41  %%%%%%%%%%%
Microcode for device _PUA0: (RD/RX controller) is not up to the current revision level
I think this is saying that the storage controller used by simh is earlier than that on the physical hardware. I could try running sysgen.
As i have no V4.4 installation disks it may be impossible to add devices, eg an ethernet card, unless the driver is already installed. This may prove limiting.
When i was a student back in the eighties i had the pleasure of using VMS on the uni’s VAX systems. We were very much constrained in our usage though so my expertise was very limited. I remember the versioning of files, and having to purge old versions to get under the quota requirements, but that’s about all that i remember. I now find myself with a little VAX/VMS system and system privileges – and i have no skills at all.
I started with the VAX/VMS primer which describes things like how to use the command line, how to use the editor, EDT, how filenames work, directories including the default directory, and few commands. It’s a gentle start but leaves a lot unsaid.
I don’t have a full manual set for MicroVMS 4.4. Instead i have found a mix of resources for various versions with OpenVMS probably having the most comprehensive documentation. I have spent a lot of time googling to discover things that are probably very obvious to a regular VMS user.
The rest of this page is really a set of adhoc notes. Don’t take them too seriously.
Built-in commands are described in the VAX/VMS Command Language User’s Guide
Hard disk: dua0
First floppy disk drive: dua1
Second floppy disk drive: dua2
Change to a specific directory:
$ SET DEFAULT DISK$USER:[USERNAME.SUBDIRECTORY]
Move to a higher-level directory (Parent):
$ SET DEFAULT [-]
Move up two levels:
$ SET DEFAULT [--]
Move to a peer directory:
$ SET DEFAULT [-.SUBDIRECTORY]
Return to user login directory:
$ SET DEFAULT SYS$LOGIN
Change to a new disk:
$ SET DEFAULT DISK2:[000000]
Show the current directory.
$ show default
  SYS$SYSROOT:[SYSMGR]
The root directory on a drive is [000000].
To see what is in the root directory:
$ dir dua0:[000000]

Directory DUA0:[000000]

000000.DIR;1        BACKUP.SYS;1        BADBLK.SYS;1        BADLOG.SYS;1
BITMAP.SYS;1        CONTIN.SYS;1        CORIMG.SYS;1        INDEXF.SYS;1
SYS0.DIR;1          SYSEXE.DIR;1        SYSMAINT.DIR;1      USER.DIR;1
VOLSET.SYS;1

Total of 13 files.
$
Subdirectories appear as files with a .DIR extension.
For the first level the 000000 is not required eg with the subdirectory sys0 and its subdirectory tmp:
$ dir dua0:[sys0]

Directory DUA0:[SYS0]

SYSCBI.DIR;1        SYSERR.DIR;1        SYSEXE.DIR;1        SYSHLP.DIR;1
SYSLIB.DIR;1        SYSMAINT.DIR;1      SYSMGR.DIR;1        SYSMSG.DIR;1
SYSTEST.DIR;1       SYSUPD.DIR;1

Total of 10 files.
$ dir dua0:[sys0.syshlp]

Directory DUA0:[SYS0.SYSHLP]

EDTHELP.HLB;1       EXAMPLES.DIR;1      HELPLIB.HLB;1       UAFHELP.HLB;1

Total of 4 files.
$
Console output can be redirected with /output=filename
Subdirectories are included with …
$ dir dua0:[000000...]*.dir

Directory DUA0:[000000]

000000.DIR;1        SYS0.DIR;1          SYSEXE.DIR;1        SYSMAINT.DIR;1
USER.DIR;1

Total of 5 files.

Directory DUA0:[SYS0]

SYSCBI.DIR;1        SYSERR.DIR;1        SYSEXE.DIR;1        SYSHLP.DIR;1
SYSLIB.DIR;1        SYSMAINT.DIR;1      SYSMGR.DIR;1        SYSMSG.DIR;1
SYSTEST.DIR;1       SYSUPD.DIR;1

Total of 10 files.

Directory DUA0:[SYS0.SYSHLP]

EXAMPLES.DIR;1

Total of 1 file.

Grand total of 3 directories, 16 files.
My impressionwas that getting software to run on the MicroVAX would be challenging.
The base operating system includes a simple editor and a macro assembler.
The hard disk is predominantly filled with Security Toolkit development stuff which was written in assembler and is of most interest to security specialists. There were three games disks, but the first had deteriorated badly. I was able to retrieve the Startrek game from the others.
There are several text games (including StarTrek) at:
There are a few other items in TAP format for a TK50 but i would need to be able to convert them to disks on an emulator – perhaps the Microvax II simh emulator. These tapes include BASIC (3.3), Cobol (5.2), and Fortran (4.7). I think both the BASIC and Cobol require VMS 5. The Fortran may be ok with MicroVMS 4.
I also have about 50 TK50 tapes which could contain anything. I have no means to read them. The Australian Computer Museum is set up to read these tapes, but it would be quite an exercise to archive them all and may yield not much.
A lot of possibilities opened up when i realised a “Rosetta VAX” could be built as an emulation.
Failed installations can be problematic so i did a rehearsal on simh using an image of the physical disk. I had to clear some space by deleting files in dua0:[development].
The first disk has to be mounted as foreign.
$ mount /foreign dua1:
$ @sys$update:vmsinstal vaxc022 dua1:


        VAX/VMS Software Product Installation Procedure V4.4


It is 28-APR-2026 at 17:46.
Enter a question mark (?) at any time for help.

* Are you satisfied with the backup of your system disk [YES]?

Please mount the first volume of the set on DUA1:.
* Are you ready? y
%MOUNT-I-MOUNTED, VAXC01       mounted on _ANJIN$DUA1:

The following products will be processed:

  VAXC V2.2


        Beginning installation of VAXC V2.2 at 17:46

%VMSINSTAL-I-RESTORE, Restoring product saveset A...
%BACKUP-I-READYREAD, mount volume 2 on _ANJIN$DUA1: for reading
Enter "YES" when ready:
Simulation stopped, PC: 80008B1F (BRB 80008B1F)
sim> at rq1 v22d2_BL-CS92D-BE.dsk
sim> c
y
%BACKUP-I-READYREAD, mount volume 3 on _ANJIN$DUA1: for reading
Enter "YES" when ready:
Simulation stopped, PC: 80008B1F (BRB 80008B1F)
sim> at rq1 v22d3_BL-CS93D-BE.dsk
sim> c
y
%BACKUP-I-READYREAD, mount volume 4 on _ANJIN$DUA1: for reading
Enter "YES" when ready:
Simulation stopped, PC: 80008B1F (BRB 80008B1F)
sim> at rq1 v22d4_BL-ey93c-BE.dsk
sim> c
y

        VAX C V2.2-015 Installation is commencing ...

* Do you want to run the IVP after the installation [YES]?
* Do you want to purge files replaced by this installation [YES]?
* Do you want to extract .H files from the text library [YES]?
        VAX C V2.2-015 : copying images and libraries.
        VAX C V2.2-015 : extracting .H files.

        A summary of the Software Performance Reports (SPRs) for this release
        can be found in the file SYS$LIBRARY:VAXCSPR.DAT.


        Your VMS system will now be updated to inculde the following new
        and modified files:

        SYS$SYSTEM:VAXC.EXE             [new]
        SYS$LIBRARY:VAXCDEF.TLB         [new]
        SYS$LIBRARY:VAXCSPR.DAT         [new]
        SYS$MESSAGE:VAXCERR.EXE         [new]
        SYS$MESSAGE:VAXCVCGERR.EXE      [new]
        SYS$MESSAGE:VAXCCRXERR.EXE      [new]
        SYS$HELP:HELPLIB.HLB            [modified]
        SYS$LIBRARY:DCLTABLES.EXE       [modified]
        SYS$EXAMPLES:VAXCIVPP.C         [new]
        SYS$EXAMPLES:VAXCIVPC.C         [new]

        VAX C V2.2-015 Installation completed successfully.

%VMSINSTAL-I-MOVEFILES, Files will now be moved to their target directories...

        VAX C V2.2-015 Installation Verification Procedure commencing ...


****** VAX C Installation Certification Procedure SUCCESSFUL ******


        VAX C V2.2-015 Installation Verification Procedure completed successfull
y.


        Installation of VAXC V2.2 completed at 17:47


        VMSINSTAL procedure done at 17:47


$ cc
_File: fghgf
%CC-F-OPENIN, error opening SYS$SYSROOT:[SYSMGR]FGHGF.C; as input
-RMS-E-FNF, file not found

$ ls dua0:[000000]
%DCL-W-IVVERB, unrecognized command verb - check validity and spelling
 \LS\
$ dir dua0:[000000]

Directory DUA0:[000000]

000000.DIR;1        ANJIN.DIR;1         BACKUP.SYS;1        BADBLK.SYS;1
BADLOG.SYS;1        BITMAP.SYS;1        CONTIN.SYS;1        CORIMG.SYS;1
DEVELOPMENT.DIR;1   INDEXF.SYS;1        JEFF.DIR;1          JENNY.DIR;1
LEND_LEASE.DIR;1    NONPRIV.DIR;1       ORMR.DIR;1
OTHER_DEVELOPMENT.DIR;1                 PAPERS.DIR;1        QUOTES.DIR;1
REXONA.DIR;1        SALES.DIR;1         SECURE.DIR;1        SECURITY.DIR;1
STKV2.DIR;1         SYS0.;1             SYS0.DIR;1          SYSEXE.DIR;1
SYSMAINT.DIR;1      SYSWORK.DIR;1       TAPE_LIBRARY.DIR;1  TESTS.DIR;1
TRAINING.DIR;1      USER.DIR;1          V5_DEVELOPMENT.DIR;1
VOLSET.SYS;1

Total of 34 files.
$ dir [000000...]*.c

Directory SYS$SYSROOT:[000000.SYSHLP.EXAMPLES]

VAXCIVPC.C;1        VAXCIVPP.C;1

Total of 2 files.
$ set def SYS$SYSROOT:[000000.SYSHLP.EXAMPLES]
$ cc vaxcivpc
$ dir

Directory SYS$SYSROOT:[000000.SYSHLP.EXAMPLES]

VAXCIVPC.C;1        VAXCIVPC.OBJ;1      VAXCIVPP.C;1        XADRIVER.MAR;1
XALINK.MAR;1        XAMESSAGE.MAR;1     XATEST.COM;1        XATEST.FOR;1

Total of 8 files.
$ cc vaxcivppp
%CC-F-OPENIN, error opening SYS$SYSROOT:[000000.SYSHLP.EXAMPLES]VAXCIVPPP.C; as
input
-RMS-E-FNF, file not found

$ cc vaxcivpp
$ dir /size

Directory SYS$SYSROOT:[000000.SYSHLP.EXAMPLES]

VAXCIVPC.C;1              2
VAXCIVPC.OBJ;1            2
VAXCIVPP.C;1             69
VAXCIVPP.OBJ;1           37
XADRIVER.MAR;1           93
XALINK.MAR;1              5
XAMESSAGE.MAR;1          21
XATEST.COM;1              1
XATEST.FOR;1             10

Total of 9 files, 240 blocks.
$
I think i can be fairly confident that VAX C V2.2 will install on the physical system.
I have not found (so far) a utility that can write a file to a Files-11 ODS 2 disk format. There are some that can extract files, but not none that can inject them. I’d like to be wrong on this.
It is possible to transfer text files to the simh Microvax by simply using the Create command and then pouring text in at the command line eg by copy and paste in the emulation. Source code for a hex-to-bin converter can be sent as assembly code and then assembled and linked on the MicroVAX I to create the EXE. Binary files can then be transferred as hex and that program used to reconstitute the original binary file.
Once on simh they can be written to floppy disk and transferred to the physical MicroVAX.
In practice, the size of the text files that can be poured into the command line without error is too small, so a better solution is required.
It is a very handy communications program with clients for a vast number of operating systems. Most (perhaps all) implementations support the transfer of text files. Some implementations support the transfer of binary files. For those that only support text, binary files must be converted to text eg as an intel hex format, transferred, and then converted back to binary.
The first version of kermit (kermit32) for VMS supports binary transfers, but apparently VMS binary files don’t always survive the experience. I don’t really understand why, but it reminds me of the Apple Mac experience with file forks.
Anyway, it is able to transfer a large hex file, and its own hex file is small enough that it can be successfully poured into a create command, together with an assembly language program that allows it to be reconstituted as an EXE.
Kermit32 can then be used to transfer a later kermit version (196) which does fully support binary transfers. After that the sky is the limit. (Spoiler alert – this didn’t work out well.)
Doing all this on a PC has some advantages – not least of which is that i can mount a second disk so that i have more working space – hex files are quite large and the available space on the system disk is small.
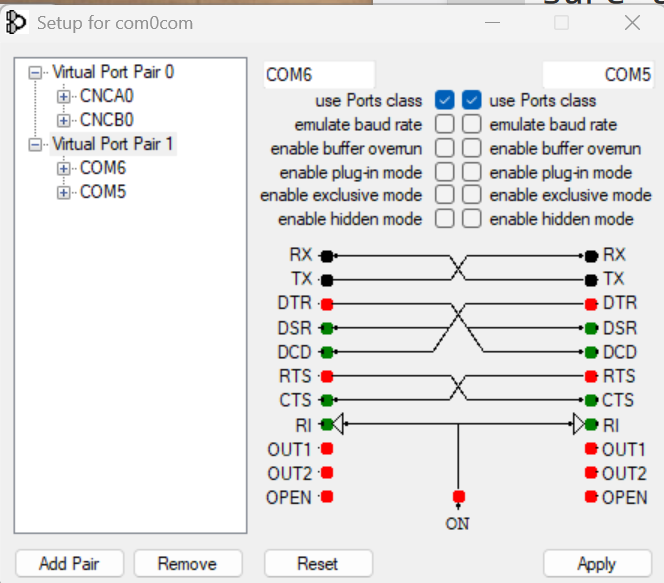
Simh allows a Microvax serial port to be allocated a host serial port. That port could be connected to another PC running Kermit. However, with the aid of com0com it is possible to create and link two virtual serial ports and connect one to the simh Microvax and the other to Kermit running on the same PC. I linked two virtual ports: Com5 and Com6.
In this context, i’m not sure that changing the baud rate makes any difference at all, but just in case, i used a baud rate of 19200.
I adapted the instructions here for the simh environment:
Importantly, i found that kermit32 processes ascii lines as records, each of which is terminated in a CR/LF. Unfortunately, the hex files must have come from a unix system so there was a LF but no CR. This resulted in random CRLFs appearing in the transferred file.
I added the CR using the CR utility that comes with CPMTools:
c:> cr ckermit196.hex ckermit196cr.hex
I find that no two kermit implementations are ever the same, so even with instructions, there is always a little experimenting to be done.
At the PC i did:
C-Kermit> set line COM5
C-Kermit> set carrier-watch off
C-Kermit> server
On simh:
simh> SHOW SERIAL
Serial devices:
 ser0   CNCA0 (\Device\com0com10)
 ser1   CNCB0 (\Device\com0com20)
 ser2   COM1  (\Device\Serial0)
 ser3   COM5  (\Device\com0com21)
 ser4   COM6  (\Device\com0com11)
simh> AT DZ LINE=0, CONNECT=SER4
On VMS:
$ SET TERMINAL /PERMANENT /SPEED=(19200,19200) TTA0:
$ SET DEF DUA3:[kermit]
$ RUN K32
On kermit (K32):
Kermit-32> SET LINE TTA0:
Kermit-32> GET ckermit196cr.hex
Back to VMS:
$ run vmsdeh
Please type the file name: CKERMIT196CR.HEX;1

ckv196-vax-vms55-nonet.exe

$ run ckv196-vax-vms55-nonet.exe
%DCL-W-ACTIMAGE, error activating image SORTSHR
-CLI-E-IMGNAME, image file DUA0:[SYS0.][SYSLIB]SORTSHR.EXE
-SYSTEM-F-SHRIDMISMAT, ident mismatch with shareable image
And that, folks, is why one should read the fine print. This executable really needs open VMS 5.5. In this game of snakes and ladders, i am now proceeding down a very long snake.
There is a version of ckermit196 available for VMS 4.4, but it is in the form of an executable archive which i cannot transfer with kermit32.
I would either need to find and download the sources and build it on the microvax, or transfer it on to another simh machine that is setup with a TCP/IP stack and an FTP program. This probably implies OpenVMS 5 which has no licensing facility at present. I am snookered.
For now i will need to be content with transferring c sources via kermit32.
I started searching for hard disk images that might hold some interesting software and i happened upon this gem: VAX/VMS v4.7 “Turnkey” Distribution.
This site provides a simh setup for a very sophisticated VMS 4.7 VAX. It is fully featured – so fully featured that it is a struggle for a mortal like me to do the simplest of operations. Two distributions are required – one for the VAX 8650 setup and the other with all the distribution media.
My eye lit up when i saw the distribution media which includes various programming languages and the All-In-One office programs. This is the best collection of installation media that i have found so far. It comes in various forms though including CDs, floppy disks, TK50 tapes, TU58 tapes, and 9 track tapes.
To exploit this variety of media, the 8650 setup has to have a lot of I/O devices and this makes it the rosetta stone for DEC media. My current options for reading media are limited. The physical MicroVAX I has only an RX50 floppy drive but one day it may have a solid state hard drive. Similarly, the MicroVAX I simh emulation has an RX50 and two hard drives. Conveniently though these hard drives can accept images from some other systems – even CDs.
My thought was that, if i instantiate this turnkey system, then i might be able to transfer some installation kits from the media library to a hard disk image. Then i could move the hard disk image from the emulated 8250 to the emulated MicroVAX I (or even a solid state hard disk on the physical MicroVAX I). I may also be able to move the kits to RX50 floppy disks for installation on the physical machine.
The first step was to instantiate the 8650 system above. I downloaded the two archives and copied the dist folder from the media tree into the turnkey system tree. I added the 8650 simh executable from the simh distribution. The 8650.ini file was provided as part of the turnkey system.
The setup procedure is provided in a readme.txt file. You fire up the 8650 executable and then initiate the installation. Then you stand back as it all happens. There’s a lot going on!
Eventually there is a setup dialog for passwords and networking – i won’t lie – much of this was completely overwhelming. I wasn’t losing too much sleep over the networking as that’s not my goal at the moment.
At the end, i could log in as “system” using the default password.
I found it quite tricky to correlate the VMS devices with the simh devices. I’m sure this is obvious to the more experienced operators but in frustration i turned to AI (Gemini):
Device mapping
1. The MSCP Disks (DU)
In SIMH, you had four controllers (RQ, RQB, RQC, RQD). VMS has mapped them as follows:
•	DUA0 - DUA3: These are attached to SIMH's RQ controller. DUA0 is your system boot disk (VAXVMSRL4).
•	DUB0 - DUB1: These are attached to SIMH's RQB controller (labeled as SPOOL disks).
•	DUC0: This is the first unit on your SIMH RQC controller.
•	DUD0 - DUD1: These are the first two units on your SIMH RQD controller.
2. The Massbus Disks (DR)
•	DRA0 - DRA2: These map to your SIMH RP device (Massbus Adapter 0).
o	Note: VMS is calling them DR (typical for RP07/RM05) rather than DB because of the specific drive type set in SIMH. DRA0 and DRA1 are currently mounted as HOM0 and HOM1.
3. The Tapes (MT and MS)
•	MTA0 - MTA3: These map to your SIMH TU device (Massbus Adapter 1). VMS shows these as "Online alloc," meaning they are likely allocated to a process or initialized for use.
•	MSA0: This maps to your SIMH TS device (the TS11 tape emulator).
4. The "Old School" Disks (DA and DM)
•	DMA0 - DMA1: These map to your SIMH HK device (RK611/RK07).
•	DDA0 - DDA1: These map to your SIMH TDC device (the RX211/RX02 floppy controller).
5. The Oddball (DJB2)
•	DJB2: This is an RA-series disk on a KDJ11-B or similar controller. In your SIMH list, this corresponds to your CS (Console Storage) unit.
Actually, i also found that it was in the installation script for the turnkey installation.
I tried some experiments and found that the 8650 DUA3: hard disk Shared2 could be copied, and the image mounted on the emulated Microvax I. This opened up a transfer mechanism between the two machines.
I have struggled to get my head around the Storage Library System which seems to have control of MTA*:. The MSA0: device which is for 9 track tapes is unallocated and good to go.
I could then mount a 9 track tape image on MSA0 eg pascal.
$
Simulation stopped, PC: 80008B1F (BRB 80008B1F)
>>> at ts0 "L:\Users\Graham\Onedrive\Computers\_Other\Microvax I\telegraphics2\vms47\dist\media\16mt9\BB-Z912L-BE.tap"
>>> c
mount msa0: pascal
%MOUNT-I-MOUNTED, PASCAL mounted on _795VAX$MSA0:
$ dir msa0:

Directory MSA0:[]

PASCAL037.A;1             6  27-MAR-1988 00:00
PASCAL037.B;1            91  27-MAR-1988 00:00
PASSTR034.A;1            20  27-MAR-1988 00:00
PASCAL037.A;1             6  27-MAR-1988 00:00
PASCAL037.B;1            91  27-MAR-1988 00:00
PASSTR034.A;1            20  27-MAR-1988 00:00

Total of 6 files, 234 blocks.
Note that Ctrl-P is required to exit to the simh >>> prompt. By default, it is Ctrl-E.
The tape identifier can be found by mounting the tape with the/foreign option or just having a look at the media file with a hex editor.
The media distribution includes a spreadsheet that makes the association between media images and product identifiers. In this case pascal V3.7 is BB-Z912L-BE.tap. It also includes the volume labels.
Then the kit can be copied over to the transfer disk.
$ create/dir dua3:[kits]
$ create/dir dua3:[kits.pascal037]
$ copy msa0:*.* dua3:[kits.pascal037]*.* /log
%COPY-S-COPIED, MSA0:[]PASCAL037.A;1 copied to DUA3:[KITS.PASCAL037]PASCAL037.A;1 (6 records)
%COPY-S-COPIED, MSA0:[]PASCAL037.B;1 copied to DUA3:[KITS.PASCAL037]PASCAL037.B;1 (91 records)
%COPY-S-COPIED, MSA0:[]PASSTR034.A;1 copied to DUA3:[KITS.PASCAL037]PASSTR034.A;1 (20 records)
%COPY-S-COPIED, MSA0:[]PASCAL037.A;1 copied to DUA3:[KITS.PASCAL037]PASCAL037.A;2 (6 records)
%COPY-S-COPIED, MSA0:[]PASCAL037.B;1 copied to DUA3:[KITS.PASCAL037]PASCAL037.B;2 (91 records)
%COPY-S-COPIED, MSA0:[]PASSTR034.A;1 copied to DUA3:[KITS.PASCAL037]PASSTR034.A;2 (20 records)
%COPY-S-NEWFILES, 6 files created
$
Then the hard disk image, share2_795.vhd, can be copied and dropped into the Microvax I simh folder and mounted.
$
Simulation stopped, PC: 80008B1F (BRB 80008B1F)
sim> at rq3 share2_795.vhd
sim> c
$ mount dua3: share2
%MOUNT-I-MOUNTED, SHARE2       mounted on _ANJIN$DUA3:
%MOUNT-I-REBUILD, volume was improperly dismounted; rebuild in progress
$ dir dua3:[kits.pascal037]

Directory DUA3:[KITS.PASCAL037]

PASCAL037.A;2       PASCAL037.A;1       PASCAL037.B;2       PASCAL037.B;1
PASSTR034.A;2       PASSTR034.A;1

Total of 6 files.
And then the installation can proceed.
$ @sys$update:vmsinstal pascal037 dua3:[kits.pascal037]


        VAX/VMS Software Product Installation Procedure V4.4


It is 4-MAY-2026 at 19:37.
Enter a question mark (?) at any time for help.

* Are you satisfied with the backup of your system disk [YES]?


The following products will be processed:

  PASCAL V3.7


        Beginning installation of PASCAL V3.7 at 19:37

%VMSINSTAL-I-RESTORE, Restoring product saveset A...


        *-----------------------------------------*
        *    Installation Command Procedure for   *
        *             VAX PASCAL V3.7             *
        *-----------------------------------------*


* Do you want to purge files replaced by this installation [YES]?


    This kit contains a file summarizing the new features, changes,
    restrictions, and compatibility issues in this release of VAX
    PASCAL.  This file is named PASCAL037.RELEASE_NOTES and is
    placed in SYS$HELP:.

    This file contains information valuable to VAX PASCAL programmers.
    Please inform your user community of this file's existence.


    All questions regarding the installation have now been asked.
    The installation of VAX PASCAL V3.7 will now continue for
    approximately 5 to 120 minutes depending on your configuration.

%VMSINSTAL-I-RESTORE, Restoring product saveset B...

  Your VMS system will now be updated to include the following new and
  modified files:

    SYS$HELP:HELPLIB.HLB                   [modified]
    SYS$HELP:PASCAL037.RELEASE_NOTES       [new]
    SYS$LIBRARY:DCLTABLES.EXE              [modified]
    SYS$LIBRARY:LIBDEF.PAS                 [new]
    SYS$LIBRARY:MTHDEF.PAS                 [new]
    SYS$LIBRARY:PASDEF.PAS                 [new]
    SYS$LIBRARY:PASSTATUS.PAS              [new]
    SYS$LIBRARY:SIGDEF.PAS                 [new]
    SYS$MESSAGE:PASCALER1.EXE              [new]
    SYS$MESSAGE:PASCALER2.EXE              [new]
    SYS$SYSTEM:PASCAL.EXE                  [new]

%VMSINSTAL-I-MOVEFILES, Files will now be moved to their target directories...


        *-----------------------------------------*
        * Installation Verification Procedure for *
        *            VAX PASCAL V3.7              *
        *-----------------------------------------*


%PASCAL-F-SENDSPR, Internal Compiler Error
%PASCAL-I-SENDSPR, while processing routine PASCTEST at line 27
%PASCAL-F-ENDDIAGS, PASCAL completed with 1 diagnostic
%VMSINSTAL-F-UNEXPECTED, Installation terminated due to unexpected event.

        VMSINSTAL procedure done at 19:37
This process should work for the other 9 track tapes which include:
VAX C v2.4
VAX CDD v3.4-1
VAX CDD/Plus v4.0
VAX/VMS v4.6
VAX COBOL v4.1
DEC/MMS v2.4
VAX-11/RSX v2.3
VAX FORTRAN v4.8
DEC/CMS v3.0
VAX BLISS-32 v4.4
Data Interchange Library v2.0
VAX DATATRIEVE v4.1
VAX DATATRIEVE v4.2
VAX ALL-IN-1 v2.1
VAX Pascal v3.7
VAX Rdb/VMS V2.3-0
Matlab
I added two more TU devices in the 8650.ini file.
set TU4 enable, TU77
set TU5 enable, TU77
That got me tape devices MTA4: and MTA5: which are not captured by the Storage Library Service. I found i could mount both TU58 and TK50 cartridges on these devices. The TU58 tapes don’t seem to have a file structure but the TK50 cartridges bring in:
VAX BASIC v3.2 (needs >=VMS 4.5)
VAX/VMS v4.x 1–8 Users License
VAX/VMS v4.x 1–8 Users License
VAX/VMS v4.x 3–8 Users License
VAX GKS v3.0
VAX DBMS v4.0
Local Area VAXcluster v1.0
These are some that are on the openvms 5.0 CDs that are still good on VMS4, including:
RPG
LISPdel
APL
CDD
DIBOL
These distributions work with 4.7; they may not work with 4.4 that is currently on the physical MicroVAX I.