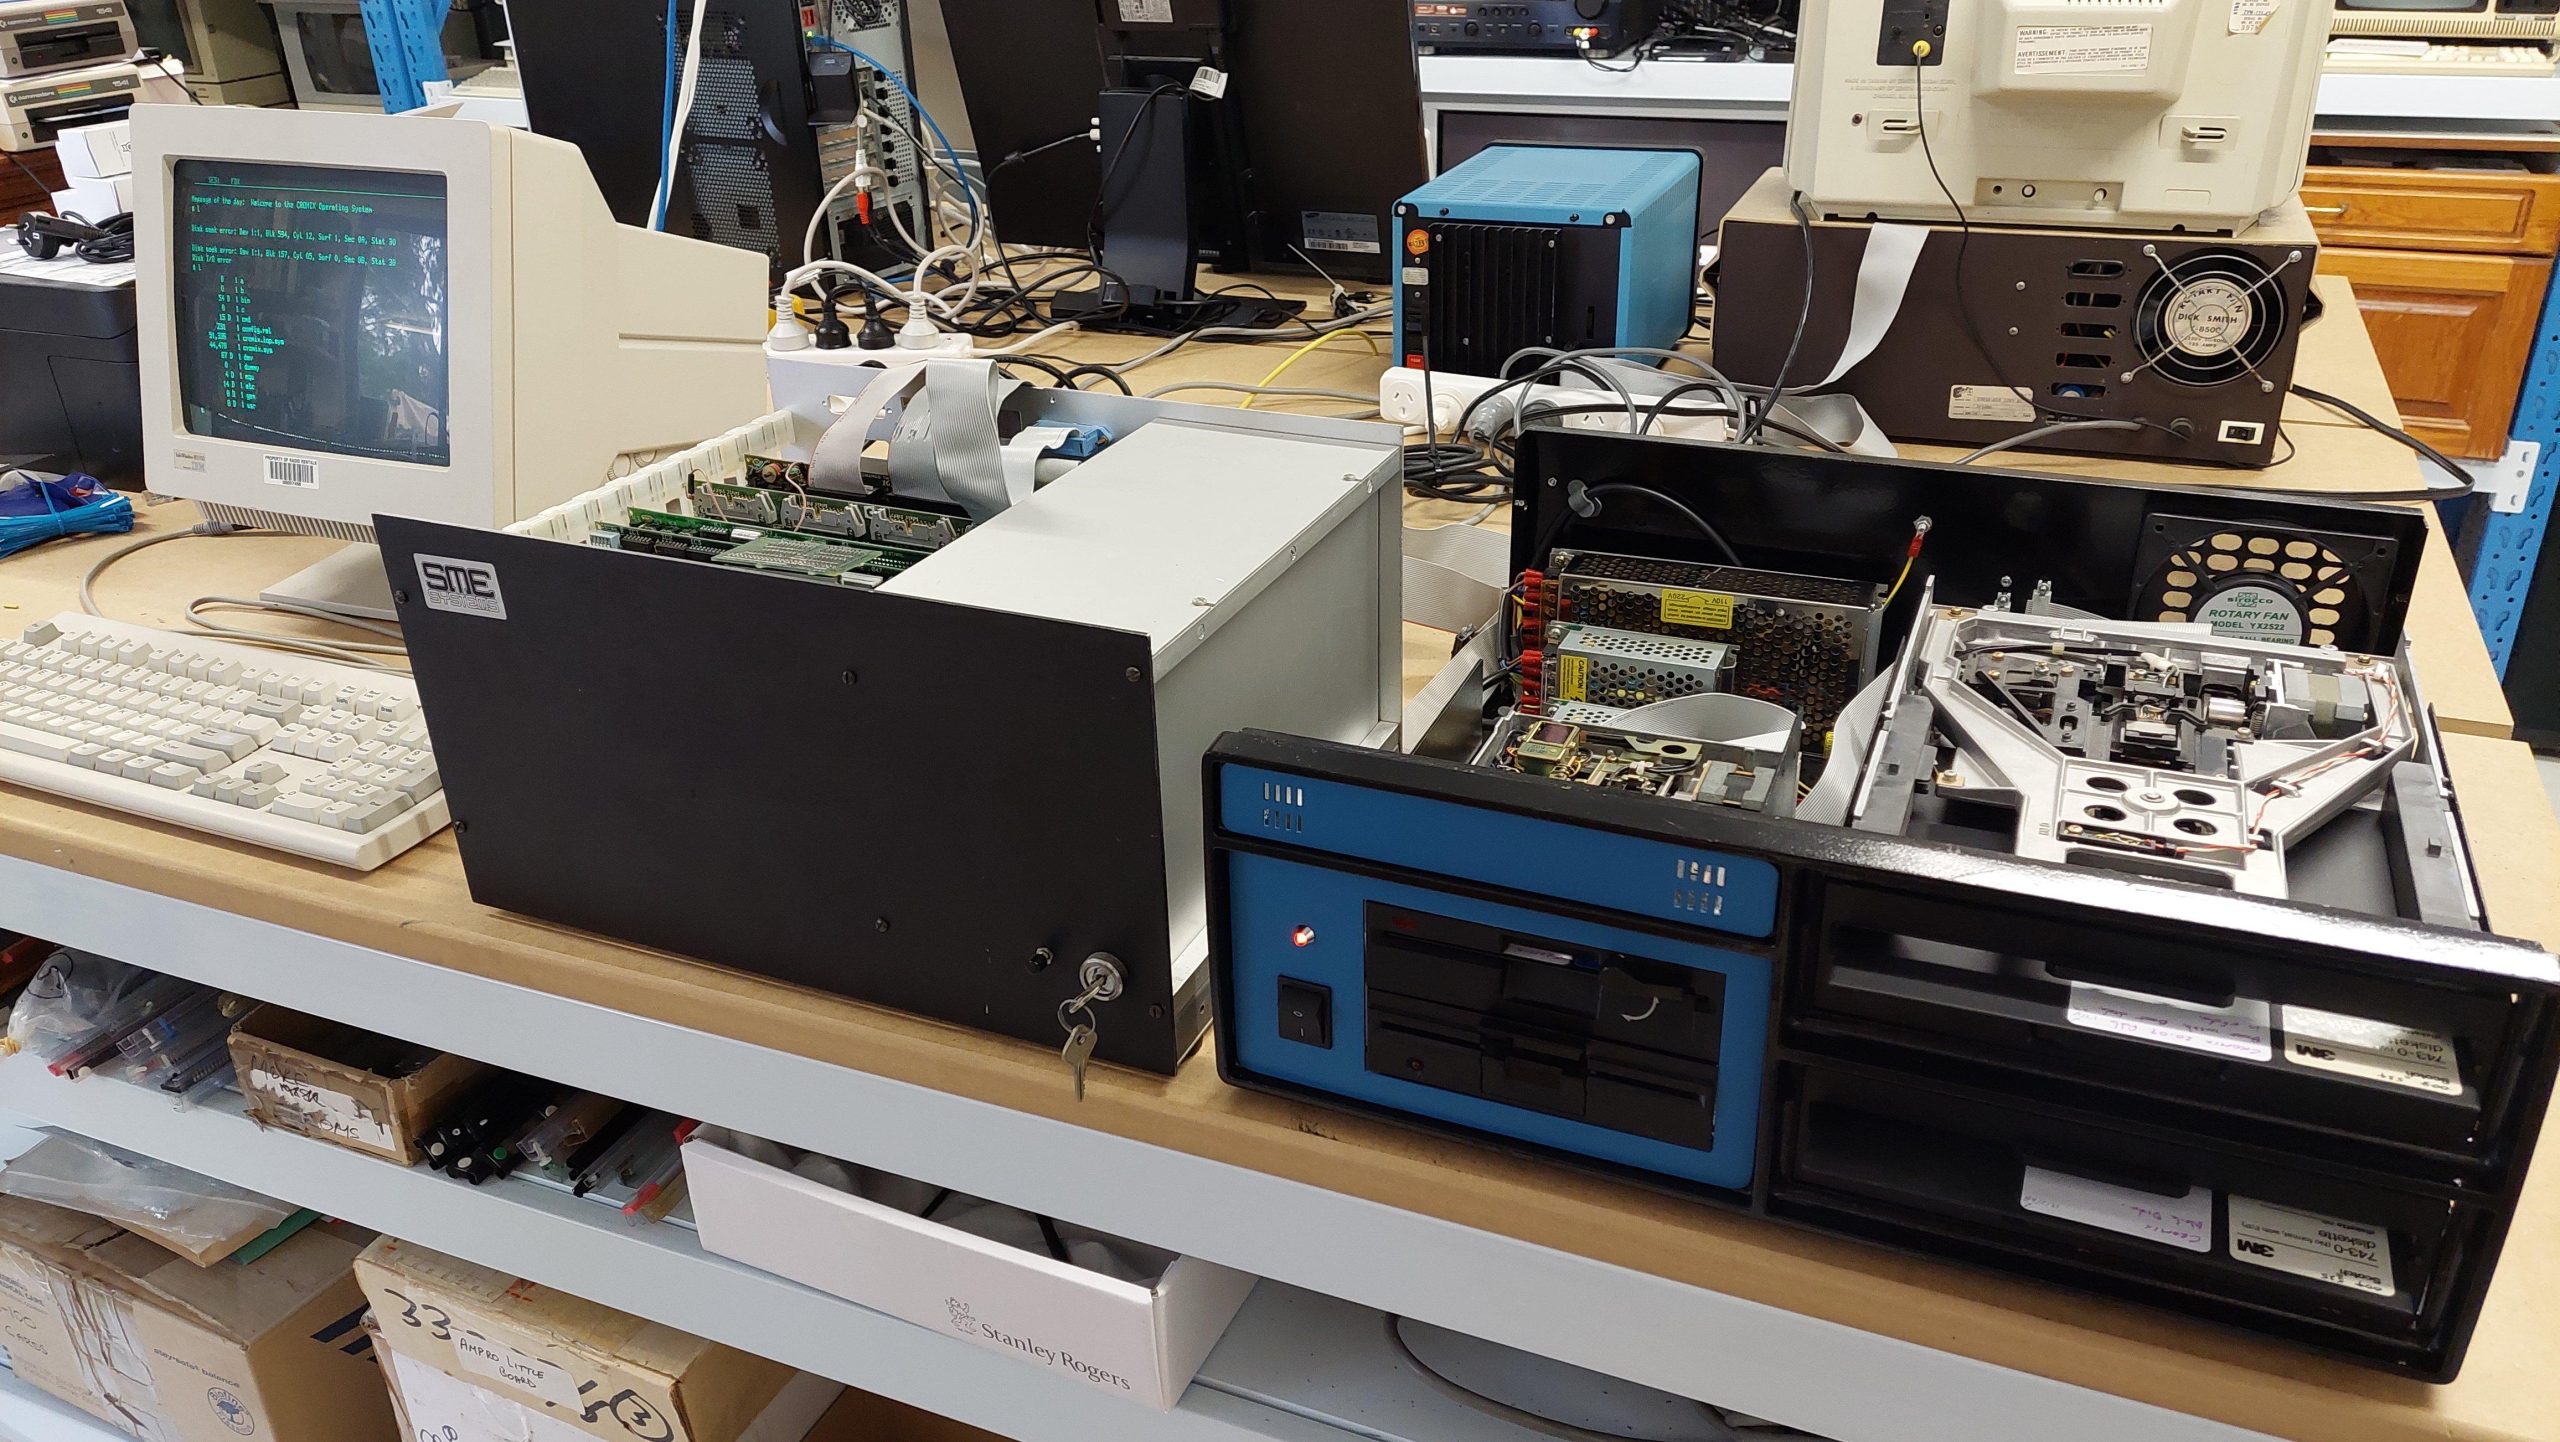
At its core this is a Cromemco 68000 system. It lacks the Cromemco chassis and Cromemco disk drives but it has a complete card set including:
a DPU Dual Processor Card with Z80 and 68000
a MCU Memory Control Unit
a 512MSU Memory Storage Unit connected to MCU via a MBus ribbon cable.
a 16FDC Floppy Drive Controller
2x TUART Twin UART
The chassis is an Australian made SME unit. I constructed the drive chassis based on an old STD chassis. It includes two Mitsubishi 8″ drives, a Mitsubishi 5.25 77 track drive and a gotek.
I have since added a modern IDE/CF Card for solid state storage and a modern 8MB RAM card.
It runs a very impressive unix-esque operating system called Cromix Plus. It supports up to 5 users via serial terminals. It can run 68000 programs and most programs written for CP/M. Each user can run multiple tasks.
I will probably do a lot of posts on this machine because it is fairly unusual and involved a lot of work. I do want to mention upfront that the solid state solution in this machine was made possible by the ever innovative John Monahan and software efforts of Damian Wildie.
The Cromemco Single Card Computer (SCC) design dates back to 1978 and this particular unit appears to have been made in 1978 or early 1979.
It has a Z80 processor running at 4MHz, 1kB of RAM, space for 8k of 2716 ROM, three parallel ports and one serial port.
The board was ROM-less but the binaries for the usual ROM set, MCB-216 were available online. These ROMs provide a monitor and 3k basic.
This means that with the addition of a terminal it’s possible to have a single card capable of executing programs that can exercise the S-100 bus.
I burnt the code into a couple of EPROMs, hooked up a terminal, and gave it a whirl. It fired up as if 45 years meant nothing. It starts up basic to start with but QUIT sends it to the monitor and B in the monitor sends it back to basic.
Programs can be saved to memory including to EPROM on particular Cromemco boards. They can also be saved to or read from the serial port.
The Monitor includes a memory test. I used it to check out a number of memory cards, with some success.
The Cromemco 64KZ appeared to be working fine. One board didn’t work because it expected pSTVAL to be driven and the SCC does not drive it. This was when i started to understand that the S-100 bus was not as “standard” as i had thought.
The main outcome was that i had a Cromemco memory card that was likely to be functional.
Andrew, a friend from the ARC Group, has supplied me with a lot of funky gear including a box of S-100 cards, a couple of chassis, several 8″ floppy disk drives, and about 500 8″ floppy disks.
I never imagined that i would get an opportunity to work with S-100 bus. Components are difficult to find and, when they do appear, people expect an arm and a leg for them.
I had no idea if any of the cards were related to a particular system so all i could do was catalogue them and see if any patterns emerged. One pattern did emerge – there were several Cromemco cards including:
a Single Card Computer (SCC)
a 64KZ Dynamic Memory Card
a DPU Dual Processor Card with Z80 and 68000
a MCU Memory Control Unit
a 512MSU Memory Storage Unit connected to MCU via a MBus ribbon cable.
a 16FDC Floppy Drive Controller
a TUART Twin UART
Not knowing much about Cromemco, i started reading and a new world opened up. The Cromemco community seems to exist primarily as a Google Group with a huge repository on GIT. This proved critical because i did not have a skerrick of software or doco. There was nothing related on any of the 8″ disks that i had.
The repository includes a vast array of manuals, disk images, software etc.
I realised that there were sufficient cards to be able to build a system capable of running Cromix (a Unix look alike). It would consist of:
a DPU Dual Processor Card with Z80 and 68000
a MCU Memory Control Unit
a 512MSU Memory Storage Unit connected to MCU via a MBus ribbon cable.
a 16FDC Floppy Drive Controller
a TUART Twin UART (optional)
I’m not sure where these cards came from. Perhaps they had been used in a bespoke design or stripped out of a Cromemco system. If the latter, then the chassis and drives have not made it into my hands. I will need to use a third party chassis, drive enclosure, and drives. Also, notably missing from the list, is a hard disk controller such as the Cromemco WDI-II but i did see that it was possible to run a skeleton Cromix system from floppy disks. That would be good enough for me (until it wasn’t).
It was also possible to build a system capable of running Cromemco DOS (a CP/M look alike) and that seemed like a less intimidating option to start with. It would consist of the following:
a DPU Dual Processor Card with Z80 and 68000
a 64KZ Dynamic Memory Card or an MCU Memory Control Unit and a 512MSU Memory Storage Unit connected to MCU via a MBus ribbon cable.
a 16FDC Floppy Drive Controller
And there was an even simpler machine that could be built using just the SCC.
I started with the SCC and then used it to help locate faults in other boards. Then i moved onto the CDOS system which was also handy for finding faults in the 68000 system.
Having got a CDOS system to start up the next logical step would be to move on to a version of Cromix intended to work with the Z80 processor.
The Z80 Cromix requires at least 128kB of memory and because that is larger than the address space of a Z80 processor it needs to be managed. Cromemco uses a particular scheme to do that and, alas, i have only one 64k card (at least that’s what i thought at the time) that supports this scheme so i was blocked.
68000 Cromix has no such need. Instead, it takes advantage of the large address space of both the 68000 and the S-100 bus. The memory card combo of the Memory Control Unit (MCU) and the 512kB Memory Storage Unit (512MSU) is a compatible memory solution. All of this info was layed out fairly clearly in the 68000 Cromix administrator’s manual.
This is quite a sophisticated storage solution. Each 16 bit word is accompanied by 6 error correcting bits. The 512kB of storage is provided using 64 x 1 bit memory chips so the MSU has a total of 112 ICs. MCU can support up to 4 storage units. There is a memory bus that runs between the MCU and the MSUs.
ECC is off at power up and is optionally enabled by Cromix via a I/O port.
The initial system configuration consisted of:
a DPU Dual Processor Card with Z80 and 68000
a MCU Memory Control Unit
a 512MSU Memory Storage Unit connected to MCU via a MBus ribbon cable.
a 16FDC Floppy Drive Controller
On power on i was hoping that after a few keystrokes on the terminal that i would see the RDOS monitor prompt as i had seen with the CDOS arrangement. Nup. Nothing.
Adding the 64KZ back in, even with the MCU/512MSU present, allowed RDOS to function so the MCU/512MSU were apparently not responding at all.
I was able to use RDOS to quickly confirm that the MCU registers were working, although strangely they were located at 44H rather than the 4CH described in the manual.
I pulled all the cards except the MCU/512MSU and added the SCC back in. The SCC is self-contained so provides a stable work place for further testing. I could enter a simple program with the monitor.
A started with a simple write loop to a single location and then upgraded to a write-read loop.
After getting my bearings i could see that nothing was being written to the MSU. A lot of things have to happen for a memory write to work, and the SCC does not drive. SXTRQ_L and Z80/68k_L were both negated with pullup resistors.
Also, obviously, the SCC doesn’t drive the A[23:16]. The MCU pulls these high so when using the SCC the address selection switches must be set for FF rather than 00.
The MCU does have quite a job to do – it must arbitrate at least three different requests:
Read
Write
Refresh
There’s also 8 and 16 bit transactions. And the error detection and correction must also have quite an impact.
As part of dealing with each cycle, it must control the data paths and the DRAM signals eg CAS, RAS, and Write. IC24 initiates the cycles; CYCLE START indicates the start. CT[2..0] indicate (I think) the type of cycle.
IC45 steps through the sequence of events and times the length of each step. IC30 is a lookup table that determines (amongst other things) the duration of each step based on the step number and the cycle type.
IC46 is a large lookup table that generates a bunch of signals based on the step number and the cycle type.
The activity was complicated because the SCC generates external reads and writes even when accessing internal RAM and the presence of the refreshes. I tried masking the MemR signal and disabling the refreshes but these both had the side-effect of locking up what is, in effect, a very complicated state machine.
In the end it wasn’t necessary, and it was possible to see the write cycle on the scope. The output signals made no sense so either the lookup table was toast or there was a bad connection. Sure enough closer inspection revealed a that the pins on IC46 had developed a brown coating (it’s socketed). I should have checked this on day one, but i wouldn’t have learnt nearly as much!
The reset is interesting – a lot of the MCU is reset by the POC signal – probably so that the RAM is refreshed through a reset.
I cleaned all legs on all socketed ICs and suddenly there was action. I did find that once the MCU/MSU became responsive there were some issues with the Z80 monitor on the SCC – specifically when quitting BASIC to enter the monitor was unsuccessful. If the board is disabled (eg set a DIP switch on the MSU to off, then the monitor starts fine. Once started the DIP switch can be returned to one apparently with no ill effect.
Alas, there are several RAM errors and all the chips are soldered in. Worse still the 4 x 64kx16bit banks appear to be interleaved. That means that all of 64 RAM chips need to be working just for the bottom 64k to be available. And that’s ignoring the error detection and correction etc. Ouch. On the bright side it’s possible to partially test each RAM chip from the SCC.
I did different fills at different addresses to detect address line issues.
There were a lot of address errors where bits were written to the wrong address, eg because an address line was stuck in an IC. That yielded another 12 duds.
Most of this i could do from the SCC Monitor.
The pattern of ICs on the 512MSU is like this:
I think that the MCU/MSU always performs 16 bit transactions even when an eight bit transaction is requested. And I think it does this by using read-modify-write cycles ie it writes back the contents of the unchanged byte as well as calculating the new error detection and correction bits. Tricky!
I made numerous attempts to install 68000 cromix from the source images, but i encountered numerous problems (will cover in another post). I eventually concluded that i must have a residual hardware issue and was able to confirm this via CDOS – in particular, i could copy files reliably when i used my 64KZ but not when i used the MCU/MSU.
The MCU/MSU RAM checked out well with the 68k RAM test but i thought i’d try the 8 bit test as well and that showed an issue with the delay test. I was not able to reproduce the issue by manually changing RAM values in the monitor, so it must be quite a specific situation that triggers it. The delay test is really made for the 16KZ, so the chip identifiers were meaningless – the memory organisation in the MSU is completely different to that of the 16KZ. Nevertheless, it did indicate that the fault was in bit 8.
I figured there were 8 x “bit 8” chips on the MSU and i had already replaced 2 so i replaced the other 6. Having done that, it passed the delay test and eliminated the erratic behaviour. Consequently, my personal well-being improved dramatically.
I used a socket with each replaced RAM chip, so they are visible in the photo. A total of 24 chips out of 64 memory ICs. I think there’s a fair chance that others will develop faults over time.
I have never checked the ECC ICs, but i would expect that about 1/3 of the 24 ICs will be faulty.
I don’t know why the failure rate has been so high. Sure, 4164 RAMs do fail, but i have not seen this sort of rate before. These are TI TMS4164-15NL with date code P8231.
First, i needed to work out what version of Cromix to install. The Cromemco repository is well stocked although i did find that some images were better than others.
Rather than using 8″ drives straight up, i started with HD 5.25″ drives. This post describes how this is done. My intention was to eventually use 8″ drives, but the Cromemco 8″ drive interface is a little special so i saved that hurdle for another day.
The version of RDOS in the boot ROM only supports 40 track drives so i was restricted to a 360k drive as the first drive, but this could be a gotek/flashfloppy. Actually, this is a real advantage because once past RDOS the gotek can just morph into a pseudo 8″ drive after boot. It might be possible to pull that trick off with a HD drive too – a thought for another day.
I made a generic drive unit a while back with two goteks and two 40 track drives and lots of configuration options (a post for another time perhaps). I used it a jukebox for disk images.
As i had no hard drive option available, i was restricted to installing a very basic system on to two 1.2MB floppy disks and then using a third to swap programs in and out. Very limited, but enough to show it working and perhaps enough to inspire looking for a hard drive solution.
I started with early versions of Cromix in the hope that they would be smaller – and generally they are. I also needed systems that would install from a 40 track drive.
I found some success with version 20.09, but the system was very erratic. There was one last RAM error that was the cause and then i was able to complete the installation successfully following the detailed instructions in the Cromix Administration Manual from the GIT repository.
I found that not all high density drives wre suitable, but never really put my finger on why; i was just happy to find two that would do the job. It seemed important to always have the drives spinning, otherwise i got errors. This also proved to be the case when i moved to 8″ drives. There seems to have been some expectation that the drives would always spin, and the head would be engaged only when the drive was being used.
The Cromemco GIT has a huge range of software, but being able to use it turned out to be somewhat more difficult than i had expected.
At this point i thought it may have been possible to run Z80 programs, but i didn’t know for sure, and i certainly didn’t know how to do it. I concentrated on 68000 software instead.
There is a huge catalogue that accompanies the hundreds of disk images in the archive. The range of software for 68000 is not huge, but there are some compilers, for example.
The catalogue also shows the disk format. It turned out that a lot of the disks with 68000 software were in a particular format referred to as Uniform, which i knew nothing about. As it turned out Cromix 20.09 knew nothing about it either, which left me with a problem.
By this stage searching the text catalogue was starting to get tedious, so i translated it to a spreadsheet. The repository is not static, so my spreadsheet is just a snap-shot:
Faced with this problem as i’m re-writing this a couple of years later, i would probably turn to Damian Wildie’s image manipulation program, cromix-fs, but that was beyond me back then.
I sought some help from the Cromemco google group and they were very helpful. They thought was that Uniform support was added at about version 31.50. This was much later than the simple 20.09. In fact, it had crossed over into Cromix Plus and into a new versioning scheme: Cromix Plus 150.
Things got very complex very fast at this point. For a start the boot and install disks were no longer 40 track images but RDOS 2.01 can only do 40 tracks so it would be necessary to construct a 40 track boot disk. (I could have made a new EPROM, but i was reluctant to mess with a working card.)
Also tricky is that Uniform support has to be included in the cromix.sys that is executed at boot. If the version in the repository has not included it, then it would need to be regenerated. And what if the install disks are actually in Uniform format?
And, wait, regeneration requires disk and memory space. Cromix Plus is bigger. The systems it supports are also bigger, and the configurations on the archives have more functions installed. That 512kB memory starts to look quite small, and the floppy disks claustrophobic.
The install itself is also larger. 20.09 essentials would fit on one 1.2MB disk. That’s not possible with Cromix Plus.
There was a lot of chicken and egg going on!
Just to add a little more complexity, somehow some of the archive disks had been archived with the wrong rotational speed, so before use it was necessary to “cleanse” them through the HxC software.
The speed should have been 360rpm, but was 300rpm. This is obvious in the track viewer in the hxc software. This can be corrected using the hxc software by converting IMD to raw and then importing the img as a raw file. They can then be exported as hfe and scp for Greaseweazle or gotek/flashfloppy.
The cromix format uses 1 boot track of 26x128B sectors with FM and the rest of the 2*77-1 are 16x512B sectors with MFM. The uniform format is 2*77*15*512B sectors with MFM. Getting the number of sectors wrong produces some odd results eg checksum errors on ftar/uniform disks!
After numerous attempts, i found a way through with the version 162 disks. These disks seemed to be close to original so that the existing cromix.sys was a bit smaller.
Three of the four installation disks were in uniform format (tarred). But the first one was not, and there was one more seemingly random disk that contained the regen directory for this version in the standard format. That was the “get out of gaol free card” that i needed.
Most of the Cromix Plus disks are 8”. That means that I had to construct a boot disk by copying the cromix.sys from the 8” boot disk to a 360k disk. Worse than that it turned out that bootloader from the 20.09 disks would not load the Cromix Plus cromix.sys.
I was able to create a boot disk by getting a copy of the Cromix Plus fdboot file and popping it into the /etc directory of the 20.09 root disk. Then I could use wboot to write the Cromix Plus bootloader to the 360k disk. That gave a Cromix Plus loader and a Cromix Plus cromix.sys. Having made one boot disk it was easy to make boot disks for other versions just by copying the cromix.sys file.
Once the system booted, i updated the sysdef to add the Uniform driver (uflop), regenerated cromix.sys, updated the boot disk, and created the device files for uniform disk drives.
I set up the following drives.
Select
Current Setup
Play
Final?
Drives
Use
0
5.25” 40 track DD
Gotek
Gotek
fda/sfda/ufda
Boot initially and then access to images. Good compromise because 360k works with RDOS 2.01 for boot and then the gotek switches format with the image
1
8”
Gotek / 8”
8”
fda/sfda/ufda
/
2
8”
8”
8”
fda/ufda
/usr
3
5.25” 80 track HD
5.25” 80 track HD
5.25” 80 track HD
fda/ufda
Temporary mounts eg /usr/help /gen
This gave an absolute minimum system that would allow software to be installed on disks on the fourth floppy drive. I could install from disk images that were in Uniform format. Software disks would need to be mounted prior to use and help would not be available.
I found there are three classes of software that can be run:
Native 68000 Cromix programs
Z80 Cromix programs
Z80 Cromix/CP/M programs
The Cromix programs automatically invoke Sim. The other Z80 programs automatically invoke Z80 which allocates the code to the Z80 processor.
Most of the applications for cromix that are available in github are languages. Many of them seem to have been badged as Cromemco. They install, predominantly, to /usr/pkg but not exclusively. The installers often use links to make files appear in other places eg bin and cmd. This is problematic because links can only be within a single device and there is not enough space to do this.
Each package really needs its own disk, which is mounted under the pkg folder. Because the links fail, it’s necessary to work just from each pkg folder. This would be intolerable for serious work, but for demonstrating the system it’s fine. Some of the command files need to be modified to work around the missing links.
The following cromix programs were installed:
68000 C
Z80 C
68000 Basic
68000 Assembler
Wordstar and Dbase also worked fine, although there are some tricks with drive letters if needed.
Cromix Plus is a multiuser system, but to support more users requires more serial lines and terminals.
I had a Twin UART (TUART) card that would fit the bill and i’d purchased one more for another project, but it can be plugged into this rack for now. This would give a total of 5 users.
As for terminals – well they are hard to find so i have to be satisfied with a Windows machine with several serial ports and multiple instances of kermit.
The TUART is installed as TUART #1 as per the Cromix Plus Administrator’s Guide. This puts the ports at 20h and 50h and makes them 2 and 5 in the sysdefs file.
Cromix has been regenerated to enable the two TUART serial ports as devices tty2 and tty3. The disk controller serial port remains at tty1.
The TUARTs support interrupts, so the 16FDC no longer has the interrupt line to itself. Priority is established by a daisy chain that connects from the OUT on the 16FDC to the IN on the TUART. Just to mess with everyone’s heads, the IN and OUT positions on the TUART are the reverse of the 16FDC.
The serial ports can be configured as terminal ports by editing /etc/ttys:
Along the way, I stumbled on a Software Update Note for 20.14 that said:
This means that if no terminal is connected, the port should not be configured as a terminal port.
A second TUART was setup as TUART#2, but this clashed with the IDE card, so it was moved to TUART #3. These are 8 and 9 in the sysdefs file used to rebuild cromix.
The second TUART also needed to join the interrupt priority chain: OUT from the first TUART to IN on the second TUART.
Here’s an example of multiple users (3) and multiple processes (9):
Initially i built the 68000 Cromix system using high density 5.25″ disk drives for the system drives. Having been able to install Cromix it was time to take the next step and add genuine 8″ drives.
The selected drives were Mitsubishi M2896-63 half height drives.
The 16FDC disk controller was designed primarily for Cromemco Persci drives. I don’t have of these drives and am unlikely to ever find any.
The 50 pin interface is quite different. I stumbled on this document by Martin Eberhard that examined in detail how to adapt the 16FDC to use Shugart SA800/850 drives.
I shamelessly used this very handy information to make an adapter cable for the Mitsubishi drives.
16FDC Pin
16FDC Signal
Drive Pin
Drive Signal
2
Side_Select
14
Side_Select
4
DS4_L
32
DS4_L
6
N/C
6
Alternate I/O
8
N/C
8
Alternate I/O
10
Seek_Complete_L
12
Restore_L
14
Eject_L
16
N/C
16
Alternate I/O
18
DS3_L
30
DS3_L
20
Index_L
20
Index_L
22
Ready_L
22
Ready_L
24
Motor_On_L
18
Alternate I/O /Head_Load_L / Motor_Start_L
26
DS1_L
26
DS1_L
28
DS2_L
28
DS2_L
30
N/C
32
N/C
34
DirC
34
Select (Direction)
36
Step_L
36
Step_L
38
Write_Data_L
38
Write_Data_L
40
Write_Gate_L
40
Write_Gate_L
42
Track_0_L
42
Track_0_L
44
Write_Prot_L
44
Write_Prot_L
46
Read_Data_L
46
Read_Data_L
48
N/C
48
Not Used
50
N/C
50
Not Used
2
Alternate I/O / Write Current Switch
4
Alternate I/O
10
Alternate I/O
12
Alternate I/O
24
Not Used
[Next time a drive is out, get the jumper settings.]
I reinstalled Cromix 20.09 on the 8″ disks using the same instructions as i had used previously.